
Are you tired of struggling to install cabinet hardware perfectly every time? Imagine having a simple tool that helps you drill holes in the exact spot, making your work faster and more precise.
Creating your own cabinet hardware jig can save you time, reduce mistakes, and give your cabinets a professional look. In this guide, you’ll learn easy steps to make a jig tailored just for your needs. Keep reading, and you’ll soon handle your cabinet projects like a pro—no guesswork, no frustration.
Choosing The Right Materials
Choosing the right materials is key to making a cabinet hardware jig that works well. The materials affect the jig’s strength and accuracy. Good materials make the project easier and the results better.
Focus on wood types that are strong and stable. Use tools and supplies that help create precise cuts and measurements. This section guides you on what wood and tools to pick for your jig.
Types Of Wood To Use
Hardwoods like maple, oak, and birch are great choices. They resist dents and stay stable over time. Softwoods like pine can work but may wear out faster.
Plywood is another good option. Choose high-quality plywood with many layers. It cuts clean and holds screws well. Avoid thin or cheap plywood that can split easily.
Keep your wood pieces smooth and flat. This helps keep the jig accurate. Sand the wood before assembly to remove rough spots.
Essential Tools And Supplies
Use a saw for cutting wood parts to size. A drill with bits is needed for making holes. Clamps hold pieces firmly while you work.
A ruler or tape measure ensures exact measurements. Marking tools like pencils or pens guide your cuts. Sandpaper smooths edges and surfaces.
Wood glue adds strength to joints. Screws or nails keep parts together securely. Choose tools that are easy to use and reliable.

Credit: www.youtube.com
Measuring And Marking
Measuring and marking are key steps in making a cabinet hardware jig. Accurate marks ensure the holes line up perfectly. This saves time and prevents mistakes. Take your time to measure carefully. Use clear marks that you can see while working.
Determining Hole Placement
Start by deciding where the holes should go on your cabinet. Measure the distance from the edge to the first hole. Check the spacing between holes for handles or knobs. Mark these points lightly with a pencil. Double-check measurements before making permanent marks. Proper placement makes the hardware look balanced and professional.
Using A Template For Consistency
A template helps you keep hole placement the same on every cabinet. Cut a piece of scrap wood or cardboard to the size of your jig. Drill holes in the template at the exact spots you marked. Use the template to mark all your cabinets quickly. This method reduces errors and speeds up your work. Templates are perfect for projects with many cabinets.
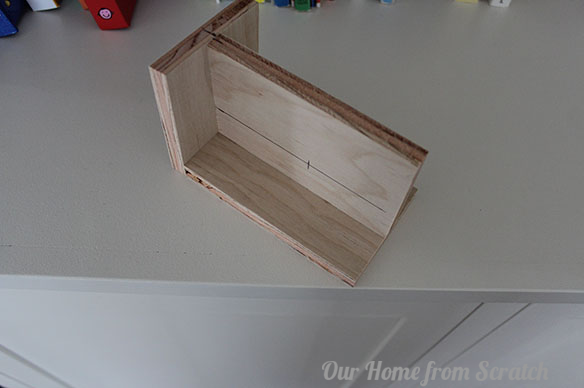
Cutting And Assembling The Jig
Cutting and assembling the cabinet hardware jig is a key step in creating a tool that fits your needs. This process requires careful attention to detail. Each cut must be precise to ensure the jig works well. Assembling the parts correctly guarantees stability and accuracy during use.
Cutting Guide Holes
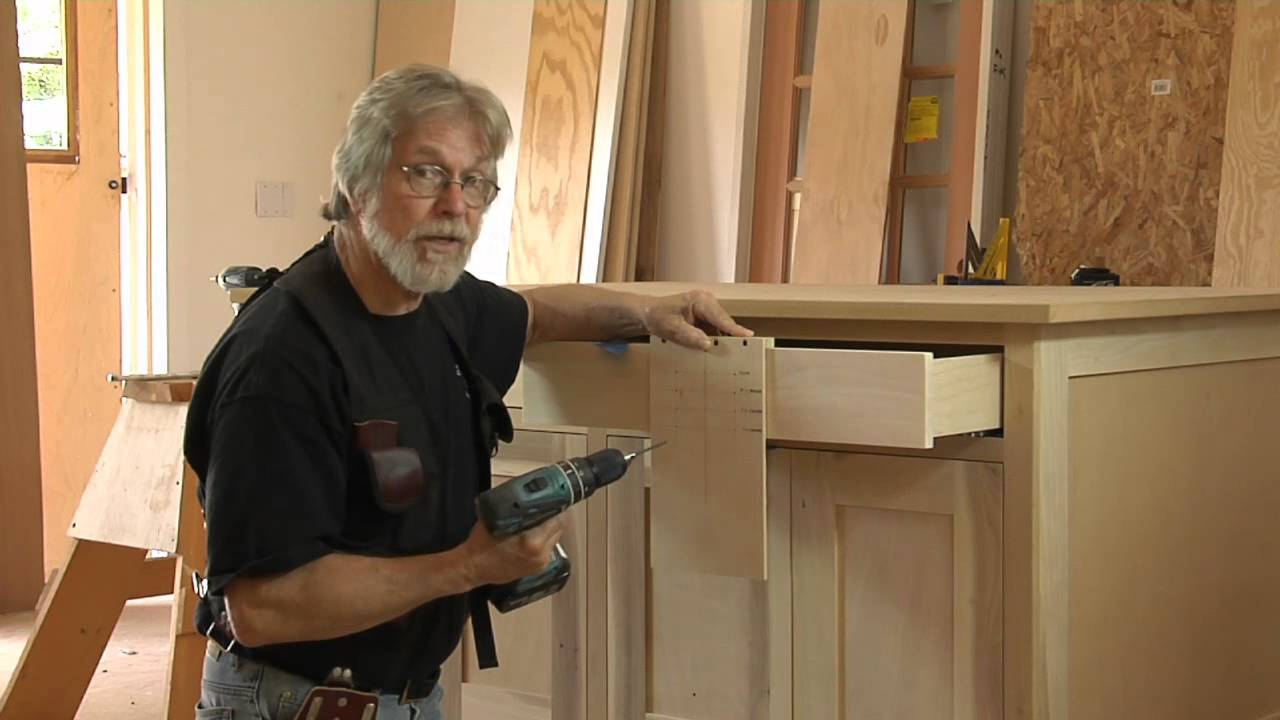
Start by marking the exact spots for guide holes on your jig material. Use a ruler and pencil for straight, even marks. Drill holes slowly to avoid splintering the wood. Choose a drill bit size that matches your cabinet hardware screws. Clean any rough edges around holes with sandpaper. This helps screws fit perfectly and prevents damage.
Securing Components Together
Align all parts of the jig before joining them. Use clamps to hold pieces steady during assembly. Apply wood glue on contact surfaces for extra strength. Insert screws carefully to avoid splitting the wood. Tighten screws evenly to keep the jig flat. Check for any wobble and adjust as needed. A firm jig ensures accurate hardware placement every time.
Credit: www.youtube.com
Testing The Jig
Testing the cabinet hardware jig is a key step before full use. It ensures the jig works properly and places holes exactly where needed. This step saves time and avoids mistakes in your project.
Ensuring Hole Accuracy
Start by clamping the jig to a scrap piece of wood. Drill holes using the jig as you would on your cabinet. Measure the hole positions carefully. Check if they match your hardware’s mounting points. Accurate holes mean the jig is ready to use.
Making Adjustments If Needed
If holes are off, note the difference in measurements. Loosen the jig clamps slightly to adjust the position. Shift the jig until holes line up perfectly with your marks. Tighten clamps and drill test holes again. Repeat this until the jig drills precise holes every time.
Using The Jig For Cabinet Hardware
Using the cabinet hardware jig helps you install handles and knobs quickly and accurately. It keeps holes aligned and spaced evenly on all cabinet doors and drawers. The jig acts as a guide, making drilling easier and reducing mistakes.
This tool saves time and improves the look of your cabinets. It is especially helpful when you need to fit many pieces of hardware. Follow simple steps to position the jig and drill with precision for the best results.
Positioning The Jig On Cabinets
Place the jig flat against the cabinet surface. Align it with the edge or center, depending on your hardware style. Use the built-in measurements on the jig for exact placement. Hold the jig firmly to stop it from moving.
Check the height and distance between holes before drilling. Make sure the jig fits the cabinet thickness. Adjust the jig if needed to match your hardware size. Accurate positioning ensures consistent hardware placement across all cabinets.
Drilling With Precision
Select the right drill bit size for your hardware screws. Insert the drill bit into the jig’s guide holes. Drill slowly and steadily to avoid splintering the wood. Keep the drill straight to make clean, straight holes.
Use a clamp to hold the jig in place if you need extra stability. Drill only as deep as the screw length. Double-check hole depth and alignment before moving to the next cabinet. Precise drilling creates a professional finish on your cabinets.
Credit: ourhomefromscratch.com
Tips For Long-term Use
Taking care of your cabinet hardware jig is key to using it for a long time. Simple habits can keep it working well and save you time. Small steps help keep your jig accurate and ready for every project.
Maintaining Jig Accuracy
Check your jig often for any loose parts or wear. Tighten screws and bolts to keep it steady. Use a ruler or square to confirm measurements before use. Fix any misalignment quickly to avoid errors. Clean the jig after each use to stop dirt buildup. This keeps your holes in the right spot every time.
Storage And Care
Store your jig in a dry, safe place away from dust. Use a box or bag to protect it from scratches. Avoid dropping or stacking heavy items on it. Wipe the jig with a dry cloth before storing. Keep it away from moisture to stop rust. Proper storage extends the life of your tool.
Frequently Asked Questions
What Materials Are Needed To Make A Cabinet Hardware Jig?
To make a cabinet hardware jig, you need plywood, drill bits, clamps, measuring tape, and screws. These materials ensure precision and durability for accurate hardware placement.
How Do I Ensure Accurate Hole Placement With A Jig?
Use precise measurements and mark drill points clearly. Clamp the jig firmly to the cabinet door to avoid movement during drilling.
Can I Customize The Jig For Different Hardware Sizes?
Yes, you can adjust hole spacing and drill bit sizes. Customizing allows the jig to fit various hardware types and cabinet styles.
How Long Does It Take To Build A Cabinet Hardware Jig?
Building a basic jig typically takes 1-2 hours. Time varies based on materials and complexity of the design.
Conclusion
Making a cabinet hardware jig helps you work faster and neater. It gives you the right holes every time. You save money by doing it yourself. This tool makes your projects look professional. With simple steps, anyone can build one.
Try making your own jig and see the difference. It’s a small tool that brings big results. Keep practicing, and your skills will grow. Enjoy your woodworking and have fun creating!

