Are your kitchen cabinets looking a little outdated or worn? Changing the hardware is one of the quickest and most affordable ways to refresh your kitchen’s style.
Whether you want sleek modern pulls or charming vintage knobs, replacing your cabinet hardware can transform the entire look without a full remodel. If you’re wondering how to tackle this simple upgrade yourself, you’re in the right place. In this guide, you’ll discover easy, step-by-step tips to remove old hardware, prepare your cabinets, and install new pieces like a pro.
Ready to give your kitchen a fresh new feel? Let’s get started!
Credit: www.homedepot.com
Tools And Materials
Replacing hardware on kitchen cabinets refreshes the look quickly. Gathering the right tools and materials simplifies the job. Proper preparation ensures smooth removal and installation. Understanding what you need saves time and effort.
Essential Tools
A screwdriver is necessary for removing and attaching hardware. Choose a Phillips or flathead based on your screws. A drill speeds up the process, especially for new holes. Measuring tape helps check screw spacing and placement. A pencil marks where to drill or align hardware. Wood filler repairs old holes if new hardware differs in size. Sandpaper smooths any patched areas before painting or staining. A level ensures handles and knobs line up straight. Gloves protect your hands during work. Having these tools ready makes the project easier.
Selecting New Hardware
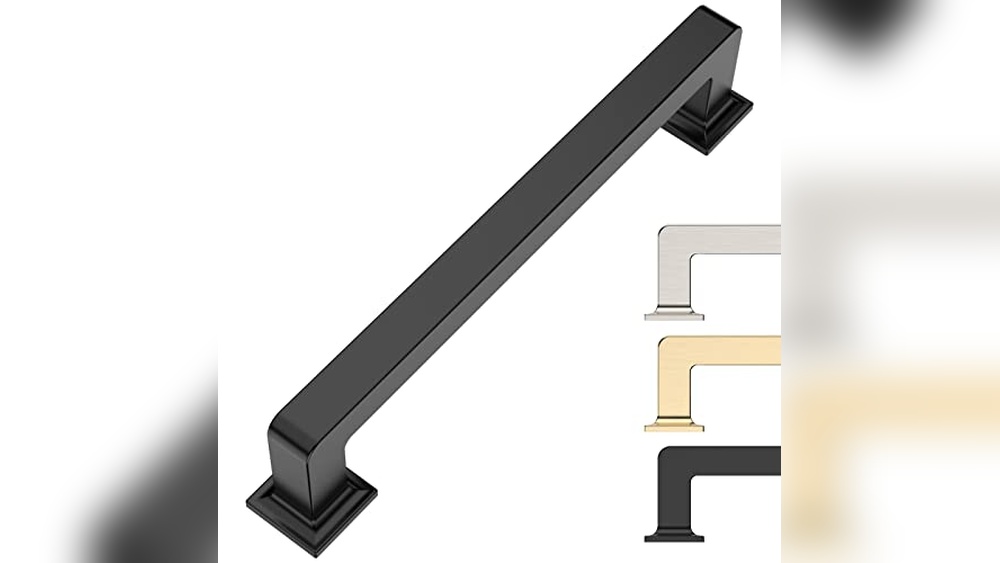
Pick hardware that matches your kitchen style and cabinet design. Choose knobs or pulls based on your preference. Consider the finish: brushed nickel, bronze, chrome, or black. Hardware size affects appearance and comfort when opening drawers. Budget also guides your choice without sacrificing quality. Select pieces that feel sturdy and fit your cabinets well. Remember to buy a few extra in case of mistakes or future needs.
Matching Screw Spacing
Check the distance between screw holes on your old hardware. Measure center to center of the holes carefully. Matching this spacing allows easy replacement without drilling new holes. If spacing differs, you must fill old holes before making new ones. This prevents damage and keeps cabinets looking neat. Using hardware with the same spacing saves time and effort. Always measure twice to avoid errors and extra work.
Removing Old Hardware
Removing old hardware from kitchen cabinets is the first step in a smooth upgrade. This task clears the way for fresh knobs and pulls. Taking care during removal prevents damage to your cabinet doors and drawers.
Work carefully and patiently. Proper removal makes installation of new hardware easier and keeps your cabinets looking great.
Unscrewing Knobs And Pulls
Use a screwdriver that fits the screws exactly. Turn the screws counterclockwise to loosen them. Hold the knob or pull steady while unscrewing to avoid scratching the surface.
Place the removed screws and hardware in a small container. This keeps them safe and easy to find if you want to reuse them.
Handling Stubborn Fixtures
Sometimes screws are tight or rusted. Spray a little lubricant on the screws and wait a few minutes. This helps loosen rust and makes unscrewing easier.
If the screwdriver slips, try using a rubber band between the screw and screwdriver for extra grip. Avoid forcing the screw to prevent stripping or damage.
Saving Old Hardware
Old hardware can be useful later. Store it in a labeled bag or box. Keep it safe in case you want to return your cabinets to their original look.
Cleaning and polishing old knobs and pulls can also refresh their look. This can be a budget-friendly option if you like the style.
Preparing Cabinet Surfaces
Preparing cabinet surfaces is a key step before installing new hardware. This process ensures a smooth and clean base for the new knobs or pulls. Proper preparation helps the hardware fit well and look professional. It also hides any old holes or damage left from the previous hardware.
Filling Old Holes
Old holes from previous hardware must be filled to avoid uneven surfaces. Use wood filler or putty to fill these holes completely. Press the filler firmly into the holes and remove excess with a putty knife. Let the filler dry fully before moving on. This step creates a flat surface for new hardware installation.
Sanding And Smoothing
After filling holes, sand the surface gently to smooth it out. Use fine-grit sandpaper to blend the filler with the cabinet surface. Sanding removes bumps and rough edges for a clean finish. Wipe away dust with a damp cloth to prepare for painting or staining. Smooth surfaces help paint or finish stick better.
Touching Up Paint Or Finish
Touch up the cabinet’s paint or finish to cover filled holes and sanding marks. Use matching paint or stain for a seamless look. Apply thin coats and let each coat dry before adding more. This step restores the cabinet’s original appearance. Well-finished surfaces enhance the overall look of new hardware.
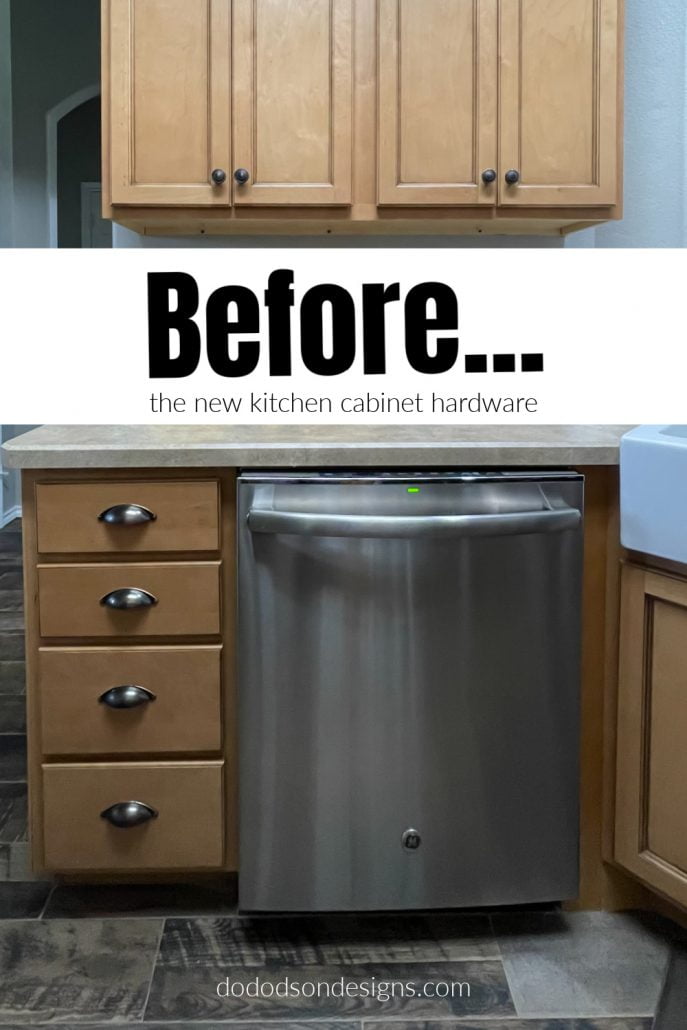
Credit: www.dododsondesigns.com
Measuring And Marking
Measuring and marking cabinet doors and drawers correctly is crucial. It ensures new hardware fits perfectly and looks professional. Take your time in this step to avoid mistakes. Precise measurements save effort and prevent unnecessary holes. Use the right tools for accurate results. Follow simple methods to measure and mark each spot carefully.
Using Templates
Templates help mark drill points quickly and evenly. You can buy ready-made templates or make your own from cardboard. Place the template on the cabinet surface and align it with the edges. Hold it steady while marking the holes with a pencil. This method keeps all hardware placements consistent across all doors and drawers.
Ensuring Alignment
Alignment affects the cabinet’s overall look. Check that all hardware pieces line up horizontally and vertically. Use a level or ruler to double-check measurements. Mark reference points before drilling to keep everything straight. Proper alignment prevents handles from looking crooked or uneven.
Marking Drill Points
Mark drill points clearly with a sharp pencil or awl. Make small, precise marks at the center of each hole location. Avoid large or messy marks that can cause errors. Before drilling, verify the marks are in the right places by measuring again. Clean and accurate marks lead to neat holes and easy hardware installation.
Drilling New Holes
Drilling new holes in kitchen cabinets is often necessary when the new hardware does not match the old hole pattern. It requires careful measurement and the right tools to avoid mistakes. Taking your time during this step ensures a clean, professional look for your cabinet upgrades.
Choosing Drill Bits
Select drill bits that match the screw size of your new hardware. Use a bit slightly smaller than the screw diameter. This creates tight, secure holes for the screws. Sharp drill bits reduce splintering and make cleaner holes. For wood cabinets, high-speed steel bits work best.
Drilling From The Back
Drilling from the inside of the cabinet can prevent damage to the visible surface. Place a piece of scrap wood behind the drilling spot. This supports the cabinet door and reduces tear-out. Mark the hole position clearly before drilling. Drill slowly and steadily for the best results.
Avoiding Damage
Protect the cabinet surface with painter’s tape over the drill spot. This helps prevent cracking and splintering around the hole. Use a low drill speed to control the cut. Do not press too hard, let the drill bit do the work. Check the hole size before inserting screws to avoid splitting wood.
Installing New Hardware
Installing new hardware on kitchen cabinets transforms the look and feel of your space. This step requires precision to ensure the new handles and knobs fit well and function smoothly. Take your time during installation for the best results.
Inserting Screws
Start by placing the new handle or knob on the cabinet door or drawer. Align the holes on the hardware with the pre-drilled holes on the cabinet. Insert the screws from inside the cabinet, pushing them through the holes to meet the hardware. Screw them in gently by hand to hold the hardware in place.
Aligning Handles And Knobs
Check the position of each handle or knob before tightening the screws fully. Make sure they sit straight and line up evenly with other hardware on the cabinets. Adjust the alignment by loosening the screws slightly and moving the hardware as needed. Proper alignment ensures a neat and professional look.
Avoiding Overtightening
Tighten the screws until the hardware feels secure but not too tight. Overtightening can strip the screw holes or damage the cabinet surface. Use a screwdriver and stop once you feel resistance. This prevents damage and keeps your cabinets looking good for years.
Finishing Touches
Finishing touches are key to a successful cabinet hardware replacement. They ensure your work looks polished and lasts longer. This phase helps catch any small issues before you declare the job done. Taking time for these steps saves you effort later.
Checking For Loose Hardware
After installing your new knobs or pulls, test each one by gently tugging. Tighten screws that feel loose with a screwdriver. Loose hardware can cause damage or fall off over time. Make sure every piece is secure and sits flush against the cabinet surface. This step also prevents noise from rattling when you open or close doors.
Cleaning Up Work Area
Clear away dust, debris, and any leftover screws from your work zone. Use a soft cloth to wipe down cabinet surfaces. Cleaning prevents scratches and keeps your kitchen looking neat. Dispose of old hardware properly or save it for future use. A tidy space helps you enjoy your updated kitchen right away.

Credit: agirlsguidetohomediy.com
Tips For Success
Replacing hardware on kitchen cabinets can refresh your kitchen’s look. Success depends on careful choices and good habits. Follow these tips to ensure a smooth and satisfying project. Each step matters, from picking materials to finishing the work quickly and neatly.
Choosing Durable Materials
Select hardware made from strong materials like stainless steel or solid brass. These last longer and resist rust and wear. Avoid cheap metals that bend or chip easily. Durable hardware saves money over time and keeps your kitchen looking fresh.
Check for quality finishes that won’t fade or peel. Matte, satin, and polished finishes each suit different styles. Make sure the finish is easy to clean and maintain. Good materials also feel sturdy in your hands and give a sense of quality.
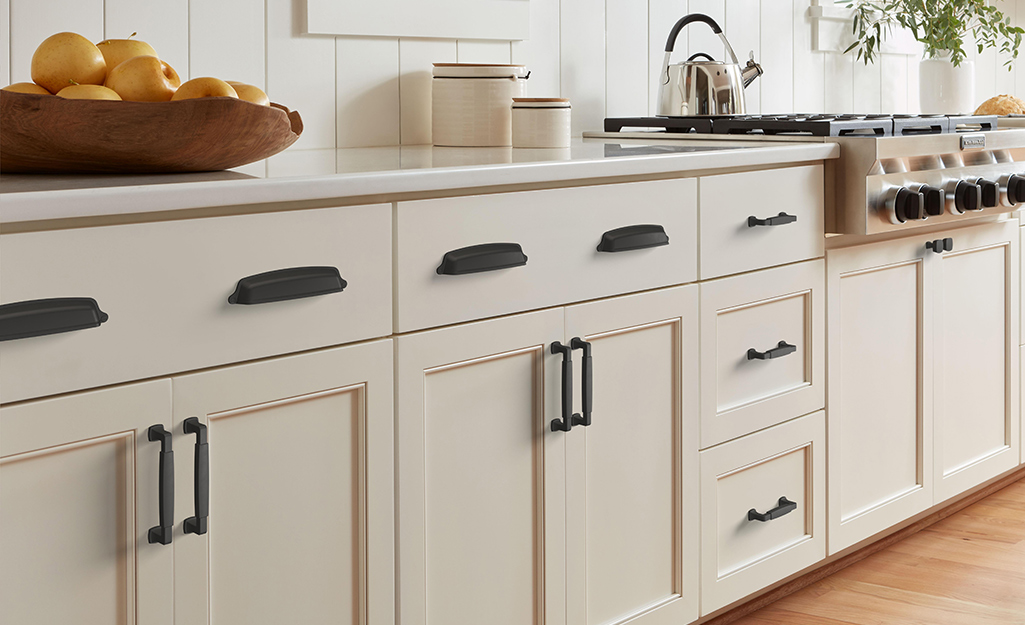
Maintaining Consistent Style
Match new hardware with your kitchen design. Consistency in style creates a polished look. Choose knobs and pulls that complement your cabinet color and kitchen theme. Mixing too many styles can make the space feel busy and disorganized.
Use the same finish on all hardware pieces for a unified appearance. Think about the size and shape to keep balance and proportion. Visual harmony adds to your kitchen’s charm and value.
Working Efficiently
Prepare all tools before starting. A screwdriver, drill, measuring tape, and wood filler are essentials. Work on one cabinet at a time to avoid mistakes. Remove old hardware carefully to protect the wood.
Measure screw spacing accurately for new hardware. Mark drill points clearly if needed. Clean the surface after removal and before installing new pieces. Take breaks to avoid rushing, which can cause errors. Efficient work leads to a neat and fast upgrade.
Frequently Asked Questions
Is It Easy To Replace Cabinet Hardware?
Replacing cabinet hardware is easy and quick. Unscrew old pieces, align new ones, and secure with screws. Use matching screw spacing to avoid drilling new holes. Fill old holes with wood filler if needed. Proper measurement ensures a neat, professional look.
What Is The 1 3 Rule For Cabinet Hardware?
The 1-3 rule for cabinet hardware means placing knobs one inch from the edge and three inches apart for balanced, ergonomic design.
How Do I Update Old Cabinet Hardware?
Unscrew old knobs or handles using a screwdriver. Match new hardware screw spacing. Fill old holes with wood filler if needed. Drill new holes carefully using a template. Attach new hardware by aligning screws and tightening gently.
How To Remove Old Cabinet Hardware?
Use a screwdriver or drill to unscrew old cabinet hardware from the back. Remove handles carefully to avoid damage.
Conclusion
Replacing hardware on kitchen cabinets can refresh your space quickly. Use the right tools and take your time. Match new hardware to old holes for an easier job. Fill old holes carefully if needed before drilling new ones. This simple update improves your kitchen’s look without much effort.
Enjoy the fresh, clean style your new hardware brings. Small changes make a big difference in your kitchen’s feel. Try it yourself and see how easy it can be!