Are you ready to upgrade your cabinets with new hardware but unsure about the right hole size to drill? Getting this step right is crucial.
Drill a hole that’s too small, and you’ll struggle to fit the screws. Drill one that’s too big, and the hardware won’t be secure. Don’t worry—this guide will walk you through exactly what size hole to drill for your cabinet knobs and pulls.
You’ll learn easy tips to avoid common mistakes, save time, and make your installation look professional. Keep reading to master this simple yet important skill and transform your cabinets with confidence.
Credit: www.superiorstoneandcabinet.com
Hole Sizes For Cabinet Knobs
Choosing the right hole size for cabinet knobs is key to a neat installation. Drill too small a hole, and the knob won’t fit. Drill too large, and the knob may be loose or wobbly. This section explains common hole sizes and tips for drilling holes that match your cabinet knobs perfectly.
Standard Drill Bit Sizes
Most cabinet knobs require a hole size of 3/16 inch or 5 mm. This size fits the standard screws that come with knobs. Some knobs use larger screws, needing a 1/4 inch hole. Check the knob packaging or measure the screw length to confirm. Using the correct drill bit size avoids damage and makes installation easier.
Matching Screw And Bit Sizes
Match the drill bit size to the screw diameter. The hole should be slightly larger than the screw’s core. This allows the screw to fit without splitting the wood. For example, use a 3/16 inch bit for a 8 screw. Always test the drill bit on a scrap piece of wood before drilling your cabinet. This helps ensure a snug fit.
Adjusting For Wood Type
Softwood needs a smaller pilot hole than hardwood. Drill a pilot hole about 75% of the screw’s diameter in hardwood. For softwood, drill a hole about 90% of the screw diameter. This prevents splitting and gives the screw good grip. Always consider the wood hardness before choosing the hole size.
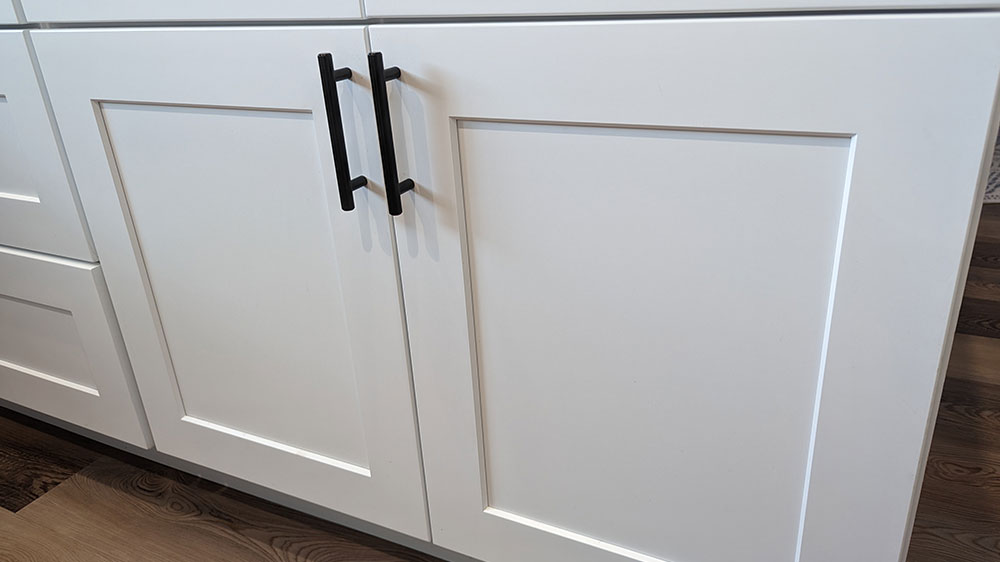
Hole Sizes For Cabinet Pulls
Choosing the right hole size for cabinet pulls is important. It ensures your hardware fits well and looks great. Different pulls need different hole sizes. Measuring and drilling carefully avoids damage to your cabinets.
Understanding hole sizes helps you drill accurately. It saves time and prevents mistakes during installation. This guide covers common measurements and drill bit choices for cabinet pulls.
Common Center-to-center Measurements
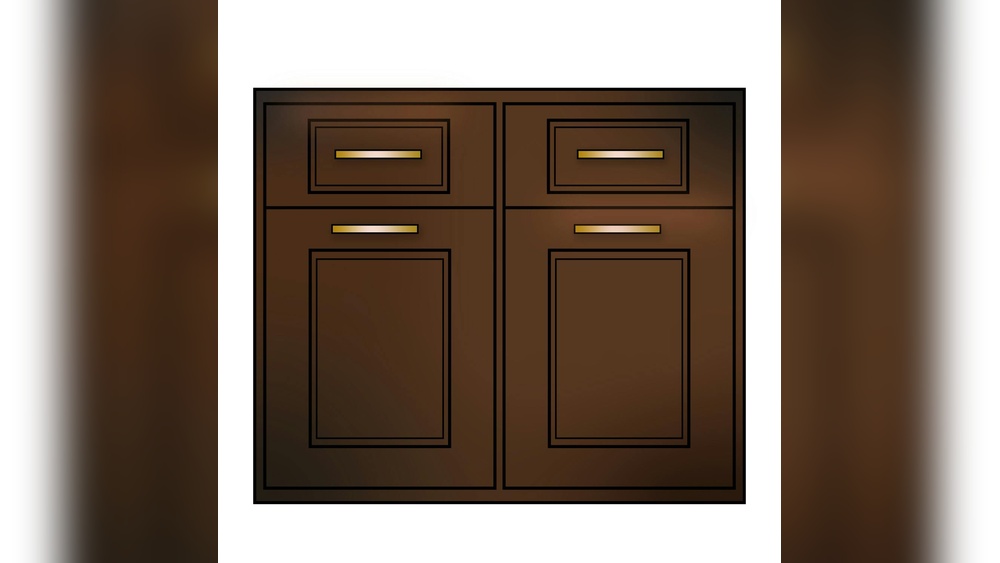
Center-to-center measurement is the distance between two screw holes. Most cabinet pulls use standard sizes like 3 inches or 128 millimeters. Smaller drawers often use 3 inches (76 mm). Larger cabinet doors can have 4 inches or more.
Always measure your pull before drilling. Use a ruler or tape measure for accuracy. Matching the drill holes to your pull’s holes is key for a proper fit.
Drill Bit Recommendations
Choose a drill bit size close to your screw diameter. Common sizes for cabinet pulls are 3/16 inch or 1/4 inch. The hole must be slightly larger than the screw to allow easy insertion.
Use a sharp drill bit to avoid splintering the wood. A brad point bit is ideal for clean holes in cabinet doors. Start with a smaller pilot hole if unsure, then enlarge as needed.
Appliance Pulls Hole Sizes
Appliance pulls are larger and need bigger holes. Typical hole sizes for these pulls range from 5/16 inch to 3/8 inch. Measure your appliance pull screws to pick the right drill bit.
These pulls often have longer screws for thick doors. Check the screw length before drilling. Drilling the correct hole size makes installation easier and ensures a strong fit.
Drilling For Cabinet Hinges
Drilling holes for cabinet hinges requires precision and the right tools. Proper hole size ensures hinges fit snugly and doors open smoothly. This section covers the typical hole diameter, the use of Forstner bits, and helpful hinge mounting tips.
Typical Hole Diameter
Most cabinet hinges need a 35mm diameter hole. This size fits standard cup hinges perfectly. Drilling a hole too small makes hinge installation hard. Too large a hole weakens the door surface. Measure twice to avoid mistakes.
Using Forstner Bits
Forstner bits create clean, flat-bottomed holes. They are ideal for drilling hinge cups. Choose a 35mm Forstner bit for standard hinges. Drill at a steady speed to prevent wood splintering. Mark the hole center before drilling for accuracy.
Hinge Mounting Tips
Always drill pilot holes for hinge screws to avoid wood splitting. Use a clamp to hold the door steady while drilling. Check hinge alignment before tightening screws fully. Test door movement to ensure smooth operation. Adjust screws if the door does not close properly.
Measuring And Marking Holes
Measuring and marking holes accurately is the first step to perfect cabinet hardware installation. Precise measurements ensure that knobs and pulls fit well and look balanced. Mistakes here can cause misaligned hardware and wasted time. Take your time to measure carefully and mark spots clearly before drilling.
Center-to-center Measurement Explained
Center-to-center measurement means the distance between the centers of two holes. This is important for cabinet pulls that need two screws. Measure from the center of one hole to the center of the other. Common sizes are 3 inches, 4 inches, or 5 inches. Always check the hardware specs to confirm your measurement.
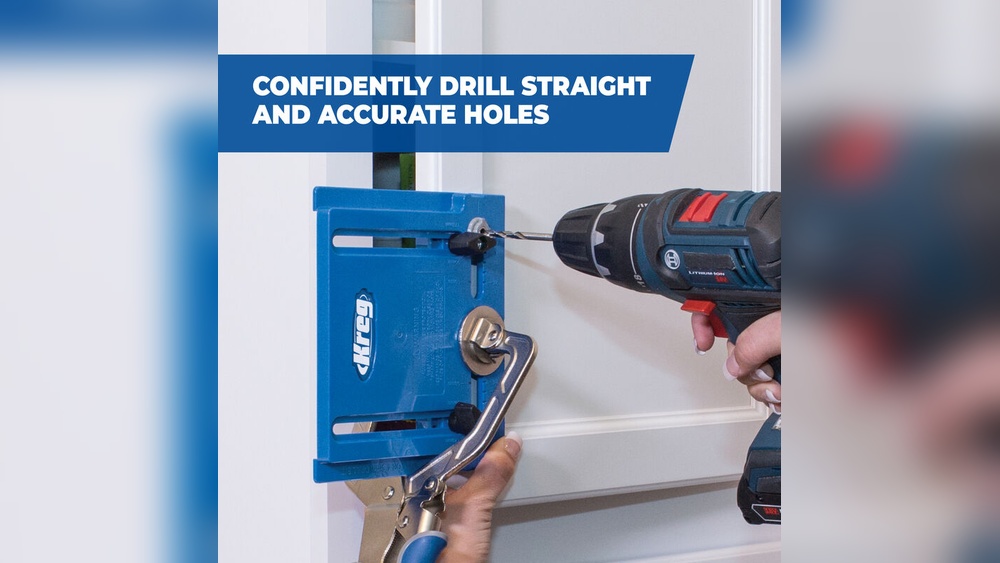
Using Templates And Jigs
Templates and jigs help mark holes quickly and evenly. They keep holes straight and spaced correctly. Use a paper or plastic template made for your hardware size. Place the template on the cabinet door or drawer and mark the holes through the guide. Jigs can be adjusted for different hardware sizes.
Avoiding Misalignment
Mark holes with a pencil before drilling. Use a level to ensure marks are straight. Double-check measurements on both sides. Drill pilot holes first to prevent wood from splitting. Take your time and work carefully. Proper marking saves effort and gives your cabinets a professional look.
Drilling Techniques
Drilling holes for cabinet hardware needs care and precision. Proper drilling techniques help avoid damage and ensure a clean finish. Using the right tools and methods keeps your cabinets looking great and extends their life.
Preventing Wood Splintering
Splintering happens when wood fibers tear during drilling. To stop this, place masking tape over the drilling spot. The tape holds wood fibers in place. Drill slowly and steadily. Back the drill bit out gently to clear wood chips. This technique reduces splintering on both sides of the cabinet door.
Holding And Supporting Cabinet Doors
Secure the cabinet door before drilling. Use clamps or a non-slip mat to hold it steady. Support the door with a flat surface underneath. This prevents movement and uneven holes. Holding the door firmly ensures clean, straight holes for your hardware.
Drill Speed And Pressure Tips
Use a slow to medium drill speed. High speed can burn wood or cause splintering. Apply steady, gentle pressure. Let the drill bit do the work. Pressing too hard can crack the wood or damage the bit. Slow and steady drilling creates smooth holes and protects your cabinet doors.
Tools And Accessories
Choosing the right tools and accessories makes drilling holes for cabinet hardware easier. Accurate holes protect your cabinet from damage. The right drill bit size matches the hardware screw size. You also need guides and other tools to keep holes straight and even. This section covers essential tools for drilling cabinet hardware holes.
Best Drill Bits For Cabinet Hardware
For cabinet knobs and pulls, a 3/16-inch drill bit works well most times. It fits common screw sizes without cracking the wood. Use brad point drill bits for clean holes. These bits have a sharp tip that keeps the bit from wandering. For larger pulls, use a drill bit slightly bigger than the screw. Check your hardware’s screw size before choosing a bit. Match or go a little bigger than the screw diameter.
Using Cabinet Hardware Jigs
Cabinet hardware jigs help drill holes in the same spot on every door or drawer. They hold the drill steady and guide the bit. Jigs save time and prevent mistakes like crooked holes. Choose a jig that fits your cabinet door size and hardware type. Some jigs come with adjustable stops for different pull lengths. Using a jig keeps your cabinet look uniform and professional.
Additional Helpful Tools
Other tools improve your drilling accuracy and ease. A tape measure and pencil mark hole positions clearly. A level ensures marks are straight across drawers or doors. Use a center punch to make a small dent where you drill. This dent stops the drill bit from slipping. Clamps hold the jig and cabinet door steady while you drill. These tools reduce errors and give a neat, polished result.
Common Mistakes To Avoid
Drilling holes for cabinet hardware may seem simple. Yet, many make avoidable mistakes. These errors can cause damage or poor fitting of knobs and pulls. Knowing what to avoid helps achieve a clean, professional look. Below are common mistakes to watch out for during drilling.
Drilling Oversized Holes
Drilling holes too large is a frequent error. It weakens the wood around the hardware. Knobs or pulls may wobble or not fit tightly. Use a drill bit that matches the hardware’s recommended size. Check the packaging or instructions for guidance.
Ignoring Screw Length
Choosing the wrong screw length causes problems. Screws that are too long can poke through the cabinet back. Too short screws fail to hold the hardware firmly. Measure the cabinet thickness and select screws accordingly. Match the screw length to the cabinet’s depth.
Skipping Measurement Checks
Not measuring before drilling leads to misplaced holes. Misaligned holes affect the hardware’s appearance and function. Always measure twice for center-to-center spacing of pulls. Mark holes carefully with a pencil. Use a level or template for accuracy.
Replacing Existing Hardware
Replacing cabinet hardware can refresh your kitchen or bathroom look quickly. Precise drilling matters most to avoid damaging your cabinets. When swapping old knobs or pulls, proper hole size and placement keep things neat and functional. Follow simple steps to measure and match hardware holes.
Measuring Existing Hole Spacing
Use a ruler or tape to measure the distance between holes on drawer fronts or doors. Measure from the center of one hole to the center of the next. This is called center-to-center spacing. Write down the measurement carefully. It ensures your new pulls or handles fit perfectly without extra drilling.
Matching New Hardware Sizes
Compare the center-to-center measurement with the new hardware size. Choose knobs or pulls that match or are very close in size. Check the screw length and diameter included with the new hardware. Use a drill bit just slightly larger than the screw diameter. This helps the screw fit easily without cracking the wood.
Filling And Refinishing Old Holes
Old holes left unused can look messy and weaken cabinet doors. Fill these holes with wood filler or putty that matches your cabinet color. Let the filler dry completely, then sand it smooth with fine-grit sandpaper. Touch up the area with matching paint or stain to blend it in. This restores a clean, smooth surface before installing new hardware.
Tips For Professional Results
Getting professional results when drilling holes for cabinet hardware requires care and precision. Small mistakes can lead to misaligned handles or damaged cabinets. Follow these simple tips to ensure your hardware looks neat and functions well. Proper hole size and placement make installation easier and improve the final look.
Consistent Hole Placement
Measure carefully before drilling each hole. Use a ruler or tape measure to mark the exact spot. Mark all holes with a pencil or masking tape. Consistency keeps handles aligned and the cabinet looking balanced. Use a template or jig to repeat the same placement on multiple doors. Check measurements twice to avoid errors.
Choosing Hardware Proportions
Select hardware size that fits your cabinet doors and drawers. Large pulls suit wide drawers, small knobs work best on narrow doors. Consider the screw length and diameter. Match your drill bit size to the screw for a smooth fit. Avoid drilling holes too large or too small to prevent loose hardware or wood splitting.
Finishing Touches
Use a countersink bit to create a clean hole edge. This prevents wood from splintering around the hole. Sand lightly around the drilled hole to smooth rough edges. Wipe away dust before installing hardware. Tighten screws evenly to avoid damaging the cabinet surface. Small details make a big difference in appearance and durability.

Credit: thepalettemuse.com

Credit: www.youtube.com
Frequently Asked Questions
What Is The 1/3 Rule For Cabinet Hardware?
The 1/3 rule for cabinet hardware means choosing pulls about one-third the length of the drawer or door width. This ensures balanced, proportional hardware placement.
What Size Drill Bit For Cabinet Pulls At Home Depot?
Use a 3/16-inch drill bit for cabinet pulls at Home Depot. This size fits most standard pull screws perfectly.
What Size Hole For Cabinet Hinges?
Drill a 35mm hole for standard cabinet hinges. Measure carefully and use a drill bit matching the hinge cup size.
What Size Pilot Hole For 10 Cabinet Screw?
Use a 13/64-inch drill bit for a pilot hole with a 10 cabinet screw in hardwood. For softwood, use a 1/8-inch bit. This ensures the screw fits without splitting the wood or binding. Always verify screw size for best results.
Conclusion
Choosing the right drill bit size is key for cabinet hardware installation. Use the screw size as your main guide. Drill a hole slightly larger than the screw diameter. Measure the center-to-center distance carefully for pulls. Mark the drill spots with tape to avoid slipping.
Take your time and drill slowly for clean holes. Proper hole size ensures hardware fits well and stays secure. With these simple steps, your cabinets will look neat and professional. Enjoy your updated cabinets without extra hassle or mistakes.