Are your vinyl shutters looking worn out or are you ready to replace them? The first step is removing the fasteners holding them in place.
It might seem tricky, but with the right approach, you can do it quickly and without damaging your shutters or siding. In this guide, you’ll discover simple, step-by-step instructions to remove vinyl shutter fasteners safely and efficiently. Keep reading, and you’ll gain the confidence to handle this task like a pro—saving time, money, and frustration along the way.
Types Of Vinyl Shutter Fasteners
Vinyl shutters are popular for their durability and low maintenance. Removing their fasteners requires knowing the types of fasteners used. Different fasteners hold shutters in place in various ways. Understanding these types helps remove them safely and quickly.
Common Fastener Materials
Fasteners for vinyl shutters come in several materials. Plastic is common because it resists rust and damage. Metal fasteners offer strong hold but can rust over time. Stainless steel is popular for its strength and rust resistance. Knowing the material helps choose the right tools for removal.
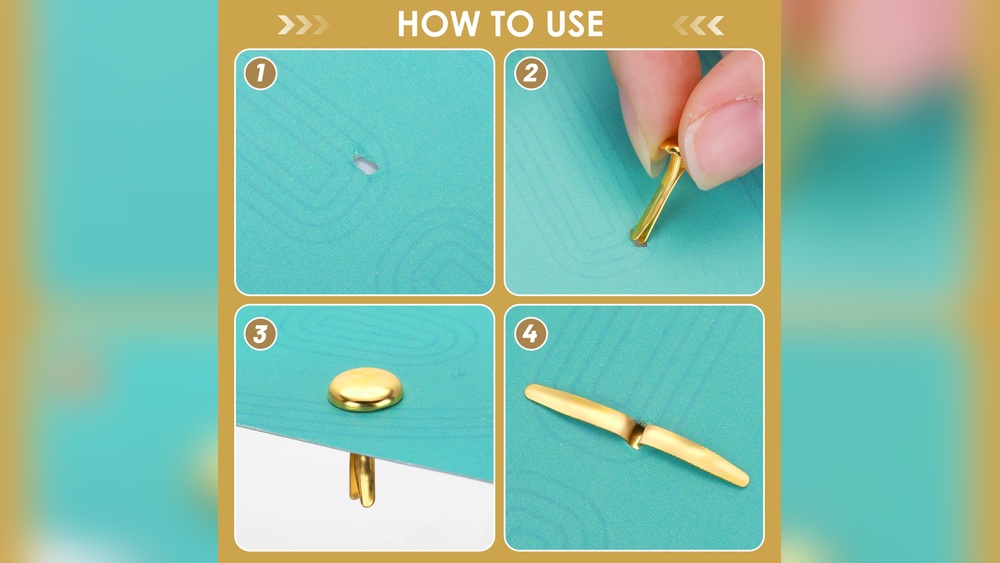
Fastener Designs And Mechanisms
Fasteners have different designs to secure shutters firmly. Some use screws that need a screwdriver to remove. Others have clips that snap into place, requiring gentle prying. There are also nails or pins driven directly into walls. Each design affects how you remove the fasteners without harming shutters or walls.

Credit: www.youtube.com
Tools Needed For Removal
Removing vinyl shutter fasteners needs the right tools. Having these tools ready makes the job smoother and safer. Some tools are common and easy to find. Others are made for specific removal tasks. Knowing what to use helps avoid damage to shutters or walls.
Basic Hand Tools
Start with simple hand tools. A flathead screwdriver helps pry out fasteners gently. A Phillips screwdriver fits many screws on shutters. Needle-nose pliers grip and pull small fasteners or clips. A hammer can tap tools carefully to loosen stuck fasteners. Keep a utility knife handy to cut any caulk or paint sealing the fasteners.
Specialty Removal Tools
Some fasteners need special tools for safe removal. A panel clip remover is designed to pull clips without breaking them. A trim removal tool with a wide, flat edge works well to pry fasteners from tight spaces. If fasteners are rusted, a small wire brush cleans them first. A power drill with a screwdriver bit speeds up removing screws but use it carefully to avoid damage.
Safety Precautions
Safety is very important before removing vinyl shutter fasteners. Taking the right steps can stop accidents and injuries. Always prepare well to work safely and finish the job without problems.
Protective Gear
Wear safety glasses to protect your eyes from dust and debris. Use gloves to keep your hands safe from sharp edges. A long-sleeve shirt can protect your arms from scratches. Closed-toe shoes help protect your feet from falling tools or parts. Always choose gear that fits well and feels comfortable.
Work Area Preparation
Clear the area around the shutters to have enough space to move. Remove any obstacles that could cause trips or falls. Make sure the ground is dry and stable to stand on. Use a sturdy ladder if you need to reach high spots. Keep tools organized and within reach to avoid unnecessary movements.
Step-by-step Removal Process
Removing vinyl shutter fasteners requires a clear and simple process. Follow these steps carefully to avoid damage. The process involves finding the fasteners, loosening them, and then removing them safely.
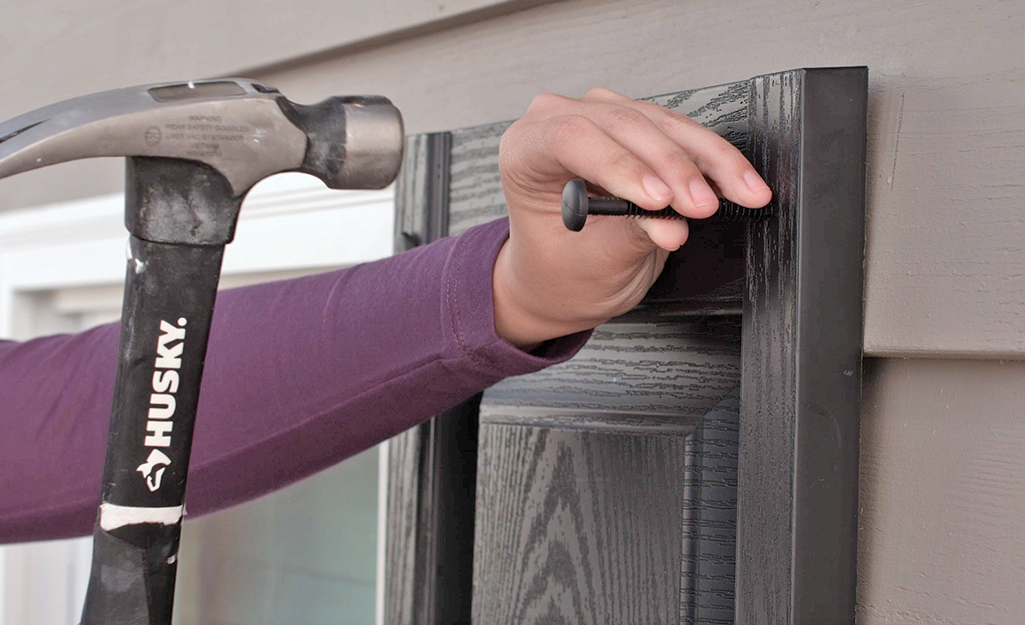
Locating The Fasteners
First, check the edges of the vinyl shutter. Fasteners are usually hidden under the shutter frame or along the sides. Look for small clips, screws, or plastic pins. Use a flashlight if needed to see clearly. Knowing their exact location helps avoid mistakes during removal.
Loosening Clips And Screws
Use the right tools like a screwdriver or pliers to loosen clips and screws. Turn screws slowly to prevent stripping. For clips, gently pry them away from the shutter. Do this carefully to avoid breaking the vinyl. Work step-by-step until all fasteners feel loose.
Extracting The Fasteners
Once fasteners are loose, pull them out carefully. Use pliers for better grip on stubborn clips or pins. Remove screws fully by turning them out. Keep all fasteners in a safe place if you plan to reuse them. Check the shutter for any remaining fasteners before moving it.
Troubleshooting Stubborn Fasteners
Removing vinyl shutter fasteners can be tricky when they do not budge easily. Stubborn fasteners slow down your project and cause frustration. This section helps solve common problems with tough fasteners. Use these tips to save time and avoid damage.
Dealing With Rust Or Corrosion
Rust or corrosion makes fasteners hard to remove. Spray a rust remover or penetrating oil on the fastener. Let it sit for 10 to 15 minutes. This softens the rust and loosens the fastener.
Use a wire brush to scrub off loose rust. Try turning the fastener gently with a screwdriver or pliers. Repeat oil application if it still sticks. Avoid forcing it, as this can break the fastener.
Handling Damaged Fasteners
Fasteners with stripped or damaged heads need extra care. Use a rubber band between the screwdriver and fastener. This helps grip the head better.
If this fails, try a screw extractor tool. Drill a small hole in the damaged fastener first. Then, insert the extractor and turn slowly to remove it.
For very damaged fasteners, cut the head off carefully with a rotary tool. Then pull out the remaining shaft with pliers. Always wear safety glasses during this process.
Credit: www.homedepot.com
Replacing Or Repairing Fasteners
Replacing or repairing vinyl shutter fasteners is essential for keeping shutters strong and looking good. Over time, fasteners can wear out or break. Fixing them helps maintain the shutters’ function and appearance. This section explains how to choose the right parts and reinstall shutters safely.
Choosing Replacement Parts
Pick fasteners that match your shutter’s style and size. Measure the old fasteners before buying new ones. Use rust-resistant materials like stainless steel or coated metal. These last longer and resist weather damage. Avoid cheap plastic fasteners; they may break quickly. Quality parts save time and money in the long run.
Reinstalling Shutters Securely
Place the shutter back in the right position. Align the holes carefully to avoid damage. Insert the fasteners straight to hold the shutter tight. Tighten screws just enough; too much force can crack vinyl. Check that the shutter does not move or wobble. Secure shutters protect windows and improve curb appeal.
Tips For Maintaining Vinyl Shutter Fasteners
Maintaining vinyl shutter fasteners keeps them strong and secure. Good care stops damage and saves money. Small efforts help shutters last longer and look better.
Regular Inspection
Check fasteners often for signs of rust or wear. Look for loose or missing screws. Tighten any that feel weak. Catching problems early avoids big repairs later.
Inspect after storms or strong winds. Dirt and debris can hide damage. Clean the fasteners gently to see their condition clearly.
Preventative Care
Use a soft cloth to clean fasteners regularly. Avoid harsh chemicals that may cause corrosion. Apply a light coat of lubricant to moving parts. This keeps them working smoothly and prevents rust.
Paint or seal exposed fasteners to protect against weather. Choose products safe for vinyl materials. Proper care extends the life of your shutters and their fasteners.

Credit: www.pirouette-editions.fr
Frequently Asked Questions
What Tools Do I Need To Remove Vinyl Shutter Fasteners?
You need a flathead screwdriver or a pry bar to remove vinyl shutter fasteners. A hammer may help loosen stubborn fasteners. Always wear gloves for safety and protect the shutter surface from damage during removal.
How Do I Safely Remove Vinyl Shutter Fasteners?
Gently pry around the fastener edges using a flathead screwdriver. Avoid applying excessive force to prevent shutter damage. Work slowly and evenly until the fastener pops out. Use a hammer lightly if needed to loosen tight fasteners.
Can Vinyl Shutter Fasteners Be Reused After Removal?
Yes, most vinyl shutter fasteners can be reused if undamaged. Inspect the fasteners for cracks or bends before reinstalling. Clean any debris from the fasteners to ensure a secure fit when reattaching the shutters.
How Do I Prevent Damage When Removing Vinyl Shutter Fasteners?
Use a flat tool with a protective cloth to avoid scratching shutters. Work slowly and avoid sudden force to prevent cracks. Keep the surrounding area clean and support the shutter to reduce stress during removal.
Conclusion
Removing vinyl shutter fasteners can be simple with the right steps. Use basic tools like a screwdriver or pliers for best results. Take your time and work carefully to avoid damage. Clean the area after removal to keep shutters looking good.
This process helps maintain your home’s exterior easily. Now you can handle shutter fasteners without stress or confusion. Try these tips on your next project for smooth removal.