Are you looking to refresh your cabinets without spending a fortune? Putting on old cabinet hardware can give your kitchen or bathroom a charming, vintage touch that makes a big difference.
But how do you do it right, so everything fits perfectly and looks just like it should? If you’ve ever felt unsure about handling old knobs and pulls, you’re not alone—and this guide is made just for you. Keep reading, and you’ll discover simple steps that make installing old cabinet hardware easy and satisfying.
Your cabinets are about to get a stunning makeover!
Gather Necessary Tools
Gathering the right tools is the first step to putting on old cabinet hardware. Having everything ready helps the process go smoothly. It saves time and avoids frustration. You can focus on the task without interruptions.
Identify Required Equipment
Start by listing the tools you need. A screwdriver is a must, usually Phillips or flathead. Check the screws from the old hardware to match the screwdriver type. You will also need a measuring tape or ruler to align the hardware correctly.
A drill can help if new holes are necessary. Include drill bits that fit the screw size. A level is useful to keep the hardware straight. Keep a pencil nearby to mark hole positions. Finally, gather cleaning supplies to clean the surface before attaching new hardware.
Prepare Workspace
Clear the area around your cabinet. Remove any items that could get in the way. Lay down a cloth or paper to protect the surface. Good lighting helps you see details clearly. Open windows or use a fan for ventilation if needed.
Arrange your tools within easy reach. Organize screws and hardware in small containers. This prevents losing small parts. Take your time to set up. A clean, organized workspace makes the job easier and faster.
Remove Old Hardware
Removing old cabinet hardware is the first step in giving your cabinets a fresh look. This task needs care to avoid damage. Taking your time helps keep the cabinet surface smooth and ready for new handles or knobs.
Follow simple steps to remove hardware safely and clean the area well afterward. Clean surfaces make new hardware fit better and last longer.
Unscrew Existing Handles And Knobs
Start by opening the cabinet door or drawer fully. Use a screwdriver to turn the screws holding the handles or knobs. Turn slowly to avoid stripping the screws.
Keep the screws in a safe place if you plan to reuse them. Remove the hardware gently. If the pieces are stuck, wiggle them slightly to loosen.
Clean Cabinet Surface
After removing the hardware, clean the cabinet surface well. Use a mild soap and warm water solution. Wipe away dirt, grease, and old glue spots.
Dry the area completely with a soft cloth. A clean surface helps new hardware stick better and look neat. Check for any damage or holes that need fixing before new installation.
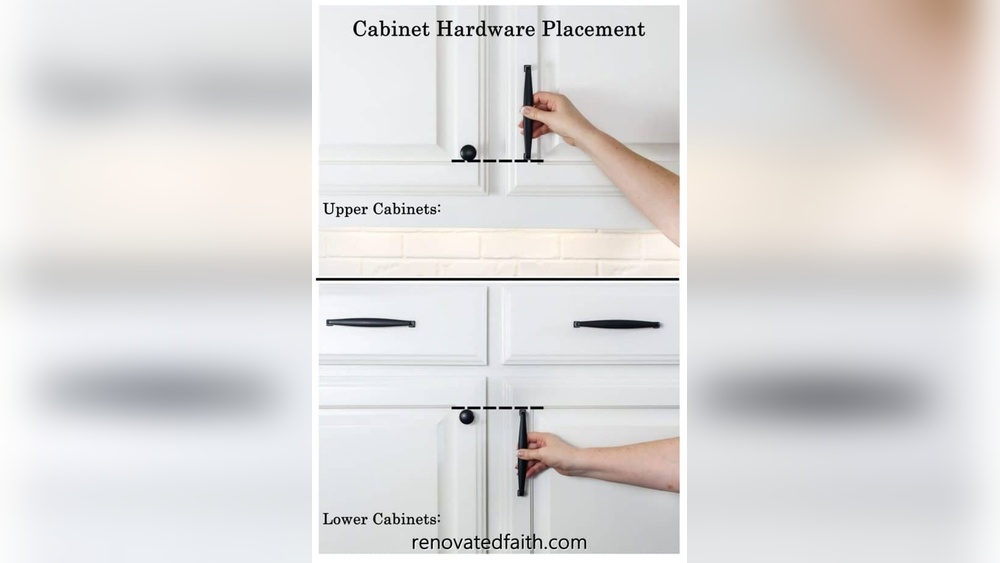
Measure And Mark Placement
Measuring and marking the placement of old cabinet hardware is an important step. It ensures the hardware fits well and looks balanced. Taking time to measure carefully prevents mistakes that can damage your cabinets. Marking the spots clearly makes installation easier and neater.
Align Hardware Positions
Start by checking the position of the old hardware. Use a ruler or tape measure to find the exact spot. Make sure the hardware aligns with the cabinet edges and other pieces. Consistent placement creates a uniform and clean look. Mark the spots lightly with a pencil for easy adjustment.
Use Templates For Accuracy
Templates help keep hardware placement consistent across cabinets. You can make one from cardboard or buy a ready-made template. Place the template on the cabinet and mark holes quickly. This saves time and reduces errors. Using a template works well for handles, knobs, and pulls.

Credit: www.youtube.com
Drill New Holes
Drilling new holes is often necessary when installing old cabinet hardware. The original holes may not match the new hardware’s design or size. Drilling new holes helps ensure a secure fit and proper alignment. It also prevents damage to the cabinet surface and maintains a clean look.
Select Correct Drill Bit
Choose a drill bit that matches the screw size of your hardware. The bit should be slightly smaller than the screw diameter. This prevents the hole from being too large and loose. Use a high-quality bit for clean, precise holes. Wood bits work best for cabinet surfaces made of wood.
Drill Carefully To Avoid Damage
Mark the spot for the new hole with a pencil. Use a small nail to make a starter dent. This keeps the drill bit from slipping. Drill slowly and straight to avoid cracking the wood. Stop drilling once you reach the right depth. Clean any dust or wood chips after drilling.
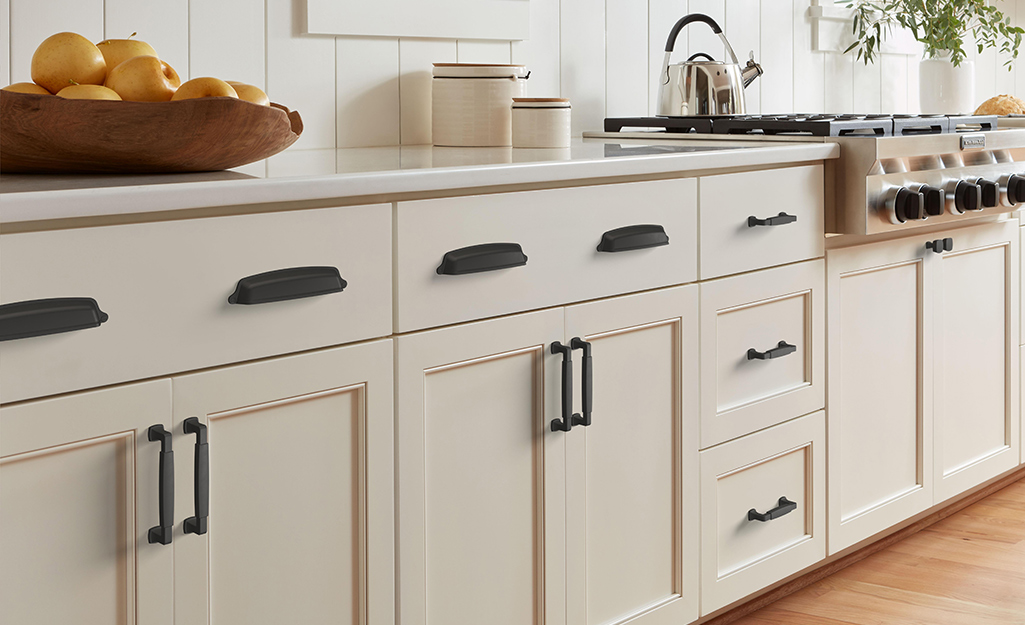
Attach New Hardware
Attaching new hardware to old cabinets brings fresh life to your kitchen or bathroom. This step requires care to ensure the hardware fits well and works properly. Follow simple steps for a smooth installation.
Insert Screws And Tighten
Place the new hardware on the cabinet door or drawer. Align the holes in the hardware with the pre-drilled holes in the cabinet. Insert screws through the hardware and into the holes carefully. Use a screwdriver to tighten the screws gently. Avoid over-tightening to prevent damage to the cabinet or hardware. Tighten just enough to hold the hardware firmly in place.
Check For Firmness And Alignment
After tightening, test the hardware by pulling it gently. Ensure it does not wobble or feel loose. Look closely to confirm the hardware sits straight and lines up with the edges. Misaligned hardware affects the cabinet’s look and function. Adjust screws slightly if needed to fix alignment. A firm and aligned handle makes your cabinets easy to use and attractive.

Credit: www.homedepot.com
Final Touches
After installing old cabinet hardware, the final steps are important. These steps ensure your work looks neat and the hardware works well. Taking time on these details makes the cabinets look complete and polished.
Clean Up Residue
Remove any dust or debris left from installation. Use a soft cloth to wipe around the hardware. Clean any fingerprints or smudges from the surface. Avoid harsh cleaners that could damage the old finish. A gentle cleaner and water usually work best.
Test Functionality
Open and close each cabinet door or drawer slowly. Check for smooth movement and proper alignment. Tighten screws if the hardware feels loose. Make sure nothing sticks or jams. Smooth function shows a job well done.
Credit: www.homedepot.com
Frequently Asked Questions
How Do You Remove Old Cabinet Hardware Safely?
Start by unscrewing the hardware using the right screwdriver. Use a cloth to protect the cabinet surface. Gently pry off stubborn pieces to avoid damage. Clean the area before installing new hardware.
Can Old Cabinet Hardware Be Reused On New Cabinets?
Yes, old hardware can fit new cabinets if the hole spacing matches. Measure carefully before installing. Refinishing may be needed to match the new cabinet style. This saves cost and keeps vintage charm.
What Tools Are Needed To Install Old Cabinet Hardware?
You need a screwdriver, drill, tape measure, and pencil. A level helps align hardware perfectly. Use screws that match the original size. Proper tools ensure secure and accurate installation.
How Do You Align Old Cabinet Hardware Properly?
Measure the existing holes or mark new spots evenly. Use a level to keep hardware straight. Double-check measurements before drilling or screwing. Proper alignment improves both function and appearance.
Conclusion
Putting on old cabinet hardware can bring charm to your space. Take your time to clean and align each piece carefully. Use the right tools to avoid damage and ensure a firm fit. Old hardware adds character and makes cabinets look unique.
Small steps lead to great results. Enjoy the process and the new look of your cabinets. Simple actions can refresh your kitchen or bathroom easily. Remember, patience and care make all the difference.