Are you thinking about updating your cabinets but worried that installing new hardware might be too hard? You’re not alone.
Many people hesitate because they imagine complicated tools, tricky measurements, or messy mistakes. But what if it’s easier than you think? You’ll discover simple steps to make your cabinet hardware installation smooth and stress-free. By the end, you’ll feel confident to tackle the project yourself—and enjoy a fresh, stylish look in your space.
Keep reading to find out how easy it really can be!
Choosing The Right Hardware
Choosing the right cabinet hardware is an important step in any kitchen or bathroom update. The hardware affects both the look and function of your cabinets. The right choices make your space feel complete and easy to use.
Understanding the different types, materials, and styles helps you pick hardware that fits your needs and taste. This guide covers the basics to help you decide with confidence.
Types Of Cabinet Hardware
Cabinet hardware comes in many forms. The most common are knobs and pulls. Knobs are small and round. Pulls are longer and easier to grip. Some cabinets use handles or even finger pulls for a modern look. Each type offers a different feel and function. Choose what feels best for your daily use.
Materials And Finishes
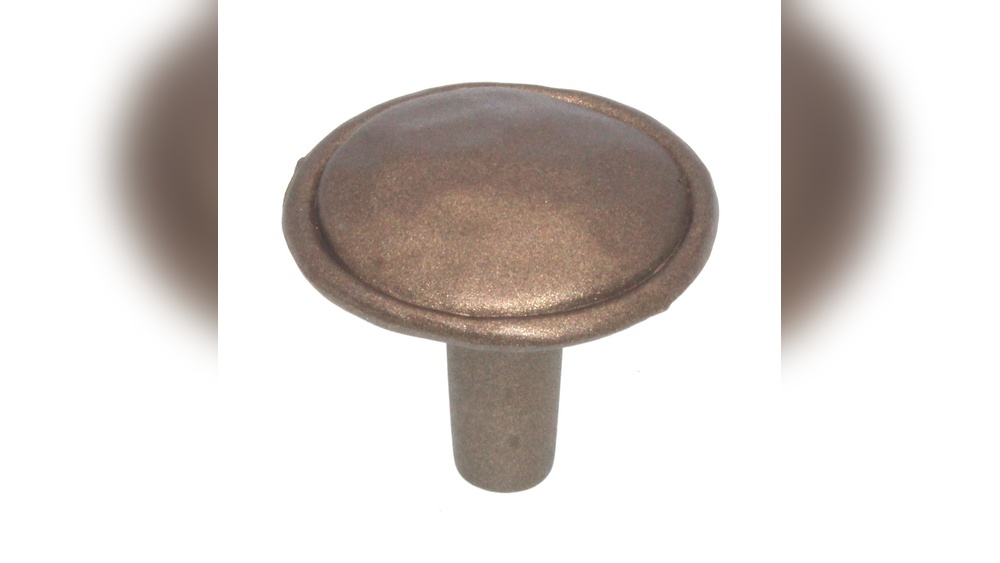
Hardware materials affect durability and style. Popular choices include metal, plastic, and wood. Metal finishes vary from shiny chrome to aged bronze. Brushed nickel is popular for its soft shine. Matte black adds a bold touch. Consider the room’s moisture and wear when choosing materials. The finish can brighten or soften the room’s overall look.
Matching Hardware To Style
Hardware should match your cabinet style. Traditional cabinets pair well with classic brass or bronze knobs. Modern cabinets look great with sleek stainless steel or black pulls. Rustic kitchens benefit from wooden or iron hardware. Think about the room’s colors and textures. The right hardware ties everything together and enhances your design.

Credit: www.homedepot.com
Tools You Will Need
Installing cabinet hardware is a task that requires some basic tools. Having the right tools makes the job easier and faster. This section covers the tools you will need for a smooth installation process.
Essential Hand Tools
A screwdriver is a must-have for installing cabinet hardware. Choose one that fits your screws well to avoid slipping. A drill with screwdriver bits also helps speed up the work. A small wrench may be needed for some hardware types. Keep a pair of pliers handy for gripping and adjusting parts.
Measuring And Marking Tools
Accurate measurement is key to proper hardware placement. Use a tape measure to find the right spots. A ruler or a straight edge helps keep marks straight. A pencil is perfect for marking where screws will go. Marking guides or templates can make this step easier and more precise.
Optional Power Tools
Power tools are not always necessary but can save time. A cordless drill speeds up screw installation. A drill bit set allows you to pre-drill holes, preventing wood splits. An electric screwdriver can reduce hand strain. Use these tools if you want a quicker, less tiring job.
Preparing For Installation
Preparing for cabinet hardware installation is a key step for a smooth process. Taking time to get ready helps avoid mistakes and saves time later. Clean and ready surfaces make the new hardware fit perfectly. Checking for any damage ensures the cabinets hold the hardware well. The right preparation leads to better results and a more polished look.
Removing Old Hardware
Start by carefully taking off the old handles or knobs. Use a screwdriver to remove screws holding the hardware. Keep the screws in a safe place in case you need them. Avoid forcing the hardware off to prevent damage. Removing old hardware properly creates a clean base for the new pieces.
Cleaning Cabinet Surfaces
After removing hardware, clean the cabinet surfaces well. Use a mild cleaner and a soft cloth to remove dirt and grease. Make sure the surface is dry before moving on. Clean surfaces help the new hardware stick better and look nicer. Do not skip this step for the best finish.
Checking For Damage
Look closely for scratches, holes, or cracks on cabinet surfaces. Small holes from old hardware can be filled with wood filler. Sand the area smooth once the filler dries. Fixing damage ensures the hardware fits firmly and lasts longer. Healthy cabinets support hardware better and improve appearance.
Credit: renovatedfaith.com
Marking Hardware Placement
Marking the placement of cabinet hardware is a key step in installation. It sets the foundation for a neat and functional look. Precise marking helps avoid mistakes and ensures the hardware fits well.
Measuring For Handles And Knobs
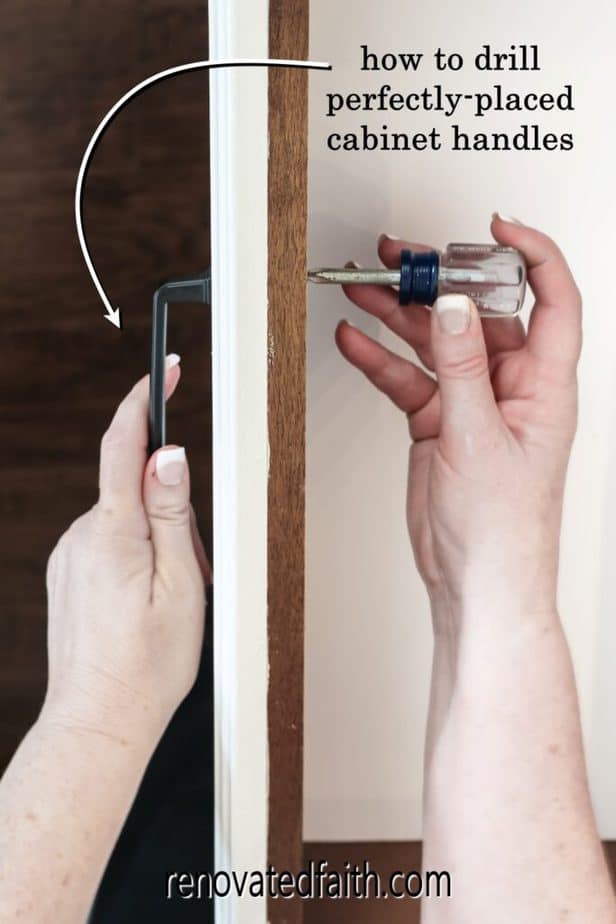
Measure carefully before marking. Use a ruler or tape measure to find the center or edge. For knobs, mark the spot at the center of the door or drawer. Handles need two marks, one for each screw hole. Measure the distance between holes on the hardware first. Mark these points clearly to guide drilling.
Using Templates And Jigs
Templates and jigs simplify marking. They help keep holes in the right place. Use a paper template or plastic jig made for your hardware type. Align it on the cabinet and mark through the holes. This method saves time and reduces errors. It also works well for multiple cabinets needing the same layout.
Ensuring Consistency
Consistency is crucial for a polished look. Check that all hardware aligns evenly across cabinets. Use a level or straight edge to confirm horizontal or vertical placement. Double-check measurements before drilling. Mark all cabinets with the same template or measuring method. This keeps handles and knobs uniform and balanced.
Drilling Holes Accurately
Drilling holes accurately is key to installing cabinet hardware properly. Correct holes ensure handles and knobs fit well and look neat. Mistakes in drilling can damage cabinets or cause misalignment. Take time to drill with care and precision.
Selecting The Right Drill Bit
Choose a drill bit that matches the screw size of your hardware. For wood cabinets, a brad point bit works best. It creates clean holes without splintering the wood. Avoid using bits that are too large or too small.
Drilling Techniques
Mark the exact spot for each hole with a pencil. Use a small nail or punch to make a dent. This stops the drill bit from slipping. Drill slowly and keep the drill steady. Stop as soon as you reach the right depth.
Avoiding Common Mistakes
Do not rush the drilling process. Avoid drilling at an angle to prevent crooked holes. Measure twice and drill once to avoid errors. Check for any wires or pipes behind the cabinet before drilling.
Attaching The Hardware
Attaching cabinet hardware is a key step in upgrading your cabinets. It gives your furniture a fresh and polished look. This process is simple but needs care for the best results. Proper attachment ensures durability and good function.
Aligning Handles And Knobs
Start by marking where you want the handles or knobs. Use a ruler or template to keep them even. Align each piece carefully so they look balanced. This step helps avoid crooked or uneven hardware. Take your time to check the position before drilling.
Securing Screws Properly
Choose screws that fit your hardware and cabinet thickness. Insert screws gently to avoid splitting the wood. Tighten screws enough to hold the hardware firmly. Avoid over-tightening to prevent damage. A steady hand ensures the hardware stays secure.
Checking For Stability
After attaching, test each handle and knob. Pull and twist lightly to check if they hold firm. Loose hardware may need screws tightened again. Stability means your hardware will last longer. This final check keeps your cabinets looking good and working well.
Tips For A Professional Finish
Installing cabinet hardware can improve your space’s look. A professional finish makes a big difference. Small details help your cabinets appear neat and polished. Follow these tips for the best results.
Touching Up Paint Or Finish
Sometimes holes or scratches appear after installation. Use matching paint or stain to cover these marks. Apply gently with a small brush. Let it dry fully before using the cabinet. This keeps your cabinets looking fresh and new.
Handling Uneven Surfaces
Cabinet doors or drawers may not be perfectly flat. Use washers behind screws to level hardware. This avoids loose or crooked handles. Tighten screws carefully to prevent damage. A steady hand creates a smooth, even look.
Maintaining Hardware Over Time
Clean hardware regularly with a soft cloth. Avoid harsh chemicals that can damage finishes. Check screws often and tighten if needed. Well-kept hardware lasts longer and stays shiny. Small care steps protect your investment.
Troubleshooting Common Issues
Installing cabinet hardware can sometimes bring small problems. These issues often slow down the process. Troubleshooting common problems helps you fix them quickly. Knowing simple fixes saves time and frustration. It makes the installation smoother and more satisfying.
Fixing Loose Hardware
Loose hardware feels unstable and looks bad. Tighten screws gently to secure the hardware. Use a screwdriver that fits well to avoid damage. If screws won’t tighten, try using a toothpick. Insert it into the hole, then screw again. The toothpick fills extra space and holds the screw tight.
Dealing With Misaligned Holes
Misaligned holes cause handles or knobs to sit unevenly. Measure carefully before drilling new holes. Use a filler like wood putty to cover old holes. Let it dry fully before drilling new ones. Mark the new spots clearly. Drill slowly and straight for best results.
Replacing Stripped Screws
Stripped screws lose their grip and can’t tighten well. Use a rubber band over the screw head for better grip. Turn slowly with a screwdriver. If this fails, drill the screw out carefully. Replace stripped screws with new ones of the same size. Always use good quality screws to avoid stripping.

Credit: www.thriftydecorchick.com
Frequently Asked Questions
Is Installing Cabinet Hardware Difficult For Beginners?
Installing cabinet hardware is generally easy for beginners. Basic tools like a drill and screwdriver are required. Clear instructions and measuring carefully help ensure success. Most people complete the task in under an hour without professional help.
What Tools Are Needed To Install Cabinet Hardware?
You need a drill, screwdriver, tape measure, and pencil to install cabinet hardware. A template or jig can help for precise placement. These common tools simplify the process and improve accuracy.
How Do I Measure For Cabinet Hardware Placement?
Measure the cabinet door or drawer width and height first. Mark the desired hardware position with a pencil. Use a template or ruler to ensure consistent placement across all cabinets. Accurate measurement prevents mistakes and ensures a professional look.
Can I Install Cabinet Hardware Without Drilling?
Yes, you can use adhesive-backed hardware or magnetic handles. However, these options may not be as durable or secure as drilled hardware. For long-lasting results, drilling is recommended.
Conclusion
Installing cabinet hardware is easier than many think. With basic tools and clear steps, anyone can do it. Taking your time helps avoid mistakes and saves effort. Small changes like new knobs or handles refresh your cabinets fast. This simple task improves your space without needing expert help.
Start with one cabinet to build confidence. Soon, you’ll enjoy the look and feel of updated hardware. Give it a try and see the difference yourself.