Are you struggling with stubborn metal fasteners that just won’t budge? Whether you’re fixing furniture, repairing a vehicle, or working on a DIY project, knowing how to remove metal fasteners properly can save you time, effort, and frustration.
You’ll discover simple, effective techniques that anyone can use to tackle even the toughest fasteners. Ready to make your next project smoother and easier? Keep reading to learn the best tips and tricks for removing metal fasteners like a pro.

Credit: www.youtube.com
Types Of Metal Fasteners
Metal fasteners hold things together tightly. They come in different shapes and sizes. Each type has a unique way to attach materials. Knowing these types helps in removing them safely and quickly.
Screws
Screws have a helical ridge wrapped around a cylinder. They need a screwdriver to turn and remove. Screws grip materials firmly by threading into them. They come in many head shapes like flat, Phillips, and hex.
Nails
Nails are simple metal pins with a flat head. You push or hammer them into surfaces. Nails hold materials with friction and pressure. They are harder to remove than screws because they lack threads.
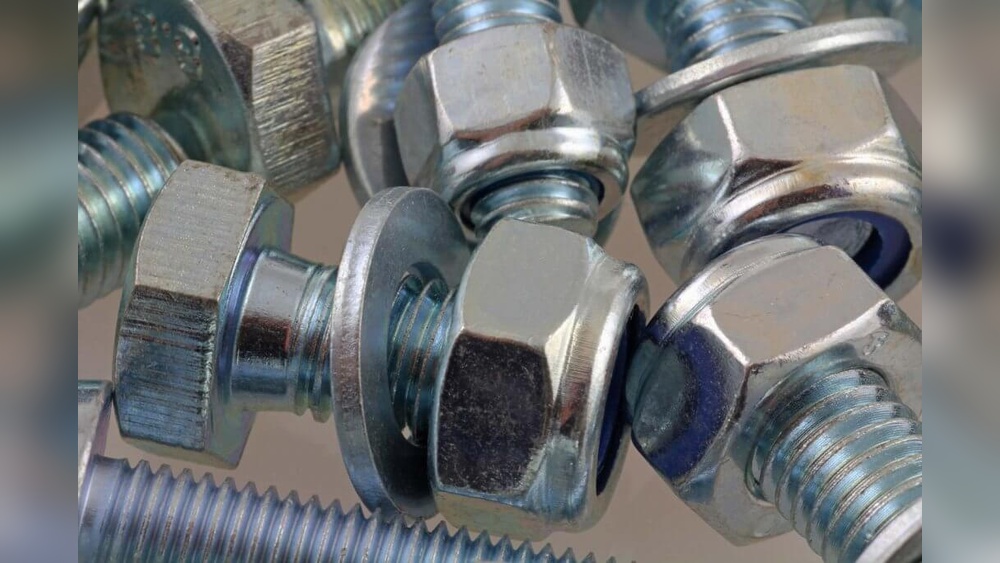
Bolts
Bolts are similar to screws but thicker and longer. They use nuts on the opposite side for a strong hold. Bolts need wrenches or sockets for removal. They are common in heavy-duty construction and machinery.
Rivets
Rivets are permanent fasteners. They join materials by deforming the tail end. Rivets require special tools to remove or drill out. They are often used in metalwork and aircraft construction.
Tools Needed For Removal
Removing metal fasteners requires the right tools. Using proper tools makes the job easier and safer. Each tool has a specific role in the removal process. Knowing which tool to choose helps save time and effort.
Pliers And Wrenches
Pliers grip and hold fasteners tightly. They work well on nuts, bolts, and small metal pieces. Wrenches turn and loosen nuts and bolts. Adjustable wrenches fit different sizes. Use these tools for fasteners that need twisting or pulling.
Screwdrivers
Screwdrivers fit into the slots of screws. Flathead and Phillips are common types. They help remove screws by turning them counterclockwise. Choose the right size screwdriver to avoid slipping or damaging the screw head.
Hammers And Crowbars
Hammers can tap or knock fasteners loose. Use a claw hammer to pull out nails. Crowbars provide leverage to pry out stubborn fasteners. These tools work best on nails and staples stuck in wood or other materials.
Power Tools
Power tools speed up fastener removal. Impact drivers and cordless drills remove screws and bolts quickly. Use a grinder or rotary tool to cut off damaged fasteners. Power tools require safety gear and careful handling.
Removing Screws Safely
Removing screws safely is important to protect your tools and materials. Using the right method avoids damage and makes the job easier. Taking care with screws saves time and prevents frustration.
Using The Correct Screwdriver
Choose a screwdriver that fits the screw head perfectly. A loose fit can strip the screw or slip and hurt you. Match the screwdriver type to the screw, like Phillips or flathead. Hold the screwdriver straight and apply steady pressure while turning.
Dealing With Stripped Screws
Stripped screws have damaged heads and are hard to turn. Use a rubber band between the screwdriver and the screw for extra grip. Another way is to tap the screwdriver into the screw with a hammer gently. If needed, try a screw extractor tool designed for this problem.
Applying Lubricants
Lubricants help loosen tight or rusty screws. Apply a small amount of oil or WD-40 to the screw head. Let it sit for a few minutes to work into the threads. Then, try turning the screw slowly with the correct screwdriver. Lubricants reduce friction and make removal easier.
Extracting Nails Without Damage
Removing nails without causing damage is important for many projects. It saves wood, walls, and other materials from harm. This section explains easy ways to pull out nails safely and cleanly.
Leveraging With A Claw Hammer
A claw hammer is a common tool for nail removal. Position the claw under the nail head carefully. Use the hammer handle as a lever. Pull back slowly to lift the nail out. Place a small block of wood under the hammer to protect the surface. This method helps avoid dents and scratches.
Using Nail Pullers
Nail pullers are designed to remove nails with less effort. Slide the tool’s jaws around the nail head. Squeeze the handle to grip tightly. Pull the nail straight out to reduce damage. Nail pullers work well for nails that are flush with the surface or slightly sunk in.
Removing Stubborn Nails
Some nails are hard to remove. Use pliers to grip and wiggle the nail gently. Tap around the nail with a hammer to loosen it. Apply steady pressure while pulling to avoid breaking the nail. For very tight nails, drill a small hole near the nail to help ease it out.
Detaching Bolts And Nuts
Detaching bolts and nuts is a common task in many repair projects. Removing them properly helps avoid damage to the metal fasteners and surrounding parts. The right tools and techniques make this task easier and safer. Below are important steps to follow for detaching bolts and nuts effectively.
Choosing The Right Wrench
Select a wrench that fits the bolt or nut snugly. A loose fit can strip the edges and make removal harder. Adjustable wrenches work well for various sizes but might slip more easily than fixed ones. Box-end or combination wrenches provide better grip and control. Use a wrench designed for the specific size of the fastener for best results.
Loosening Rusted Bolts
Rusted bolts can be tough to turn. Apply steady force without jerking to avoid breaking the bolt. Tap the bolt gently with a hammer to break the rust seal. Use heat to expand the metal slightly, which can also loosen rusted bolts. Take care not to damage nearby parts when applying heat or force.
Using Penetrating Oils
Penetrating oils help loosen stuck bolts and nuts by seeping into rust and corrosion. Spray the oil around the fastener and let it sit for 10 to 15 minutes. For very stubborn bolts, reapply the oil and wait longer. This softens rust and makes turning the bolt easier. Always wipe off excess oil before using a wrench to prevent slipping.

Credit: www.youtube.com
Techniques For Rivet Removal
Removing metal fasteners like rivets requires the right methods to avoid damage. Rivets hold parts tightly, so removing them needs care. Different techniques suit different projects and tools available.
These techniques help remove rivets safely and prepare for new ones. Understanding each method makes the work easier and cleaner.
Drilling Out Rivets
Drilling is a common way to remove rivets. Use a drill bit slightly smaller than the rivet head. Drill through the center carefully to avoid damaging surrounding material. The rivet head will come off, and the shaft can be pushed out. Wear safety glasses and work slowly for best results.
Using Rivet Removal Tools
Special rivet removal tools make the job faster. These tools grip the rivet head and twist it off. Some use a punch and hammer to drive the rivet out. They reduce the risk of hurting the material around the rivet. Choose a tool that fits the rivet size and type for good results.
Replacing Rivets
After removing rivets, replace them to keep parts secure. Use the same size and type of rivet for best fit. Insert the new rivet into the hole and use a rivet gun or hammer to set it. Proper replacement ensures strength and prevents future damage. Check the new rivet is tight and flush with the surface.
Safety Tips During Removal
Removing metal fasteners can be risky without the right safety steps. Protecting yourself and your space helps avoid injuries and accidents. Follow these safety tips to keep the process smooth and safe.
Protective Gear
Wear safety glasses to protect your eyes from flying debris. Gloves help prevent cuts and scrapes from sharp edges. Use long sleeves and sturdy shoes for extra protection.
Work Area Preparation
Clear the area of clutter and tripping hazards. Ensure good lighting to see the fasteners clearly. Keep children and pets away from the work zone.
Handling Tools Properly
Use the right tool for each fastener type. Hold tools firmly and keep fingers clear of moving parts. Check tools for damage before use to avoid accidents.
Preventing Damage To Materials
Removing metal fasteners can damage the materials around them. Scratches, dents, or cracks may appear if you are not careful. Taking steps to protect these surfaces helps keep your project clean and strong. This section explains how to prevent damage during fastener removal.
Supporting Surrounding Surfaces
Support the area around the fastener before you start. Use a block of wood or a flat tool to hold the surface steady. This support stops the material from bending or breaking. It also spreads the force evenly, reducing the risk of damage.
Using Protective Barriers
Place a protective barrier between tools and the surface. Tape, cloth, or thin plastic sheets work well. These barriers stop tools from scratching or marking the material. They act as a cushion to keep surfaces safe during removal.
Slow And Steady Removal
Remove fasteners slowly and with control. Quick or forceful actions can cause chips or cracks. Use gentle pressure and small movements. Patience helps protect your materials and leads to cleaner results.
When To Seek Professional Help
Removing metal fasteners can sometimes be tricky. Some jobs are simple and can be done with basic tools. Other times, the task becomes difficult or risky. Knowing when to call a professional saves time and prevents damage. Professionals have the right skills and tools to handle tough jobs safely.
Complex Fasteners
Some fasteners are hard to remove. They may be rusted, stripped, or stuck. Others have unique shapes or sizes. These can be hard to handle with home tools. A professional knows how to deal with these fasteners. They avoid breaking or damaging the material around them.
Structural Concerns
Fasteners often hold important parts together. Removing them may affect the structure’s strength. This is common in buildings, vehicles, or machinery. Mistakes can cause safety problems or costly repairs. Professionals understand how to keep structures safe. They know which fasteners to remove and which to leave.
Specialized Equipment Needs
Some fasteners require special tools to remove. Power tools, extractors, or heating devices may be needed. These tools are not common in every toolbox. Using the wrong tool can cause damage or injury. Professionals have access to all necessary equipment. They use the right tool for each fastener type.

Credit: www.reddit.com
Frequently Asked Questions
How Do I Safely Remove Metal Fasteners At Home?
Use proper tools like pliers or a screwdriver. Wear gloves and eye protection. Apply steady pressure to avoid damage or injury.
What Tools Are Best For Removing Stubborn Metal Fasteners?
Use a pry bar, pliers, or a flathead screwdriver. For rusted fasteners, apply penetrating oil first. Heat can also help loosen them.
Can I Reuse Metal Fasteners After Removal?
Yes, if they aren’t damaged or rusted. Clean and inspect each fastener before reuse to ensure safety and effectiveness.
How To Remove Rusted Metal Fasteners Easily?
Apply a penetrating oil and let it sit for 10-15 minutes. Gently tap with a hammer, then use pliers or a wrench to turn.
Conclusion
Removing metal fasteners can be simple with the right tools and care. Always choose the correct method for the type of fastener you face. Take your time to avoid damaging materials around the fastener. Safety matters, so wear gloves and eye protection.
Practice makes the process easier and faster over time. Keep these tips in mind to handle metal fasteners confidently. Your projects will look cleaner and last longer with proper removal. Ready to take on your next task?