If you’ve ever tried to fix or upgrade your car, you know how tricky plastic auto body fasteners can be. They hold important parts together, but removing them without damage can feel frustrating and confusing.
You might worry about breaking the fasteners or scratching your car’s surface. Don’t worry—this guide will show you simple, effective ways to remove plastic auto body fasteners quickly and safely. Keep reading, and you’ll learn the tips and tricks that make the job easier, saving you time and stress.
Types Of Plastic Auto Body Fasteners
Plastic auto body fasteners hold many car parts together. They are strong but easy to remove with the right method. Knowing the types helps to remove them without damage. Each type has a unique design and use.
Push Clips
Push clips are common in car panels and bumpers. They have a pin in the center that locks the clip in place. To remove, push the pin inward or lift it slightly. Then pull the whole clip out carefully.
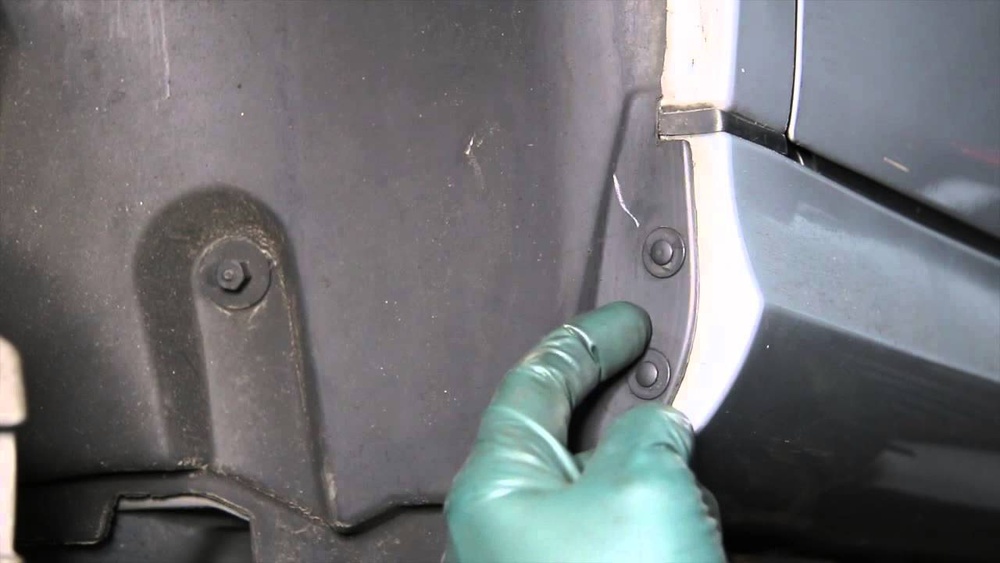
Screw Clips
Screw clips combine a plastic fastener with a screw. Unscrew the top part first using a screwdriver. After that, gently pull out the plastic base. They are often used in wheel wells and fender liners.
Trim Panel Fasteners
Trim panel fasteners secure interior panels and trims. They snap into holes, holding the panel tightly. To remove, pry gently with a trim tool or flat tool. Avoid pulling too hard to prevent panel damage.
Rivet Clips
Rivet clips have a plastic rivet that expands inside the hole. They require pushing or prying to remove the rivet head. Some need a special tool to pull out the rivet. They are strong and used in many body parts.

Credit: rogofastener.com
Tools Needed For Removal
Removing plastic auto body fasteners needs the right tools. These tools help avoid damage to your car parts. They make the removal process easier and faster. Using the proper tools also keeps the fasteners reusable. Here are the main tools needed for removal.
Plastic Trim Removal Tools
Plastic trim removal tools are designed for auto fasteners. They are gentle on car surfaces. These tools come in different shapes to fit various fasteners. They help pry off clips without scratching paint or trim. Using plastic tools reduces the risk of breaking fasteners.
Flathead Screwdriver
A flathead screwdriver is a common tool for removing fasteners. It fits under the fastener’s head to pry it up. Use it carefully to avoid damaging the plastic parts. Wrap the tip with tape to protect your car’s paint. It’s handy for fasteners that need a small lift.
Pliers
Pliers help pull out stubborn fasteners. Needle-nose pliers work well in tight spaces. Grip the fastener’s center pin and pull gently. Avoid squeezing too hard to prevent breaking. Pliers provide good control during removal.
Panel Clip Pliers
Panel clip pliers are built for fastener removal. They have a forked tip to slide under clips. The tool’s design gives leverage to pull clips out smoothly. These pliers reduce effort and damage to panels. They work best for larger or stuck clips.
Preparing The Work Area
Preparing the work area is an important first step before removing plastic auto body fasteners. A clean and protected workspace helps prevent damage to your vehicle. It also makes the process smoother and safer. Taking time to prepare ensures better results and less stress.
Cleaning The Surface
Start by cleaning the surface around the fasteners. Use a soft cloth and mild soap to remove dirt and grease. Dry the area well with a clean towel. Dirt can cause scratches or get in the way while removing the fasteners. A clean surface gives clear access and reduces risk of damage.
Protecting Surrounding Areas
Cover parts close to the fasteners with painter’s tape or soft cloths. This protects paint and trim from scratches or accidental tool slips. Avoid using harsh tapes that might leave residue. Protecting the surrounding area keeps your vehicle looking good after the work is done.
Step-by-step Removal Process
Removing plastic auto body fasteners needs care and the right steps. Follow this guide to avoid damage and save time. Each step helps you remove clips safely and cleanly. Use the correct tools and techniques for the best results.
Locating Fasteners
Start by finding all the plastic fasteners on the panel. Look along edges, corners, and under trim pieces. Fasteners often hide in small gaps or under dirt. Clean the area if needed to see them clearly. Knowing their position helps plan the removal process.
Using Trim Removal Tools
Use trim removal tools instead of screwdrivers or knives. These tools fit under clips without scratching surfaces. Choose a tool that matches the fastener size and shape. Insert the tool gently to loosen the fastener base. Tools reduce the risk of breaking clips or panels.
Prying Gently To Avoid Damage
Apply slow, steady pressure when prying fasteners. Avoid sudden force that can crack plastic or bend metal. Work around the fastener evenly, lifting little by little. Stop if you feel strong resistance. Take breaks to prevent damage and keep control.
Removing Stubborn Clips
Some clips stick tight and need extra care. Use a small flat tool to wiggle the clip side to side. Spray a little lubricant if clips won’t budge. Heat can help soften plastic, making removal easier. Patience and gentle movements protect your vehicle’s finish.
Tips To Avoid Damage
Removing plastic auto body fasteners requires care to avoid damage. These fasteners can break or scratch your vehicle if handled roughly. Use the right methods to keep your car’s surface safe. Follow these simple tips for a smooth removal process.
Applying Even Pressure
Press evenly on the fastener to prevent cracking. Uneven force can break the plastic parts. Use both hands if needed to spread the pressure. This helps release the fastener gently without damage.
Using The Right Tools
Select tools designed for plastic fasteners. Plastic trim removal tools work best. Avoid metal tools that can scratch or dent the surface. The right tool fits well and makes removal easier.
Working Slowly And Carefully
Take your time during removal. Rushing can cause fasteners to snap or bend. Slowly wiggle the fastener back and forth. Patient work reduces risk and protects your vehicle’s finish.

Credit: www.youtube.com
Replacing Or Repairing Fasteners
Replacing or repairing plastic auto body fasteners keeps your vehicle secure and looking good. These clips hold panels and parts in place. Over time, they can break or wear out. Fixing them quickly prevents bigger problems. Choosing the right fasteners and installing them right is key. This section guides you through those steps.
Choosing Replacement Clips
Pick clips that match the original size and style. Check your vehicle’s manual or parts guide. Use fasteners made for your car’s make and model. Avoid generic clips that may not fit well. Correct clips ensure panels hold tightly. Poor fitting fasteners can cause rattles or damage.
Installing New Fasteners Correctly
Clean the area before fitting new clips. Align panels carefully to avoid bending. Press clips in firmly but gently. Do not force fasteners or use too much pressure. Test by moving the panel slightly. Proper installation keeps parts secure and quiet. Take your time for best results.
Common Mistakes To Avoid
Removing plastic auto body fasteners can be tricky. Many people make simple mistakes that damage the fasteners or the car. Avoiding these errors saves time and money. Here are common mistakes to watch out for.
Forcing Fasteners
Forcing plastic fasteners often breaks them. These fasteners are delicate and need gentle handling. Pulling too hard can crack the head or snap the pin. Use slow, steady pressure instead. Let the tool do the work, not your strength.
Using Metal Tools Improperly
Metal tools can damage fasteners or paint if used wrong. Avoid sharp or pointed tools that dig into plastic. Choose flat, wide tools made for fasteners. Slide tools carefully under the fastener’s edge. This prevents scratches and keeps parts intact.
Ignoring Safety Precautions
Removing fasteners without safety gear risks injury. Wear gloves to protect your hands from sharp edges. Eye protection stops debris from causing harm. Work in a well-lit area to see clearly. Safety prevents accidents and keeps you safe.

Credit: www.amazon.com
Frequently Asked Questions
What Tools Are Needed To Remove Plastic Auto Body Fasteners?
You need a trim removal tool or flathead screwdriver. These tools help pry the fastener gently without damage. Using the right tool prevents scratches and broken clips, making removal easier and safer for your car’s body.
How Do I Avoid Damaging Fasteners During Removal?
Apply gentle, even pressure when prying. Avoid forcing the fastener out quickly. Use a proper removal tool to reduce the risk of breaking or warping clips. Take your time to preserve the fastener for reuse.
Can Plastic Fasteners Be Reused After Removal?
Yes, plastic fasteners can often be reused if undamaged. Inspect for cracks or breaks before reinstalling. If damaged, replace them to ensure secure attachment and avoid panel looseness or rattling.
Are There Different Types Of Plastic Fasteners On Cars?
Yes, common types include push pins, rivets, and clips. Each type requires a slightly different removal technique. Identifying the fastener type helps choose the correct tool and removal method.
Conclusion
Removing plastic auto body fasteners is easy with the right steps. Use proper tools to avoid damage. Work slowly and carefully to keep parts safe. Clean the area after removing fasteners for better results. Practice makes the process quicker and smoother.
Remember, patience helps prevent mistakes. Follow these tips for a successful removal every time. Your car will stay in good shape. Simple actions lead to great outcomes.