Are you struggling to remove shutter fasteners from your vinyl siding without causing damage? You’re not alone.
Removing these fasteners might seem tricky, but with the right approach, you can do it quickly and safely. In this guide, you’ll discover simple, step-by-step tips that make the process easy—even if you’ve never done it before. Keep reading, and you’ll save time, avoid costly mistakes, and get your siding looking flawless again.

Credit: www.youtube.com
Tools Needed
Removing shutter fasteners from vinyl siding needs the right tools. Using proper tools makes the job easier and prevents damage. Knowing what you need helps you prepare well before starting.
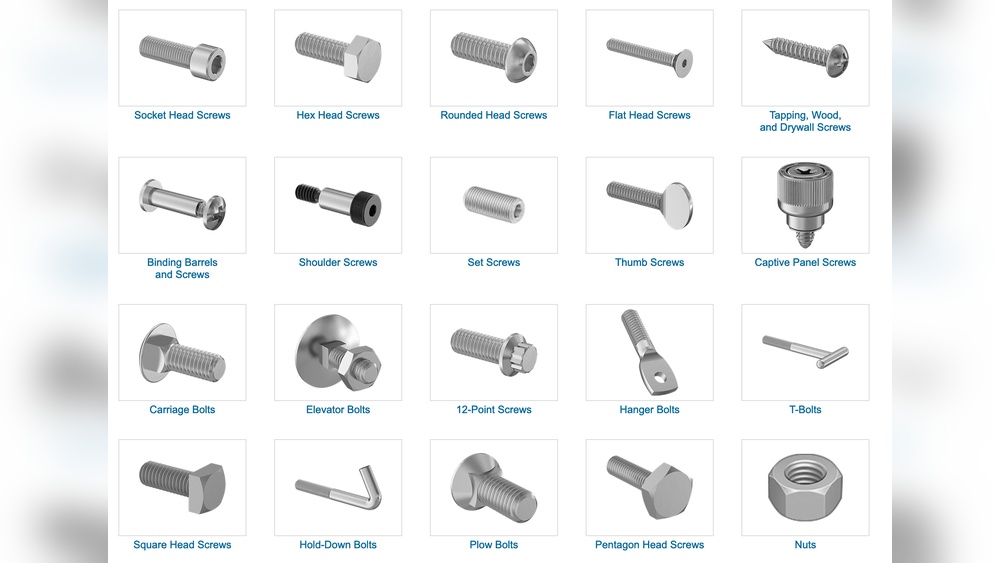
Common Fastener Types
Shutter fasteners come in different types. Some common ones include screws, nails, and clips. Screws often have a Phillips or flat head. Nails may be small and thin. Clips hold shutters with a snap-in design. Identifying the fastener type helps choose the right tool.
Recommended Equipment
A screwdriver set with various heads is essential. A flat-head and Phillips screwdriver cover most screws. A pry bar or flat putty knife helps lift clips or nails gently. Needle-nose pliers assist in pulling out stubborn nails. A cordless drill speeds up screw removal. Keep a small hammer handy for nails that need tapping out.
Preparation Steps
Preparing well before removing shutter fasteners from vinyl siding saves time and prevents damage. Taking the right steps sets a safe and efficient work environment. Follow these key preparation steps to get started.
Safety Precautions
Wear safety glasses to protect your eyes from debris. Use gloves to avoid cuts from sharp edges. Choose sturdy shoes to protect your feet. Keep a first aid kit nearby just in case. Always work with a stable ladder if needed. Avoid loose clothing that may catch on tools.
Workspace Setup
Clear the area around the siding for easy access. Remove any obstacles that could cause trips or falls. Place tools within reach to avoid stretching or bending. Use drop cloths to protect plants and surfaces. Ensure good lighting to see fasteners clearly. Keep a trash bin nearby for removed fasteners and debris.
Removing Fasteners
Removing fasteners from vinyl siding is a careful task. Fasteners hold shutters tightly. Removing them without damaging the siding is important. Different tools help with this job. Choose the right one based on the fastener type and condition.
Using A Screwdriver
A screwdriver is the simplest tool for fasteners. Match the screwdriver tip with the fastener head. Turn the screwdriver slowly to loosen the fastener. Keep steady pressure to avoid slipping. If the fastener turns easily, keep unscrewing until it comes out.
Employing A Pry Bar
A pry bar helps with nails or stuck fasteners. Slide the flat end gently under the fastener head. Use slow pressure to lift the fastener. Protect the siding by placing a thin cloth between the bar and the siding. Pull the fastener out carefully to avoid damage.
Handling Stubborn Fasteners
Stubborn fasteners need extra care. Spray a little lubricant around the fastener. Let it sit for a few minutes to loosen rust or dirt. Try the screwdriver or pry bar again. If stuck, tap gently with a hammer to loosen grip. Take your time to prevent siding damage.
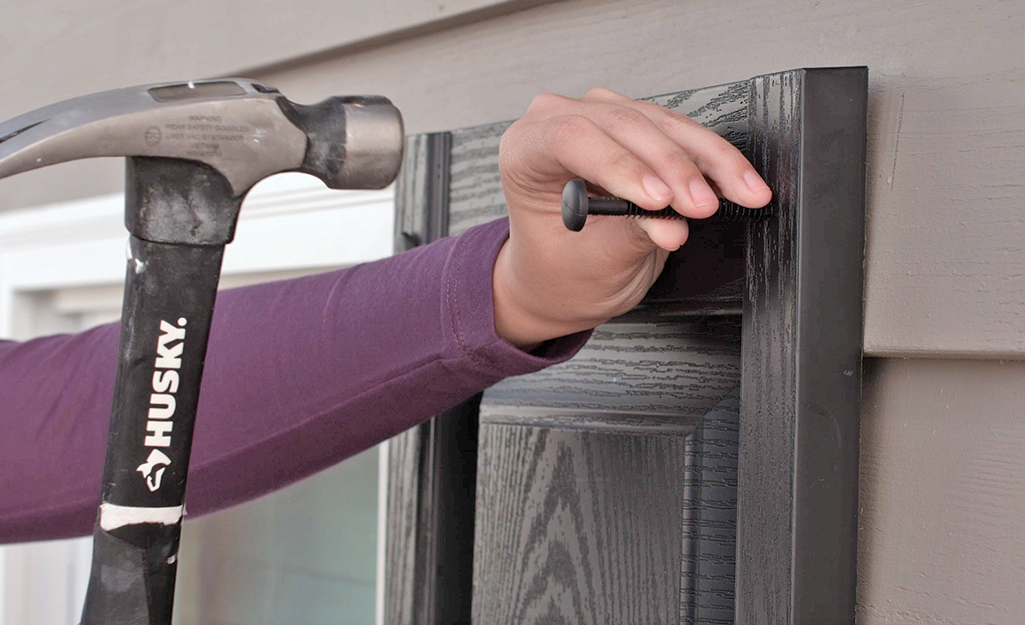
Credit: www.homedepot.com
Protecting Vinyl Siding
Protecting vinyl siding is key when removing shutter fasteners. Vinyl siding is sturdy but can scratch or crack easily. Careful handling saves time and money on repairs. Follow simple steps to keep siding intact and looking good.
Avoiding Damage
Use the right tools to remove fasteners. A flathead screwdriver or a pry bar works well. Gently lift the fastener without forcing it. Avoid pulling or twisting hard. Work slowly to prevent cracking or bending the siding. Keep the siding clean to spot any damage early.
Repairing Minor Scratches
Small scratches on vinyl siding can be fixed easily. Use a soft cloth and warm soapy water to clean the area. Apply a vinyl siding repair kit or touch-up paint made for siding. Smooth the area with a plastic scraper or your finger. Let it dry completely before touching or painting again.
Post-removal Cleanup
After removing shutter fasteners from vinyl siding, cleaning the area is important. This step keeps your siding looking good and ready for new fasteners or repairs. Proper cleanup prevents damage and helps maintain your home’s exterior.
Disposing Of Old Fasteners
Collect all old fasteners carefully. Use a container to keep them from scattering. Dispose of them in the trash or recycle if possible. Removing all debris stops hazards and keeps the area safe.
Inspecting The Area
Look closely at the siding where fasteners were removed. Check for cracks, holes, or dents. Small damage can grow if not fixed. Clean dirt and dust to see the surface clearly. Repair any damage before adding new fasteners or shutters.
Tips For Reinstallation
Reinstalling shutter fasteners properly keeps your vinyl siding safe and your shutters stable. Use the right tools and materials to avoid damage. Follow simple steps for a strong and neat finish.
Choosing The Right Fasteners
Select fasteners made for vinyl siding. Use corrosion-resistant screws or nails. Avoid metal that can rust or stain the siding. Pick fasteners with a wide head to hold the shutter firmly.
Check the length of fasteners. Too short means weak hold. Too long can pierce through siding layers. Match fastener size to shutter thickness and siding type.
Ensuring Secure Attachment
Align shutters correctly before fastening. Mark holes to keep fasteners straight. Drill pilot holes to avoid cracking siding or shutter.
Drive fasteners gently. Tighten enough to hold but not to crush siding. Check each fastener for tightness after installation.
Use caulk or sealant around fasteners. This prevents water from entering and damaging siding. Smooth the sealant to blend with siding surface.
Credit: gsexteriorexperts.com
Frequently Asked Questions
How Do I Safely Remove Shutter Fasteners From Vinyl Siding?
Use a flathead screwdriver or pry bar to gently lift the fastener edges. Avoid forcing to prevent siding damage. Work slowly and carefully to loosen the fasteners before pulling them out.
What Tools Are Best For Removing Shutter Fasteners?
A flathead screwdriver, pry bar, or needle-nose pliers work best. These tools provide leverage to safely lift and remove fasteners without damaging vinyl siding.
Can Removing Fasteners Damage Vinyl Siding?
Yes, improper removal can crack or warp vinyl siding. Use gentle tools and avoid excessive force to protect the siding’s integrity during fastener removal.
How To Prevent Damage When Removing Shutter Fasteners?
Lift fasteners slowly and evenly using proper tools. Avoid prying at sharp angles and protect siding edges with a putty knife or similar tool for added safety.
Conclusion
Removing shutter fasteners from vinyl siding is simple with the right steps. Use the proper tools to avoid damage. Take your time and work carefully around the siding. Clean the area after removal to keep it neat. This helps maintain your home’s look and prevents future issues.
Now you can handle shutter fasteners safely and easily.