Are you looking for a simple way to add charm and function to your walls? Making wooden wall hooks is easier than you think, and you don’t need fancy tools or skills to get started.
Imagine having custom hooks that perfectly match your style and keep your space organized. In this guide, you’ll discover step-by-step how to create beautiful, sturdy wooden hooks that you’ll be proud to show off. Ready to transform your walls and make your home more inviting?
Let’s dive in!
Materials Needed
Gathering the right materials is the first step to making wooden wall hooks. Having quality supplies makes the project easier and the final product strong. This guide breaks down the materials into three main groups. Each group covers what you need to create beautiful and useful wall hooks.
Types Of Wood
Choose wood that is easy to cut and sturdy. Pine, oak, and cedar are popular choices. Pine is soft and easy to shape. Oak is hard and durable. Cedar resists moisture and insects, making it great for bathrooms. Pick wood that fits your style and space.
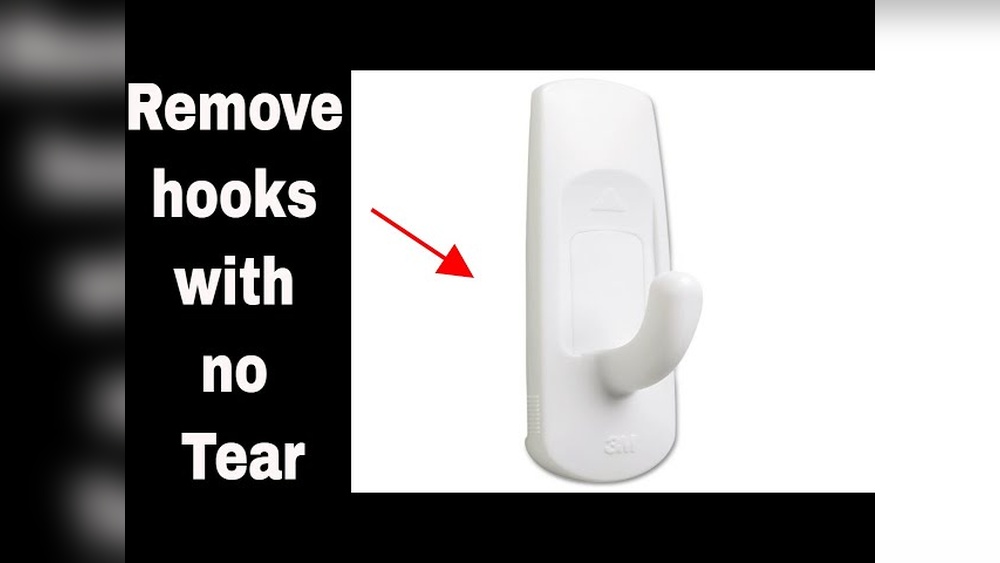
Tools And Hardware
You need basic tools to work with wood. A saw helps to cut wood pieces. Sandpaper smooths rough edges. A drill is useful for making holes. Screws or nails hold the hooks in place. Hooks or pegs are the main parts to hang items.
Finishing Supplies
Finishing protects wood and improves look. Wood stain changes color and shows grain. Clear varnish or sealant adds shine and stops damage. Brushes or cloths help apply finishes evenly. Let each layer dry before adding the next.

Credit: www.youtube.com
Choosing The Right Design
Choosing the right design for wooden wall hooks sets the tone for your space. It shapes how the hooks look and how well they work. The design should match your style and needs. You want hooks that look good and hold your items safely. Think about where you will place them and what you will hang. This helps pick the best shapes and styles for your project.
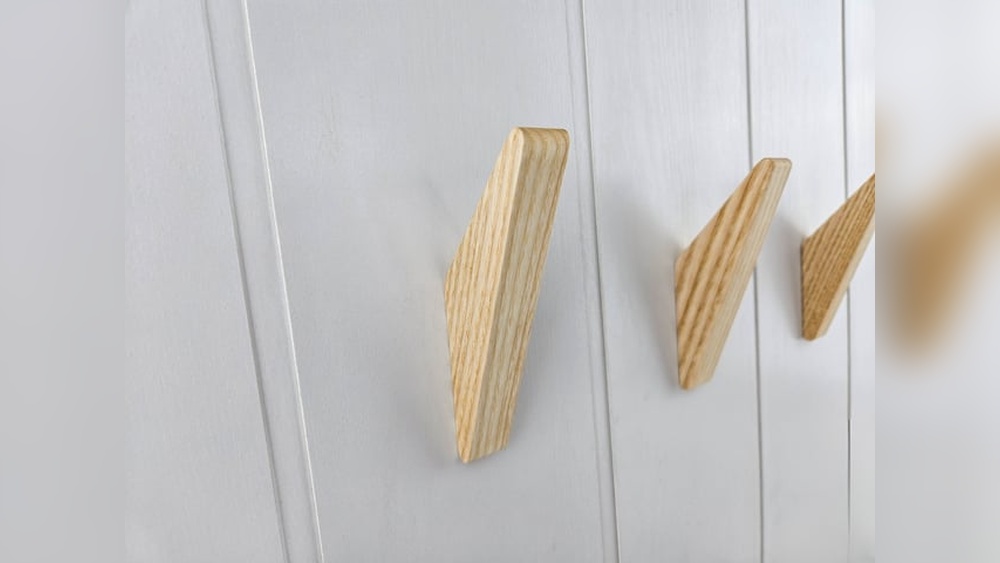
Simple Shapes
Simple shapes suit many rooms. Circles, squares, or rectangles are easy to make. They fit with any decor and bring a clean look. Simple hooks focus on function. They hold coats, bags, or keys without fuss. These shapes use less wood and less time to build. Perfect for beginners and practical designs.
Decorative Styles
Decorative styles add character to your wall hooks. Use carved patterns or painted designs. Nature themes like leaves or animals feel warm. Vintage or modern shapes create different moods. These hooks become small art pieces on your wall. Choose styles that match your room’s vibe. They make your space more personal and fun.
Functional Considerations
Think about how you will use the hooks. Size matters for heavy items like coats or bags. Strong wood and secure mounting keep hooks safe. Space hooks apart to avoid crowding items. Rounded edges prevent clothes from snagging. Hooks with multiple prongs hold more things. Balance looks with strength for the best result.
Cutting And Shaping Wood
Cutting and shaping wood is a key step in making wooden wall hooks. It sets the shape and size. This step needs care and accuracy. Proper cutting ensures the hooks fit well and look good.
Using the right tools and methods helps avoid mistakes. It also keeps the wood strong and smooth. Let’s explore how to measure, cut, and sand wood for wall hooks.
Measuring And Marking
Start by measuring the wood piece carefully. Use a ruler or tape measure for exact marks. Mark the cutting lines with a pencil. Check the marks twice before cutting. Accurate measuring saves time and prevents waste.
Safe Cutting Techniques
Always use sharp tools for clean cuts. Hold the wood firmly on a stable surface. Cut slowly along the marked lines. Wear safety glasses and gloves for protection. Keep your fingers clear of the blade. Follow all safety rules to avoid accidents.
Sanding For Smooth Edges
After cutting, sand the edges to remove splinters. Use medium grit sandpaper first, then fine grit. Sand in one direction for a smooth finish. Smooth edges prevent injuries and improve look. Take your time to make the wood feel nice to touch.

Credit: www.reddit.com
Assembling The Hooks
Assembling the wooden wall hooks is an important step in your project. This part brings all pieces together to create a strong and useful hook. Each step must be done carefully to ensure the hook lasts long and holds weight well.
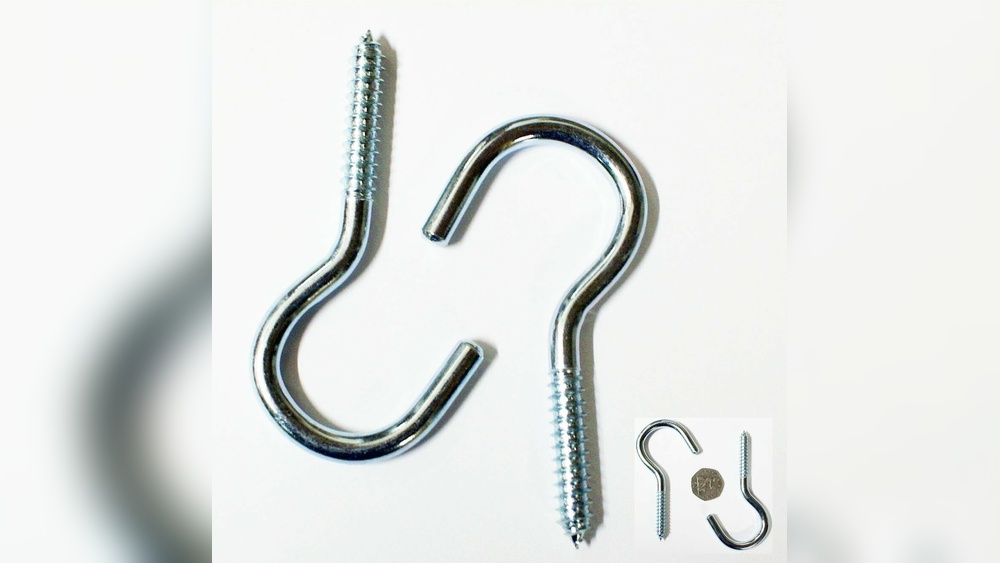
Attaching Hook Hardware
Start by choosing the right hook hardware for your wooden base. Use screws that fit the holes in the hardware. Place the hook on the wood and mark the screw spots. Drill small pilot holes to avoid splitting the wood. Screw the hardware tightly to the wood surface. Make sure the hook is straight and secure.
Securing Pieces Together
If your hook design has multiple wooden parts, join them firmly. Use wood glue on the contact surfaces for extra hold. Clamp the pieces together and wait for the glue to dry. Add small finishing nails or screws to keep the parts tight. Check for gaps and press pieces again if needed. The stronger the join, the longer the hook will last.
Adding Reinforcements
Reinforce the hook with extra support for heavy items. Attach small metal brackets or corner braces behind the wood. Use screws to fix these reinforcements in place. For larger hooks, consider adding a wooden backplate. This spreads the load and prevents damage to the wall. Test the hook’s strength by gently pulling on it before hanging anything.
Finishing Touches
Finishing touches give your wooden wall hooks a polished look. They protect the wood and enhance its beauty. Small details make a big difference in the final product.
Painting And Staining
Choose paint or stain based on the style you want. Paint offers bright colors and hides wood grain. Stain shows the natural wood texture and adds warmth. Apply thin coats for a smooth finish. Let each coat dry before adding the next.
Sealing For Durability
Seal your hooks to protect against moisture and wear. Use clear varnish, polyurethane, or wax. These finishes keep the wood strong and long-lasting. Apply with a brush or cloth in thin layers. Allow full drying time to ensure good protection.
Decorative Enhancements
Add small details to make hooks unique. Use stencils or stickers for patterns. Attach small metal or wooden accents for extra charm. Sand edges lightly for a soft, finished feel. These touches make your hooks stand out on any wall.
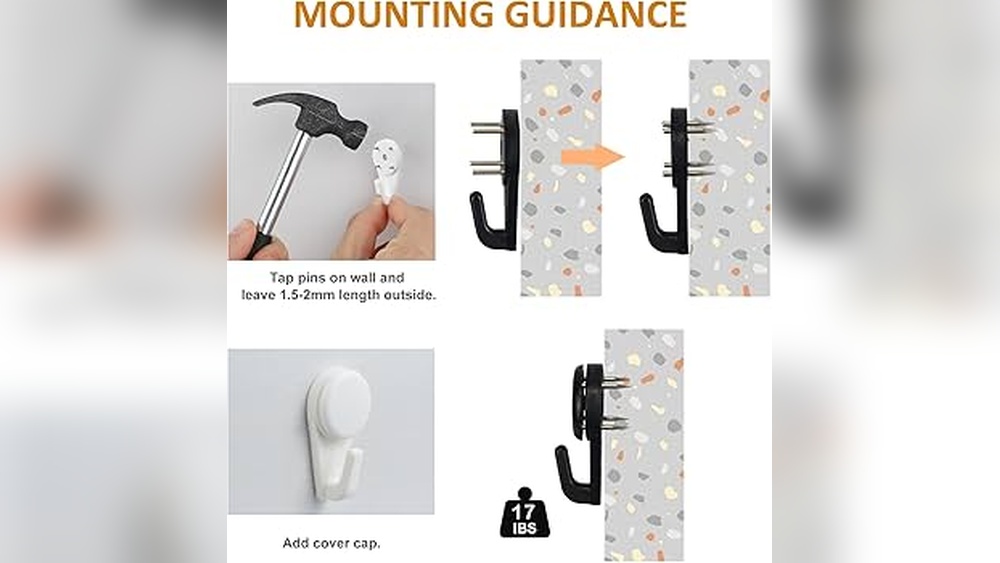
Mounting On Walls
Mounting wooden wall hooks securely is key for safety and function. Proper installation keeps hooks strong for daily use. Follow these steps to place and fix hooks on your wall correctly.
Choosing Placement
Pick a spot that fits your needs and space. Look for a wall area where hooks can hold weight easily. Avoid places near doors or windows that might block access. Measure the height so hooks are easy to reach. Mark the spots lightly with a pencil.
Using Anchors And Screws
Use wall anchors to hold screws firmly in drywall or plaster. Drill small holes where you marked the spots. Push anchors into holes until flush with the wall. Screw hooks into the anchors tightly. For wooden walls, screws can go directly in without anchors.
Ensuring Stability
Test each hook by pulling gently after mounting. Hooks should not wiggle or feel loose. Tighten screws further if needed. Check the wall for cracks or damage before mounting. Strong hooks last longer and keep your items safe.
Creative Variations
Creative variations make wooden wall hooks unique and fun. They add style and function to any room. Simple hooks can become art with a little imagination. Try different ideas to fit your space and taste.
Multi-hook Designs
Combine several hooks on one wooden board for more space. Arrange hooks in lines or patterns for a neat look. Use different hook shapes and sizes for variety. This design works well in entryways and bathrooms.
Incorporating Natural Elements
Add natural materials like branches or stones to your wooden hooks. Glue small twigs or bark pieces for a rustic feel. Use smooth river stones as hook bases for a natural touch. These elements bring the outdoors inside your home.
Personalizing With Engraving
Engrave names, words, or simple designs on the wood. Use a wood burner or small carving tools for this detail. Personal touches make each hook special and meaningful. Great for gifts or family rooms to add warmth.

Credit: www.papernstitchblog.com
Frequently Asked Questions
What Materials Are Needed To Make Wooden Wall Hooks?
You need wood pieces, hooks or screws, a drill, sandpaper, wood finish, and mounting hardware. Choose sturdy wood for durability.
How Do You Attach Wooden Hooks To The Wall Securely?
Use wall anchors or screws suited for your wall type. Pre-drill holes in wood and wall for firm attachment.
Can I Customize Wooden Wall Hooks To Match Decor?
Yes, you can paint, stain, or add decorative elements to match your room’s style and color scheme.
How Long Does It Take To Make Wooden Wall Hooks?
Typically, it takes 1-2 hours, including cutting, sanding, assembling, and finishing the hooks.
Conclusion
Making wooden wall hooks is simple and fun. You only need a few tools and some wood. This project adds style and function to any room. You can customize the hooks to match your space. Try different shapes and finishes for a unique look.
Enjoy the satisfaction of creating something useful by hand. Wooden wall hooks help keep your space neat and organized. Start your DIY project today and see the difference it makes.