Are your dimmer lights flickering or not working the way you want? Changing a dimmer light switch might seem tricky, but it’s easier than you think.
Imagine controlling the brightness in your room just the way you like it, with smooth, reliable dimming every time. In this guide, you’ll learn simple steps to replace your dimmer switch safely and quickly. By the end, you’ll have the confidence to upgrade your lighting and create the perfect mood in any room.
Ready to get started? Let’s dive in!
Credit: www.homedepot.com
Tools And Materials Needed
Changing a dimmer light switch requires specific tools and materials. Having the right items ready makes the job easier and safer. This section covers what you need before starting.
Essential Tools
Start with a flathead screwdriver and a Phillips screwdriver. A voltage tester is crucial to check power safety. Wire strippers help prepare wires for connection. Needle-nose pliers assist in bending wires neatly. Electrical tape secures wire connections and prevents shorts. A flashlight or headlamp is helpful in dark spaces.
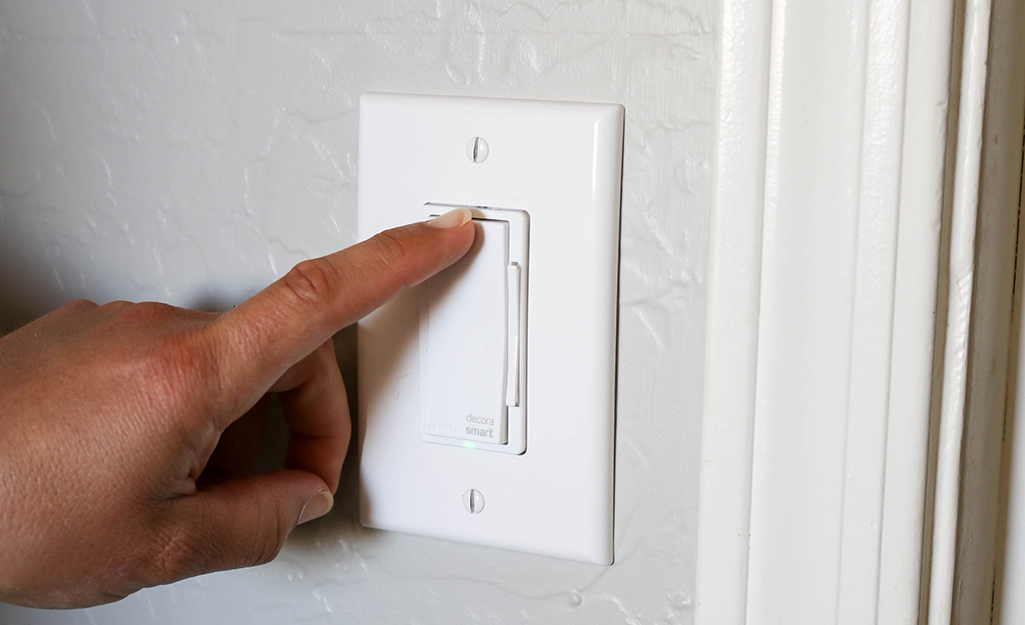
Choosing The Right Dimmer Switch
Select a dimmer switch that matches your light bulbs. Some dimmers work only with incandescent bulbs. Others support LED or CFL bulbs for energy savings. Check the dimmer’s wattage rating to avoid overload. Choose a style that fits your wall plate and decor. A compatible dimmer ensures smooth dimming and longer bulb life.
Credit: www.homedepot.com
Safety Precautions
Working with electrical switches requires care. Safety precautions help avoid shocks and accidents. Before changing a dimmer switch, follow simple safety steps. These steps protect you and your home.
Turning Off Power
Start by turning off power at the circuit breaker. This stops electricity from flowing to the switch. Locate the correct breaker by checking your home’s electrical panel. Switch it off to cut power to the dimmer switch. Double-check that the lights no longer respond to the switch.
Testing For Live Wires
Use a voltage tester to check for live wires. Touch the tester to each wire connected to the switch. The tester will show if any wire still has power. Never assume wires are safe without testing. This step ensures no electricity flows while you work.
Removing The Old Dimmer Switch
Removing the old dimmer switch is the first step in installing a new one. This process requires caution and simple tools. Safety is key, so always turn off the power before starting.
Follow each step carefully to avoid damage or injury. Let’s begin with the easiest part: taking off the faceplate.
Unscrewing The Faceplate
Locate the screws holding the faceplate in place. Usually, there are two screws at the top and bottom.
Use a screwdriver to turn the screws counterclockwise. Keep the screws safe for later use.
Gently pull the faceplate away from the wall. Set it aside carefully to avoid breaking it.
Detaching The Switch
Now, look at the screws holding the dimmer switch. These are usually on the sides of the switch.
Unscrew these with the screwdriver. The switch will become loose from the wall box.
Pull the switch out slowly. You will see the wires connected to it.
Before touching the wires, double-check that the power is off. Use a voltage tester if available.
Carefully disconnect the wires by loosening the screws or pulling off wire nuts. Remember how they connect for the new switch.
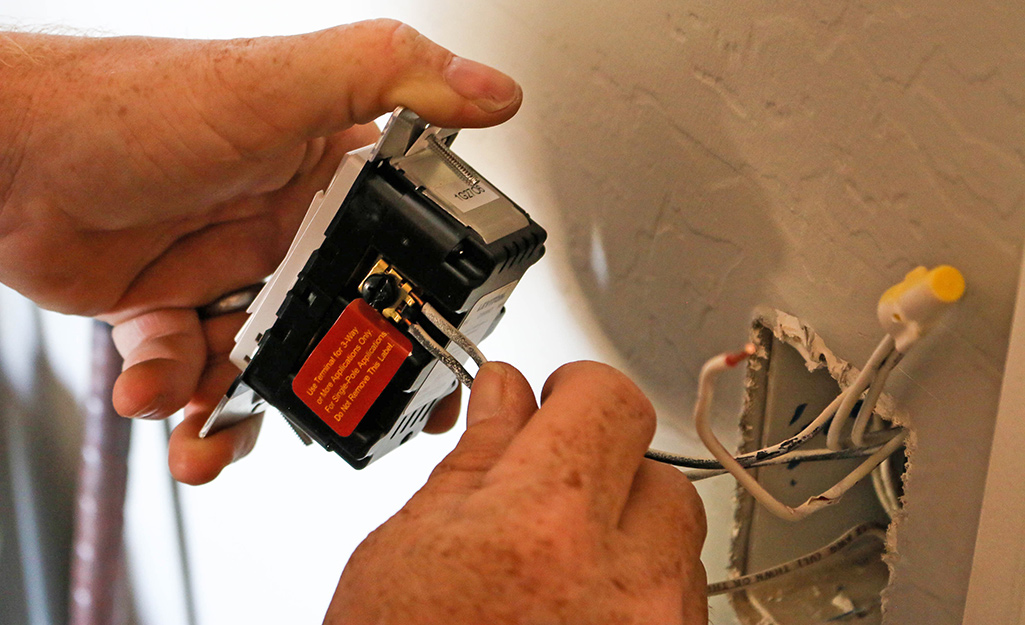
Wiring The New Dimmer Switch
Wiring the new dimmer switch is a key step in your project. It ensures the switch works safely and correctly. Take your time to follow each step carefully. Proper wiring prevents electrical problems and keeps your home safe. This section explains how to identify and connect wires during installation.
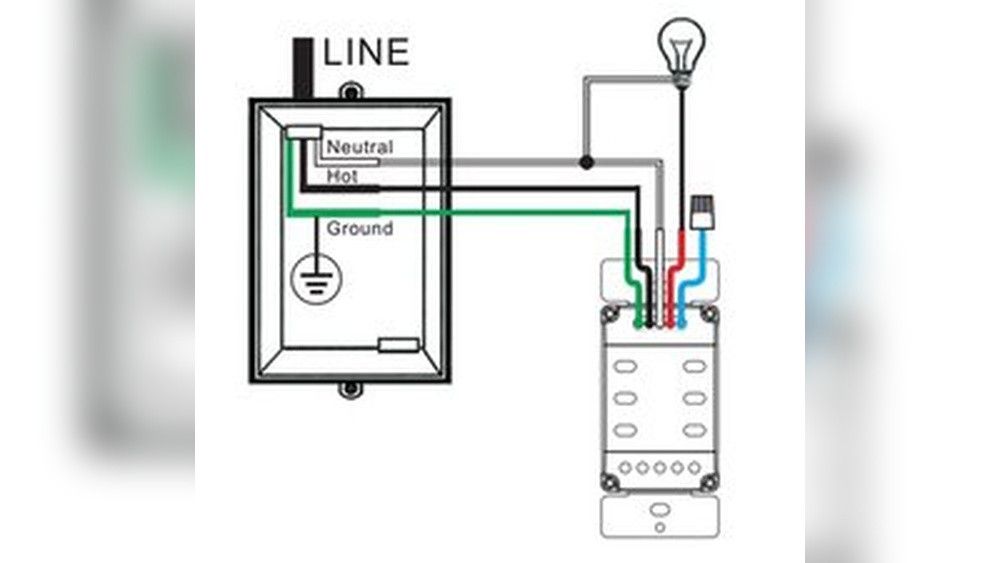
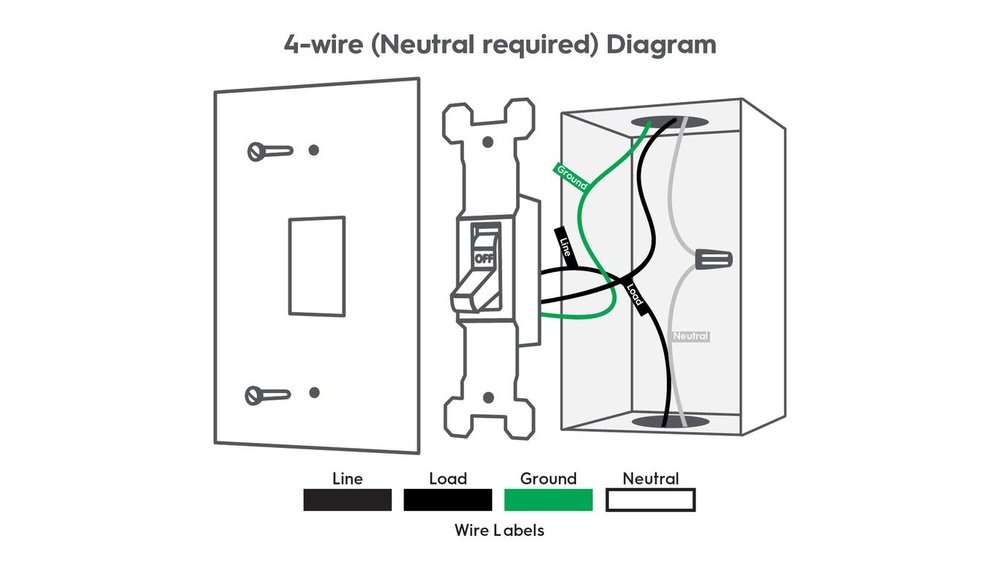
Identifying Wires
First, turn off the power at the circuit breaker. Use a voltage tester to confirm no electricity flows. Next, look at the wires inside the switch box. Usually, you will see a black (hot) wire, white (neutral) wire, and green or bare copper (ground) wire. The black wire carries power. The white wire returns power to the panel. The ground wire protects you from shocks. Note that some older homes may have different wire colors. Use a wire tester if unsure.
Connecting Wires Properly
Connect the dimmer switch wires to the corresponding wires in the box. Match black to black, white to white, and green to ground wire. Use wire nuts to secure connections tightly. Twist wires together before placing wire nuts. Wrap electrical tape around wire nuts for extra security. Push wires neatly back into the box. Attach the dimmer switch to the box using screws. Restore power and test the dimmer switch. Ensure the light dims smoothly without flickering.
Securing And Testing The Switch
Securing and testing the dimmer switch is a key step. This ensures the switch works safely and correctly. Proper mounting keeps the switch stable. Testing confirms the dimmer adjusts light levels smoothly.
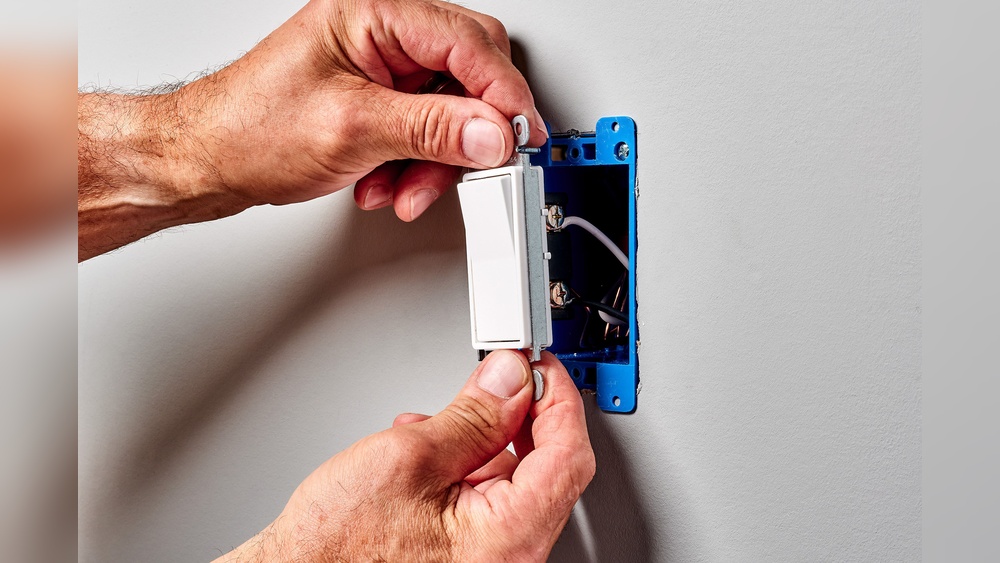
Mounting The Switch
Place the dimmer switch into the electrical box carefully. Align the screw holes on the switch with the box holes. Use a screwdriver to tighten the mounting screws. Do not overtighten; the switch should be firm but not cracked. Make sure wires stay inside the box without pinching. This prevents damage and ensures a clean fit.
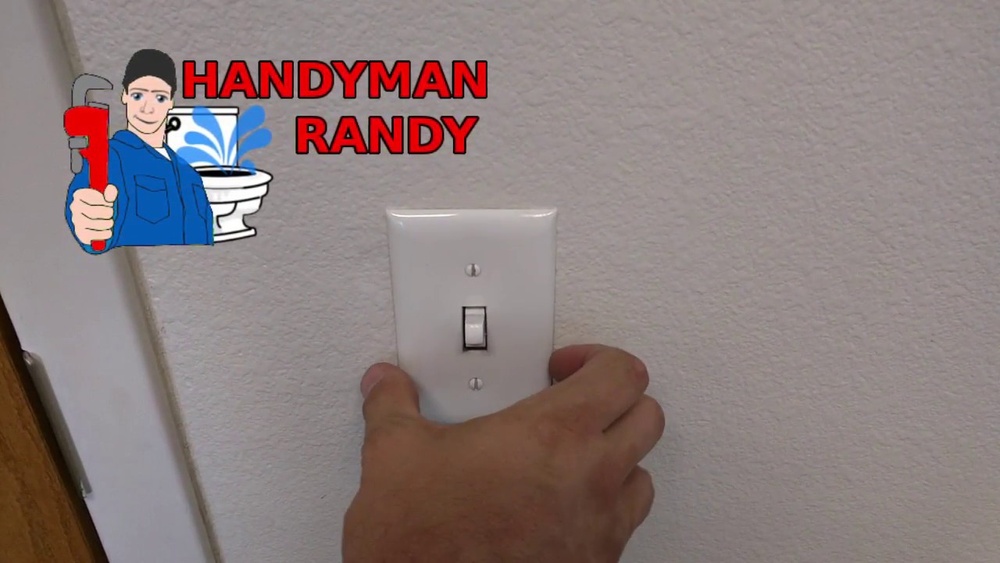
Restoring Power And Testing
Turn the power back on at the circuit breaker. Check the dimmer switch for any signs of sparks or unusual sounds. Slowly move the dimmer knob to test light brightness. Lights should brighten and dim smoothly without flickering. If lights do not respond, turn off power and recheck wiring. Confirm all connections are secure and try again.

Credit: www.youtube.com
Troubleshooting Common Issues
Troubleshooting common issues with dimmer light switches helps you fix problems fast. Many problems come from simple causes. You can solve them without calling an electrician. This saves time and money. Understanding common issues makes it easier to keep your lights working well.
Dimmer Not Working
Check the power first. Make sure the circuit breaker is on. If the dimmer still does not work, test the switch. Replace it if it is old or damaged. Sometimes, the dimmer is not compatible with the bulb type. Use bulbs that match the dimmer’s requirements.
Flickering Lights
Flickering often happens with LED bulbs. Make sure your dimmer supports LED lights. Loose wires can also cause flickering. Turn off power and tighten all wire connections. If flickering continues, try changing the bulb or the dimmer switch.
Switch Overheating
Overheating is dangerous. It usually means the switch handles too much power. Check if the bulb wattage is too high for the dimmer. Replace bulbs with lower wattage if needed. Poor wiring or a bad dimmer also causes heat. Replace faulty parts to stop overheating.
Tips For Maintaining Dimmer Switches
Maintaining dimmer switches helps keep them working smoothly. Regular care can extend their life. It also prevents flickering or buzzing lights. Simple tips make a big difference in performance.
Regular Cleaning
Dust and dirt can build up on dimmer switches. Use a dry cloth to wipe the surface often. Avoid using water or liquid cleaners. Dirt inside the switch can cause poor contact. Clean switches reduce the chance of failure.
When To Replace
Replace dimmer switches if they feel warm or hot. Flickering lights or strange noises mean trouble. Switches that don’t adjust brightness properly need replacing. Old switches may not work with new bulbs. Replacing early saves you from bigger problems later.
Frequently Asked Questions
How Do I Safely Turn Off Power Before Changing A Dimmer?
Switch off the circuit breaker controlling the dimmer switch. Use a voltage tester to confirm no electricity flows. This prevents shocks and ensures your safety while working on the switch.
What Tools Are Needed To Replace A Dimmer Switch?
You will need a screwdriver, voltage tester, wire stripper, and electrical tape. These tools help you remove the old switch and install the new dimmer properly.
Can I Install A Dimmer Switch On Any Light Fixture?
Dimmer switches work best with compatible bulbs like LEDs or incandescent. Check your bulb type before installation to avoid flickering or damage.
How Do I Connect Wires When Changing A Dimmer Switch?
Match wire colors: black to black (hot), white to white (neutral), and green to ground. Secure connections with wire nuts and wrap them with electrical tape.
Conclusion
Changing a dimmer light switch is easier than it seems. Turn off the power to stay safe. Follow each step carefully to avoid mistakes. Take your time and check your work. A new dimmer switch can improve your room’s lighting.
You don’t need special skills to do this job. Enjoy the soft light and save energy too. Simple tasks like this can boost your confidence. Try it yourself and see the difference today.