Hanging pictures on your wall might seem simple, but getting it right takes a bit of know-how. You want your favorite photos or artwork to stay secure and look great, without damaging your walls.
If you’ve ever struggled with crooked frames or holes that don’t line up, this guide is for you. Keep reading, and you’ll learn easy steps to put picture hooks in your wall like a pro—making your space more personal and stylish in no time.

Credit: www.wikihow.com
Choosing The Right Hooks
Choosing the right picture hooks is key for hanging art safely and neatly. The hooks must hold the weight and fit the wall type. Picking the wrong hook can cause damage or make pictures fall. Learn about different hooks, their strength, and which walls they suit best.
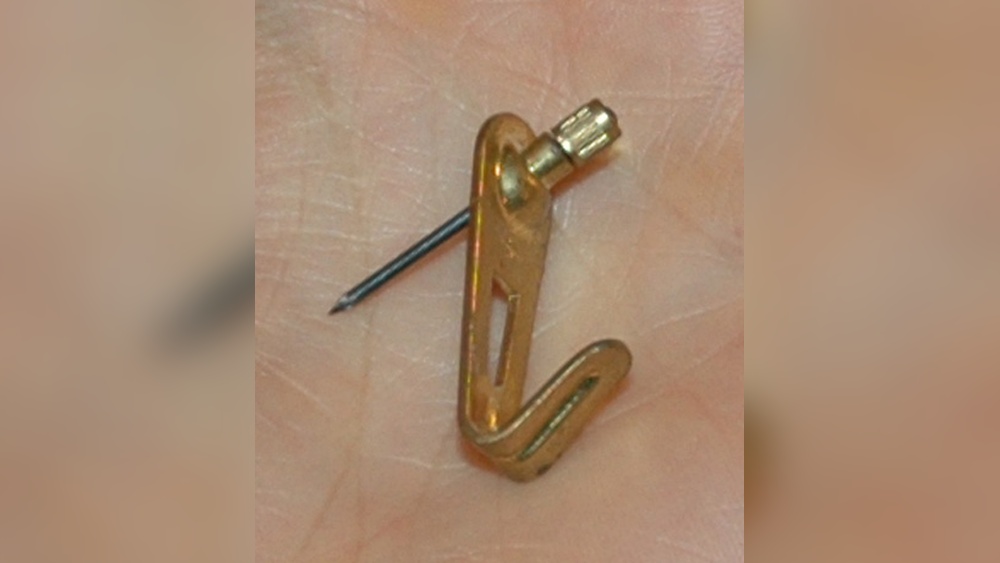
Types Of Picture Hooks
There are several types of picture hooks. Basic metal hooks work well for light frames. Sawtooth hangers attach to the back of frames and fit small nails. Adhesive hooks stick to walls and avoid holes. Heavy-duty hooks have strong nails for big or heavy art. Each type suits different needs and wall surfaces.
Weight Capacity Considerations
Check the weight of your picture before choosing hooks. Light frames need small hooks that hold up to 10 pounds. Medium frames require hooks rated for 10 to 25 pounds. Heavy frames need hooks that support over 25 pounds. Using a hook with the right weight capacity keeps pictures secure and walls safe.
Material And Wall Compatibility
Match hook material to your wall type. Metal hooks work well on drywall and wood. Plastic or adhesive hooks are best for smooth surfaces like plaster. Avoid heavy hooks on fragile walls. Studs or anchors help with extra support on drywall. Proper hook and wall matching prevents damage and holds pictures firmly.

Credit: www.wikihow.com
Gathering Necessary Tools
Before hanging pictures, gather all the tools you need. This step saves time and keeps your work neat. Having the right tools helps avoid mistakes. It also makes the job easier and faster. Prepare your space and tools for a smooth process.
Essential Tools Checklist
- Picture hooks
- Hammer
- Measuring tape or ruler
- Pencil for marking spots
- Level to ensure straight placement
- Wall anchors (for heavy pictures)
Optional Tools For Precision
- Stud finder to locate wall studs
- Painter’s tape to mark positions
- Small screwdriver (for anchors or screws)
- Laser level for perfect alignment
Preparing The Wall
Preparing the wall is the first step before putting picture hooks. It helps the hook stay secure and protects your wall from damage. Take time to clean and check the wall carefully. This makes sure the hook will hold well and your picture will hang straight.
Cleaning And Marking The Spot
Start by wiping the wall with a dry cloth. Remove dust and dirt from the surface. A clean wall gives the hook better grip. Next, decide where you want to hang your picture. Use a pencil to mark the exact spot gently. This mark guides you when placing the hook. Avoid pressing too hard to keep the mark light.
Locating Studs And Avoiding Hazards
Find the studs behind the wall for stronger support. Use a stud finder tool or tap the wall softly. Studs sound solid compared to hollow spots. Avoid hanging heavy pictures on drywall alone. Also, be careful of electrical wires and pipes inside the wall. Use caution to prevent damage or injury. Mark safe spots clearly before drilling or nailing.
Credit: www.youtube.com
Installing The Picture Hooks
Installing picture hooks is an easy way to hang art or photos. Doing it right keeps your pictures safe and your walls neat. Follow these steps to place hooks securely and avoid damage.
Step-by-step Hook Placement
Start by choosing the right spot for your picture. Mark the wall lightly with a pencil. Hold the hook against the mark. Use a hammer to tap the nail gently into the wall. Stop when the hook feels firm and does not wobble.
Using Anchors For Drywall
Drywall can be fragile. Simple nails may not hold heavy pictures well. Use wall anchors to add strength. First, drill a small hole where you want the hook. Push the anchor inside the hole. Then, insert the hook’s nail into the anchor and tap it in. Anchors keep hooks stable on drywall.
Ensuring Hook Stability
Check the hook’s grip by pulling it lightly. The hook should not move or come loose. Make sure the nail is straight and fully in the wall. Use more than one hook for heavier frames. Balanced hooks stop pictures from falling or tilting.
Hanging The Picture
Hanging the picture is the final step to display your artwork or photo. It requires care to make sure the picture looks great on the wall. Proper placement makes a room feel balanced and welcoming.
Take your time during this step. Small changes can make a big difference in how the picture fits the space. Follow simple tips to get the best results.
Measuring For Perfect Alignment
Start by measuring the wall space. Use a tape measure to find the center of the area. Mark this spot lightly with a pencil. Measure the picture’s width and divide by two to find its center.
Match the picture’s center with the wall’s center mark. Measure the distance from the top of the frame to the hanging hook. Transfer this distance to the wall below the center mark. This spot will hold your picture hook.
Adjusting For Level And Balance
After hanging the picture on the hook, check if it is level. Use a small level tool or a smartphone app for accuracy. Adjust the picture by moving it slightly left or right.
Step back and see if the picture looks balanced with other items in the room. Make small changes until it feels right. A straight and balanced picture enhances the room’s look.
Troubleshooting Common Issues
Putting picture hooks in walls can sometimes cause problems. These common issues may stop your picture from hanging nicely. Knowing how to fix them saves time and effort. Let’s explore easy solutions for these problems.
Dealing With Wall Damage
Wall damage happens when hooks leave holes or cracks. Small holes can be filled with spackle or wall putty. Apply the putty with a putty knife. Let it dry, then sand it smooth. Paint over the spot to match the wall color.
For bigger holes, use a patch kit. Follow the instructions carefully. Avoid heavy hooks on weak walls. Use anchors for better support. This prevents more damage next time.
Fixing Uneven Hanging
Pictures that hang crooked look messy. Use a level to check if the hook is straight. Mark the spot before placing the hook. Measure the distance between hooks for double-hook frames.
Adjust the hook height if the picture tilts. Use adhesive pads behind the frame corners. These stop the picture from shifting. Check the picture again after hanging. Small fixes make a big difference.
Frequently Asked Questions
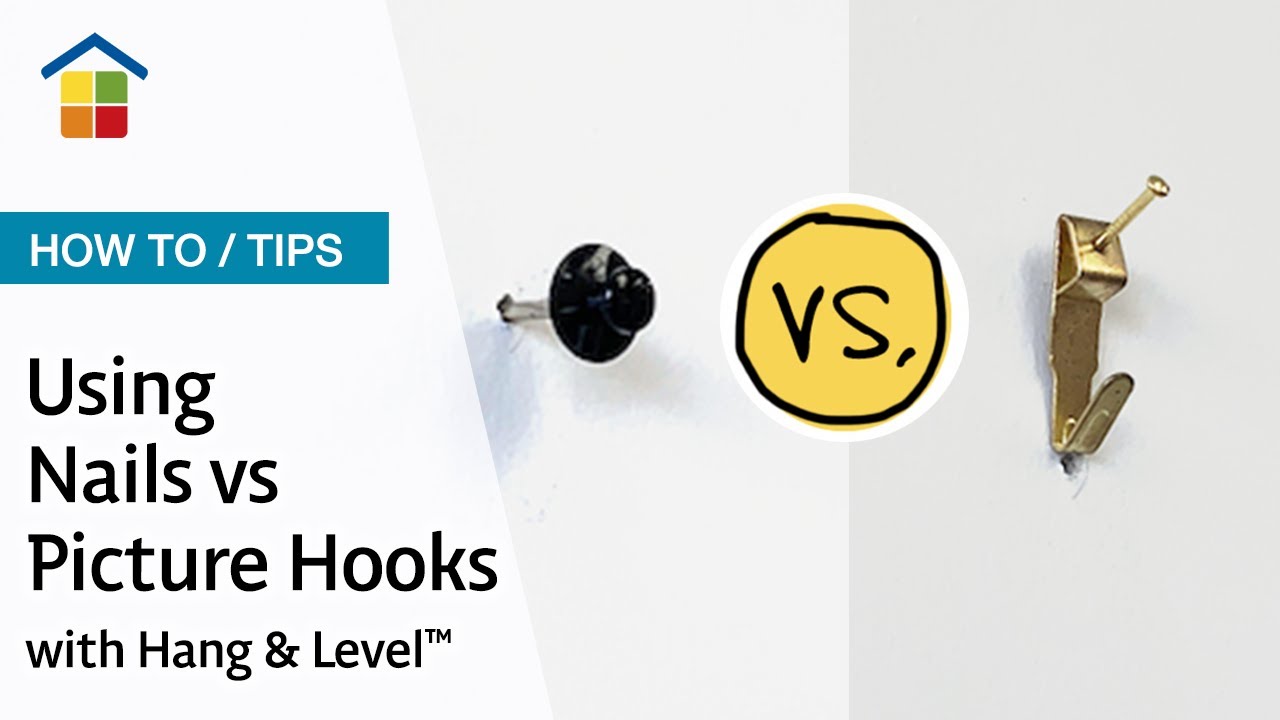
How Do I Choose The Right Picture Hook For My Wall?
Select a picture hook based on your wall type and frame weight. Use plastic anchors for drywall and metal hooks for plaster walls. Always check the hook’s weight limit to ensure it supports your picture securely.
What Tools Are Needed To Install Picture Hooks Properly?
You need a hammer, measuring tape, pencil, and level. Optional tools include a drill and wall anchors for heavier frames. These tools help you place hooks accurately and securely on the wall.
Can I Hang Pictures On Drywall Without Studs?
Yes, use wall anchors or special drywall hooks designed for weight support. These provide extra holding strength and prevent damage. Avoid heavy frames without proper anchors to prevent wall damage.
How High Should I Hang A Picture Hook?
Hang picture hooks at eye level, typically 57 to 60 inches from the floor. This height ensures the artwork is easily visible and complements room decor. Adjust based on furniture height and wall space.
Conclusion
Putting picture hooks in your wall is simple and quick. Choose the right hook for your wall type. Measure carefully and mark the spot before you drill. Use a level to keep pictures straight. Secure the hook tightly for safety.
Take your time and follow these steps well. Your walls will look neat and your pictures will stay up. Enjoy decorating your space with confidence and ease.