Have you ever wanted to control a single light from two different switches? Whether it’s for a hallway, staircase, or large room, being able to turn your light on or off from multiple spots adds convenience and comfort to your daily life.
But how exactly do you connect two switches to one light without confusing wires or costly mistakes? You’ll discover simple, step-by-step guidance that anyone can follow—even if you’re not an expert. Keep reading, and soon you’ll have full control of your lighting with ease.
Tools And Materials Needed
Before starting to connect two switches to one light, gather all tools and materials. Having everything ready ensures a smooth and safe installation. This helps avoid delays and mistakes during the process.
Use only proper tools and materials made for electrical work. This keeps the wiring secure and reduces risks. Each item has a specific role in the installation.
Tools Needed
- Screwdriver set (flathead and Phillips)
- Wire strippers
- Voltage tester
- Needle-nose pliers
- Electrical tape
- Drill (optional, for mounting)
- Wire cutter
Materials Needed
- Two single-pole switches or two 3-way switches
- Electrical wires (14/3 or 12/3 gauge, depending on circuit)
- Wire connectors (wire nuts)
- Electrical box for each switch
- Light fixture
- Switch plates
Safety Gear
- Insulated gloves
- Safety glasses
- Non-conductive shoes
Credit: theorycircuit.com
Safety Precautions
Turn off the power before starting any wiring work to avoid electric shock. Use proper tools and check connections twice for safety. Always follow local electrical codes and consider consulting a professional if unsure.
Turn Off The Power
Always switch off the power at the circuit breaker before starting. This prevents electric shock and injury. Use a voltage tester to confirm no current flows.
Use Proper Tools And Equipment
Use insulated tools designed for electrical work. Avoid using damaged or worn-out tools. Wear rubber-soled shoes to reduce the risk of shock.
Follow Wiring Codes
Check local electrical codes before wiring switches. Proper wiring ensures safety and avoids future problems. Use the correct wire type and size for the job.
Label Wires Clearly
Label each wire before disconnecting old switches. Clear labels help avoid confusion during installation. This reduces errors and wiring mistakes.
Wear Safety Gear
Wear safety glasses to protect your eyes from sparks or debris. Gloves can protect your hands but use thin ones to feel wires better. Stay alert and focused.
Types Of Switches
Understanding the types of switches helps in connecting two switches to one light. Switches control the flow of electricity and turn lights on or off. Choosing the right switch type makes wiring easier and safer.
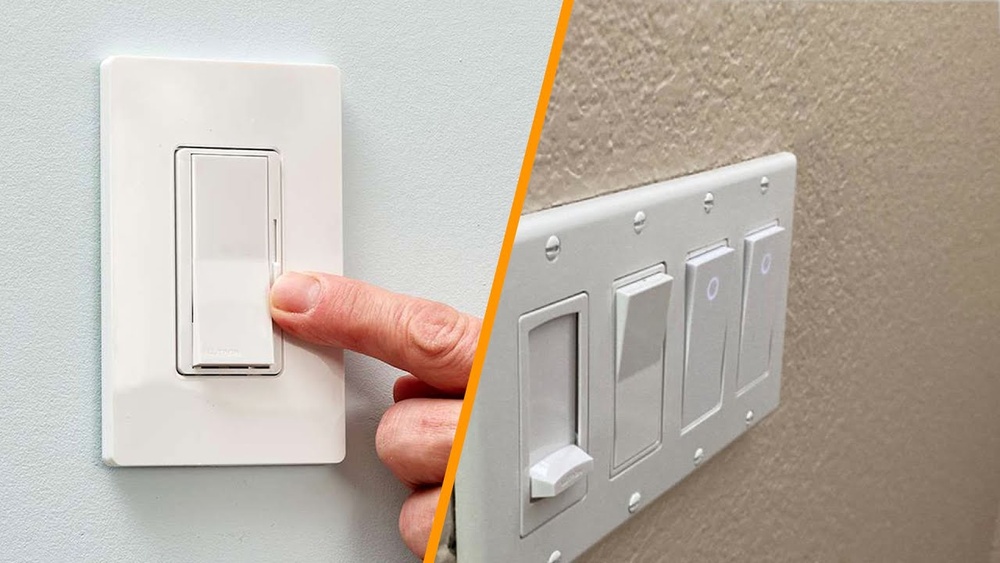
Single-pole Switch
A single-pole switch controls one light from one location. It has two terminals and a simple on/off function. This switch type is common in most homes. It cannot control a light from two different places.
Three-way Switch
A three-way switch controls one light from two locations. It has three terminals and works in pairs. This switch type is perfect for hallways or large rooms. You can turn the light on or off from either switch.
Credit: www.reddit.com
Wiring Basics
Understanding the basics of wiring is key to connecting two switches to one light. It helps avoid mistakes and ensures safety. This section explains the foundation of electrical circuits and how to identify wires properly.
Grasping these concepts makes the installation process smoother and more efficient. It also helps in troubleshooting if problems arise later.
Understanding Electrical Circuits
An electrical circuit is a path for electricity to flow. It includes a power source, wires, switches, and the light fixture. The power source provides electricity that travels through the wires.
Switches control the flow of electricity by opening or closing the circuit. When the circuit is closed, electricity reaches the light, turning it on. Opening the circuit stops the flow, turning the light off.
Two switches can control one light by creating a special circuit called a three-way circuit. This setup allows turning the light on or off from either switch.
Identifying Wires
Wires come in different colors and each has a specific role. The most common colors are black, white, and green or bare copper. Black wires carry the live current. White wires are neutral and complete the circuit.
Green or bare copper wires are ground wires. They protect against electrical faults. Correctly identifying these wires is important for safe installation.
Use a voltage tester to check which wire is live. Label wires before disconnecting them. This prevents confusion during reconnection.
Step-by-step Wiring Process
Connecting two switches to one light allows control from different spots. This setup is common in hallways or large rooms. The wiring process needs attention and care. Follow each step carefully to ensure safety and proper function.
Turn Off Power Supply
Start by switching off the power at the circuit breaker. This step prevents electric shocks. Use a voltage tester to confirm no power flows to the switches. Safety first before handling any wires.
Prepare The Switch Boxes
Remove the cover plates from both switch boxes. Pull out the wires gently for easy access. Check the wires for any damage or wear. Strip about half an inch of insulation from each wire end.
Connect The First Switch
Attach the black (hot) wire to the common terminal on the first switch. Connect the traveler wires to the other two terminals. Tighten all screws to secure the wires. Ensure no bare wire is exposed outside the terminals.
Wire The Second Switch
At the second switch, connect the traveler wires to the same terminals as before. Attach the black wire coming from the light fixture to the common terminal. Check all connections are tight and properly placed.
Connect To The Light Fixture
Connect the black wire from the second switch to the light fixture’s black wire. Join the white wires together using a wire connector. Connect the fixture’s ground wire to the ground wire in the box. Secure all connections firmly.
Test The Setup
Turn the power back on at the breaker. Flip each switch to see if the light responds correctly. The light should turn on and off from both switches. If it does not, double-check the wiring connections.
Common Issues And Solutions
Connecting two switches to one light can be tricky. Many face common problems during installation. Knowing these issues helps fix them fast. This section covers typical errors and easy solutions.
Incorrect Wiring Connections
Wrong wires cause the light or switches to fail. Double-check which wire goes where. Use a tester to identify live, neutral, and traveler wires. Follow the wiring diagram carefully. Secure all wire nuts tightly.
Switches Not Controlling Light Properly
Switches may not work if not compatible or wired wrong. Ensure both switches are three-way switches. Check traveler wires between switches are connected correctly. Replace faulty switches if needed.
Light Flickers Or Works Intermittently
Loose connections often cause flickering. Tighten all wire terminals and connections. Inspect wires for damage or wear. Use quality switches and bulbs to avoid flicker.
Breaker Trips Or Fuse Blows
This happens due to short circuits or overloads. Turn off power before checking. Look for exposed wires touching metal or each other. Replace damaged wires and fix wiring errors.
Light Does Not Turn Off
One switch may be stuck on or miswired. Test each switch separately. Swap switches to find the faulty one. Correct wiring or replace bad switches.
When To Call A Professional
Connecting two switches to control one light can be tricky. Sometimes, the task may go beyond basic DIY skills. Knowing when to call a professional saves time and avoids danger.
Electrical work involves risks like electric shocks and short circuits. A licensed electrician has the right tools and knowledge. They ensure the job is safe and done correctly.
Signs You Need Professional Help
Confusing wiring diagrams or unclear instructions are red flags. If you cannot identify wires or connections, stop. Professionals can quickly understand complex circuits.
Frequent tripping of circuit breakers or flickering lights means something is wrong. It shows wiring might not be correct or safe. An expert can diagnose and fix these issues.
Handling Complex Electrical Setups
Some homes have outdated wiring or unusual electrical layouts. Adding two switches to one light may require rewiring. Professionals handle complex setups with care and skill.
They know local electrical codes and ensure your installation meets safety standards. This prevents future problems and potential hazards.
When Safety Is A Priority
Electricity can cause fires or injuries if handled wrongly. If you feel unsure or unsafe, call a professional. It is better to be safe than sorry.
Licensed electricians carry insurance and guarantees for their work. This protects you and your property from accidents or damage.

Credit: www.realpars.com
Frequently Asked Questions
How Do I Wire Two Switches To One Light?
To wire two switches to one light, use a three-way switch setup. Connect the switches with traveler wires, and link the light to the common terminal. This allows control of the light from both switches efficiently.
Can I Use Regular Switches For Two Switch Wiring?
No, regular switches won’t work for this setup. You need three-way switches designed for controlling one light from two locations. These switches have three terminals to manage the traveler wires properly.
What Tools Are Needed To Connect Two Switches To One Light?
You’ll need a screwdriver, wire stripper, voltage tester, electrical tape, and three-way switches. Proper tools ensure safe and accurate wiring. Always turn off power before starting any electrical work.
Is It Safe To Connect Two Switches To One Light?
Yes, it’s safe if wired correctly using three-way switches and following electrical codes. Incorrect wiring can cause shorts or fire hazards. If unsure, consult a licensed electrician for help.
Conclusion
Connecting two switches to one light is easier than it seems. You just need the right tools and clear steps. Remember to turn off power before starting any work. Double-check your wiring to avoid mistakes. With patience, you can control one light from two places.
This setup adds convenience to your home lighting. Safety matters most, so follow instructions carefully. Soon, you will enjoy better control without extra switches. Give it a try and see how simple it can be.