If you’re looking to remove your Schlage keypad deadbolt, you’ve come to the right place. Whether you’re upgrading your lock, fixing a problem, or just need to take it off for maintenance, this task might seem tricky at first.
But don’t worry—removing your Schlage keypad deadbolt is easier than you think. In this guide, you’ll find clear, step-by-step instructions that anyone can follow. By the end, you’ll have the confidence to handle the job quickly and safely. Ready to get started?
Let’s dive in.
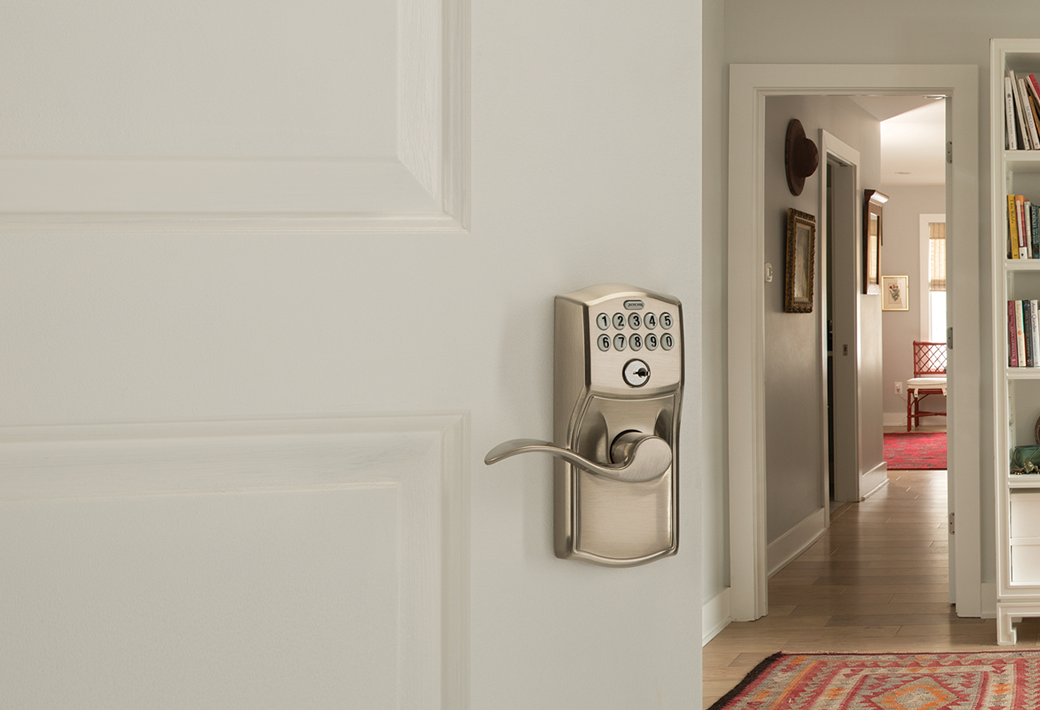
Credit: www.schlage.com
Tools Needed
Removing a Schlage keypad deadbolt requires the right tools. Using proper tools makes the job easier and safer. Prepare all tools before starting to avoid interruptions.
Phillips Head Screwdriver
This tool is essential for removing screws on the lock. Most Schlage deadbolts use Phillips screws. A medium-sized screwdriver fits most screws well.
Flathead Screwdriver
A flathead screwdriver helps to pry off covers gently. It also assists in loosening parts stuck in place. Use it carefully to avoid damage.
Allen Wrench
Some Schlage models include small Allen screws. An Allen wrench set with different sizes is useful. Check your lock to match the right size.
Small Container
Keep all screws and small parts in a container. This prevents losing pieces during removal. A small bowl or box works well.
Flashlight
A flashlight helps to see inside dark areas of the lock. It improves visibility during the removal process. Use a bright, focused light.
Prepare The Door
Start by removing any screws from the keypad and exterior parts. Make sure the door is open and stable before proceeding. This helps to avoid damage during the removal process.
Clear The Area Around The Door
Start by removing any objects near the door. Clear tables, rugs, or decorations close to the lock. This space helps you work easily and safely. A tidy area prevents accidents and loss of small parts.
Gather Necessary Tools
Collect tools before starting. Usually, a screwdriver and a small flat tool work well. Having tools ready saves time. It also keeps the process smooth and stress-free.
Check The Lock And Door Condition
Look at the deadbolt and door closely. Note any damage or wear. Check if the lock moves freely. Understanding the lock’s state helps avoid surprises during removal.
Ensure The Door Is Fully Closed
Close the door completely. A closed door aligns the lock parts. This alignment makes removing the deadbolt easier. Avoid forcing any pieces while working.
Remove Interior Cover
Start by locating the screws on the interior cover of the Schlage keypad deadbolt. Remove these screws carefully to take off the cover without damage. This step exposes the battery and internal parts for maintenance or replacement.
Gather Necessary Tools
Start by collecting a screwdriver, usually a Phillips head. Keep a small container ready for screws. This helps prevent losing tiny parts during removal.
Locate The Interior Cover
The interior cover sits on the inside of the door. It hides the battery pack and electronics. Look for screws around its edges holding it in place.
Remove Screws Carefully
Use the screwdriver to remove all visible screws. Turn counterclockwise to loosen them. Place screws in your container to keep them safe.
Lift Off The Interior Cover
Gently pull the cover away from the door. It may need a slight wiggle if stuck. Avoid using too much force to prevent damage.
Disconnect Battery Pack
Inside, find the battery pack connector. Unplug it carefully by pulling straight out. This stops power supply and makes further work safe.
Disconnect Wiring
Disconnecting the wiring is a key step in removing a Schlage keypad deadbolt. This step ensures safety and prevents damage to the lock and electrical system. It also makes the removal process smoother and easier to handle.
Before disconnecting, make sure the power is off. This stops any electrical shocks or shorts. The wires connect the keypad to the lock’s internal mechanism. Careful handling protects these connections for future use or replacement.
Locate The Wiring Harness
Open the interior cover of the deadbolt to access the wiring harness. The harness is a small bundle of wires connected to the lock’s circuit board. Look for a plastic connector that holds the wires together.
Disconnect The Wiring Connector
Press the release tab on the wiring connector gently. Pull the connector straight out to avoid damaging the wires. Do not pull on the wires themselves. Keep the connector intact for reinstallation or repair.
Secure The Loose Wires
After disconnecting, tuck the wires safely inside the door cavity. Use electrical tape or wire nuts to cover any exposed wire ends. This prevents short circuits or corrosion during the removal process.
Unscrew Deadbolt Assembly
Unscrewing the deadbolt assembly is the first step to remove a Schlage keypad deadbolt. This step allows access to the internal parts for repair or replacement. Proper tools and careful handling make the process smooth and safe.
Start by locating the screws that hold the deadbolt assembly to the door. These screws keep the keypad and lock firmly attached. Removing them frees the lock from the door.
Gather Necessary Tools
Use a Phillips-head screwdriver for most Schlage deadbolts. Make sure the screwdriver fits well to avoid stripping screws. A magnetic screwdriver can help hold screws during removal.
Remove Interior Screws
Open the door and find the screws on the inside part of the lock. Unscrew each one slowly and place them in a small container. This prevents losing any screws during removal.
Separate The Deadbolt Assembly
After removing the screws, gently pull the interior assembly away from the door. Avoid forcing it to prevent damage. The exterior keypad will come off together with the interior part.
Remove Exterior Keypad
The exterior keypad is the main part of your Schlage deadbolt. It controls access to your door. Removing it carefully is important for repairs or replacement.
This section guides you through the simple steps to remove the keypad safely. Follow each step to avoid damage.
Turn Off Power To The Lock
Start by removing the batteries from the interior side. This stops power to the keypad. It prevents any electrical issues during removal.
Locate And Remove Screws
Find the screws that hold the keypad to the door. Usually, they sit under the keypad or behind a cover. Use a screwdriver to remove these screws carefully.
Gently Pull The Keypad Away
After removing screws, pull the keypad straight off the door. Avoid twisting or bending it. The wires inside can be fragile.
Disconnect Wiring Harness
Look for the wiring harness connected to the keypad. Press the clip or tab to unplug it. Keep the wires safe for reinstallation.
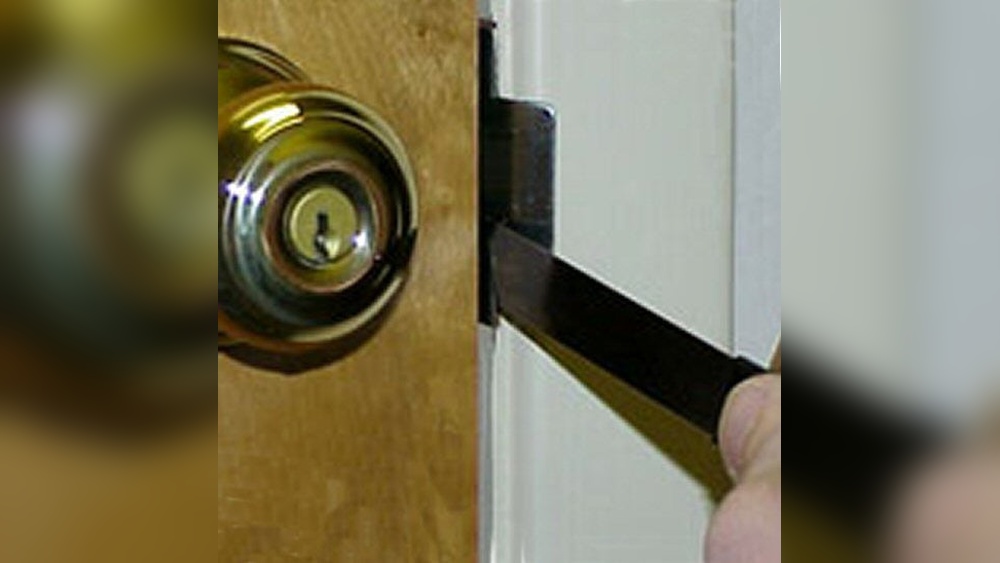
Take Out Deadbolt Latch
Removing the deadbolt latch is a key step in taking out a Schlage keypad deadbolt. The latch is the metal piece that slides into the door frame to keep the door locked. Taking it out carefully helps you access the inner parts of the lock.
Before starting, make sure the door is open. This makes it easier to reach the screws and avoid damage. Keep your tools ready, like a screwdriver, for this task.
Locate The Screws Holding The Deadbolt Latch
Look at the edge of the door. You will see the latch plate attached with two screws. These screws hold the latch firmly in place. Use a screwdriver to remove them carefully.
Pull Out The Deadbolt Latch From The Door
After removing the screws, gently pull the latch out. It should slide out smoothly. If it feels stuck, wiggle it slightly to loosen it. Do not use force to avoid damage.
Check The Latch Mechanism For Any Damage
Once the latch is out, inspect it closely. Check for any signs of wear or damage. This step helps decide if you need to replace the latch or clean it before reinstalling.

Credit: www.youtube.com
Troubleshooting Tips
Troubleshooting can help fix common problems with your Schlage keypad deadbolt. Simple steps often solve issues without extra tools or help. Follow clear tips to save time and avoid damage. Here are key points to check before removing the lock.
Check Battery Power
Weak batteries cause keypad failure. Replace old batteries with fresh ones. Use the correct battery type for best results. Test the keypad after changing batteries. The lock should respond promptly.
Reset The Lock
Resetting clears errors and restores factory settings. Find the reset button inside the lock. Press and hold it as per instructions. This often fixes unresponsive keypads or code issues.
Inspect The Mounting Screws
Loose screws affect lock operation. Tighten all screws on the keypad and interior plate. Avoid overtightening which can damage the lock. Properly secured screws ensure smooth removal later.
Verify User Codes
Incorrect or expired codes cause access failure. Double-check the user manual for code entry rules. Delete old codes if needed. Add new codes carefully to avoid mistakes.
Listen For Mechanical Issues
Strange sounds can signal internal problems. Clicks or grinding noises mean parts may be stuck. Apply light lubricant to moving parts. Test the lock after lubrication for better function.

Credit: www.youtube.com
Frequently Asked Questions
How Do I Remove A Schlage Keypad Deadbolt?
To remove a Schlage keypad deadbolt, first remove the interior cover. Unscrew the mounting screws, then carefully pull the lock apart. Disconnect the wiring and remove the deadbolt from the door.
What Tools Are Needed To Remove Schlage Deadbolt?
You will need a Phillips screwdriver, a flathead screwdriver, and possibly a small pry tool. These help remove screws and carefully detach the lock components without damage.
Can I Remove Schlage Deadbolt Without Damaging The Door?
Yes, by carefully unscrewing and gently pulling apart the lock, you can avoid door damage. Use proper tools and avoid forcing parts during removal.
How Long Does It Take To Remove Schlage Keypad Deadbolt?
Removing a Schlage keypad deadbolt typically takes 10 to 15 minutes. Experience and proper tools can speed up the process significantly.
Conclusion
Removing a Schlage keypad deadbolt is simple with the right steps. Take your time and follow each instruction carefully. Keep your tools ready before you start. Remember to keep all parts safe for reassembly. This guide helps you avoid damage and save money.
Now, you can handle the task with confidence. Try it yourself and see how easy it can be. Your door will work perfectly again in no time.