Are you worried about your lockers tipping over or moving around? Anchoring lockers to the wall is the simple step that can keep your space safe and organized.
Whether you’re setting up a school, gym, or workplace, knowing how to secure your lockers properly will give you peace of mind. In this guide, you’ll discover easy, step-by-step instructions that anyone can follow. By the end, you’ll have strong, stable lockers that stay exactly where you want them.
Ready to make your space safer and more reliable? Let’s get started!

Credit: www.3dstoragesystems.co.uk
Choosing The Right Anchors
Choosing the right anchors is key for a safe and strong locker installation. Anchors hold the locker firmly to the wall. Picking the wrong type can cause the locker to fall or damage the wall. Understanding anchor types and matching them to your wall material ensures a secure fit. Prepare tools before starting the job for smooth installation.
Types Of Wall Anchors
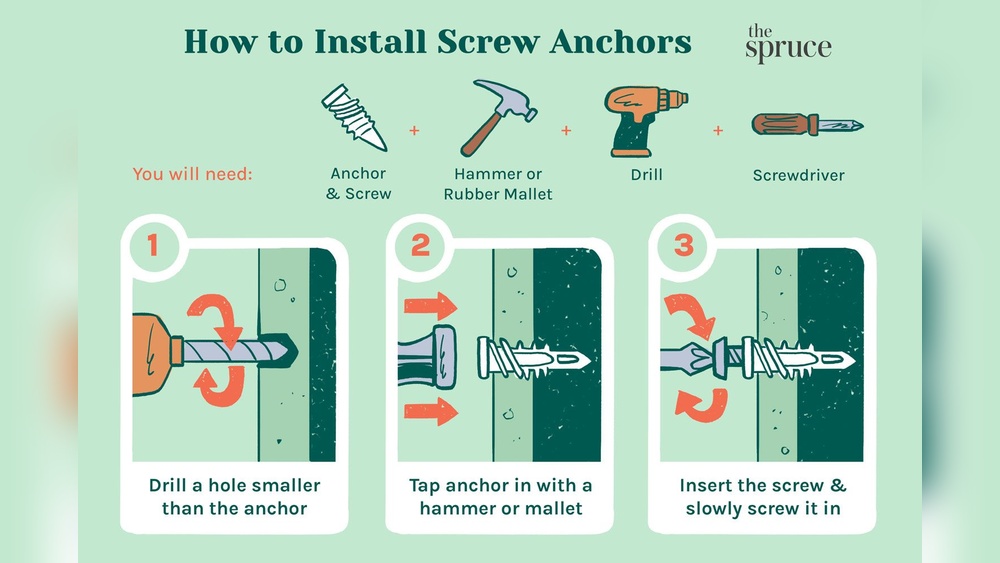
Plastic anchors are good for lightweight lockers and drywall. Metal anchors offer stronger support and work well for medium loads. Toggle bolts expand behind the wall for heavy lockers. Molly bolts provide firm grip inside drywall or hollow walls. Each anchor type suits different weight and wall conditions.
Matching Anchors To Wall Material
Drywall needs anchors like plastic, molly bolts, or toggle bolts. Concrete or brick walls require heavy-duty anchors like sleeve or wedge anchors. Wood walls allow direct screwing or use of wood screws. Check your wall type before choosing anchors. Proper match prevents damage and keeps lockers stable.
Tools Needed For Installation
Drill with correct drill bits is essential for making holes. Screwdriver or power driver helps secure anchors and screws. A level ensures the locker hangs straight. Tape measure measures correct placement on the wall. Pencil marks drill spots to avoid mistakes. Having these tools ready makes installation easier and faster.

Credit: www.instructables.com
Preparing The Wall And Locker
Preparing the wall and locker is the first step in securing lockers safely. This step ensures the locker stays firmly attached without damage to the wall. Proper preparation saves time and effort during installation.
Start by checking the wall’s condition and the locker’s size. Both must be ready to fit well together. Gathering the right tools and materials before starting helps the process go smoothly.
Locating Studs And Marking Points
Studs are the wooden or metal beams inside the wall. They hold the weight of heavy objects. Use a stud finder to locate these studs accurately. Mark the stud positions with a pencil. These marks show where to drill holes for the anchors.
Measure carefully to match the locker’s mounting holes with the stud marks. This step ensures the locker will be stable and secure.
Measuring And Aligning Locker Position
Measure the locker’s height and width before placing it. Decide the exact spot on the wall where it will hang. Use a level tool to keep the locker straight. Mark the wall with light pencil lines to guide installation. Checking these measurements twice avoids mistakes later.
Cleaning The Surface
Clean the wall surface where the locker will attach. Remove dust, dirt, and grease using a damp cloth. A clean surface improves anchor grip and locker stability. Let the wall dry completely before drilling or mounting. The locker base should also be free of dust or debris.
Drilling And Installing Anchors
Drilling and installing anchors is a key step in securing lockers to a wall. It ensures the lockers stay stable and safe during use. Doing this correctly prevents damage to the wall and keeps the lockers firmly in place.
Drilling Pilot Holes
Start by marking the points where you want to drill. Use a pencil to make clear marks. Select a drill bit slightly smaller than the anchor size. Drill straight pilot holes at the marked points. Drill slowly to avoid cracking the wall. Clean out dust from the holes before moving on.
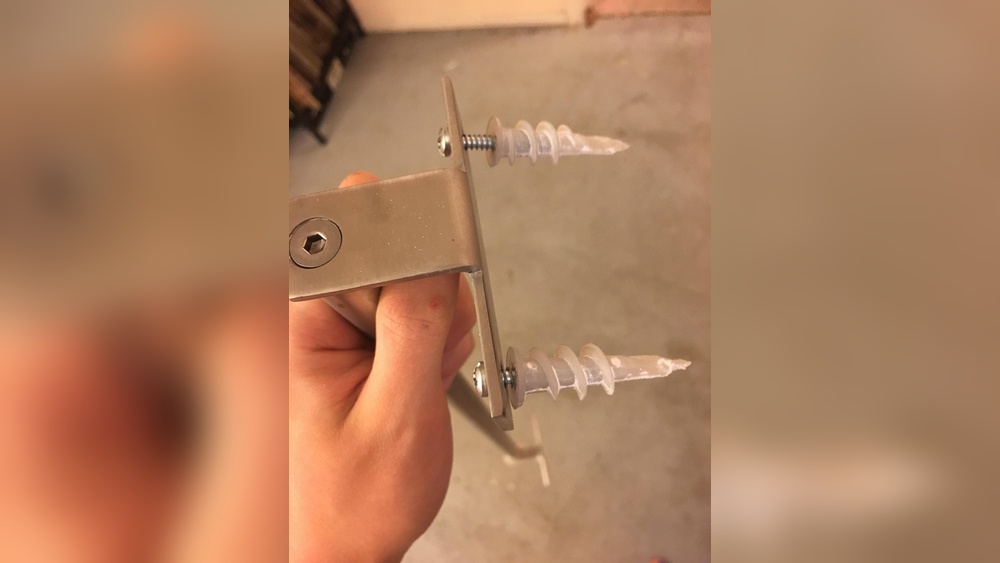
Inserting Anchors Correctly
Choose anchors that fit the hole size and wall type. Push the anchor into the hole gently. Tap it lightly with a hammer if needed. Make sure the anchor sits flush with the wall surface. Avoid forcing the anchor too deep or leaving it loose. Proper insertion holds the screws firmly.
Checking Anchor Stability
After inserting anchors, test their hold by pulling gently. The anchor should feel tight and not move. Insert screws into the anchors and tighten slowly. Watch for any signs of wall cracking or anchor slipping. Stable anchors provide a strong base for locker mounting.
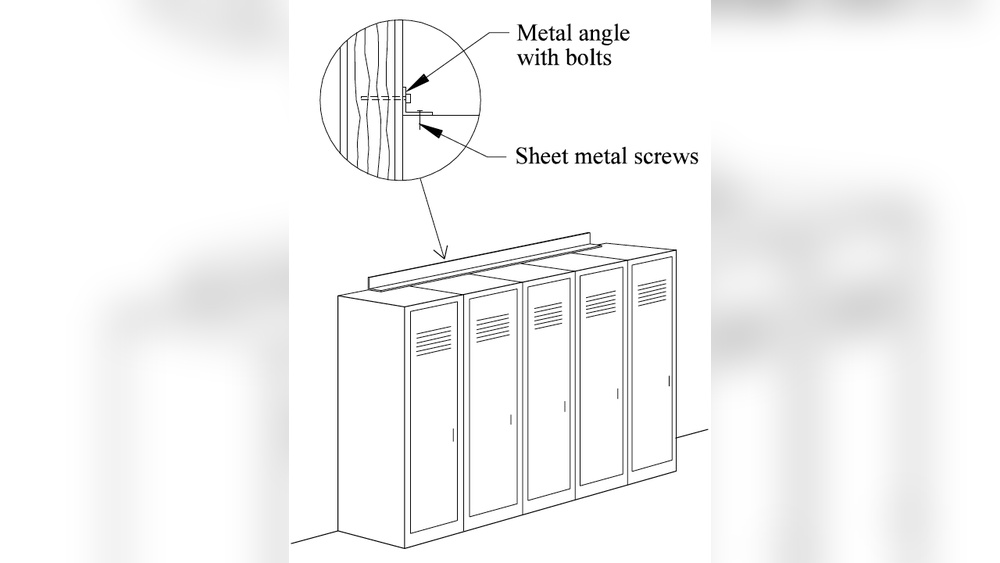
Securing The Locker To The Wall
Securing the locker to the wall ensures safety and stability. This step prevents the locker from tipping over or moving. Proper anchoring protects both the locker and the people around it. Follow the steps below to secure your locker firmly and safely.
Positioning The Locker
Place the locker close to the wall. Make sure it stands straight and level. Check the space behind for any cables or pipes. Mark the spots on the wall where the locker will be anchored. These marks guide the drilling process.
Fastening With Screws
Choose screws suitable for your wall type. Use a drill to make holes on the marked spots. Insert wall anchors if needed for extra support. Align the locker with the holes. Tighten screws firmly to hold the locker in place.
Testing The Installation
Gently push the locker to check its stability. Open and close the doors to ensure smooth movement. Listen for any unusual sounds or movements. If the locker feels loose, tighten the screws again. A solid installation keeps everyone safe.
Safety Tips And Maintenance
Anchoring lockers to a wall keeps them stable and safe. Proper safety tips and maintenance extend the life of your lockers. They also prevent accidents and damage. Follow simple steps to maintain a secure locker setup.
Avoiding Common Mistakes
Always use the correct anchors for your wall type. Avoid using weak screws or nails. Make sure to anchor at the right height and position. Do not overload lockers beyond their weight limit. Check that all parts fit tightly before use.
Regular Inspection
Check lockers regularly for loose bolts or screws. Look for signs of rust or damage on metal parts. Inspect the wall area for cracks or wear. Tighten any loose fittings immediately. Regular checks keep lockers safe and durable.
Handling Repairs
Fix small problems quickly to avoid bigger issues. Replace broken parts with the correct replacements. Use proper tools to avoid damaging the locker or wall. If unsure, seek professional help for repairs. Timely repairs ensure long-term safety and function.
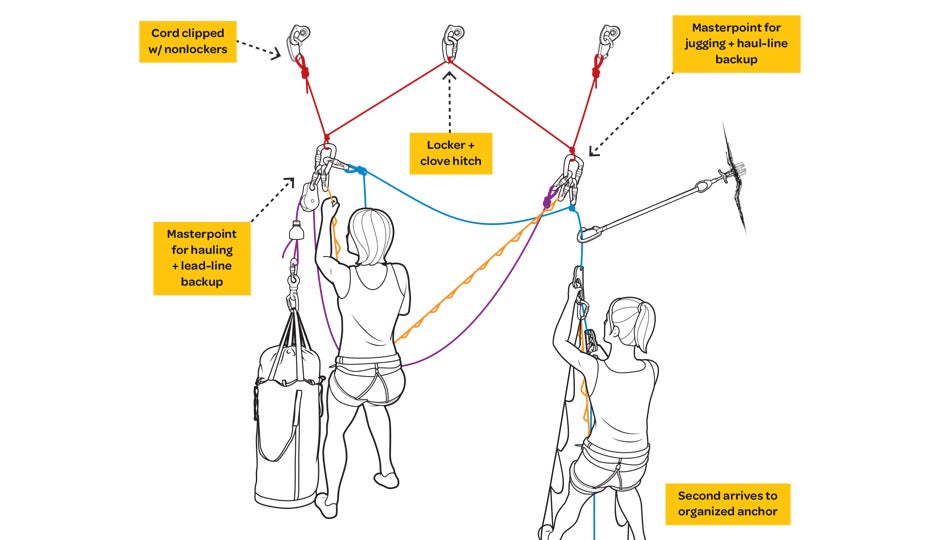
Credit: www.climbing.com
Frequently Asked Questions
How Do You Securely Anchor Lockers To A Wall?
To securely anchor lockers, locate wall studs and use heavy-duty anchors. Drill pilot holes, then fasten lockers with bolts or screws. This ensures stability and prevents tipping, enhancing safety in your space.
What Tools Are Needed To Anchor Lockers To Walls?
You will need a drill, stud finder, screws or bolts, anchors, a wrench or screwdriver, and a level. These tools help ensure proper alignment and secure attachment of lockers to the wall.
Can Lockers Be Anchored To Drywall Only?
Anchoring lockers to drywall alone is not recommended. Drywall lacks the strength to support heavy lockers. Always locate studs or use strong wall anchors designed for heavy loads for safety.
How High Should Lockers Be Anchored On The Wall?
Lockers should be anchored near the top and bottom edges for maximum stability. Proper height depends on locker size and wall structure but secure anchoring points are essential to prevent tipping.
Conclusion
Anchoring lockers to the wall keeps them steady and safe. Follow the steps carefully for best results. Use the right tools and anchors for your wall type. Secure lockers prevent tipping and protect users from accidents. Take your time to measure and mark the spots correctly.
Strong lockers stay in place during daily use. This simple task improves safety in homes and workplaces. Now you can confidently fix lockers to any wall. Safety and stability go hand in hand.