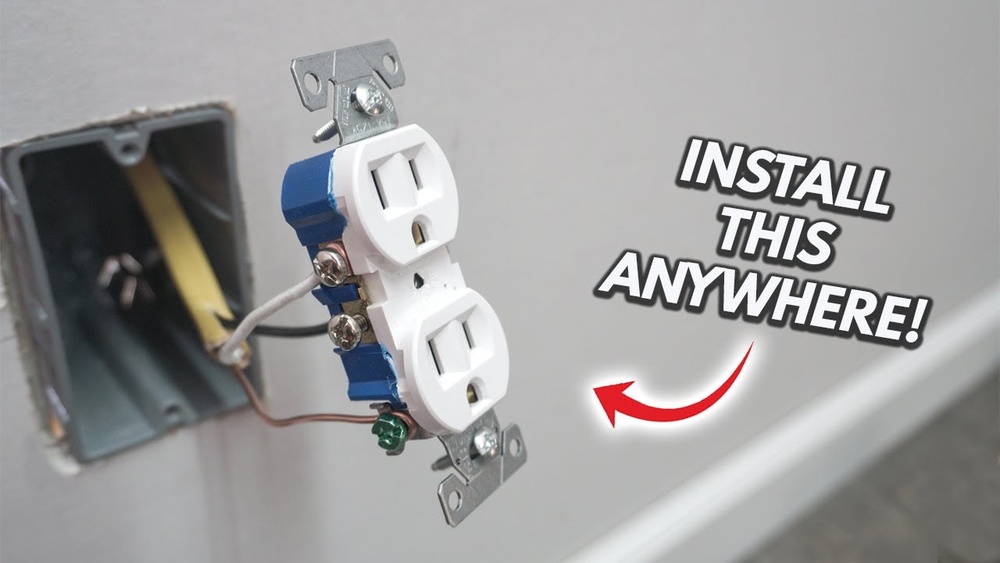
Are you looking to hook up a wall socket safely and quickly? Whether you’re upgrading your home or fixing a loose outlet, knowing how to connect a wall socket correctly is essential.
This guide will walk you through each simple step, making the process clear and easy—even if you’ve never done it before. By the end, you’ll have the confidence to handle your own wiring without worry. Keep reading to learn the exact tools and tips that will save you time and keep your home safe.
Credit: www.homedepot.com
Tools And Materials Needed
Before starting to hook up a wall socket, gather the right tools and materials. Having everything ready makes the job safer and faster. This list covers the basics needed for most wall socket installations.
Use tools that are in good condition. Check that materials match your local electrical standards. Proper tools and materials ensure a neat and secure connection.
Basic Tools Required
Start with a screwdriver set. Both flathead and Phillips screwdrivers are useful. Wire strippers help remove insulation without damaging wires. A voltage tester confirms the power is off. Pliers are handy for bending and twisting wires.
Essential Materials
Choose a wall socket that fits your needs. Electrical cables must be the right size and type. Use wire connectors to join wires safely. Electrical tape adds extra insulation and security. Wall boxes hold the socket firmly in place.
Safety Equipment
Wear insulated gloves to avoid shocks. Safety glasses protect your eyes from debris. Use a circuit breaker or switch off power at the main panel. Keep a flashlight handy in case of power outage.
Safety Precautions Before Starting
Working with electricity can be dangerous. Taking safety steps before hooking up a wall socket is very important. These steps protect you and your home from accidents and damage. Follow each safety rule carefully. It helps make your project safe and successful.
Turn Off The Power Supply
Switch off the main power supply at the circuit breaker. This stops electricity from flowing to the socket area. Use a voltage tester to check if the wires are dead. Never start work without confirming the power is off.
Use Proper Tools And Equipment
Choose tools made for electrical work. Insulated screwdrivers and pliers reduce the risk of electric shock. Avoid using damaged or worn-out tools. Keep your equipment clean and in good condition.
Wear Safety Gear
Wear rubber gloves to protect your hands. Use safety glasses to shield your eyes from sparks or debris. Avoid loose clothing that can catch on wires or tools. Dress safely to reduce risks.
Work In A Dry Environment
Do not work with wet hands or in damp places. Water conducts electricity and increases shock risk. Ensure the area is dry before you start. Use a dry cloth to clean the workspace if needed.
Understand The Wiring System
Learn the wiring colors and their functions. Identify live, neutral, and ground wires correctly. Wrong connections can cause shorts or fires. Read the socket’s manual or wiring diagram carefully.
Turning Off The Power Supply
Turning off the power supply is the first step before working on a wall socket. It keeps you safe from electric shocks. Always make sure no electricity flows to the socket.
Working with live wires can cause serious injuries. Switching off the power stops any current from reaching the socket. This simple action protects you while connecting wires.
Follow the steps carefully to turn off the power supply. Double-check to avoid any accidents during your work.
Locate The Main Circuit Breaker
Find the main circuit breaker box in your home. It is usually near the electric meter or in a utility room. The box controls the power to all rooms.
Look for a switch labeled “Main” or “All Circuits.” This switch controls the entire house’s electricity supply. Turning it off cuts power to all outlets and lights.
Switch Off The Correct Circuit Breaker
Identify the breaker that controls the socket you want to work on. The box often has labels for each circuit. Find the one marked for the room or area.
Flip the switch to the OFF position. This stops electricity from flowing to that socket alone. It allows you to work safely without shutting down the whole house.
Confirm Power Is Off
Use a voltage tester or a simple lamp to check if power is off. Place the tester into the socket or plug in the lamp. If it does not light up, the power is off.
Double-check to avoid any risks. Never trust just the circuit breaker switch. Always test the socket before starting your work.
Removing The Old Socket
Removing the old wall socket is the first step in replacing or upgrading it. This process helps ensure safety and prepares the space for the new socket. Take your time and follow each step carefully. Safety must come first.
Turn Off The Power
Switch off the power at the circuit breaker. This stops electricity from flowing to the socket. Use a tester to check if the power is really off. Never skip this step.
Unscrew The Socket Cover
Use a screwdriver to remove the screws holding the socket cover. Keep the screws safe for later use. Gently pull the cover away from the wall.
Disconnect The Wires
Identify the wires connected to the socket. Loosen the screws or clips holding the wires. Carefully pull the wires free. Note their positions for the new socket.
Remove The Socket From The Wall Box
Unscrew the socket from the wall box. Pull the socket out slowly. Avoid pulling on the wires to prevent damage.
Preparing The Wires
Connecting the new socket is a key step in installing a wall socket safely. It means attaching the wires correctly to the socket terminals. This ensures the socket works well and prevents electrical problems.
Each wire has a special role. Identifying them clearly is important before starting the connection. The process requires care and attention to detail.
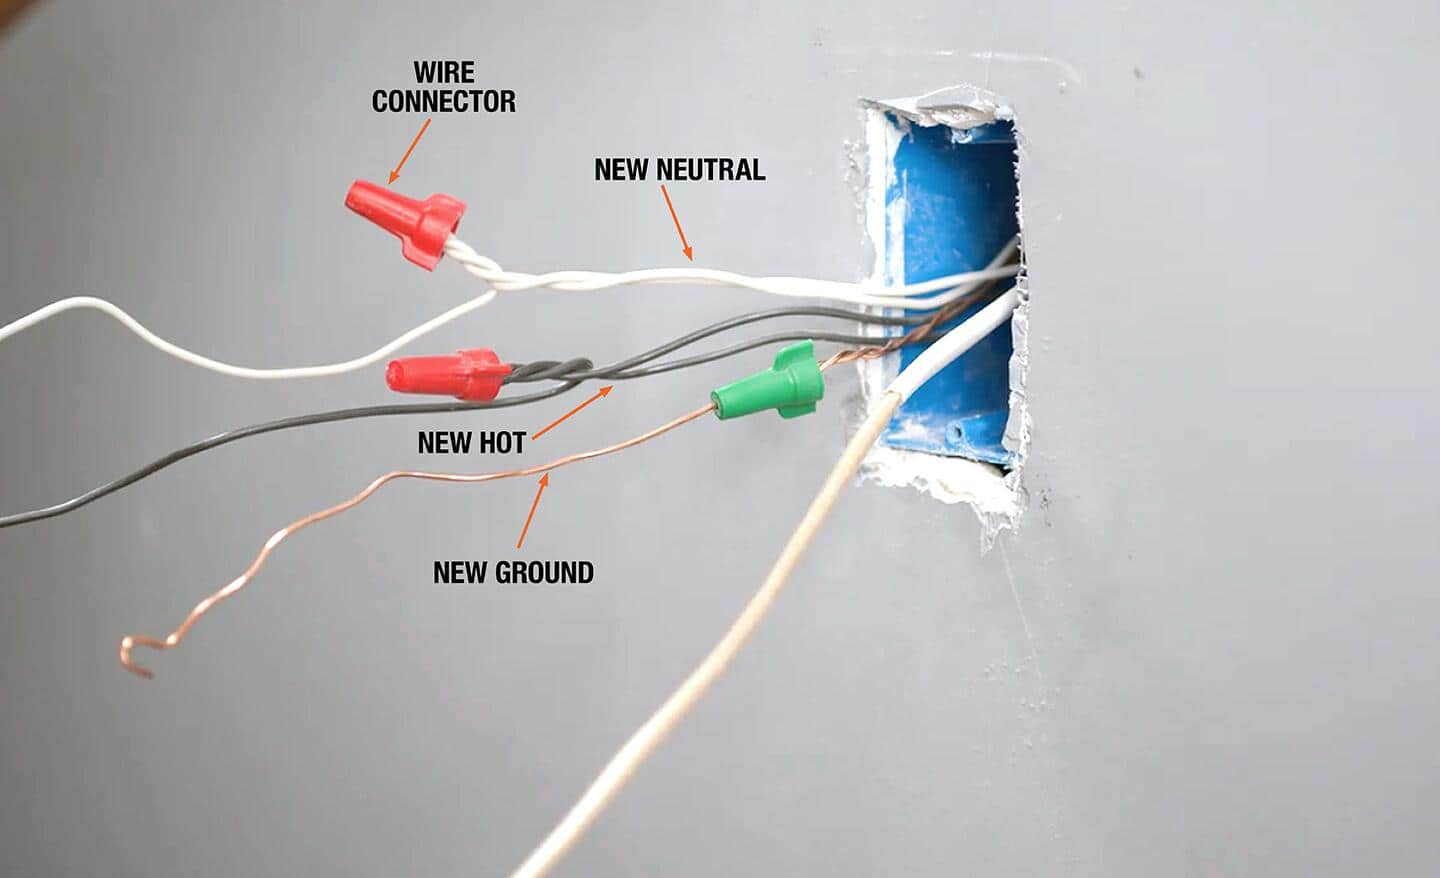
Identifying Live, Neutral, And Earth Wires
The live wire carries electricity to the socket. It usually has a brown or red color. The neutral wire returns the electricity back. It is often blue or black. The earth wire is for safety. It prevents shocks by sending electricity to the ground. It is green, yellow, or green-yellow striped.
Check the wires carefully. Use a tester if unsure. Knowing which wire is which helps avoid mistakes.
Securing The Wires To Terminals
Loosen the screws on the socket terminals. Insert the correct wire into each terminal. The live wire goes to the terminal marked L. The neutral wire fits the N terminal. The earth wire attaches to the terminal marked with the earth symbol or E.
Tighten the screws firmly to hold the wires. Make sure no bare wire is visible outside the terminal. Loose connections can cause sparks or faults.
Double-check the wires before closing the socket. Proper connection keeps your home safe and the socket working well.

Credit: www.familyhandyman.com
Connecting The New Socket
Mounting the socket to the wall is a key step in wiring a new outlet. It ensures the socket stays secure and works safely. Proper mounting keeps wires protected and prevents accidents.
Start by choosing the right position on the wall. The socket must fit flush and be easy to access. Use a pencil to mark the spots for screws on the wall box.
Prepare The Wall Box
The wall box holds the socket securely. Check that it is fixed tightly in the wall. Remove any debris or dust inside the box for a clean fit.
Attach The Socket To The Box
Align the socket with the wall box holes. Insert the mounting screws carefully. Tighten screws evenly to avoid bending the socket.
Check The Socket Alignment
Make sure the socket sits flat against the wall. It should not tilt or stick out. Adjust screws if needed for a perfect fit.
Secure The Faceplate
Place the faceplate over the socket. Screw it gently in place. The faceplate covers wires and gives a neat finish.
Mounting The Socket To The Wall
Testing the installation is a crucial step after hooking up a wall socket. It ensures the socket works safely and correctly. Skipping this step can lead to electrical hazards or device damage.
Careful testing confirms the wiring is right and the socket delivers power as expected. It also checks for any faults like short circuits or loose connections. This step protects your home and devices.
Using A Voltage Tester
A voltage tester checks if electricity flows to the socket. Touch the tester probes to the live and neutral terminals. A light or sound means the socket has power. No signal means no power or a wiring issue.
Checking For Proper Polarity
Polarity means the live, neutral, and earth wires are connected correctly. Use a socket tester for this. It lights up differently based on wiring accuracy. Correct polarity ensures devices work safely and properly.
Testing The Earth Connection
The earth wire protects from electric shocks. Test it with a socket tester or multimeter. A good earth connection shows low resistance. No or high resistance means a poor or missing earth wire.
Verifying The Socket Under Load
Plug in a small appliance like a lamp. Turn it on to check if the socket powers the device. This test shows the socket works under real conditions. It catches hidden wiring or connection problems.
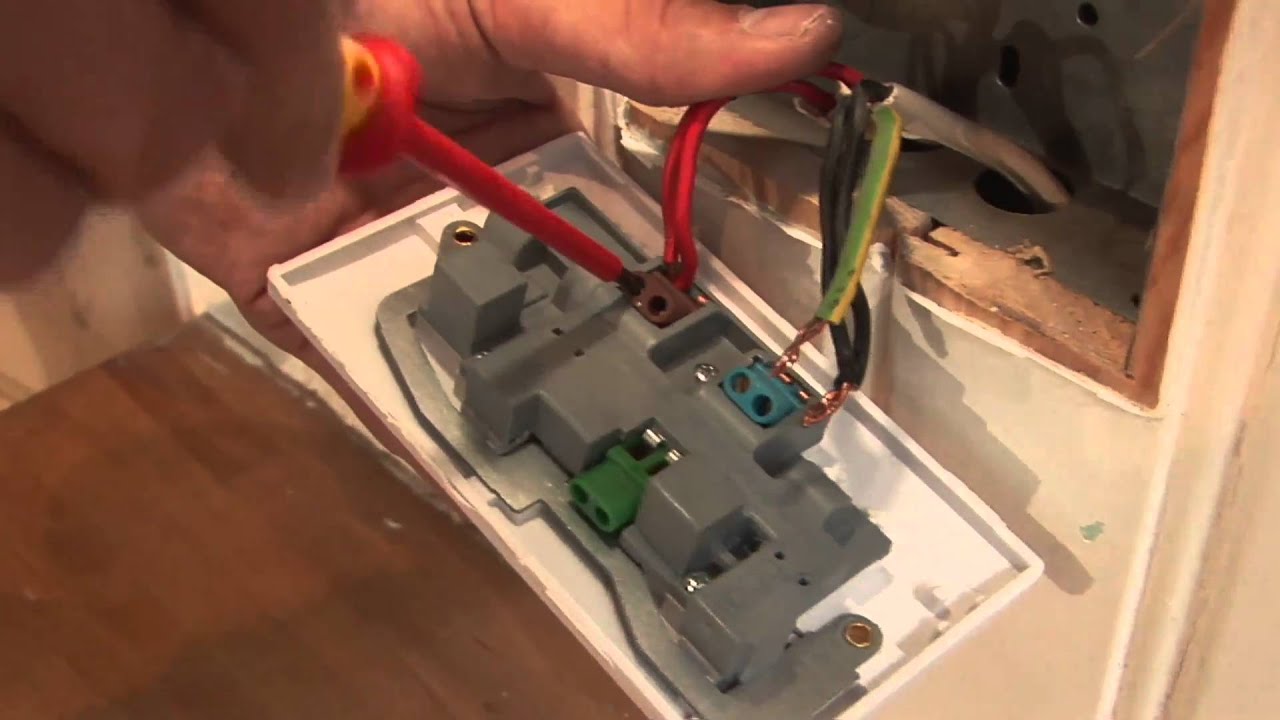
Credit: www.youtube.com
Testing The Installation
Hooking up a wall socket may seem simple. Yet, many make common mistakes that cause trouble later. Avoiding these errors saves time and keeps you safe. Here are some common mistakes to watch out for.
Incorrect Wire Connections
Connecting wires to the wrong terminals is a frequent error. The live, neutral, and earth wires must go to their correct spots. Mixing them can cause electric shock or damage devices.
Using The Wrong Wire Size
Using wires that are too thin can lead to overheating. Overheated wires may cause fires. Always pick wire sizes that match your socket’s power needs.
Not Turning Off Power
Working on a live circuit is dangerous. Always switch off the main power before starting. Double-check with a tester to confirm no electricity flows.
Poorly Secured Wires
Loose wires inside the socket can cause sparks. Tighten all screws firmly but avoid over-tightening. Loose connections reduce socket lifespan and safety.
Skipping The Earth Wire
Some skip connecting the earth wire, thinking it is optional. The earth wire is vital for safety. It prevents electric shock in case of faults.
Common Mistakes To Avoid
Knowing when to call a professional for wiring a wall socket is very important. Electrical work can be risky without the right skills and tools. Many problems can arise from incorrect connections. Safety should always come first.
Some tasks require expert knowledge. A professional electrician can ensure the job is done safely and correctly. This prevents damage and reduces the risk of electric shock or fire.
Signs You Need A Professional
Unclear wiring plans or damaged cables need expert help. If the socket is part of a complex circuit, avoid doing it yourself. Strange smells or sparks during previous use also call for a pro.
Local Laws And Regulations
Many places have strict rules about electrical work. Only certified electricians can legally install or change sockets. Following these laws keeps your home safe and avoids fines.
Lack Of Proper Tools
Special tools are necessary for safe socket installation. Without them, the risk of mistakes rises. Professionals have the right tools to do the job quickly and safely.
Complex Socket Types
Some sockets have extra features like USB ports or dimmers. These require more knowledge than standard sockets. A professional can handle these types without issues.
Frequently Asked Questions
How Do You Safely Hook Up A Wall Socket?
Turn off the power at the breaker before starting. Use a voltage tester to confirm no power. Connect the live, neutral, and earth wires correctly. Secure the socket to the wall box tightly. Restore power and test the socket for proper function.
What Tools Are Needed To Hook Up A Wall Socket?
You need a screwdriver, wire stripper, voltage tester, and pliers. A drill may be required for mounting. Always use insulated tools for safety. Having a wire cutter helps to trim wires neatly. These tools ensure a safe and efficient installation.
Can A Beginner Install A Wall Socket?
Yes, if they follow safety guidelines carefully. Understanding wiring color codes is essential. Use a voltage tester to avoid shocks. If unsure, consult a professional electrician. Proper tools and patience make the task manageable for beginners.
What Color Wires Connect To A Wall Socket?
Typically, live wire is brown or red, neutral is blue or black, and earth is green/yellow. Always verify local wiring standards. Correct connection ensures safety and functionality. Miswiring can cause electrical hazards or damage devices.
Conclusion
Hooking up a wall socket is a useful skill anyone can learn. Always turn off the power before you start working. Use the right tools and follow safety steps carefully. Connecting wires correctly keeps your home safe and prevents accidents.
Take your time and double-check each connection. Practice makes this task easier and less scary. Now you can add or replace sockets with confidence. Stay safe and enjoy your handy work around the house.