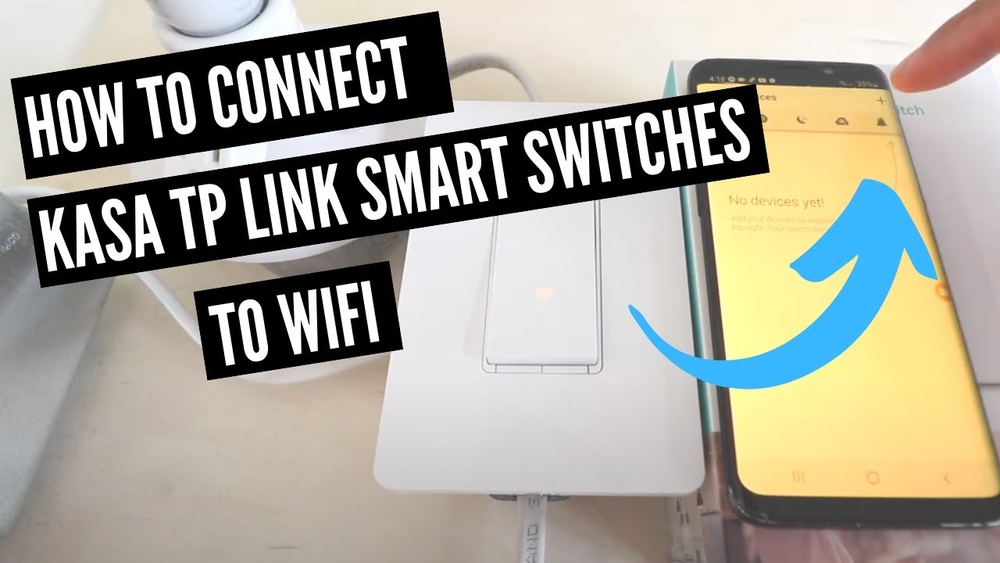
Are you ready to make your home smarter and more convenient? Connecting your Kasa Light Switch to WiFi is the first step to controlling your lights from anywhere, anytime.
Imagine turning your lights on before you even walk in the door or setting schedules that fit your daily routine without lifting a finger. In this guide, you’ll discover simple, clear steps to get your Kasa Light Switch online quickly and easily.
Keep reading, and you’ll be enjoying hands-free lighting control in no time.
Kasa Light Switch Features
Connecting your Kasa Light Switch to WiFi is simple and quick. Start by downloading the Kasa app and follow the step-by-step instructions. This lets you control lights from anywhere using your phone.
The Kasa Light Switch offers many smart features for easier home control.
It connects directly to your WiFi without needing a hub.
Control your lights from anywhere using your smartphone.
Schedule your lights to turn on or off automatically.
Works with voice assistants like Alexa and Google Assistant.
Designed to fit standard wall switch boxes for easy installation.
Supports both single-pole and multi-way switch setups.
Offers energy-saving modes to reduce electricity use.
Includes a sleek, modern design that fits any room style.
Provides reliable performance with fast response times.
Lets you share access with family members safely.
Requirements Before Setup
Before connecting your Kasa light switch to WiFi, check some key requirements. These ensure a smooth setup and stable connection. Prepare your devices and tools carefully. Verify your network details. This preparation saves time and avoids errors.
Compatible Devices
Use a smartphone or tablet to control the Kasa switch. It must support the Kasa Smart app. The app works on Android and iOS devices. Check your device’s operating system version. It should be Android 5.0 or higher, or iOS 10 or later.
The Kasa switch itself must match your home’s wiring. Most models need a neutral wire. Confirm your electrical box has one. If unsure, consult an electrician before buying.
Wifi Specifications
The Kasa switch connects only to 2.4 GHz WiFi networks. It does not support 5 GHz networks. Ensure your router broadcasts a 2.4 GHz signal. Check the network name (SSID) and password. You will need these during setup.
Your WiFi signal should be strong near the switch location. Weak signals cause connection failures. Place the router close or use a WiFi extender if needed. The internet speed should be stable for best results.
Necessary Tools
Gather basic tools before installation. A screwdriver is essential to remove and attach the switch. A voltage tester helps check power safety. Use it to avoid electric shock.
Have your Kasa Smart app ready on your phone. Create or log in to your TP-Link account in advance. This speeds up the setup process. Also, keep your WiFi password handy.
Preparing The Light Switch
Preparing the Kasa light switch for WiFi connection starts with some careful steps. These steps ensure safety and proper setup. Follow each step closely to avoid any issues.
Turn Off Power
Safety first. Switch off the power at your home’s circuit breaker. Confirm the power is off by testing the existing switch. This step prevents electric shock during installation.
Remove Existing Switch
Use a screwdriver to remove the switch cover plate. Unscrew the old switch carefully from the wall. Gently pull the switch out to expose the wires. Note the wire connections before detaching.
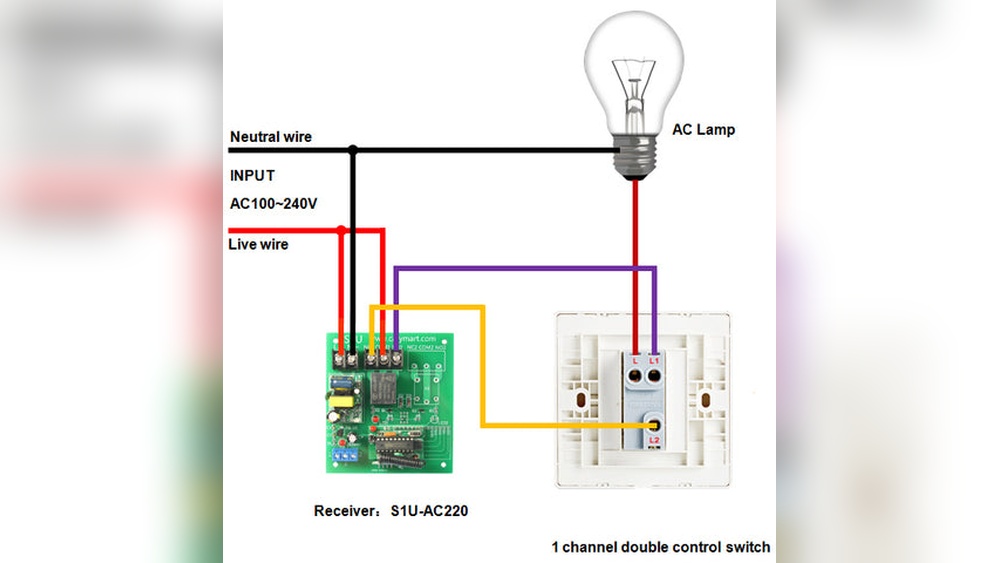
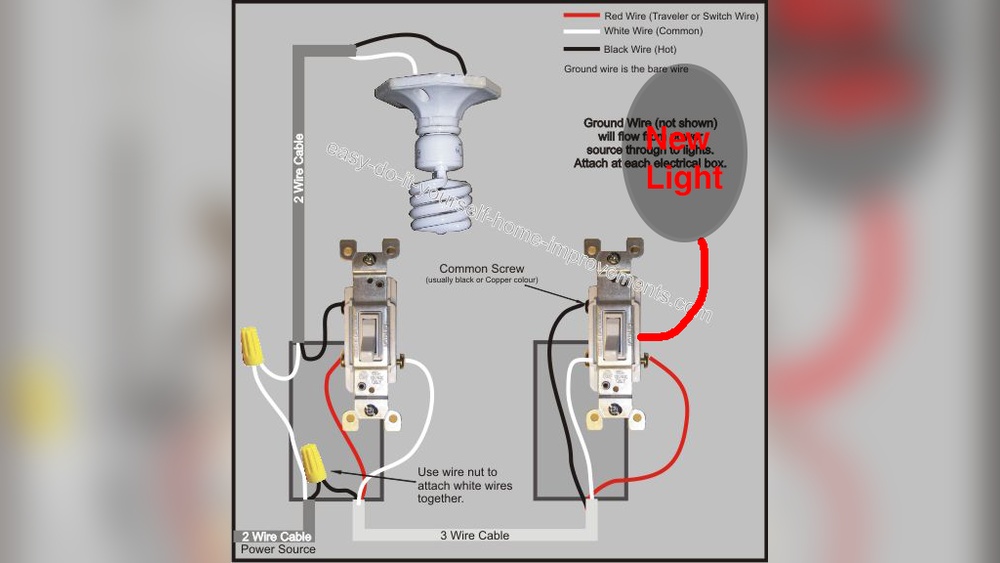
Wire The Kasa Switch
Connect the Kasa switch wires to the house wires. Match the colors: black to black, white to white, and green or copper to ground. Tighten the screws to secure wires firmly. Push the switch into the wall box and attach the cover plate.
Credit: www.reddit.com
Downloading The Kasa App
Downloading the Kasa app is the first step to connect your Kasa light switch to WiFi. The app helps you control the switch from your phone. It also makes setup quick and easy. Follow these steps to get the app and start using your smart switch.
App Store Access
Open the app store on your smartphone. For iPhone users, go to the Apple App Store. Android users should open Google Play Store. In the search bar, type “Kasa Smart.” Look for the official app by TP-Link. Tap the download or install button. Wait a few moments for the app to finish downloading. Once done, open the app to start setup.
Account Creation
After opening the Kasa app, you need an account. Tap “Sign Up” to create one. Enter your email address and create a password. Make sure your password is strong but easy to remember. Confirm your email if the app asks you to. Logging in allows you to save your devices. It also helps you access them from anywhere.
Connecting To Wifi
Connecting your Kasa Light Switch to WiFi is simple and quick. This step is essential to control your lights remotely. Follow the steps carefully to get your switch online and ready.
Power On The Switch
First, ensure the switch is properly installed. Turn on the power at your circuit breaker. The switch should light up, showing it is powered. Without power, the switch cannot connect to WiFi.
Activate Setup Mode
Next, put the switch into setup mode. Press and hold the toggle or button on the switch. Keep holding for about 5 seconds until the LED blinks rapidly. This blinking means the switch is ready to connect.
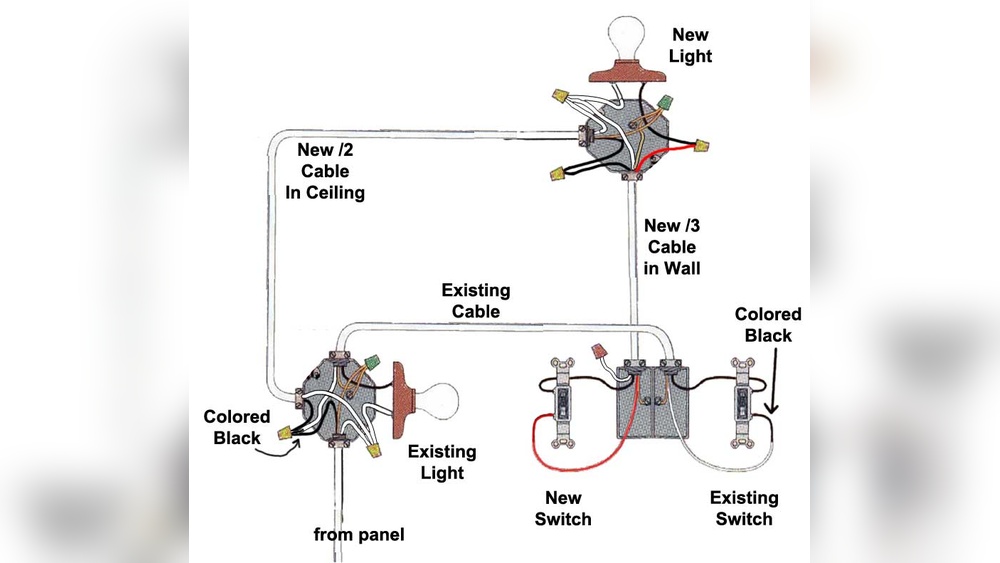
Linking Via The App
Open the Kasa app on your smartphone. Tap the plus sign (+) to add a new device. Follow the app’s prompts to select your switch and connect it to your WiFi network. Enter your WiFi password carefully. Wait for the app to confirm the connection. Once connected, your switch is ready to use.

Credit: community.smartthings.com
Troubleshooting Connection Issues
Connecting your Kasa Light Switch to WiFi can sometimes face small problems. These issues stop the switch from working properly with your network. This section helps you fix common connection problems quickly. Follow these easy steps to get your switch online.
Resetting The Switch
Resetting the switch often solves many connection troubles. Find the reset button on the device. Press and hold it for about 5 seconds. The light on the switch will blink, showing it is resetting. After reset, try connecting to WiFi again. This clears old settings that may cause problems.
Wifi Signal Tips
Weak WiFi signals cause most connection problems. Place your router closer to the switch. Avoid walls and metal objects between them. Use a WiFi extender if the signal is weak. Make sure your network uses 2.4 GHz, not 5 GHz. The switch works better on 2.4 GHz networks.
Firmware Updates
Firmware controls how your switch works. Outdated firmware can cause connection issues. Open the Kasa app and check for updates. Update the switch firmware if available. This fixes bugs and improves connection stability. Keep your switch up to date for best performance.
Customizing Switch Settings
Customizing your Kasa light switch settings helps you control your lights easily. You can give your switch a clear name, set schedules to turn lights on or off automatically, and link the switch to voice assistants. These options make your smart home more convenient and personalized.
Naming Devices
Give each Kasa switch a simple, clear name. This helps you find the switch in the app quickly. Use names like “Living Room Light” or “Bedroom Lamp” to avoid confusion. Clear names also help when using voice commands.
Setting Schedules
Set schedules to automate your lights. Choose specific times for the switch to turn on or off. This saves energy and adds security by making your home look occupied. You can create different schedules for weekdays and weekends.
Integrating Voice Assistants
Connect your Kasa switch to voice assistants like Alexa or Google Assistant. This lets you control lights with simple voice commands. Say “Turn off the kitchen light” to manage switches hands-free. Voice control adds ease and flexibility to your smart home.

Credit: www.youtube.com
Frequently Asked Questions
How Do I Connect Kasa Light Switch To Wifi?
To connect the Kasa light switch, download the Kasa app first. Then, follow in-app instructions to add the device and enter your WiFi credentials. Ensure your phone is on a 2. 4 GHz network, as Kasa switches do not support 5 GHz WiFi.
Why Won’t My Kasa Switch Connect To Wifi?
Check if your router supports 2. 4 GHz WiFi, as Kasa switches require it. Ensure the switch is in pairing mode and the password is correct. Restart your router and the switch if needed. Also, verify your phone is near the switch during setup.
Can Kasa Light Switch Work With Any Wifi Router?
Kasa light switches work with most 2. 4 GHz WiFi routers. They do not support 5 GHz networks. Ensure your router’s security settings and password are compatible. Avoid enterprise or guest networks for setup, as they may block device connections.
What To Do If Kasa Switch Loses Wifi Connection?
Restart your router and the Kasa switch to restore connection. Check for firmware updates in the Kasa app. Move the switch or router closer if signal is weak. Reset the switch and reconnect it if issues persist.
Conclusion
Connecting your Kasa light switch to WiFi is simple and quick. Follow each step carefully to avoid common mistakes. Once connected, you can control lights from anywhere using your phone. This adds comfort and saves energy. Enjoy smart home convenience without any hassle.
Keep your app updated for the best experience. Now, your home lighting works smarter and easier.