Have you ever flipped your 3-way light switch only to find the lights won’t turn on or off properly? It’s frustrating, especially when you don’t know where to start fixing it.
But here’s the good news: you don’t need to call an electrician right away. With a few simple steps and some basic tools, you can solve the problem yourself. In this guide, you’ll discover easy ways to troubleshoot and fix your 3-way light switch quickly and safely.
Keep reading, and you’ll have your lights working perfectly again in no time.

Credit: www.youtube.com
Tools And Materials Needed
Fixing a 3-way light switch needs the right tools and materials. Using proper equipment helps complete the job safely and quickly. Below is a list of what is necessary before starting.
Essential Tools
- Screwdriver (flathead and Phillips)
- Wire stripper
- Voltage tester
- Needle-nose pliers
- Electrical tape
- Flashlight or work light
- Wire nuts
Required Materials
- 3-way light switches (two pieces)
- Electrical wires (14 or 12 gauge)
- Wall plates
- Wire connectors
- Circuit tester
How 3 Way Switches Work
Understanding how 3 way switches work helps in fixing them safely and correctly. These switches control one light from two different locations. This setup is common in hallways and large rooms.
Basic Wiring Concepts
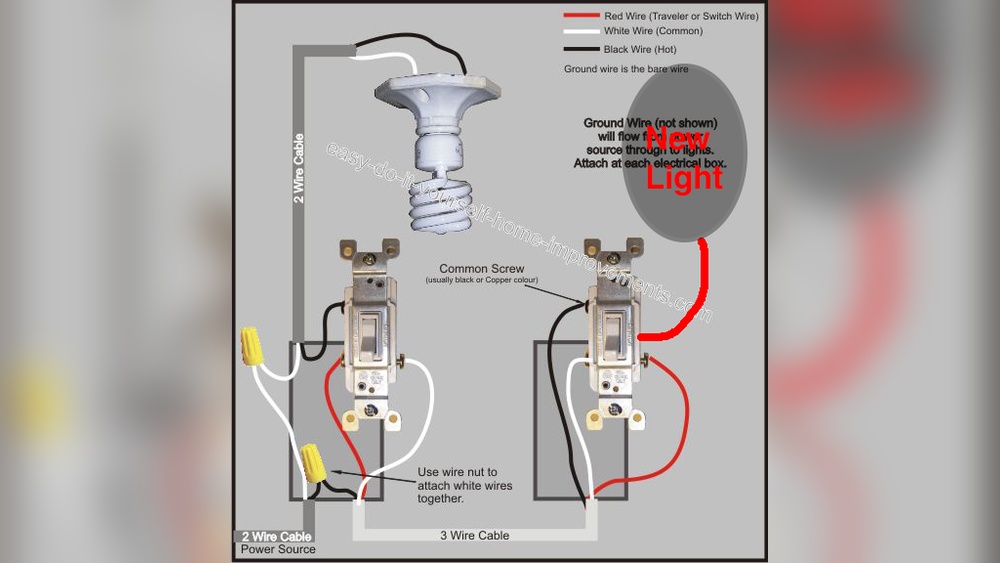
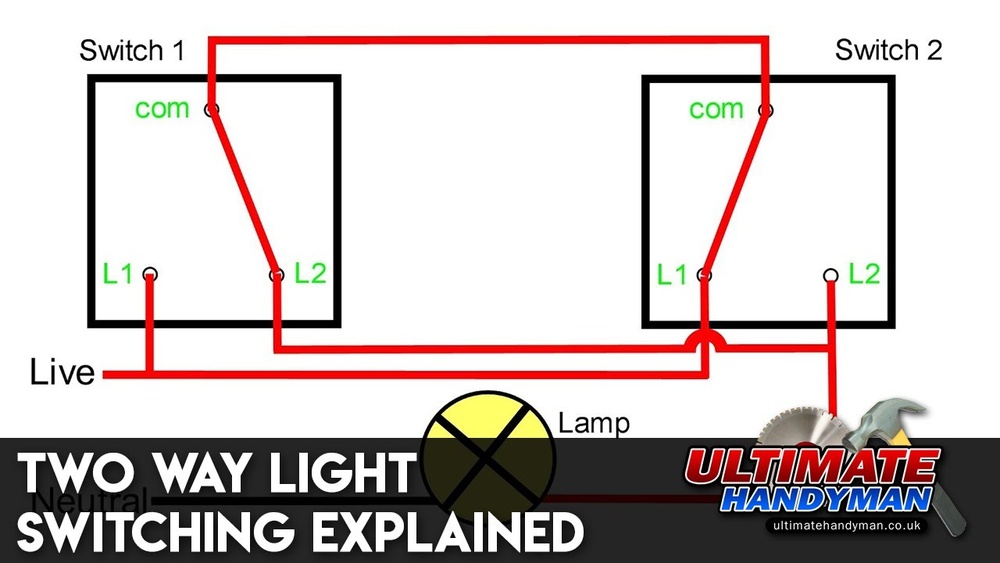
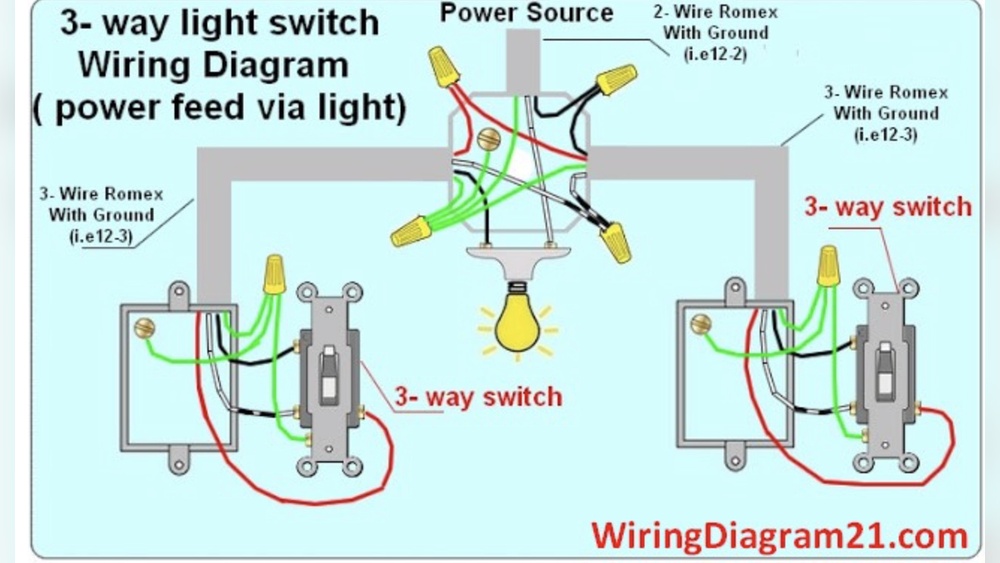
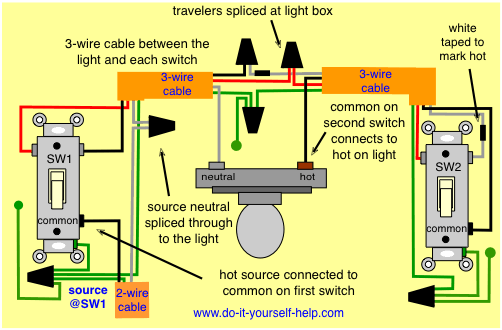
A 3 way switch uses three wires to connect two switches and a light. Two wires called travelers carry current between switches. The third wire connects to the light fixture and power source.
One switch sends power to the light, and the other switch completes the circuit. The wires must be connected properly to make the switches work together. Knowing which wire does what is important for repairs.
Switch Functionality
Each 3 way switch has three terminals. Two traveler terminals connect to the traveler wires. The common terminal connects to the power source or light.
Flipping either switch changes the current path. This turns the light on or off from either switch. The switches work by opening or closing the circuit at different points.
Safety Precautions
Working on a 3 way light switch involves electricity. Safety must come first to avoid accidents. Follow basic safety steps to protect yourself and your home. Careful preparation helps complete the task smoothly and safely.
Power Shutoff
Turn off the power at the circuit breaker before starting. This stops electricity from flowing to the switch. Never rely on the switch position alone. Confirm the power is off to prevent shocks.
Using A Voltage Tester
Use a voltage tester to check if wires are live. Test all wires in the switch box. The tester shows if electricity is present. Only start work after confirming no voltage is detected.
Identifying The Problem
Identifying the problem is the first step to fixing a 3 way light switch. Understanding what causes the issue helps to find the right solution. Problems can be simple or complex, but spotting them early saves time and effort.
Common Issues
One common issue is the light not turning on or off from both switches. Another problem is flickering lights. Sometimes, the switch feels loose or does not click properly. Wiring mistakes also cause the switch to fail. Signs of wear and tear can affect switch performance.
Troubleshooting Tips
Start by checking if the power is off. Use a voltage tester to ensure safety. Inspect the switches for any visible damage. Test each switch separately to see if one is faulty. Look at the wiring connections for loose or broken wires. Replace any damaged parts carefully. Simple fixes often restore proper function quickly.
Step-by-step Repair Guide
Fixing a 3-way light switch can seem tricky. This guide breaks down the process into simple steps. Each part helps you understand what to do next. Follow these clear instructions to repair the switch safely and correctly.
Removing The Switch Cover
First, turn off the power at the circuit breaker. Use a screwdriver to remove the screws holding the switch cover. Gently pull the cover off to expose the switch and wiring. Take care not to damage the wall or wiring.
Testing The Wiring
Use a voltage tester to check for power in the wires. Confirm the power is off before touching any wires. Identify the traveler wires and common wire by testing continuity. Label the wires if needed to avoid confusion later.
Replacing Faulty Switches
Remove the screws holding the old switch in place. Carefully pull the switch out without pulling the wires. Disconnect the wires from the faulty switch terminals. Replace it with a new 3-way switch of the same type.
Reconnecting Wires Correctly
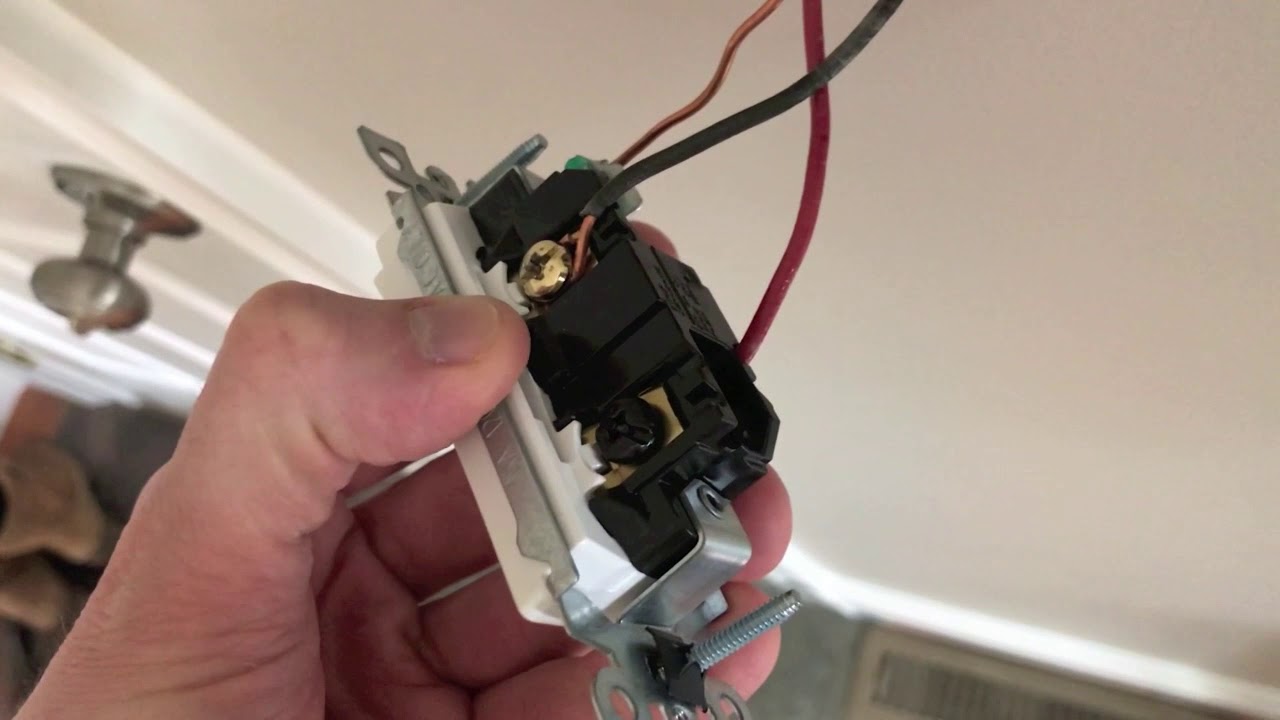
Match each wire to the correct terminal on the new switch. The common wire goes to the dark-colored screw. Traveler wires connect to the two brass screws. Tighten screws firmly to hold the wires in place.
Securing The Switch
Push the switch back into the wall box carefully. Screw the switch securely to the box using the original screws. Replace the switch cover and tighten its screws. Turn the power back on and test the switch function.
Credit: diy.stackexchange.com
Testing The Repair
Testing the repair of a 3 way light switch is a key step. It confirms that your fix works safely and correctly. This process involves turning the power back on and checking the switch’s function. Careful testing helps avoid future issues and keeps your home safe.
Restoring Power
First, turn the circuit breaker back on. Make sure your hands are dry and you stand on a dry surface. This action restores electricity to the switch. Watch for any sparks or unusual sounds. If everything seems normal, proceed to test the switch.
Checking Switch Operation
Flip each switch in the 3 way setup one at a time. The light should turn on and off smoothly from both switches. Try switching quickly to spot any flickers or delays. If the light works properly, the repair is successful. If not, recheck the wiring or connections carefully.
Tips For Preventing Future Issues
Preventing future problems with your 3 way light switch starts with good habits. Small actions can keep your switches working well for years. Taking time to care for your switches avoids costly repairs and unsafe conditions.
Regular Maintenance
Check your switches often for any signs of wear or damage. Tighten loose screws and clean dust from switch plates. Dust buildup can cause poor connections and flickering lights. Test the switches to ensure they turn the lights on and off smoothly. Catching small issues early can stop bigger problems later.
Upgrading Components
Old switches may not work well with modern wiring. Replace outdated switches with new, high-quality models. Look for switches designed to handle your home’s electrical load. Using newer components improves safety and performance. Upgrading also helps avoid frequent breakdowns and flickering lights.
Credit: www.youtube.com
Frequently Asked Questions
How Do I Identify A 3 Way Light Switch?
A 3 way switch has three terminals plus a ground screw. It controls one light from two locations. Look for two switches controlling the same light.
What Tools Do I Need To Fix A 3 Way Switch?
You need a screwdriver, voltage tester, wire stripper, and electrical tape. These tools ensure safe and effective switch repair or replacement.
How Can I Safely Turn Off Power Before Fixing?
Turn off the circuit breaker controlling the light. Use a voltage tester to confirm no electricity flows to the switch.
Why Does My 3 Way Switch Flicker Or Not Work?
Loose wiring or faulty switches cause flickering or failure. Check connections and replace switches if necessary for proper function.
Conclusion
Fixing a 3 way light switch is easier than it seems. Start by turning off the power for safety. Follow each step carefully to avoid mistakes. Testing the switch after installation ensures it works well. With patience and attention, you can handle this task yourself.
No need to call a professional every time. This simple guide helps you save time and money. Keep your home’s lighting working smoothly and safely. Try it today and see the difference it makes.