Are you ready to make your home smarter and more convenient? Connecting your Wemo Light Switch might seem tricky at first, but with the right steps, you can do it quickly and easily.
Imagine controlling your lights from your phone, no matter where you are. In this guide, you’ll discover exactly how to set up your Wemo Light Switch without any hassle. Keep reading, and by the end, you’ll have full control over your lighting – making your daily life simpler and more comfortable.
Let’s get started!

Credit: diy.stackexchange.com
Prepare For Installation
Preparing for the installation of your Wemo Light Switch is key to a smooth process. Taking the right steps before starting helps avoid mistakes. It also ensures safety and a correct setup.
Follow these simple steps to get ready for the installation. Each step guides you through what you need and what to check before you begin.
Gather Required Tools
Collect all tools needed for the job. You will need a screwdriver, wire stripper, voltage tester, and electrical tape. Keep these tools close to avoid interruptions. Having everything ready saves time and effort.
Turn Off Power Safely
Switch off the power to the circuit at your home’s breaker box. Use a voltage tester to confirm the power is off. This step prevents electric shocks and keeps you safe. Never skip this important safety check.
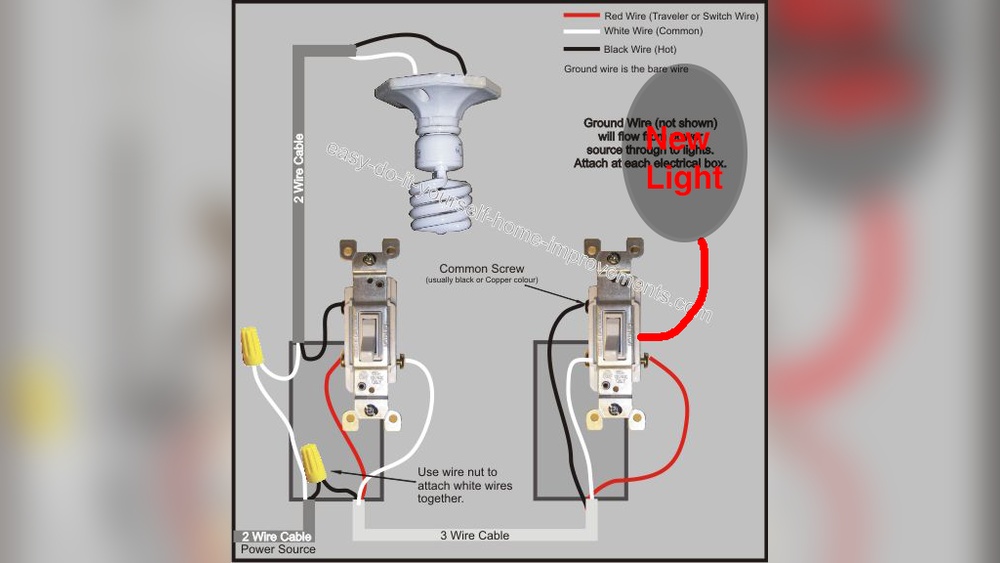
Identify Existing Wiring
Remove the cover plate of your current switch. Check the wires connected to it. Identify the line, load, neutral, and ground wires. Label each wire to avoid confusion during installation. Understanding your wiring setup is crucial for success.
Remove Old Switch
Removing the old switch is the first step to connect your Wemo light switch. This process lets you prepare the wiring for the new smart switch. It is important to work safely and carefully. Make sure the power is off at the circuit breaker before starting. This prevents any risk of electric shock.
Unscrew And Detach Switch
Use a screwdriver to remove the screws holding the old switch in place. Keep the screws safe; you may need them later. Gently pull the switch out from the wall box. Do not force it, or the wires could get damaged. Take your time to avoid breaking anything.
Label Wires For Reference
Look at the wires connected to the old switch. Use small pieces of tape or labels to mark each wire. Write simple names like “line,” “load,” or “neutral.” This step helps you remember where each wire goes. Clear labeling makes installing the Wemo switch much easier and safer.
Wire The Wemo Switch
Wiring the Wemo Light Switch is a key step in the installation process. This step connects the switch to your home’s electrical system. Proper wiring ensures the switch works safely and correctly.
Connect Line And Load Wires
Identify the line wire that brings power from your electrical panel. The load wire goes to the light fixture. Connect the line wire to the terminal marked “Line.” Attach the load wire to the terminal marked “Load.” Tighten the screws firmly to hold the wires in place.
Attach Neutral And Ground Wires
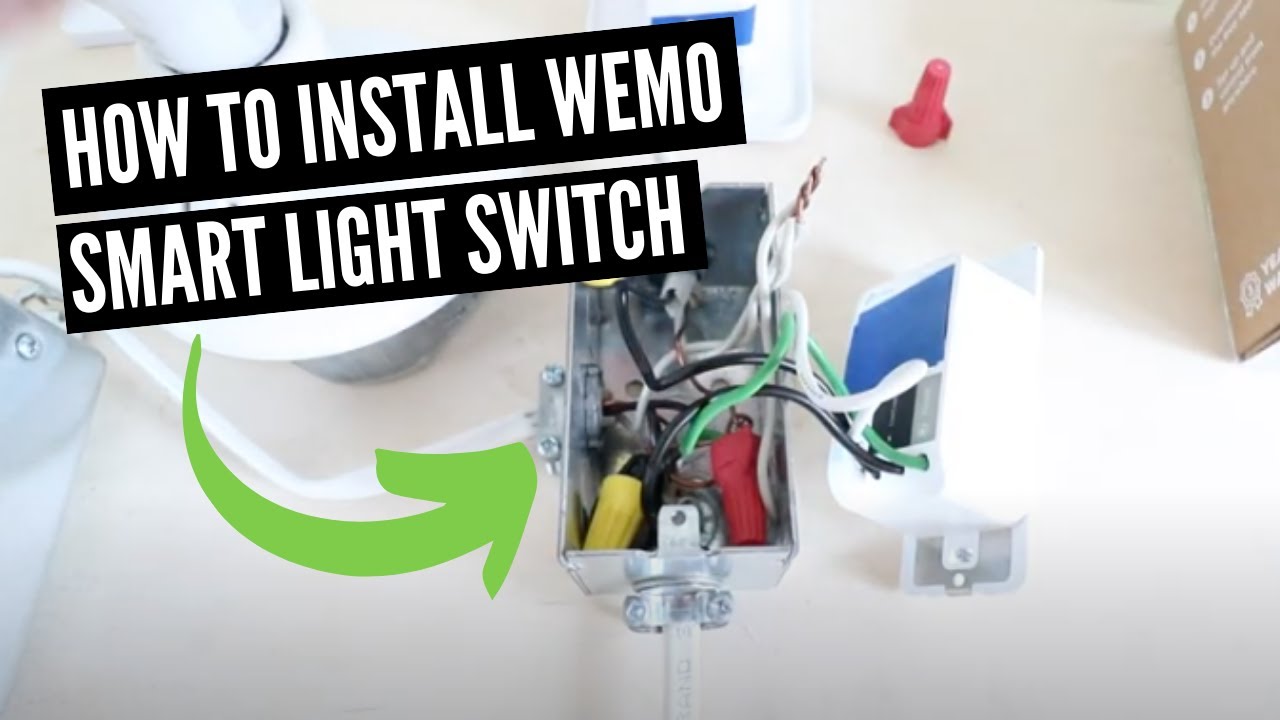
Locate the neutral wires in the wall box; these are usually white. Connect the Wemo switch’s neutral wire to the bundle of neutral wires. Attach the ground wire from the switch to the bare copper or green wire in the box. This ground connection helps protect against electrical shocks.
Secure Wire Connections
Use wire nuts to cover each connection tightly. Wrap electrical tape around the wire nuts for added safety. Make sure no bare wire is exposed outside the wire nuts. Push the wires gently back into the wall box to avoid damage. Properly secured wires reduce the risk of electrical problems.
Mount The Wemo Switch
Mounting the Wemo light switch is a key step in your installation process. It ensures the switch fits securely and looks neat. Follow these simple steps to complete this part quickly and safely.
Fit Switch Into Wall Box
Gently push the Wemo switch into the wall box. Make sure wires stay inside the box and do not get pinched. The switch should sit flush against the wall.
Screw Switch In Place
Use the screws provided to secure the switch. Tighten them evenly on both sides. Do not over-tighten to avoid damaging the switch or wall box.
Attach Wall Plate
Place the wall plate over the switch. Align it so screw holes match perfectly. Insert screws and tighten until the plate is snug against the wall.
Set Up The Wemo App
Setting up the Wemo app is the first step to control your Wemo light switch. The app lets you manage your switch from anywhere. It is easy to use and connects your switch to your home Wi-Fi network. Follow these steps to get started quickly.
Download And Install App
Go to the App Store or Google Play Store on your phone. Search for “Wemo.” Find the official Wemo app and tap “Download.” Wait for the app to install on your device. Open the app once installation is complete.
Create Or Sign In Account
Open the Wemo app. You will see options to create an account or sign in. Tap “Create Account” if you do not have one. Enter your email and create a password. If you already have an account, tap “Sign In” and enter your details. This step keeps your devices safe and connected.
Connect Switch To Wi-fi
Turn on your Wemo light switch. The app will guide you to connect the switch to Wi-Fi. Choose your home Wi-Fi network from the list. Enter your Wi-Fi password carefully. Wait a moment while the switch connects. A confirmation message will appear once connected.
Test The Switch
Testing the Wemo light switch after installation is important. It helps ensure everything works correctly and safely. Follow a few simple steps to confirm the switch functions as expected.
Restore Power
Turn the circuit breaker back on. This restores electricity to your switch and lights. Watch for any flickering or unusual behavior in the light.
If the light does not turn on, check your connections. Make sure the switch is properly wired and securely attached.
Verify Manual Control
Press the switch button to turn the light on and off. This tests the manual function of the switch. The light should respond immediately to your touch.
If the light does not react, the switch may have an issue. Double-check the wiring and installation steps.
Check App Control
Open the Wemo app on your smartphone. Connect to your switch using the app. Try turning the light on and off remotely.
The app should control the switch without delay. If not, check your Wi-Fi connection and app settings.
Troubleshoot Common Issues
Troubleshooting common issues with your Wemo Light Switch can save time and frustration. Many problems are simple to fix. Understanding key areas helps solve issues quickly. Below are common problems and easy solutions.
Wi-fi Connectivity Problems
The Wemo switch needs a strong Wi-Fi signal. Place the switch close to your router for better connection. Restart your router to refresh the network. Check if your Wi-Fi password is correct in the app. Use a 2.4 GHz network, as Wemo does not support 5 GHz. Avoid network interference from other devices. Updating your router firmware can improve stability.
Switch Not Responding
Check if the switch is powered properly. The breaker might be off or loose wiring could be the cause. Reset the switch by pressing the reset button for 10 seconds. Ensure the switch is compatible with your home wiring. Test the switch manually to confirm it works. Sometimes, a simple power cycle fixes the problem.
App Setup Challenges
Make sure your phone has the latest Wemo app version. Clear the app cache or reinstall if it crashes. Follow the app instructions carefully during setup. Confirm that your phone is connected to the same Wi-Fi as the switch. Enable location services; some phones require this for setup. Restart your phone to refresh settings and permissions.

Credit: www.belkin.com
Enhance Smart Control
Enhance smart control of your home lighting with the Wemo Light Switch. This device allows you to manage lights easily and efficiently. Control your lights from anywhere using your smartphone. Make your daily routine easier and your home safer.
Smart control brings convenience and saves energy. Set up your Wemo Light Switch to fit your lifestyle. Use simple tools to customize your lighting experience.
Set Schedules And Timers
Set schedules to turn your lights on or off automatically. Use timers to control lights during specific times. This saves energy and adds comfort. No need to remember switching lights manually. Perfect for waking up or coming home in the dark.
Integrate With Voice Assistants
Connect your Wemo Light Switch with voice assistants like Alexa or Google Assistant. Control lights using simple voice commands. Say “turn on the living room light” without moving. This hands-free control is useful when your hands are busy or dirty.
Create Automation Scenes
Create scenes to control multiple lights at once. Set your favorite lighting for movie nights or dinner. Combine lights with other smart devices. Make your home respond to your daily habits automatically.
Credit: www.youtube.com
Frequently Asked Questions
How Do I Connect A Wemo Light Switch To Wi-fi?
To connect a Wemo Light Switch to Wi-Fi, first turn off power at the breaker. Then, use the Wemo app to follow step-by-step instructions. Ensure your phone is on the same 2. 4 GHz network as the switch. Finally, complete the setup in the app.
What Tools Are Needed To Install A Wemo Light Switch?
You need a screwdriver, voltage tester, wire stripper, and electrical tape. Also, ensure the power is off before starting. Having these tools ready makes installation safer and easier. Follow the Wemo installation guide closely for proper wiring.
Can I Control Wemo Light Switch Remotely?
Yes, the Wemo Light Switch can be controlled remotely via the Wemo app. It works over Wi-Fi, allowing you to turn lights on or off from anywhere. This feature enhances convenience and energy savings.
Is The Wemo Light Switch Compatible With Smart Home Systems?
Yes, Wemo Light Switch works with Amazon Alexa, Google Assistant, and Apple HomeKit. This compatibility allows voice control and integration with other smart devices. Check your Wemo model for specific smart home support.
Conclusion
Connecting a Wemo light switch is simple and quick. Follow the steps carefully for safe installation. Test the switch to ensure it works properly. You can control your lights from anywhere with the app. Enjoy the convenience and save energy easily.
Smart home setup feels easier with Wemo switches. Keep the instructions handy for future reference. Start using your Wemo light switch today and see the difference.