Are you looking for a unique way to organize your space and add a touch of style to your walls? Making a Wall Hook Atlas is a clever and creative solution that combines functionality with eye-catching design.
Imagine having a wall hook that not only holds your keys, bags, or coats but also sparks conversations and reflects your personality. In this guide, you’ll discover simple steps to create your own Wall Hook Atlas that fits perfectly in your home or office.
Ready to transform your walls and make daily organization easier? Let’s dive in!
Credit: atlasfinest.com
Materials Needed
Gathering the right materials is the first step to make a wall hook atlas. This project needs specific wood, tools, and finishing supplies. Each item plays a key role in the final look and strength.
Choosing The Right Wood
Select wood that is strong and easy to work with. Pine or oak are good choices. Pine is soft and cuts easily. Oak is harder but lasts longer. Choose a smooth board without cracks or knots. The size depends on how big your wall hook atlas will be.
Tools And Accessories
Basic tools include a saw to cut the wood. A drill is needed for making holes. Sandpaper or a sanding block smooths rough edges. You will also need screws or nails to fix hooks. Hooks can be metal or wooden, depending on your style. A measuring tape and pencil help mark precise cuts.
Finishing Supplies
Finishing supplies protect the wood and improve its look. Use wood stain or paint to add color. Clear varnish or sealant protects from moisture. Brushes or rags apply these finishes evenly. Choose finishes that dry quickly and smell mild.

Credit: www.montreallighting.com
Designing Your Wall Hook Atlas
Designing your Wall Hook Atlas is a fun and important step. This part helps you plan how your hooks will look and fit on the wall. A good design makes the wall both useful and attractive.
Start with clear ideas about style and size. Careful planning saves time and makes the project easier to finish. Follow simple steps to create a design that suits your space and needs.
Selecting A Style
Choose a style that matches your room’s look. Pick between modern, rustic, or classic styles. Think about colors and shapes that fit your taste. The style sets the mood for the whole wall.
Measuring And Planning Layout
Measure the wall space carefully. Know how much room you have for the hooks. Plan where each hook will go. This helps avoid crowded or empty spots. Use a tape measure and note down the numbers.
Sketching Your Design
Draw a simple sketch of your wall and hooks. Mark where each hook will be placed. Use paper and pencil or a digital tool. A sketch shows your plan clearly and helps make changes early.
Cutting And Shaping Wood
Cutting and shaping wood is the key step in creating your wall hook atlas. This process defines the look and fit of each wooden piece. Careful cutting ensures the hooks hold firm and the design looks neat. Proper shaping removes rough spots and sharp edges. It makes the wood safe to touch and easy to paint or finish. Follow simple steps to cut and shape wood like a pro.
Marking Cut Lines
Start by measuring the wood pieces for your hooks. Use a pencil and a ruler to draw clear lines. These lines guide your cuts. Double-check measurements before marking. Accurate lines help avoid mistakes. Mark every piece to fit your design perfectly.
Safe Cutting Techniques
Use a sharp saw to cut along the lines. Keep your hands away from the blade. Cut slowly for control and clean edges. Always wear safety glasses to protect your eyes. Clamp the wood to a stable surface. This stops it from moving while cutting. Safety keeps your project fun and injury-free.
Sanding Edges Smooth
After cutting, sand all edges to smooth rough spots. Use fine-grit sandpaper for best results. Sand in the direction of the wood grain. Check edges for splinters or sharp points. Smooth edges prevent scratches and give a clean look. Take your time for a perfect finish.

Credit: www.mobilestairlift.com
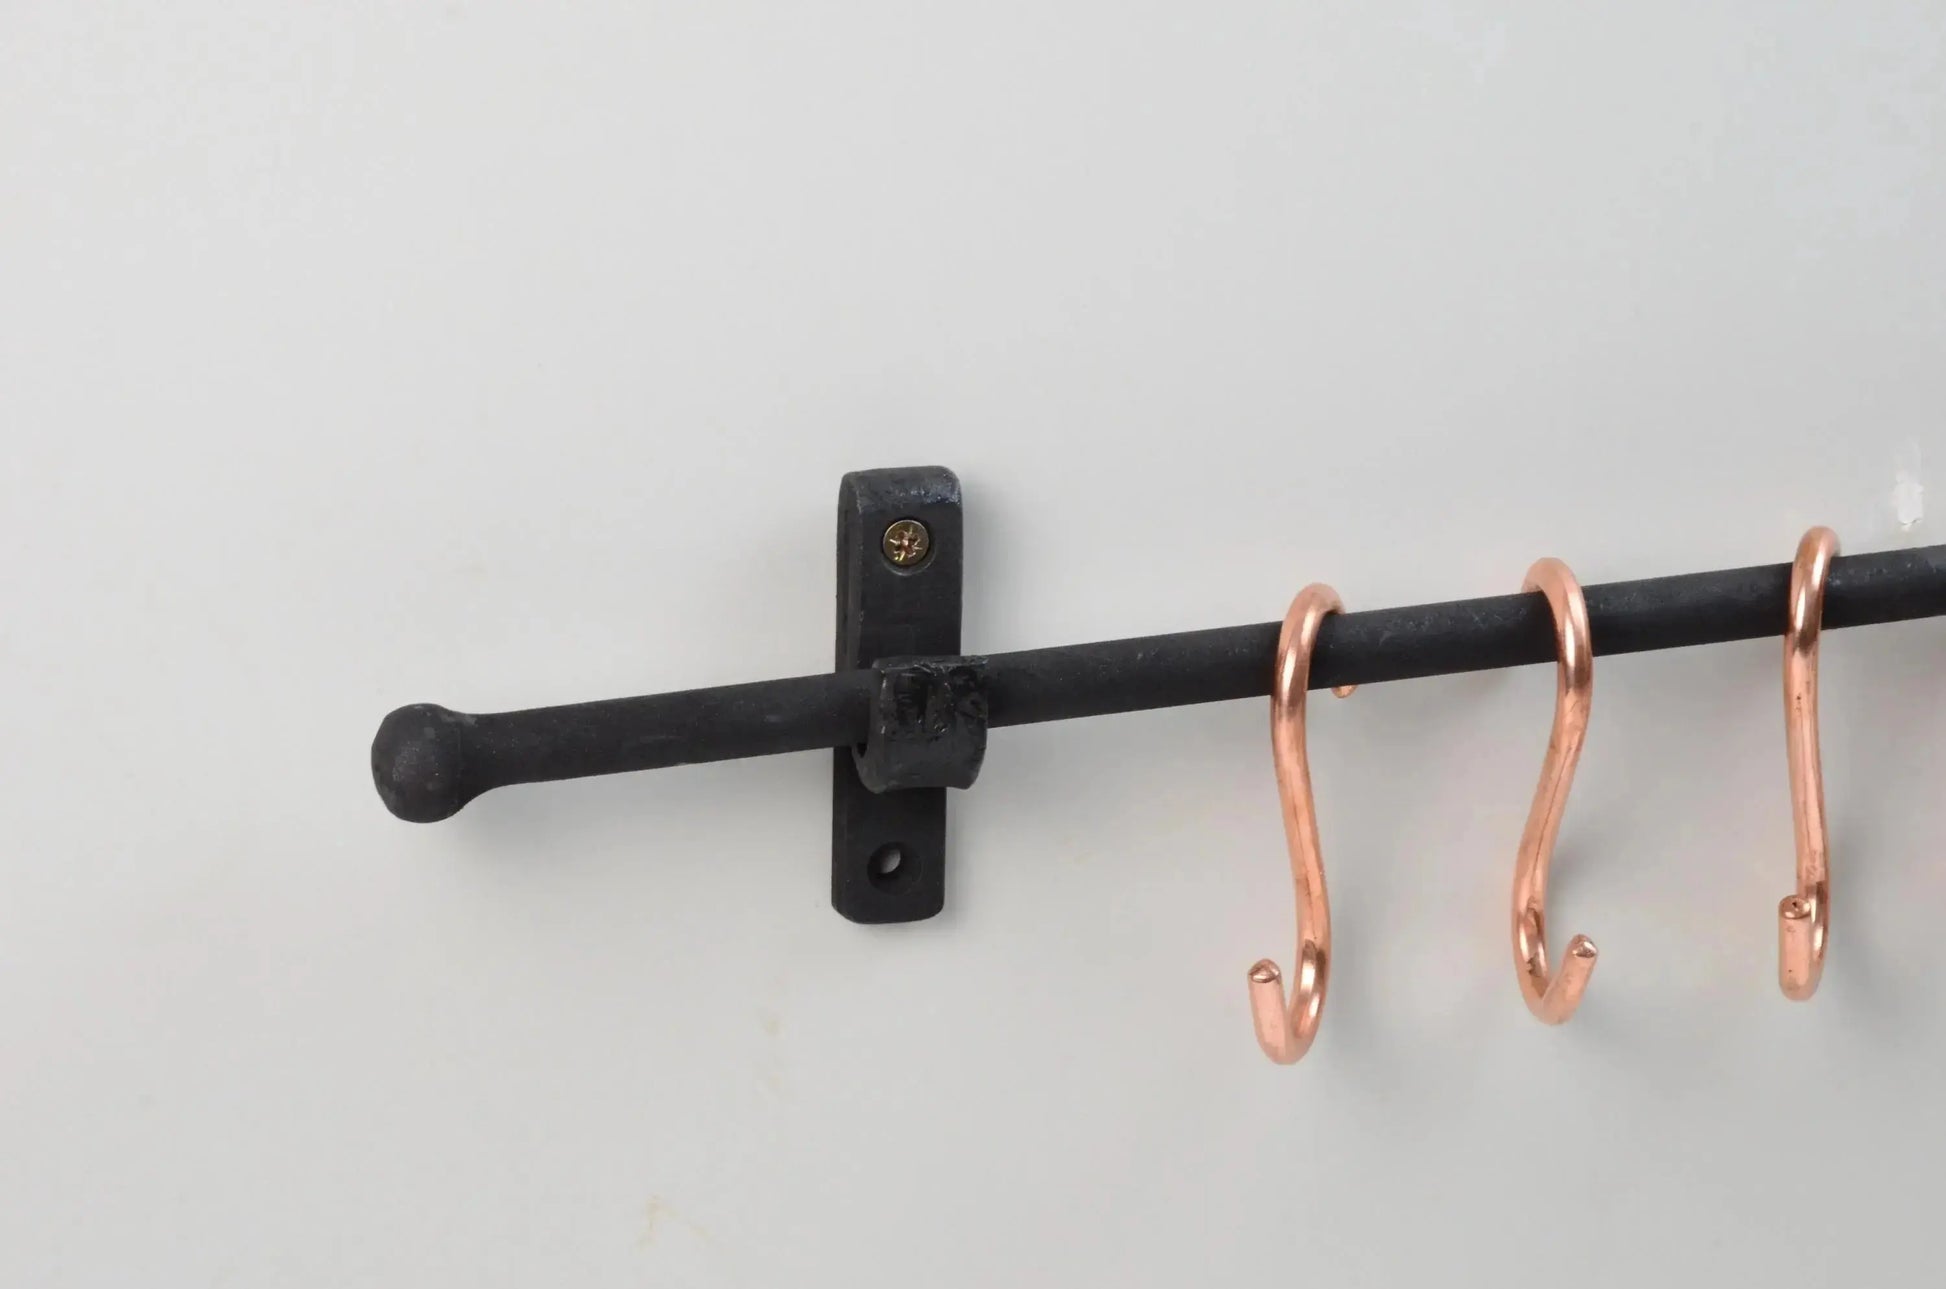
Assembling The Hooks
Assembling the hooks is a key step in making your Wall Hook Atlas. This part brings your design to life and ensures the hooks hold items securely. Follow clear steps to attach hooks firmly and safely.
Attaching Hooks To Base
Start by placing each hook on the base. Align hooks evenly for a neat look. Mark the spots where screws or glue will go. This helps keep hooks steady and balanced.
Using Screws And Adhesives
Use screws to fasten hooks strongly. Choose screws that fit the hook holes well. If you prefer glue, pick a strong adhesive made for wood or metal. Apply glue carefully to avoid mess. Let glue dry fully before use.
Ensuring Stability
Check each hook by gently pulling it. Hooks should not move or wiggle. Add more screws or glue if needed. Make sure the base itself is sturdy and ready to mount on the wall.
Finishing Touches
Finishing touches make your wall hook atlas look complete and strong. These final steps protect the wood and add style. Proper finishing also helps the hook last longer on your wall.
Applying Paint Or Stain
Choose paint or stain to match your room’s color. Paint gives bright, solid color. Stain shows the wood’s natural grain. Use a brush or cloth for even coverage. Let it dry fully before the next step.
Sealing For Durability
Sealing protects the wood from water and scratches. Use clear varnish or polyurethane. Apply thin, even coats with a brush. Allow each coat to dry well. This step keeps your hook strong over time.
Adding Decorative Elements
Add small decorations to make your hook unique. Try metal accents, stickers, or small carvings. Keep decorations simple to avoid clutter. This makes your wall hook atlas both useful and beautiful.
Mounting Your Wall Hook Atlas
Maintaining and caring for your wall hook atlas keeps it strong and attractive. Regular care helps the hook last longer and stay useful. Simple steps can prevent damage and wear. Follow these tips to keep your wall hook atlas in great shape.
Cleaning Tips
Dust the wall hook atlas with a soft cloth often. Use a damp cloth for tougher dirt. Avoid harsh chemicals that can damage the surface. Dry the hook well after cleaning to stop rust or water marks. Clean gently to keep the finish smooth and neat.
Repairing Minor Damages
Small scratches and chips can be fixed quickly. Use fine sandpaper to smooth rough spots. Apply a matching paint or finish to cover marks. For loose hooks, tighten screws or nails carefully. Repairing early stops bigger problems later.
Refreshing Finish Over Time
The finish on the wall hook atlas fades with time. Apply a fresh coat of paint or sealant to renew it. Choose a finish that matches the original look. Let the surface dry completely before use. Refreshing the finish keeps the hook looking new and strong.
Frequently Asked Questions
What Materials Are Needed To Make Wall Hook Atlas?
You need wood or metal for the hook base, strong adhesive or screws, and decorative elements like paint or labels. A drill and measuring tools help ensure precise installation and durability of your Wall Hook Atlas.
How Do I Design A Wall Hook Atlas?
Start by sketching a layout of hooks representing locations or themes. Use creative labels or icons for each hook, making the design both functional and visually appealing for easy organization.
Can Wall Hook Atlas Be Customized?
Yes, Wall Hook Atlas is highly customizable. You can choose colors, shapes, and hook styles to match your decor. Personalizing labels or adding unique symbols enhances its usability and aesthetic value.
How To Install Wall Hook Atlas Securely?
Locate wall studs or use anchors for heavy items. Mark hook positions carefully, drill pilot holes, and attach hooks firmly. Proper installation ensures stability and prevents damage to walls and items hung.
Conclusion
Making a wall hook Atlas is simple and fun. You only need a few tools and materials. Follow the steps carefully to get the best results. This project adds style and function to your space. It also gives you a chance to be creative.
Try different designs to match your room. Enjoy the process and the final product. You can proudly hang your keys or bags on it. Start today and see how easy it is to make your own wall hook Atlas.


