Are you struggling to figure out the perfect way to space hooks on your wall? Getting the spacing right can make a huge difference in how your space looks and feels.
Whether you’re hanging artwork, organizing your kitchen tools, or creating a stylish coat rack, knowing exactly where to place each hook will save you time and frustration. You’ll discover simple, practical tips that anyone can use to space hooks evenly and beautifully.
Keep reading, and soon your walls will look organized, balanced, and ready to impress.
Credit: maiamidwifery.com
Choosing The Right Hooks
Choosing the right hooks for your wall is important. The right hooks keep your items safe and your space neat. Not all hooks work for every wall or item. You need to think about the type, weight, and material of the hooks. This helps you find the best hooks for your needs.
Types Of Wall Hooks
Wall hooks come in many shapes and sizes. Some hooks are simple nails or screws. Others are decorative and add style to your room. There are adhesive hooks that stick without drilling. Heavy-duty hooks hold large or heavy items. Choose hooks that match the look and use of your space.
Weight Capacity Considerations
Each hook has a weight limit. Hanging heavy items on weak hooks can cause damage. Check the weight rating before buying hooks. Use stronger hooks for coats, bags, or tools. Light hooks work well for keys or small decorations. Match the hook strength to the item weight.
Material And Finish Options
Hooks come in metal, plastic, wood, and more. Metal hooks are strong and last long. Plastic hooks are light and easy to install. Wood hooks add a warm, natural look. Finishes like chrome, brass, or paint protect hooks. Choose a finish that fits your room style and resists rust or wear.
Preparing The Wall Surface
Preparing the wall surface is the first step to space hooks correctly. A clean, smooth, and solid wall helps hooks stay strong and last longer. Taking time to prepare the wall saves problems later. Follow these steps for the best results.
Cleaning And Smoothing
Remove dust, dirt, and grease from the wall. Use a damp cloth or mild cleaner. Let the wall dry completely before moving on. Check for bumps or rough spots. Lightly sand these areas for a smooth surface. A smooth wall allows hooks to stick or screw in better.
Checking Wall Material
Identify what type of wall you have. Common materials include drywall, plaster, brick, or concrete. Different walls need different hooks and anchors. Knowing the wall type helps choose the right tools. It also prevents damage when installing hooks.
Identifying Studs And Anchors
Locate wall studs using a stud finder or tapping method. Studs provide strong support for heavy hooks. Mark the stud positions with a pencil. Use anchors when hooks must go into drywall without studs. Anchors keep hooks secure and prevent falling. Proper support ensures hooks hold weight safely.
Measuring For Hook Placement
Measuring for hook placement is the first step to hang items neatly. It ensures hooks are spaced right and look balanced on your wall. Taking time to measure helps avoid mistakes and keeps your wall damage-free.
Clear measurements also make your hooks strong enough to hold the weight. Let’s break down how to measure correctly before drilling or hammering.
Tools You’ll Need
Gather a tape measure or ruler for exact lengths. A pencil or chalk helps mark spots on the wall. Use a level to keep hooks straight. A stud finder is useful for heavy items. These tools make measuring easier and precise.
Marking Accurate Positions
Start by marking where the top of your item will hang. Use your tape measure to find the center point. Mark this spot lightly with a pencil. Check marks with a level to keep them even. Double-check before drilling to avoid mistakes.
Spacing Based On Item Size
Small items need hooks closer together. Large or heavy items need wider spacing for support. Measure the width of your item. Divide by two for balanced hook placement. Leave extra space if hooks have large bases. Proper spacing prevents damage and keeps items secure.
Spacing Techniques For Different Uses
Spacing hooks on a wall depends on their use. Different items need different spacing for balance and function.
Proper spacing makes your wall look neat and helps hooks hold items securely. Below are simple techniques for common uses.
Hooks For Coats And Bags
Space hooks about 6 to 8 inches apart. This distance allows coats and bags to hang without overlapping. Place hooks at eye level or slightly higher. It makes reaching easier. Use sturdy hooks to hold heavy items.
Hooks For Picture Frames
Picture hooks need closer spacing. Keep them 2 to 4 inches apart depending on frame size. This helps distribute weight evenly. Measure the frame width first. Align hooks to keep pictures straight and stable.
Hooks For Decorative Items
Decorative hooks depend on the item’s size and style. Space them 4 to 6 inches apart for small items. Larger pieces might need 8 to 10 inches. Aim for a balanced look. Arrange hooks in patterns if desired.
Installing Hooks Securely
Installing hooks securely is key to keeping your items safe and your walls intact. Proper installation prevents hooks from falling or causing damage. Taking a few careful steps can make a big difference in durability and appearance.
Using Anchors And Screws
Choose anchors that fit your wall type. Drywall anchors work well for light to medium loads. For heavier items, use toggle bolts or molly bolts. Drill a hole slightly smaller than the anchor. Push the anchor into the hole until it is flush with the wall. Then, screw the hook into the anchor firmly. This method gives strong support and prevents hooks from loosening over time.
Avoiding Wall Damage
Mark hook positions before drilling. Use a level to keep hooks straight. Avoid drilling near wall studs or electrical wiring. Use a stud finder to check. Drill slowly to prevent cracking or chipping. If you make a mistake, fill the hole with spackle and sand it smooth. Taking these steps protects your wall’s surface and keeps it looking neat.
Double-checking Alignment
Measure the space between hooks carefully. Use a tape measure or ruler for accuracy. Mark each spot lightly with a pencil. Check the marks with a level to ensure they line up. Installing hooks in a straight line looks better and helps balance weight. This step saves time and effort by preventing uneven placement.
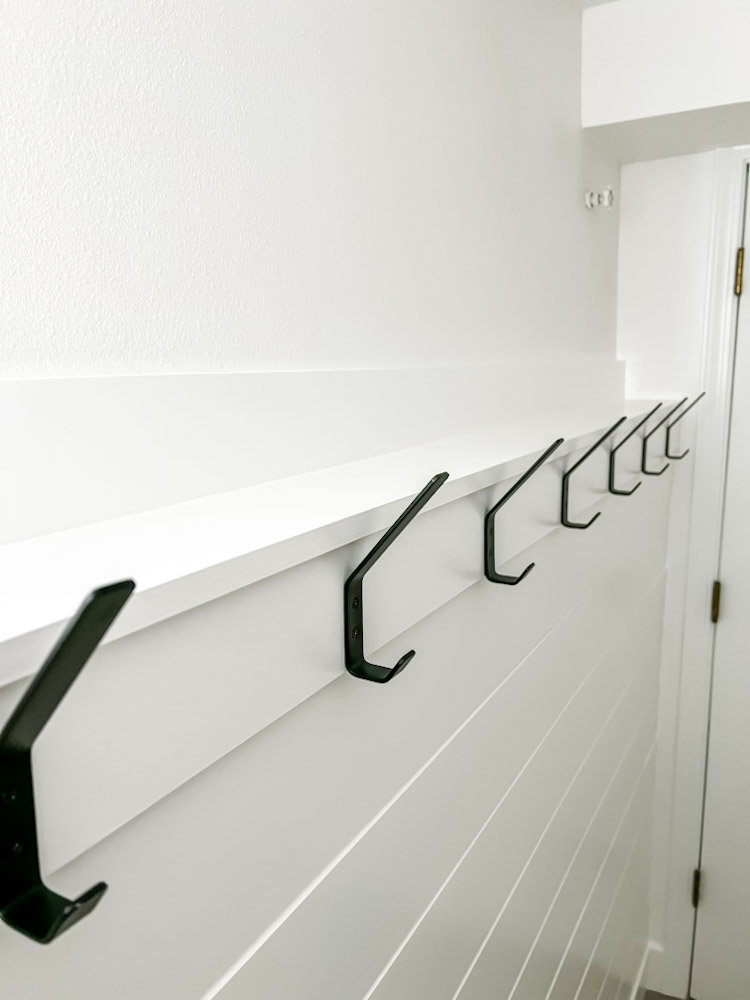
Credit: smallishhome.com
Creative Hook Arrangements
Creative hook arrangements can make your walls both useful and beautiful. They help organize items while adding style to your space. Choosing the right pattern and style changes how your room feels. Small changes can create big visual impact. Experimenting with different layouts helps find the best look for you.
Hooks do more than hold things. They can decorate your walls in unique ways. With smart spacing and design, hooks become part of your home’s art. Let’s explore some ideas to arrange hooks creatively.
Symmetrical Vs. Asymmetrical Layouts
Symmetrical layouts place hooks evenly on both sides. This creates a clean, balanced look. It suits formal or simple spaces well. Asymmetrical layouts use uneven spacing and different hook heights. This style feels more relaxed and dynamic. It works in creative or casual rooms. Choose symmetry for order. Pick asymmetry for fun and movement.
Mixing Hook Styles
Combine different hook shapes and sizes for interest. Round hooks, square hooks, and decorative ones can all mix well. Use a few styles instead of many. This keeps the look neat and clear. Mixing materials like wood and metal adds texture. Match colors to your room’s palette. This blend makes your wall feel unique and lively.
Incorporating Hooks Into Wall Art
Hooks can become part of your wall art design. Arrange them around paintings or photos for a layered look. Use hooks to hang small decorative items between artworks. This adds depth and function to your walls. Hooks shaped like leaves or animals can act as art themselves. This idea turns storage into a creative display.
Maintaining Hook Placement
Maintaining hook placement on your wall keeps your space tidy and functional. Proper care ensures hooks stay strong and useful over time. Simple steps help avoid damage and keep hooks in the right spots. Focus on how to adjust, inspect, and replace hooks as needed.
Adjusting For Heavy Use
Hooks used often need stronger support. Move hooks closer together to share weight. Use larger hooks for heavier items. Check wall type before adding more hooks. Spreading weight prevents damage and keeps hooks steady.
Regular Inspection Tips
Check hooks at least once a month. Look for loose screws or cracks in walls. Tighten screws to keep hooks secure. Remove dirt or dust around hooks. Early fixes stop bigger problems later.
Replacing And Upgrading Hooks
Replace hooks that bend or break quickly. Choose hooks made of metal or strong plastic. Upgrade to hooks with better weight ratings. Match hook style to your room’s look. Proper hooks last longer and hold items safely.

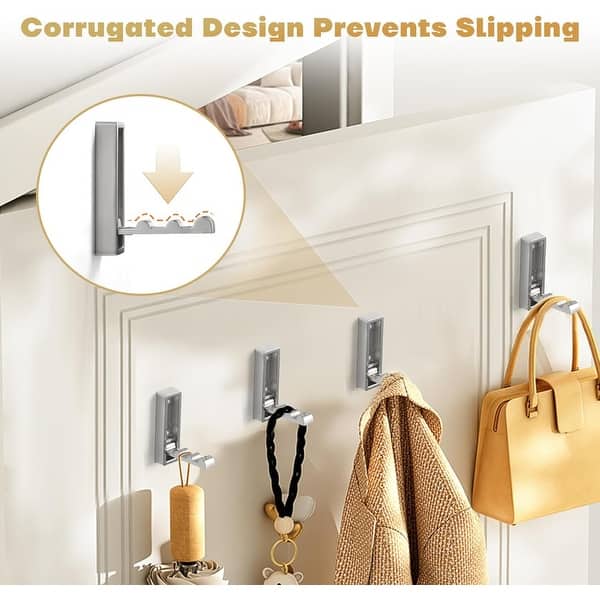
Credit: www.amazon.com
Frequently Asked Questions
How Far Apart Should Hooks Be Spaced On A Wall?
Hooks should be spaced 6 to 12 inches apart for balance. This spacing supports weight evenly and looks visually appealing. Adjust spacing based on hook size and items hung. Proper spacing prevents overcrowding and wall damage.
What Tools Help Measure Hook Spacing Accurately?
Use a tape measure and level to space hooks precisely. A pencil marks spots before drilling. A stud finder ensures secure placement on wall studs. These tools ensure hooks are evenly aligned and stable.
Can Hook Spacing Vary By Wall Type?
Yes, spacing depends on wall material and hook weight. Drywall may require anchors and wider spacing. Solid walls like brick allow closer hook placement. Always consider wall strength for safe hook installation.
How To Space Hooks For Hanging Heavy Items?
Space hooks further apart to distribute heavy weight safely. Use wall anchors and find studs for secure support. Closer hooks risk wall damage and item instability. Proper spacing ensures durability and safety.
Conclusion
Spacing hooks on your wall helps keep things neat and easy to reach. Measure the space before you drill to avoid mistakes. Use a level to make sure hooks stay straight and even. Remember to consider the size and weight of items you will hang.
Proper spacing also adds a tidy look to your room. Take your time and plan well for the best results. This simple step makes a big difference in organizing your space.


