Are you struggling to secure your gate to an inside wall and want a simple, reliable way to do it right? Anchoring a gate properly is key to keeping it sturdy, safe, and long-lasting.
In this guide, you’ll discover easy-to-follow steps that anyone can use—no special tools or skills needed. By the time you finish reading, you’ll feel confident tackling this project yourself and avoid common mistakes that can weaken your gate’s support. Ready to make your gate strong and secure?
Let’s get started!

Credit: www.rickandanns.com
Choosing The Right Gate And Wall
Choosing the right gate and wall is key to a secure and lasting installation. The gate must match the wall type and space available. The wall must be strong enough to hold the gate firmly. Both factors affect the gate’s function and safety.
Types Of Gates Suitable For Inside Walls
Wooden gates work well with most inside walls. They are light and easy to fix. Metal gates suit walls that can hold heavier weight. They offer strong security and last long. Vinyl gates are low maintenance and resist weather. Choose a gate size that fits the wall space. Keep the gate’s style simple for easy installation.
Assessing Wall Material And Condition
Check if the wall is brick, concrete, or drywall. Brick and concrete walls are best for heavy gates. Drywall is weak and needs extra support. Look for cracks or damage before fixing the gate. Strong walls keep the gate stable. Repair any damage to avoid future problems. Test the wall’s firmness by tapping or pushing gently.
Tools And Materials Needed
Anchoring a gate to an inside wall requires the right tools and materials. Choosing proper hardware and tools ensures a strong and lasting hold. Preparing these items before starting makes the installation smooth and safe.
Essential Hardware For Anchoring
- Heavy-duty gate hinges
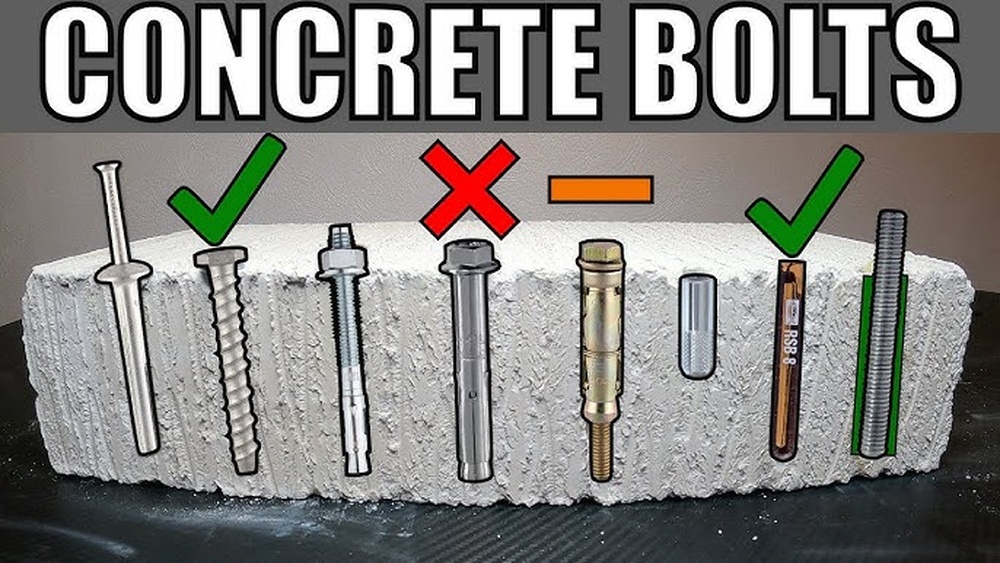
- Anchor bolts or masonry screws
- Washers and nuts
- Gate latch or lock
- Metal or wooden gate frame
- Concrete or brick anchors (for masonry walls)
- Wall plugs or anchors (for drywall or hollow walls)
Recommended Tools For Installation
- Power drill with masonry bits
- Socket wrench or spanner set
- Measuring tape
- Level
- Screwdriver set
- Pencil or marker for marking
- Hammer
Preparing The Wall And Gate
Preparing the wall and gate is the first step to secure your gate properly. It ensures stability and safety. Taking time to prepare helps avoid future problems. This stage sets the foundation for successful installation.
Measuring And Marking Anchor Points
Start by measuring the gate’s height and width. Check the wall where you want to fix the gate. Mark the spots where the gate hinges will attach. Use a pencil and a level for accuracy. Mark both the wall and the gate. Double-check the measurements before drilling.
Cleaning And Prepping Surfaces
Clear dust, dirt, and grease from the wall and gate areas. Use a brush or cloth to clean well. Roughen smooth surfaces with sandpaper for better grip. Ensure the wall is dry before drilling holes. This helps anchors hold tightly. A clean surface means a strong and lasting fit.
Installing The Anchors
Installing the anchors is a key step in securing a gate to an inside wall. Proper anchor installation ensures the gate stays firmly in place. This process involves precise drilling and firmly securing the anchors. Follow these steps carefully for a safe and strong hold.
Drilling Holes Safely
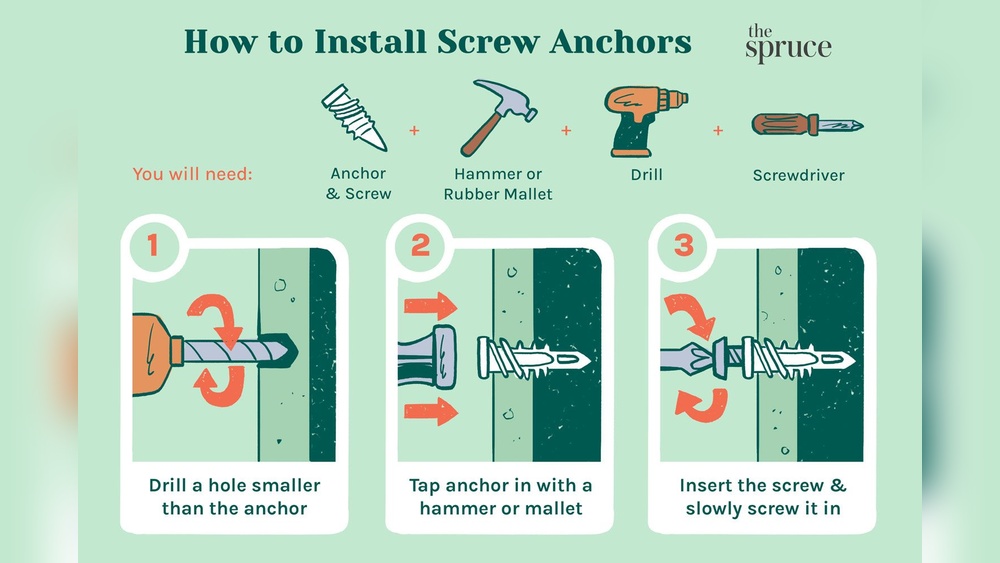
Choose the right drill bit for your wall material. Mark the exact spots for drilling. Wear safety goggles to protect your eyes from dust and debris. Use a steady hand to drill straight holes. Avoid drilling too deep or wide. Clean out dust from each hole before moving on.
Securing Anchors To The Wall
Insert the anchors gently into the drilled holes. Tap them lightly with a hammer if needed. Make sure anchors fit snugly without wobbling. Use screws that match the anchor size for best grip. Tighten screws slowly to avoid damaging the wall. Check the anchor’s firmness by giving it a small pull.
Attaching The Gate Hinges
Attaching the gate hinges is a key step in securing your gate to an inside wall. Proper hinge attachment ensures smooth gate movement and long-lasting support. Taking time to position and fix the hinges correctly prevents damage and keeps the gate stable.
Positioning Hinges Correctly
Place the hinges evenly along the gate’s vertical side. Usually, one hinge goes near the top, one near the bottom. Add a third hinge in the middle for extra support if the gate is heavy. Align hinges so the gate will swing freely without scraping the wall or ground. Use a level to check hinge placement for straight, smooth operation.
Fixing Hinges To Gate And Wall
Attach hinges to the gate first. Use screws that fit the hinge holes tightly. Drill pilot holes to avoid splitting the wood or material. Next, hold the gate in place against the wall. Mark the wall where hinge screws will go. Use strong wall anchors or bolts suitable for the wall material. Secure the hinges firmly to the wall. Test the gate swing to ensure it opens and closes easily.

Credit: www.amazon.com
Testing Gate Stability
Testing gate stability is a key step after anchoring a gate to an inside wall. It ensures the gate stays secure and works properly over time. Checking stability helps avoid damage and keeps the gate safe for daily use. This process involves observing how the gate aligns and moves, then making adjustments as needed.
Checking Alignment And Movement
Start by opening and closing the gate slowly. Watch if the gate swings evenly without wobbling. Check if the gate lines up with the wall and latch correctly. Look for gaps or uneven spaces between the gate and the wall. Notice any resistance or sticking points while moving the gate.
Test the gate from different angles. This helps spot any tilting or uneven pressure. Make sure the gate does not drag on the floor or frame. Proper alignment means less wear and longer gate life.
Adjusting For Smooth Operation
If the gate does not move smoothly, make small adjustments. Tighten or loosen the bolts holding the gate hinges. Shift the gate slightly to correct any misalignment. Use a level tool to check if the gate is straight.
Lubricate the hinges if the gate feels stiff. Repeat the opening and closing test after each adjustment. Keep adjusting until the gate moves freely without wobbling or sticking. Smooth operation ensures better safety and comfort.
Maintenance Tips For Longevity
Keeping your gate firmly anchored to an inside wall is just the start. Regular care helps it last longer and work better every day. Simple maintenance steps prevent damage and keep the gate safe and strong for years.
Regular Inspection And Tightening
Check the gate and its anchor points often. Look for loose screws, bolts, or hinges. Tighten any parts that feel wobbly or loose. This stops the gate from sagging or falling over time. Early fixes save bigger repairs later.
Protecting Against Weather Damage
Weather can harm your gate and wall anchor. Rain, sun, and wind wear down materials. Use weather-resistant paint or sealant on metal and wood parts. Cover the gate during heavy storms or snow. These steps stop rust, rot, and cracks from forming.
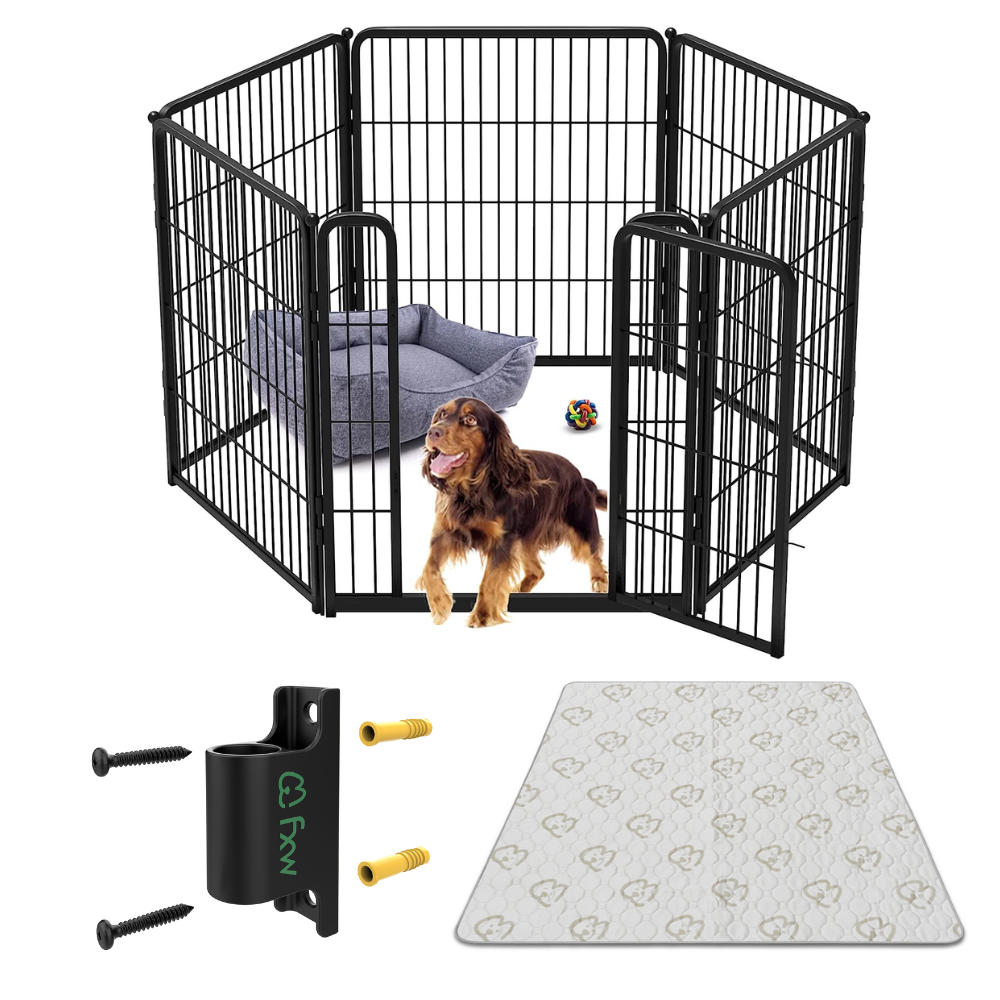
Credit: fxw.life
Frequently Asked Questions
How Do You Prepare A Wall For Gate Anchoring?
Clean the wall surface thoroughly. Remove dirt, dust, or loose materials. Mark the exact spot for the gate hinge. Use a level to ensure alignment. Proper preparation ensures a strong, stable gate installation.
What Tools Are Needed To Anchor A Gate To An Inside Wall?
You need a drill, masonry bits, screws, anchors, a wrench, and a level. These tools ensure precise drilling and secure attachment of the gate to the wall.
Which Anchors Work Best For Securing A Gate To A Wall?
Heavy-duty expansion anchors or sleeve anchors work best. They provide strong grip in concrete or brick walls. Choose anchors rated for the gate’s weight for safety and durability.
How To Ensure The Gate Is Level When Anchored?
Use a spirit level to check horizontal and vertical alignment. Adjust hinge position before tightening screws. Proper leveling prevents gate sagging and ensures smooth operation.
Conclusion
Anchoring a gate to an inside wall keeps it stable and secure. Use strong materials and follow clear steps for best results. Measure carefully before drilling to avoid mistakes. Tighten all screws firmly to ensure safety. Regularly check the gate for any loose parts.
This simple process helps your gate last longer and work better. With patience and care, you can complete the task easily. A well-anchored gate adds both function and style to your space.