Have you ever wondered how to safely disconnect an outlet from a light switch? It might seem tricky at first, but with the right steps, you can handle it yourself without stress.
Imagine the freedom of controlling your lighting exactly how you want or fixing wiring issues in your home easily. You’ll discover simple, clear instructions that anyone can follow—even if you’re not an expert. Keep reading, and by the end, you’ll feel confident tackling this task on your own.
Tools And Materials Needed
Before starting to disconnect an outlet from a light switch, gather all necessary tools and materials. Having the right items ready ensures a smooth and safe process. It helps avoid interruptions and mistakes while working with electrical parts.
Each tool has a specific role. Using the correct tool makes the task easier and safer. Below is a list of what you will need.
Safety Gear
Safety gear protects you from electric shocks and injuries. Use insulated gloves to avoid electric shock. Safety glasses protect your eyes from dust and debris. Wear shoes with rubber soles for extra protection.
Screwdrivers
You need a flathead and a Phillips screwdriver. These help remove outlet and switch covers. They also loosen and tighten screws holding wires. Choose screwdrivers with insulated handles for safety.
Voltage Tester
A voltage tester checks if power is off. It prevents accidents by confirming no electricity flows. Use a non-contact voltage tester for easy and safe testing. Test all wires before touching them.
Wire Strippers And Cutters
Wire strippers remove insulation from wires. They prepare wires for connection or disconnection. Wire cutters help trim wires to the right length. Both tools are essential for neat and safe work.
Electrical Tape And Wire Nuts
Electrical tape insulates exposed wires after disconnection. Wire nuts secure wire ends to prevent shorts or sparks. Use these materials to ensure safe and proper wire handling.
Safety Precautions
Safety is the top priority when disconnecting an outlet from a light switch. Electricity can cause serious harm or even death. Taking the right safety steps protects you and your home.
Understanding the risks and preparing properly makes the task safer and easier. Follow clear safety rules before starting any electrical work.
Always switch off the circuit breaker that controls the outlet and switch. Test the outlet with a voltage tester. Confirm no electricity flows before touching wires.
Use Insulated Tools
Choose tools with insulated handles. They prevent electric shocks. Avoid using metal tools without insulation during electrical work.
Wear Safety Gear
Wear rubber-soled shoes and safety gloves. These reduce the chance of electric shock. Avoid working in wet or damp conditions.
Work In A Well-lit Area
Good lighting helps you see wires clearly. It reduces mistakes. Use a flashlight or portable lamp if the room is dark.
Follow Local Electrical Codes
Check local rules and regulations before starting. Proper wiring follows safety standards. This prevents hazards and ensures the work is legal.
Identify The Wiring Setup
Identifying the wiring setup is the first step to safely disconnect an outlet from a light switch. Understanding how the wires connect helps avoid mistakes and electrical hazards. This section explains how to recognize the wiring system in your home.
Always switch off the circuit breaker before working on any wiring. This prevents shocks and injuries. Use a voltage tester to confirm the power is off at the outlet and switch.
Open The Outlet And Switch Covers
Remove the faceplates from the outlet and switch. Use a screwdriver to take out the screws. Gently pull the devices out to see the wires behind them.
Identify Wire Colors And Functions
Look for black, white, and green or bare copper wires. Black wires usually carry power. White wires are neutral. Green or bare wires connect to the ground.
Check For Shared Wiring
Some outlets share wiring with the light switch. Notice if black wires link both devices. This shows the switch controls the outlet’s power.
Use A Wiring Diagram
Compare your setup with a simple wiring diagram. This helps understand the connections. Wiring diagrams are available online or in electrical guides.
Mark The Wires
Label each wire with tape and a marker. This keeps track of where each wire goes. Marking wires makes the reconnection easier later.
Turn Off The Power
Turning off the power is the first and most important step before disconnecting an outlet from a light switch. This step keeps you safe from electric shock. It also prevents damage to your electrical system. Always treat electricity with respect and caution.
Power must be completely off before touching any wires or outlets. Even a small current can cause harm. Use the right tools and follow safety rules closely.
Locate The Circuit Breaker
Find the circuit breaker box in your home. It is usually in the basement, garage, or utility room. Open the box carefully. Look for the breaker labeled for the area with the outlet and switch. If there is no label, check each breaker one by one.
Switch Off The Correct Breaker
Flip the correct breaker to the OFF position. This stops electricity from flowing to the outlet and switch. Double-check by turning on the light or plugging in a device. There should be no power.
Use A Voltage Tester
Before touching any wires, test the outlet with a voltage tester. This tool confirms the power is off. Touch the tester to the wires or terminals. No light or sound means the power is off. If the tester shows power, switch off the breaker again and test once more.
Remove The Outlet Cover And Switch Plate
Removing the outlet cover and switch plate is the first step in disconnecting an outlet from a light switch. This step reveals the wiring behind the wall. It allows safe access to the electrical connections.
Take your time to do this carefully. Proper removal prevents damage to the wall or the electrical components. Always ensure the power is off before starting.
Gather The Right Tools
Use a flathead or Phillips screwdriver. Check the type of screws on the cover and plate. Having the right tool makes the process smoother and safer.
Switch off the circuit breaker for the area you work on. Test the outlet and switch to confirm no power is flowing. This step is vital for safety.
Remove The Outlet Cover
Unscrew the screws holding the outlet cover. Keep the screws safe for reinstallation. Gently pull the cover away from the wall without forcing it.
Remove The Switch Plate
Use the screwdriver to remove screws from the switch plate. Carefully lift the plate off the wall. Avoid touching any wires directly.

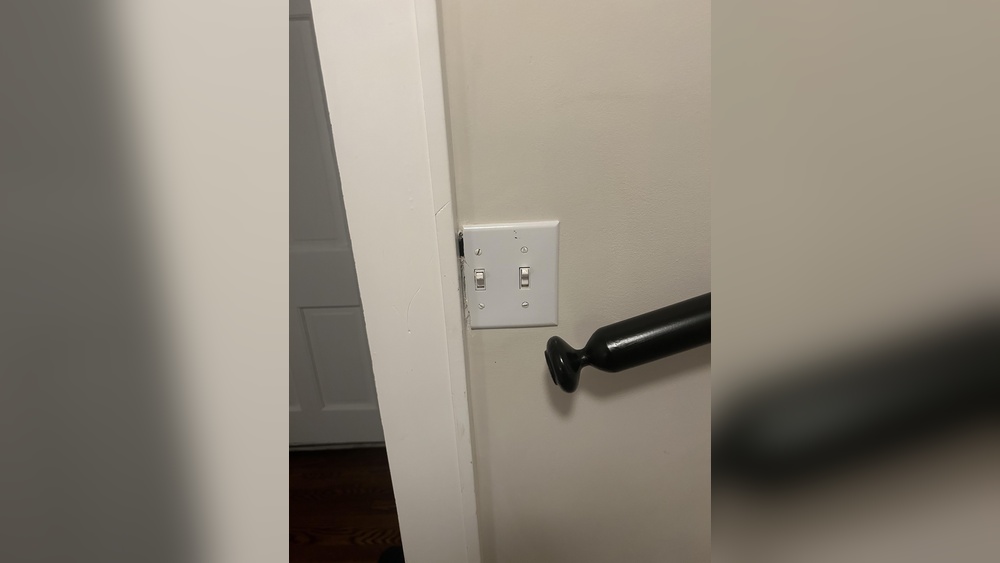
Credit: www.reddit.com
Disconnect The Outlet Wiring
Disconnecting the outlet wiring is a key step when separating an outlet from a light switch. It helps to control each device independently and improves safety during electrical work. This process requires careful handling of wires and understanding their connections.
Before starting, ensure the power is turned off at the circuit breaker. Use a voltage tester to confirm no electricity flows to the outlet. Safety first.
Remove The Outlet Cover Plate
Unscrew the outlet cover plate using a screwdriver. This exposes the outlet and wiring inside the wall. Keep the screws in a safe place for later use.
Identify The Wires Connected To The Outlet
Look inside the outlet box and note the wires attached to the outlet terminals. Typically, black or red wires are hot, white wires are neutral, and green or bare wires are ground. Recognize these to avoid mistakes.
Loosen The Terminal Screws
Use a screwdriver to loosen the screws holding the wires on the outlet. Do not remove the screws completely. This step frees the wires without damaging them.
Disconnect The Wires From The Outlet
Carefully pull the wires away from the outlet terminals. Keep the wires straight and avoid bending them. Handle each wire gently to prevent damage.
Cap The Wires For Safety
Place wire nuts on the exposed wire ends to prevent accidental contact. Twist the wire nuts securely to cover all copper. This step ensures no live wires are exposed.
Cap And Secure The Wires
After disconnecting an outlet from a light switch, capping and securing the wires is crucial. This step keeps your home safe and prevents electrical hazards. Properly capped wires avoid accidental contact and short circuits.
Always use wire nuts designed for electrical work. They create a tight seal and stop wires from touching each other or metal parts.
Turn Off The Power Supply
Before touching any wires, switch off the power at the breaker box. Test the outlet or switch with a voltage tester to confirm no electricity flows. Safety first.
Separate The Wires Carefully
Gently pull the wires apart, making sure they do not touch each other. Keep the wires straight and neat. This makes capping easier and safer.
Choose The Right Wire Nuts
Select wire nuts that fit the wire size and number. Too small or too large nuts can cause loose connections. Check the package for wire compatibility.
Cap Each Wire Securely
Place a wire nut on the end of each wire. Twist the nut clockwise until tight. Tug lightly to check it stays in place. No loose wires allowed.
Tape For Extra Safety
Wrap electrical tape around each capped wire and nut. This adds extra protection and keeps the nut from loosening. It also insulates the connection well.
Push Wires Back Into The Box
Carefully push the capped wires into the electrical box. Avoid bending or stressing the wires. Close the box cover securely after.

Credit: www.reddit.com
Reassemble The Switch And Outlet
Reassembling the switch and outlet is the final step after disconnecting the outlet from the light switch. This step ensures safety and restores functionality. Take your time to put everything back correctly.
Handle each part carefully. Loose connections can cause problems later. Follow the steps below to reassemble the switch and outlet safely and properly.
Reattach The Switch To The Electrical Box
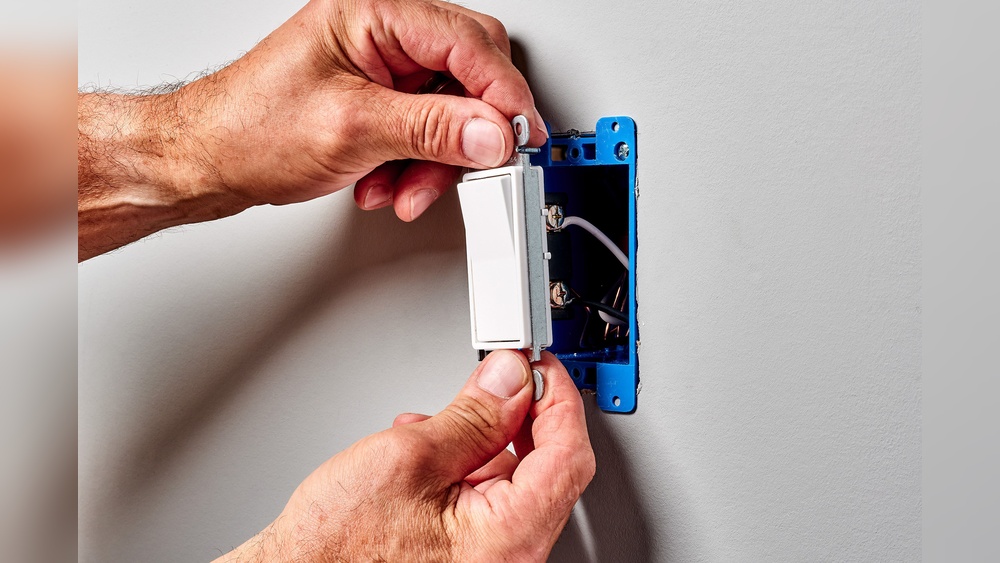
Start by placing the switch back into the electrical box. Align the screw holes with the box holes. Use a screwdriver to tighten the screws securely. Do not overtighten, or you may damage the switch.
Secure The Outlet In Place
Next, push the outlet gently back into the box. Align it so the screw holes match. Tighten the screws to hold the outlet firmly. Ensure the outlet sits flush with the wall.
Replace The Cover Plates
Put the cover plates over the switch and outlet. Line up the screw holes carefully. Screw the plates into place using a small screwdriver. This step protects the wiring and gives a finished look.
Turn the power back on at the breaker. Use a tester or plug in a device to check the outlet. Flip the switch to ensure it works properly. Confirm that both switch and outlet function safely.
Test The Outlet And Switch
Testing the outlet and switch is a key step before disconnecting them. This ensures safety and confirms the electrical parts work properly. Testing helps avoid shocks and electrical issues during the process.
Use the right tools and follow simple steps to check both devices. This step saves time and prevents damage to your wiring or devices.
Use A Voltage Tester
Start with a voltage tester to check power at the outlet. Touch the tester probes to the outlet slots carefully. The tester will light up or beep if power is present. This confirms the outlet has electricity flowing.
Check The Switch Position
Turn the switch on and off to see if it controls the outlet. The outlet should lose power when the switch is off. This shows the switch controls the outlet as expected.
Test Outlet With A Device
Plug a small device, like a lamp, into the outlet. Turn the switch on and off to check if the device powers on. This confirms the outlet and switch work together correctly.
Turn Off Power Before Disconnecting
After testing, switch off the circuit breaker or fuse for safety. Use the voltage tester again to make sure the power is off. Never disconnect wires with the power on.
Troubleshooting Common Issues
Troubleshooting common issues helps solve problems fast. Disconnecting an outlet from a light switch can cause some challenges. Knowing what to check saves time and effort. This section covers typical problems and how to fix them.
Checking For Power Supply Issues
First, ensure power is off before starting work. Use a voltage tester to confirm no electricity flows. Sometimes, the circuit breaker may trip without notice. Reset the breaker if needed and test the outlet again. Power problems are a common cause of failure.
Inspecting Wiring Connections
Loose or wrong wiring causes many issues. Look for wires that are not tightly connected. Make sure the black (hot) wire goes to the switch terminal. The white (neutral) wire should bypass the switch and connect directly to the outlet. Incorrect wiring stops the outlet from working properly.
Testing The Light Switch Functionality
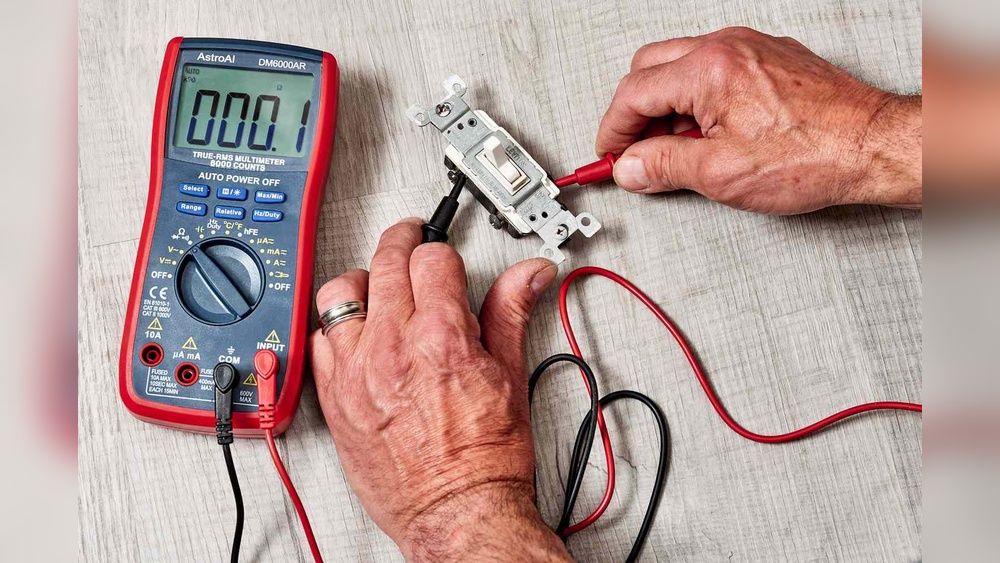
The switch itself can be faulty. Turn off power and remove the switch cover. Use a multimeter to check continuity. If the switch does not open and close the circuit correctly, replace it. A bad switch can cause the outlet to stay on or off.
Examining The Outlet For Damage
Outlets wear out over time. Look for cracks, burn marks, or loose parts. A damaged outlet may not work safely. Replace any outlet that looks worn or broken. Good condition outlets ensure safety and function.

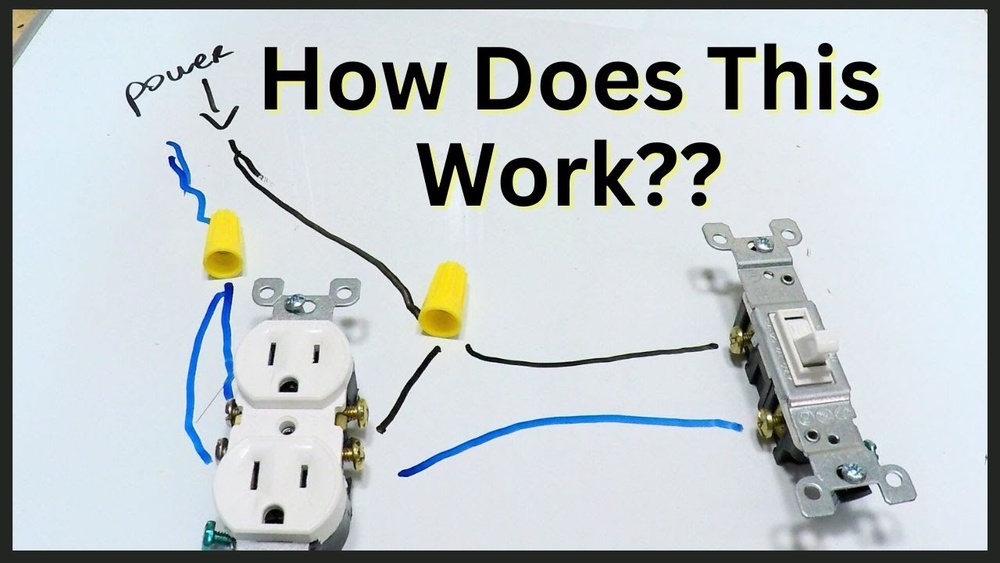
Credit: www.diychatroom.com
Frequently Asked Questions
How Do I Safely Disconnect An Outlet From A Light Switch?
Turn off the power at the circuit breaker before starting. Use a voltage tester to confirm no power. Unscrew the outlet and switch covers carefully. Disconnect the wires linking the outlet to the switch, noting their positions for safety and reference.
What Tools Are Needed To Disconnect An Outlet From A Switch?
You need a screwdriver, voltage tester, wire stripper, and electrical tape. These tools ensure safe disconnection and proper handling of wires. Having the right tools prevents damage and maintains electrical safety during the process.
Can I Disconnect The Outlet Without Professional Help?
Yes, if you have basic electrical knowledge and follow safety guidelines. Always turn off power and verify with a voltage tester. If unsure, consult a licensed electrician to avoid hazards and ensure compliance with local codes.
Why Disconnect An Outlet From A Light Switch?
Disconnecting allows independent control of the outlet, improving convenience. It prevents unwanted power loss when the switch is off. This modification is useful for powering devices without affecting the light switch operation.
Conclusion
Disconnecting an outlet from a light switch is simpler than it seems. Always turn off the power before you start. Take your time and follow the steps carefully. Double-check your work to ensure safety and function. This small task can save you from bigger electrical problems.
Stay cautious and ask for help if unsure. A safe home is a happy home.