Are you ready to bring smart lighting control to your home? Adding a Wemo Light Switch is easier than you think, and it can instantly make your daily routine more convenient.
Imagine turning your lights on or off with just a tap on your phone or using your voice. In this guide, you’ll discover simple, step-by-step instructions to install your Wemo Light Switch safely and quickly. Keep reading, and you’ll be enjoying smarter lighting in no time!
Preparing For Installation
Preparing for installation is the first step to a smooth Wemo Light Switch setup. It helps avoid mistakes and keeps you safe. Take your time to get ready before starting the work.
Gathering Required Tools
Collect all tools before you begin. You will need a screwdriver, voltage tester, wire stripper, and electrical tape. Having these ready saves time and effort. Check if your Wemo switch came with extra parts. Keep everything close to your workspace.
Turning Off Power Safely
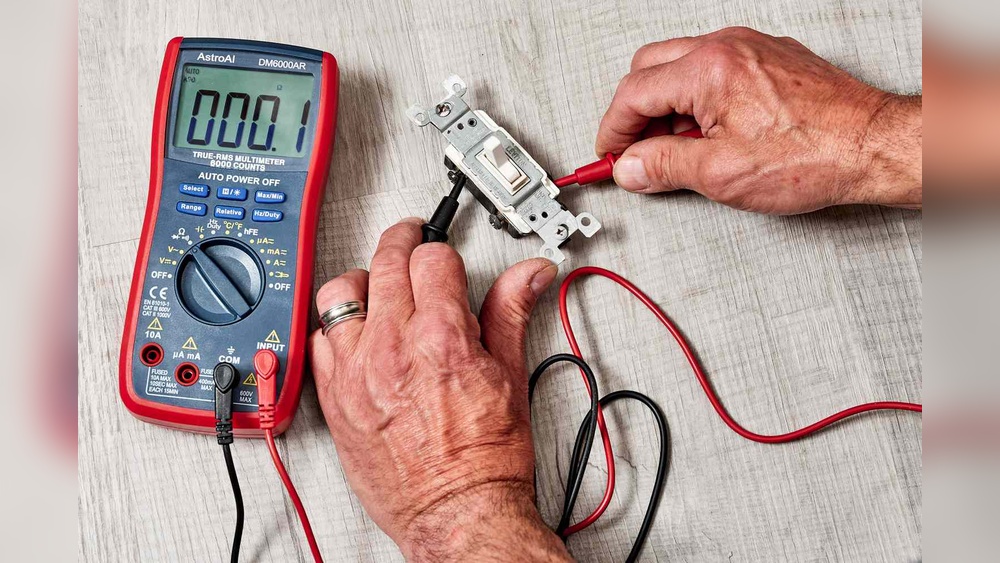
Safety is key when working with electricity. Find your home’s circuit breaker panel. Turn off the power to the switch you will replace. Use a voltage tester to confirm the power is off. Never skip this step. It protects you from electric shocks.
Removing The Existing Switch
Removing the existing light switch is the first step to install your Wemo switch. Take your time and follow these steps carefully. Safety is the top priority. Make sure the power is off before starting. Use a voltage tester to confirm no electricity flows to the switch.
Unscrewing The Wall Plate
Start by unscrewing the wall plate that covers the switch. Use a flathead or Phillips screwdriver depending on the screws. Turn the screws counterclockwise until they come out. Keep the screws in a safe place. Gently pull the wall plate away from the wall. Avoid forcing it to prevent damage.
Disconnecting Wires Carefully
Next, loosen the screws holding the wires on the switch. Use a screwdriver to turn the screws counterclockwise. Carefully pull each wire away from the switch. Note the position of each wire. Take a photo if needed for reference. Do not let wires touch each other. Place the wires safely aside until you install the Wemo switch.
Wiring The Wemo Light Switch
Wiring the Wemo Light Switch is a key step in setting up your smart lighting. This process connects the switch to your home’s electrical system. Proper wiring ensures the switch works safely and correctly. Follow the steps carefully for best results.
Identifying Wire Types
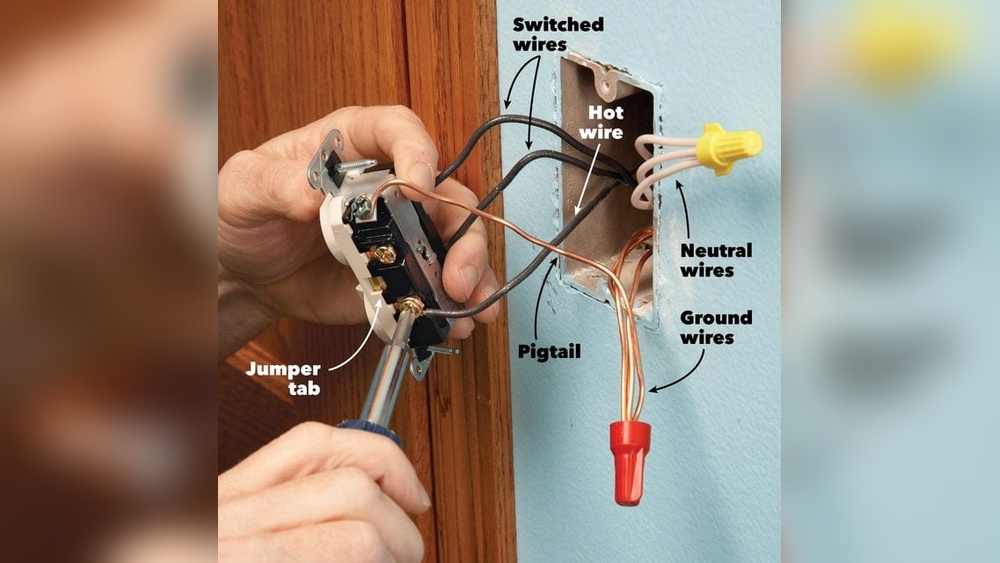
First, turn off the power at the breaker to stay safe. Open the switch box and look at the wires inside. You will usually see black, white, and green or bare copper wires. The black wires carry power. The white wires are neutral. The green or copper wires are ground wires. Knowing these helps connect the Wemo switch properly.
Connecting Wires To The Switch
Match the wires from the wall to the wires on the Wemo switch. Connect black to black, white to white, and green or copper to ground. Use wire nuts to secure each connection tightly. Push the wires back into the box carefully. Screw the switch into place. Turn the power back on and test your new Wemo switch.

Credit: www.youtube.com
Mounting The Switch And Wall Plate
Mounting the Wemo light switch and its wall plate is a key step in your installation. This step ensures the switch stays secure and looks neat. Follow each instruction carefully for a safe and tidy setup.
Securing The Switch To The Wall Box
Start by placing the Wemo switch inside the wall box. Align the screw holes on the switch with those on the box. Use the screws provided to fasten the switch tight. Avoid over-tightening to prevent damage. The switch should sit flush with the wall surface. Check that it does not wobble or move.
Attaching The Wall Plate
Next, position the wall plate over the mounted switch. Make sure the plate fits evenly around the edges. Use the small screws to attach the plate to the switch. Tighten these screws gently until the plate is secure. The wall plate covers wires and adds a finished look. It should not be loose or crooked. Clean the surface around the switch for a polished finish.
Setting Up The Wemo App
Setting up the Wemo app is the first step to control your Wemo Light Switch easily. The app lets you manage your lights from anywhere. It is user-friendly and quick to install. Follow these steps to get started with the Wemo app.
Downloading The App
Open the App Store or Google Play on your smartphone. Search for “Wemo” in the search bar. Choose the official Wemo app by Belkin International. Tap the download or install button. Wait for the app to finish downloading. Once done, open the app to start setup.
Creating An Account
After opening the app, you need to create an account. Tap on “Sign Up” to begin. Enter your email address and create a password. Use a strong password for security. Confirm your password by typing it again. Accept the terms and privacy policy. Tap “Create Account” to finish. You may receive a confirmation email. Verify your email to activate your account.
Connecting The Switch To Wi-fi
Make sure your phone is connected to your home Wi-Fi. The Wemo switch supports only 2.4 GHz networks. Open the Wemo app and tap “Add Device.” Follow the on-screen instructions to put your switch in setup mode. Select your Wi-Fi network from the list. Enter your Wi-Fi password carefully. The app will connect the switch to your network. Once connected, your switch is ready to use.
Testing And Troubleshooting
Testing and troubleshooting a Wemo light switch ensures it works correctly after installation. This step confirms the switch responds to commands and controls your lights as expected. It helps detect any issues early, making your smart home setup smoother.
Checking Switch Operation
Start by turning the switch on and off manually. The light should respond without delay. Next, use the Wemo app to control the switch remotely. Check if the app shows the correct switch status. Test voice commands if you connect with a smart assistant. All functions must work consistently for proper operation.
Resolving Common Issues
Sometimes the switch may not respond or lose connection. First, check your Wi-Fi signal near the switch. Move the router closer if the signal is weak. Restart the Wemo switch by toggling the power off and on. Ensure the switch firmware is updated via the app. If the app cannot find the switch, reset it following the manual instructions. Replace any faulty wiring if the switch does not control the light properly.
Enhancing Smart Home Experience
Enhancing your smart home experience with a Wemo Light Switch means more control and convenience. This device lets you manage your lights from anywhere. It fits easily into your daily routine and makes your home smarter.
With simple steps, you can turn ordinary lighting into smart lighting. Enjoy the comfort of adjusting lights without leaving your seat. The Wemo Light Switch helps create a modern and efficient home.
Integrating With Voice Assistants
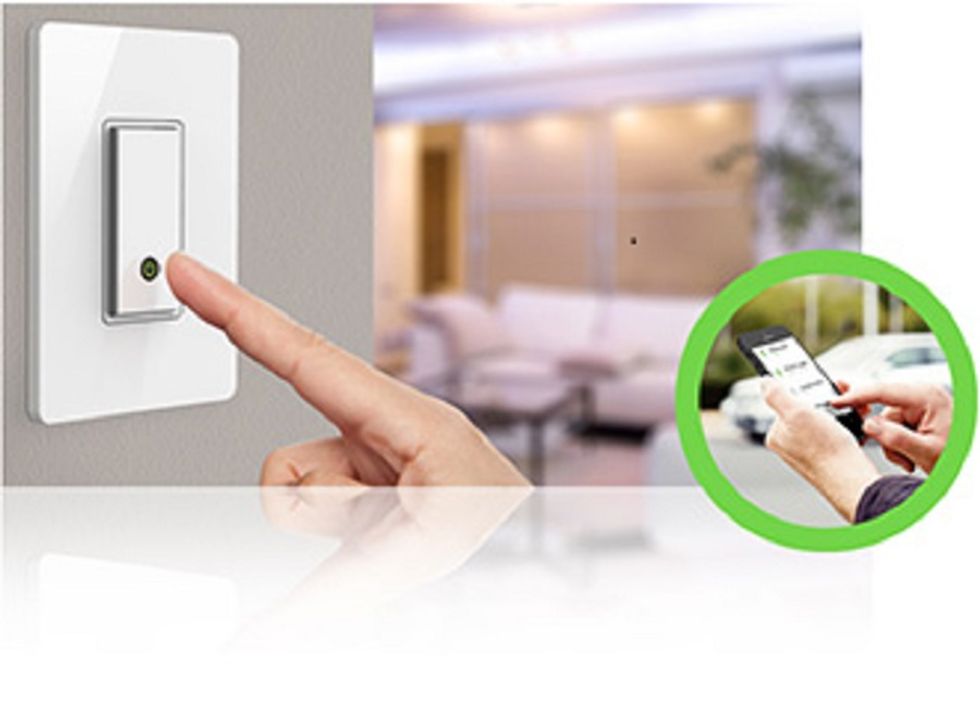
The Wemo Light Switch works well with popular voice assistants. Use Amazon Alexa, Google Assistant, or Apple HomeKit. Speak commands to turn lights on or off. No need to find the switch on the wall.
Voice control makes life easier, especially when your hands are full. You can also group lights and control them together. This adds a smooth flow to your smart home setup.
Scheduling And Automation Tips
Set schedules to turn lights on or off automatically. This saves energy and adds security when you are away. Use the Wemo app to create daily or weekly routines.
Automation helps your home adjust to your lifestyle. For example, lights can turn on at sunset or off when you leave. Small changes like these improve comfort and reduce costs.
Credit: www.gearbrain.com

Credit: www.belkin.com
Frequently Asked Questions
What Tools Do I Need To Install A Wemo Light Switch?
To install a Wemo light switch, you need a screwdriver, voltage tester, wire stripper, and electrical tape. These tools ensure safe and proper installation. Always turn off power before starting the installation to avoid electrical hazards.
How Do I Connect Wemo Switch To Wi-fi?
After wiring the Wemo switch, use the Wemo app to connect it to your Wi-Fi. Follow in-app instructions to select your network and enter the password. A stable 2. 4 GHz Wi-Fi network is required for smooth operation.
Can I Install Wemo Switch Without A Neutral Wire?
Wemo light switches typically require a neutral wire for installation. Without a neutral wire, the switch may not function properly. Check your home wiring or consult an electrician before attempting installation.
How Long Does It Take To Install A Wemo Light Switch?
Installing a Wemo light switch usually takes 15 to 30 minutes. This includes turning off power, wiring, securing the switch, and app setup. Experience level may affect installation time.
Conclusion
Adding a Wemo light switch is simple and quick. Follow the steps carefully for safe installation. You can control your lights with your phone after setup. It helps save energy and adds convenience to your home. Enjoy smart lighting without any hassle or extra cost.
Try it today and see the difference it makes. Easy, smart, and useful.