Are you tired of your motion sensor light switch not working the way you want? Changing it might seem tricky, but it’s easier than you think.
Imagine having full control over your lighting, saving energy, and boosting your home’s security—all with a simple switch. In this guide, you’ll discover step-by-step how to change your motion sensor light switch quickly and safely. Stick with me, and by the end, you’ll feel confident handling this upgrade yourself.
Let’s get started!
Tools And Materials Needed
Gathering the right tools and materials makes changing a motion sensor light switch easier. Having everything ready saves time and avoids frustration. This list covers what you need for a smooth and safe installation.
Essential Tools
You will need a screwdriver, usually a flathead and a Phillips. A voltage tester is important to ensure the power is off. Wire strippers help prepare wires for connection. Needle-nose pliers are useful for bending wires and making tight connections.
Materials Required
The new motion sensor light switch is the main item. Electrical tape helps secure wire connections. Wire nuts are needed to join wires safely. Have extra screws on hand in case the old ones are damaged or missing.
Safety Equipment
Wear insulated gloves to protect from electric shock. Safety glasses shield your eyes from dust and debris. Use a sturdy ladder if the switch is high on the wall.
Safety Precautions
Safety is the top priority before changing a motion sensor light switch. Electrical work can be dangerous without the right steps. Taking safety precautions helps prevent shocks and injuries. Follow these simple rules to stay safe.
Turn Off Power At The Circuit Breaker
Always switch off the power from the circuit breaker. Do not rely on the wall switch alone. Use a tester to confirm no electricity flows to the switch. This step stops electric shocks during the work.
Use Insulated Tools
Choose tools with insulated handles. They protect your hands from electric currents. Avoid metal tools without insulation. This reduces the risk of accidental shocks.
Wear Safety Gear
Wear rubber gloves to protect your hands. Use safety glasses to shield your eyes. These simple items add a layer of safety during the process.
Check For Damaged Wires
Inspect wires for damage before touching them. Frayed or exposed wires can be hazardous. Replace any damaged wires to avoid electrical hazards.
Work In A Dry Environment
Never work on electrical switches in wet or damp areas. Water conducts electricity and raises the risk of shocks. Ensure the area is dry before starting.
Turn Off Power
Turning off power is the first and most important step before changing a motion sensor light switch. It protects you from electric shock and prevents damage to the electrical system.
Never skip this step. Safety comes first when working with any electrical device.
Locate The Circuit Breaker
Find the main electrical panel in your home. It is usually in the basement, garage, or utility room. Open the panel door carefully.
Identify The Correct Breaker
Look for the breaker that controls the light switch. It may be labeled as “lights” or “living room.”
Switch Off The Breaker
Flip the breaker to the OFF position. This cuts off electricity to the switch you will replace.
Test For Power
Use a voltage tester or a simple light to check the switch. Make sure no power is flowing before you start working.

Credit: www.youtube.com
Remove Existing Switch
Removing the existing switch is the first step in changing a motion sensor light switch. It helps prepare the wiring for the new device. Take your time and follow safety rules. This ensures a smooth and safe process.
Turn Off The Power
Start by switching off the power at the circuit breaker. Do not rely on the wall switch alone. Use a voltage tester to confirm the power is off. This prevents electric shocks during work.
Remove The Switch Cover Plate
Use a screwdriver to take off the cover plate. Keep the screws in a safe place. This exposes the switch and wiring inside the box.
Unscrew The Old Switch
Loosen the screws holding the switch to the electrical box. Pull the switch out carefully to see the wires. Avoid pulling hard to prevent wire damage.
Note The Wiring Setup
Take a photo or write down how wires connect to the switch. This helps during installation of the new switch. Identify the line, load, and ground wires.
Disconnect The Wires
Loosen the terminal screws and gently remove the wires. Use needle-nose pliers if wires are tight. Keep the wires separated to avoid short circuits.
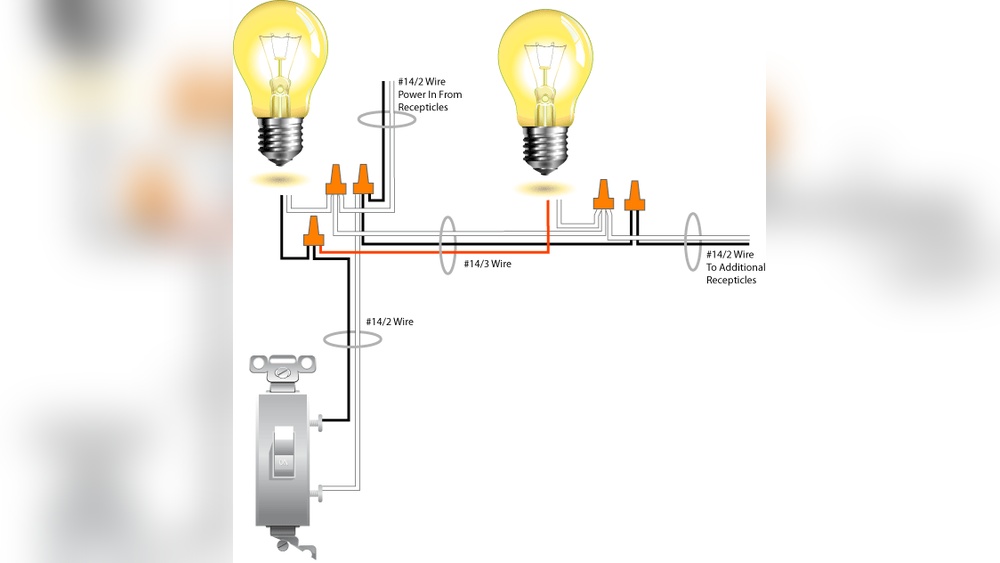
Identify Wiring
Identifying wiring is the first key step in changing a motion sensor light switch. This step helps ensure safety and smooth installation. Knowing which wire does what will prevent mistakes and damage.
Before you start, turn off the power at the circuit breaker. This stops any risk of electric shock. Use a voltage tester to double-check that no electricity flows through the wires.
Locate The Electrical Box
Find the box where the switch is installed. Remove the switch cover plate with a screwdriver. Look inside to see the wires connected to the switch.
Identify Each Wire
Typically, you will see three types of wires: live (line), load, and ground. The live wire brings power from the breaker. The load wire goes to the light fixture. The ground wire is usually green or bare copper.
Use A Voltage Tester
Check each wire with a voltage tester. The live wire should show voltage. The load wire will not have power unless the switch is on. The ground wire will not carry voltage.
Label The Wires
Use tape and a marker to label each wire. Mark live, load, and ground clearly. This step helps during the new switch installation.
Note Wire Colors
Wire colors can vary. Usually, black or red is live. White is neutral but may not be present in all switches. Green or bare copper is ground. Do not rely only on colors; always test wires.
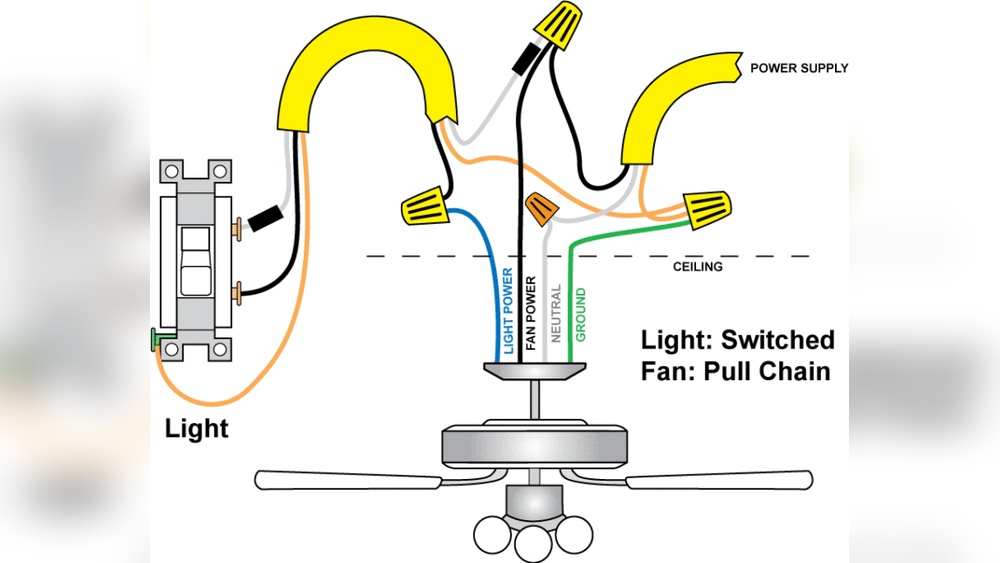
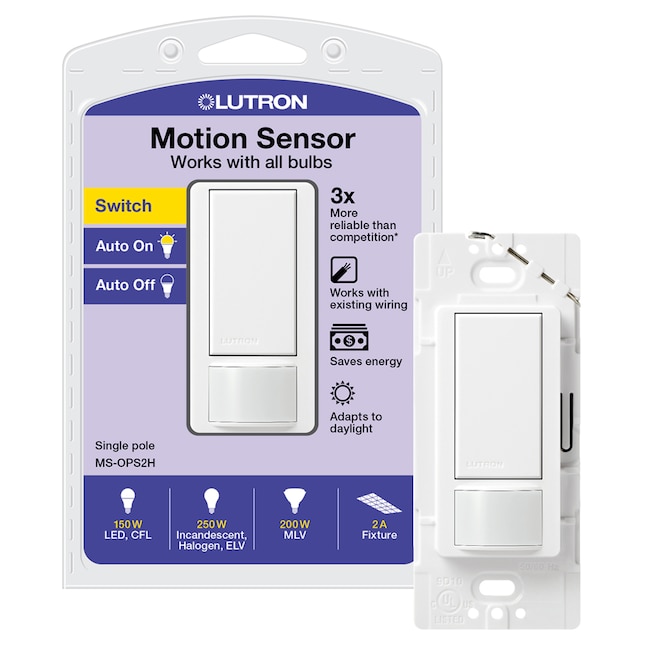
Connect New Motion Sensor Switch
Connecting a new motion sensor switch is a key step in your project. It controls the light automatically by sensing movement. This step requires careful attention to wiring. Follow each part to ensure safety and proper function.
Turn Off The Power
Start by switching off the circuit breaker. This stops electricity to the switch. Use a tester to check that the wires have no power. Safety first to avoid shocks.
Identify The Wires
Locate the wires in the wall box. Typically, you find a line (live), load, neutral, and ground wire. The motion sensor switch needs all these connections to work properly.
Connect The Ground Wire
Attach the green or bare copper wire from the switch to the ground wire in the wall. Use a wire nut to secure them tightly. This step prevents electrical hazards.
Join The Neutral Wires
Connect the white wire from the switch to the neutral wires in the box. They often come bundled together. Use a wire nut to keep this connection safe and secure.
Attach The Line And Load Wires
Connect the black wire marked “line” from the switch to the live wire in the wall. Then, connect the other black wire, labeled “load,” to the wire leading to the light fixture. This allows the switch to control the light.
Secure All Connections
Double-check each wire connection. Make sure no copper is exposed outside the wire nuts. Wrap electrical tape around wire nuts for added safety.
Mount The Switch And Restore Power
Carefully push the wires back into the box. Screw the switch into place. Turn the circuit breaker back on and test the sensor switch by moving in front of it.
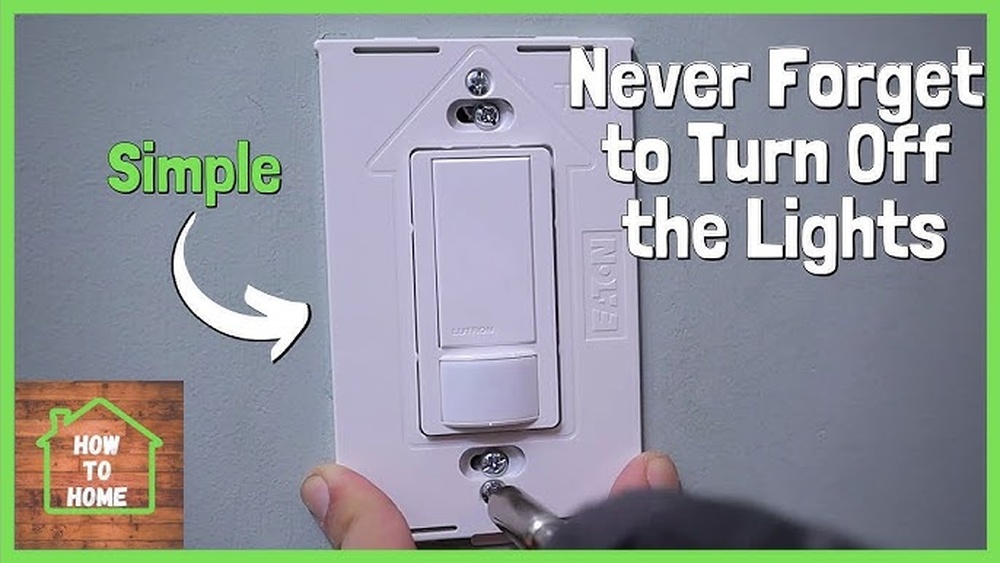
Secure The Switch
Securing the motion sensor light switch is an important step. It keeps the switch stable and safe. A loose switch can cause flickering lights or electrical problems. Properly securing the switch also helps it work correctly over time.
Check The Mounting Box
Start by inspecting the electrical box. Make sure it is firmly attached to the wall. Tighten any loose screws or brackets. A solid box provides a strong base for the switch.
Align The Switch Correctly
Hold the motion sensor switch inside the box. Align it so the switch sits straight. A crooked switch looks bad and may not work well. Use your fingers to adjust before tightening screws.
Tighten The Screws Carefully
Use a screwdriver to secure the switch screws. Tighten them evenly, one at a time. Do not over-tighten; this can crack the switch or wall plate. Tight screws keep the switch steady and safe.
Attach The Wall Plate
Place the wall plate over the switch. Align it with the screw holes. Secure it with the small screws provided. The wall plate protects wires and gives a neat finish.
Restore Power And Test
Restoring power and testing your new motion sensor light switch is the final step. It ensures the switch works correctly and safely. Follow these simple steps to bring your light back to life and check its function.
Turn The Circuit Breaker Back On
Find the breaker that controls the light switch. Flip it to the “On” position. This restores electricity to the switch and the light fixture.
Check The Light For Power
Press the switch or wait for motion near the sensor. The light should turn on immediately or after a short delay. If it does, power is restored and the switch works.
Adjust Sensitivity And Timer Settings
Use the knobs or buttons on the switch to set sensitivity and timer. Test different settings to find what works best for your space. This controls how long the light stays on and how far it senses motion.
Test Motion Detection
Walk slowly in front of the sensor. The light should turn on as you move. Step away and watch the light turn off after the set time. Repeat to confirm consistent operation.
Inspect For Any Issues
Look for flickering or failure to turn on. Check all connections if problems occur. Make sure the switch is securely mounted and wires are tight.
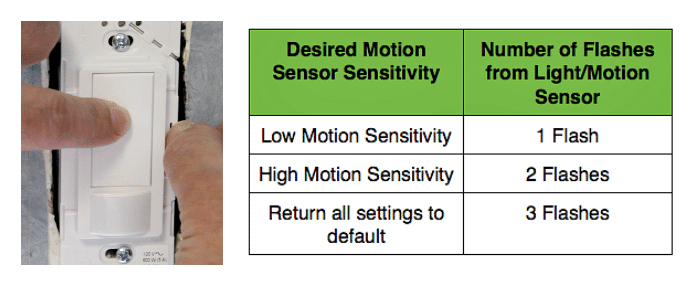
Adjust Sensor Settings
Adjusting the sensor settings on your motion sensor light switch helps you control how the light responds. This step is important for saving energy and improving convenience. Proper settings ensure the light turns on only when needed.
Each motion sensor switch has different controls. These controls usually adjust the time the light stays on, the sensitivity of the sensor, and the light level needed to activate the sensor.
Adjusting The Time Delay
The time delay controls how long the light stays on after motion stops. You can set it from a few seconds to several minutes. Shorter times save energy but may turn off too soon. Longer times keep the light on longer for safety or comfort.
Setting The Sensitivity
Sensitivity controls how far or how much motion the sensor detects. Higher sensitivity catches small or distant movements. Lower sensitivity avoids false triggers from pets or small animals. Adjust this based on your room size and activity level.
Adjusting The Light Level (photocell)
The light level setting controls when the sensor activates based on ambient light. Set it to only turn on in darkness to save power. If the sensor triggers in daylight, lower the light level setting. This keeps the light from turning on unnecessarily.
Credit: homerepairtutor.com
Troubleshooting Tips
Troubleshooting a motion sensor light switch can save time and avoid extra costs. Some common issues may arise after installation. This guide helps to identify and fix those problems quickly.
Start by checking basic things. Sometimes, the problem is simple to solve. Understanding common faults helps to restore the switch function.
Check The Power Supply
Make sure the circuit breaker is on. A tripped breaker cuts power to the switch. Use a voltage tester to confirm power at the switch box. Without power, the sensor will not work.
Inspect The Sensor Lens
Clean the sensor lens carefully. Dirt or dust can block the sensor’s view. Check for any cracks or damage on the lens. Replace the sensor if the lens is broken.
Adjust The Sensitivity Settings
Many motion sensors have adjustable sensitivity. Set it too low, and it may not detect movement. Set it too high, and it may trigger falsely. Find the right balance for your space.
Verify The Light Bulb Type
Some motion sensor switches work with specific bulb types. Check the switch manual for compatible bulbs. Replace bulbs that cause flickering or failure to turn on.
Test The Motion Detection Range
Walk in front of the sensor to test detection. Move slowly across the sensor’s range. If it does not detect motion, adjust the sensor angle or position.
Reset The Motion Sensor Switch
Turn off power at the breaker. Wait a few minutes, then turn it back on. This reset can clear minor glitches. If issues persist, consult the product manual.
Credit: www.lowes.com
Frequently Asked Questions
How Do I Safely Turn Off Power Before Switching?
Always turn off power at the circuit breaker. Use a voltage tester to confirm no electricity flows. Safety first prevents shocks and accidents during installation.
What Tools Are Needed To Change The Sensor Switch?
You need a screwdriver, voltage tester, wire stripper, and electrical tape. These tools help safely remove and install the new switch.
How To Identify Correct Wiring For Sensor Switch?
Match wires by color: black (live), white (neutral), and green or copper (ground). Follow the manufacturer’s wiring diagram for accuracy.
Can I Replace A Standard Switch With A Motion Sensor?
Yes, but ensure the new switch is compatible with your wiring and load type. Follow installation instructions carefully.
Conclusion
Changing a motion sensor light switch is simple and quick. Follow each step carefully for safety. Turn off power before starting work. Use the right tools to avoid problems. Test the new switch to ensure it works well. This small change can improve your home’s lighting.
Feel confident to handle this task yourself. Save money by doing it on your own. Enjoy better control over your lights every day.