Are you struggling to hang shelves, pictures, or hooks securely on your walls? Using the right wall anchors can make all the difference, and Rubbermaid plastic wall anchors are a reliable choice for a strong hold.
But how do you install them correctly to ensure your items stay put? In this guide, you’ll discover simple, step-by-step instructions that anyone can follow. By the end, you’ll feel confident tackling your wall projects with ease and avoid common mistakes that cause anchors to fail.
Keep reading to learn how to get the best results every time you use Rubbermaid plastic wall anchors.

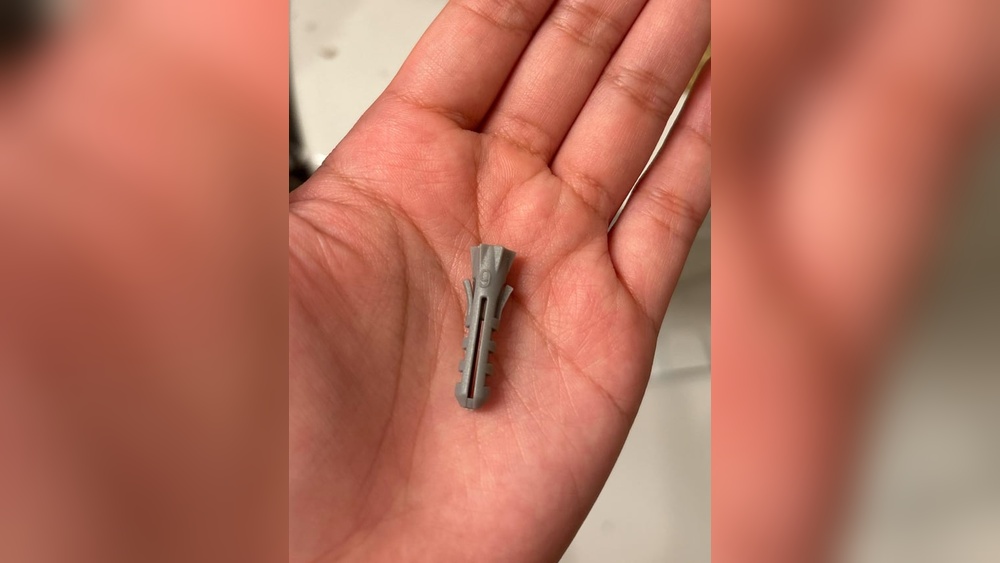
Credit: www.walmart.com
Choosing The Right Wall Anchors
Choosing the right wall anchors is key for a strong hold. Rubbermaid plastic anchors come in many types. Each type suits different walls and weights. Picking the correct anchor avoids damage and keeps items secure.
Types Of Rubbermaid Plastic Anchors
Rubbermaid offers various plastic anchors. Some are designed for light loads, like hanging pictures. Others hold medium weights, perfect for shelves or mirrors. Heavy-duty anchors support large, heavy objects. Each anchor type has a unique shape and size. This design helps it grip the wall firmly.
Matching Anchors To Wall Materials
Walls differ in material and strength. Drywall, plaster, brick, and concrete each need specific anchors. Plastic anchors work best in drywall and plaster. For brick or concrete, use anchors made for masonry. Using the right anchor for your wall ensures a safe, strong fit. Check the wall type before choosing your Rubbermaid plastic anchor.
Tools And Materials Needed
Preparing the right tools and materials is key for a smooth Rubbermaid plastic wall anchor installation. Having everything ready saves time and avoids frustration. It also ensures a secure hold for your wall hangings. Below is a list of what you need for a safe and effective installation.
Essential Tools For Installation
You will need a power drill with a drill bit that matches the anchor size. A screwdriver is necessary to tighten the anchor into the wall. A hammer may be needed to gently tap the anchor into place. A measuring tape helps mark the exact spot on the wall. A pencil is useful for making clear, visible marks. A level ensures the anchor is straight and properly aligned. Lastly, a utility knife can help trim any excess material.
Safety Gear To Use
Wear safety glasses to protect your eyes from dust and debris. Use gloves to protect your hands from sharp edges. A dust mask can prevent inhaling particles, especially when drilling into drywall or concrete. Make sure to wear closed-toe shoes to protect your feet. Always work in a well-lit area to avoid accidents. Keep your workspace tidy to prevent tripping hazards.
Preparing The Wall
Preparing the wall is the first step to install Rubbermaid plastic wall anchors correctly. It ensures the anchors hold firmly and keep your items safe. Taking time to prepare helps avoid mistakes and saves effort later.
Marking Anchor Locations
Start by deciding where you want the anchors. Use a pencil to mark these spots on the wall. Check measurements twice to keep marks even and straight. Proper marks guide drilling and ensure the anchors fit well.
Drilling Proper Holes
Choose a drill bit that matches the anchor size. Drill holes on the marked spots carefully. Keep the drill steady and straight for clean holes. Avoid making holes too big or too small. Right holes make anchors secure and strong.
Credit: www.homedepot.com
Installing The Anchors
Installing Rubbermaid plastic wall anchors is a simple process that makes hanging items easier. These anchors provide strong support for screws in drywall or plaster. Proper installation helps keep your items secure and prevents damage to the wall.
Follow these steps to insert and fit the anchors correctly. This ensures a stable hold for your shelves, hooks, or other fixtures.
Inserting The Plastic Anchors
Start by drilling a hole in the wall. Use a drill bit that matches the anchor size. Gently push the plastic anchor into the hole. Tap it lightly with a hammer until it is flush with the wall surface. Avoid forcing the anchor too hard to prevent damage.
Ensuring Secure Fit
Check the anchor to make sure it fits snugly in the hole. It should not wiggle or fall out. Insert the screw slowly into the anchor. The anchor expands inside the wall, creating a strong grip. Tighten the screw until firm, but do not over-tighten. This keeps the wall and anchor safe from cracks.
Mounting Fixtures
Mounting fixtures securely is key when using Rubbermaid plastic wall anchors. Proper installation keeps your items stable and safe. This step ensures the anchors hold tight and your fixtures stay in place.
Follow simple steps to align and tighten your fixtures correctly. This makes sure everything fits well and lasts longer.
Aligning Fixtures With Anchors
Start by placing the fixture over the wall anchors. Check if the holes on the fixture match the anchor positions. Adjust the fixture slightly for a perfect fit. Proper alignment prevents damage and holds the fixture firmly. Take your time to avoid crooked mounting.
Tightening Screws Correctly
Insert screws into the anchors carefully. Turn them slowly to avoid stripping the plastic. Tighten screws until the fixture is snug against the wall. Do not over-tighten. Over-tightening can crack the anchor or wall. Stop as soon as the fixture feels secure.
Credit: www.lowes.com
Troubleshooting Common Issues
Troubleshooting common problems with Rubbermaid plastic wall anchors is easy. Many users face simple issues during installation. Fixing these helps keep your wall secure and safe.
Problems often happen because of wall type or drilling errors. Quick solutions restore anchor strength and function. Understanding these fixes saves time and avoids damage.
Dealing With Loose Anchors
Loose anchors cause the fixture to wobble or fall. This happens if the hole is too big or the anchor is not pushed in fully. Remove the anchor gently. Use a larger anchor or a wall plug to fill the gap. Push the new anchor firmly into place. Check the fit by gently pulling on it before attaching the fixture.
Fixing Overdrilled Holes
Overdrilled holes are bigger than needed and fail to hold anchors tightly. To fix this, insert a piece of wooden dowel or toothpicks coated with wood glue. Push them into the hole until snug. Let the glue dry completely. After drying, drill a small pilot hole in the center. Insert the wall anchor as usual. This method restores grip and support in the wall.
Maintenance Tips
Proper maintenance of Rubbermaid plastic wall anchors ensures long-lasting support. Regular checks help keep your anchors secure and safe. Small efforts can prevent damage and costly repairs. Follow these simple maintenance tips to extend anchor life.
Checking Anchor Stability
Inspect anchors regularly for any movement or looseness. Gently wiggle items attached to the anchor. If you notice any shift, the anchor may need tightening. Use a screwdriver to secure loose screws. Also, check for cracks or damage around the anchor hole. Damaged anchors cannot hold weight properly.
When To Replace Anchors
Replace anchors if they show signs of wear or breakage. Swollen or cracked anchors lose their grip inside the wall. If anchors spin or pull out easily, they need replacement. Always choose the correct size for your wall and item. Replacing worn anchors prevents accidents and maintains wall strength.
Frequently Asked Questions
What Tools Are Needed To Install Rubbermaid Plastic Wall Anchors?
You need a drill, drill bits, a hammer, and a screwdriver. Choose a drill bit matching anchor size. These tools ensure proper installation and secure anchoring.
How Do You Prepare The Wall For Installation?
Mark the hole spot, then drill a pilot hole. Clean out debris for better anchor grip. Proper preparation prevents damage and improves stability.
Can Rubbermaid Plastic Anchors Hold Heavy Items?
Yes, they support light to medium loads. Check the anchor’s weight rating before use. For heavy items, consider metal anchors for extra strength.
How Deep Should The Hole Be For Anchors?
Drill the hole slightly deeper than the anchor length. This ensures the anchor fits fully inside the wall. Proper depth improves holding power and prevents damage.
Conclusion
Installing Rubbermaid plastic wall anchors is simple and effective. Follow each step carefully for the best results. Use the right tools and measure twice before drilling. These anchors hold items firmly on drywall or plaster. Take your time and avoid rushing the process.
A secure installation means your shelves or hooks stay safe. Practice makes perfect, so don’t worry if it takes a few tries. Now, you can hang items with confidence and ease.