Have you ever reached up to pull a chain to turn on your light, only to wish there was an easier way? Changing your pull chain light to a switch can make your daily routine simpler and more convenient.
Imagine flipping a regular wall switch instead of fumbling with a chain every time you need light. In this guide, you’ll discover step-by-step how to make this quick upgrade yourself, saving time and effort. Ready to transform your lighting setup and enjoy hassle-free control?
Keep reading, and you’ll have it done before you know it.

Credit: diy.stackexchange.com
Tools And Materials Needed
Changing a pull chain light to a switch needs careful attention to safety. Electricity can be dangerous. Taking safety steps protects you from shocks and accidents. This section covers important safety tips to follow before and during the project.
Turn Off The Power
Always switch off the power at the circuit breaker. Do not just use the wall switch. Test the light with a voltage tester. Make sure no electricity flows to the fixture.
Use Proper Tools
Use insulated tools made for electrical work. Avoid metal tools without insulation. This lowers the risk of electric shock. Keep tools dry and in good condition.
Wear Safety Gear
Wear rubber-soled shoes to prevent slipping. Use safety glasses to protect your eyes. Avoid loose clothing that can catch on wires or parts.
Check Wiring Carefully
Inspect all wires for damage or wear. Replace frayed or exposed wires before starting. Make sure wires are not touching each other.
Work In A Dry Area
Keep the work area dry and free from water. Do not work if the floor or your hands are wet. Water increases the risk of electric shock.
Know When To Call A Professional
Stop and ask for help if unsure about any step. Electrical work can be complex and risky. A licensed electrician ensures the job is safe and correct.
Safety Precautions
Turning off the power is the first step before changing a pull chain light to a switch. It keeps you safe from electric shock. Always treat electricity with care. A small mistake can cause serious injury.
Before starting, locate your home’s circuit breaker. This is where you control the power to different parts of your house. Turning off the right breaker stops electricity flow to the light fixture. This makes sure you can work safely.
Find The Circuit Breaker
Look for the breaker box in your home. It is usually in the basement, garage, or a closet. The box contains switches labeled for each room or area. Find the one for the room with the pull chain light.
Switch Off The Correct Breaker
Flip the breaker switch to the off position. This cuts power to the light fixture. Double-check by turning on the light switch or pull chain. The light should not turn on. If it does, try another breaker.
Use A Voltage Tester
Test the wires with a voltage tester. This tool tells if electricity is still present. Touch the tester to the wires connected to the light. No signal means the power is off. If there is a signal, do not proceed.
Stay Safe Throughout The Process
Wear rubber-soled shoes and stand on a dry surface. Avoid touching metal parts with bare hands. Keep your work area clear of water and clutter. Safety is the top priority in electrical work.
Turn Off Power
Always turn off the power before starting electrical work to stay safe. This step prevents shocks while changing a pull chain light to a switch. Safety first saves trouble later.
Start by switching off the power at the circuit breaker. This step keeps you safe from electric shock. Do not skip this. Use a voltage tester to confirm no power runs to the fixture.
Remove Light Bulbs And Cover
Take out all bulbs from the pull chain fixture. Then, remove the light cover or globe. This gives clear access to the fixture base and wiring.
Unscrew The Fixture Base
Use a screwdriver to remove screws holding the fixture base. Keep the screws safe for reinstallation. Gently pull the fixture away from the ceiling or wall.
Disconnect The Pull Chain Switch
Locate the pull chain switch inside the fixture. Note how the wires connect to it. Carefully disconnect the wires from the pull chain switch terminals.
Remove The Fixture From Electrical Box
Loosen any mounting brackets or screws fixing the fixture to the electrical box. Pull the fixture out fully. Ensure no wires get pinched or damaged.
Remove Pull Chain Fixture
Installing a wall switch is the key step to replace your pull chain light. This change offers convenience and modern control of your lighting. The process involves selecting the right spot, running wires, and connecting them properly. Follow these clear steps for a safe and effective installation.
Choose Switch Location
Pick a spot near the room entrance for easy access. Ensure the location has space for the switch box. Avoid placing it too close to doors or windows. The switch should be at a comfortable height, usually about 48 inches from the floor. Mark the wall where you want to install the switch.
Run Electrical Wires
Turn off the power at the circuit breaker before handling wires. Use a drill to make a hole from the switch spot to the light fixture. Pull electrical wires through the hole carefully. Use wires that match your home’s electrical code. Leave enough wire length for easy connections at both ends.
Connect Switch Wires
Strip about half an inch of insulation from each wire end. Connect the black (hot) wire from the power source to one switch terminal. Attach the black wire going to the light fixture to the other terminal. Twist the white (neutral) wires together and cover with a wire nut. Connect the ground wires to the green screw on the switch. Secure all connections tightly to avoid loose wiring.
Identify Wiring Setup
Start by turning off power to the light fixture. Check the wires connected to the pull chain and identify the live, neutral, and ground wires. This helps you know which wires to connect when installing a wall switch.
Turn Off The Power
Start by switching off the power at the circuit breaker. This step keeps you safe from electric shock. Never work on wiring with the power on.
Remove The Light Fixture
Carefully take down the light fixture from the ceiling or wall. Use a screwdriver to remove screws holding it in place. Gently pull the fixture away to reveal the wires.
Identify And Separate Wires
Look for the black (hot), white (neutral), and green or bare (ground) wires. Untwist any wire nuts connecting the wires. Separate each wire to prepare for reconnection.
Connect The New Switch Wires
Attach the black wire from the switch to the fixture’s black wire. Connect the white wires together. Join the ground wires securely with a wire nut.
Secure The Light Fixture
Push the wires neatly into the electrical box. Align the fixture and screw it back in place. Make sure it is tight and stable.

Credit: www.familyhandyman.com
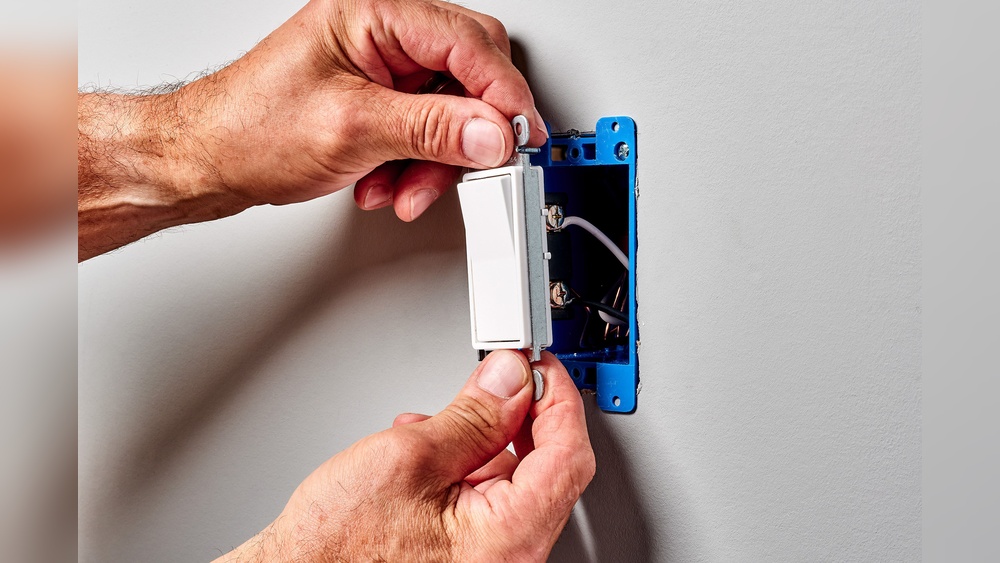
Install Wall Switch
Testing the new switch is a key step after installation. It ensures the light works safely and correctly. This step helps catch any wiring mistakes early. Take your time and follow each instruction carefully.
Turn On The Power
Start by turning the power back on at the circuit breaker. This restores electricity to the light fixture. Never test without power; it will not work.
Flip The Switch
Flip the new switch to the ON position. Check if the light turns on immediately. If it does, wiring is likely correct.
Test The Off Position
Flip the switch to OFF and see if the light goes out. The light should turn off without flickering. This confirms the switch controls power properly.
Check For Any Issues
Look for flickering, buzzing, or delayed light response. These signs may mean a loose connection or wiring problem. Turn off power before fixing any issues.
Use A Voltage Tester
Use a voltage tester to confirm power stops at the switch when OFF. This adds an extra layer of safety. It ensures no current flows when the switch is off.

Credit: www.youtube.com
Frequently Asked Questions
How Do I Replace A Pull Chain With A Wall Switch?
Turn off power first. Remove the light fixture. Disconnect the pull chain switch wires. Connect new switch wires. Mount the switch on the wall. Restore power and test the new switch.
What Tools Are Needed To Change A Pull Chain Light?
You need a screwdriver, wire stripper, voltage tester, electrical tape, wire nuts, and a wall switch. Safety gloves and a ladder may also help during installation.
Can I Change A Pull Chain Light Switch Myself?
Yes, if you know basic electrical safety. Turn off power, follow instructions carefully, and use proper tools. If unsure, consult a professional electrician to avoid hazards.
How Long Does It Take To Convert To A Switch?
Typically, it takes 30 to 60 minutes. Time depends on your experience and fixture accessibility. Preparation and safety checks may add extra time.
Conclusion
Changing a pull chain light to a switch makes daily use easier. The steps are simple and clear to follow. You only need basic tools and some care. Always turn off power before starting any work. This small change improves convenience and safety in your home.
Try the process to enjoy a smoother lighting experience. Small fixes like this save time and effort. Give it a try and see the difference yourself.