Are you tired of your old, flickering dimmer switch? Changing it might seem tricky, but it’s easier than you think—and it can make a big difference in your room’s lighting and mood.
Imagine having smooth control over your lights with just a simple upgrade. In this guide, you’ll learn step-by-step how to change your dimmer light switch safely and quickly, even if you’re not a DIY expert. Keep reading, and you’ll soon enjoy perfect lighting that fits your style and needs.
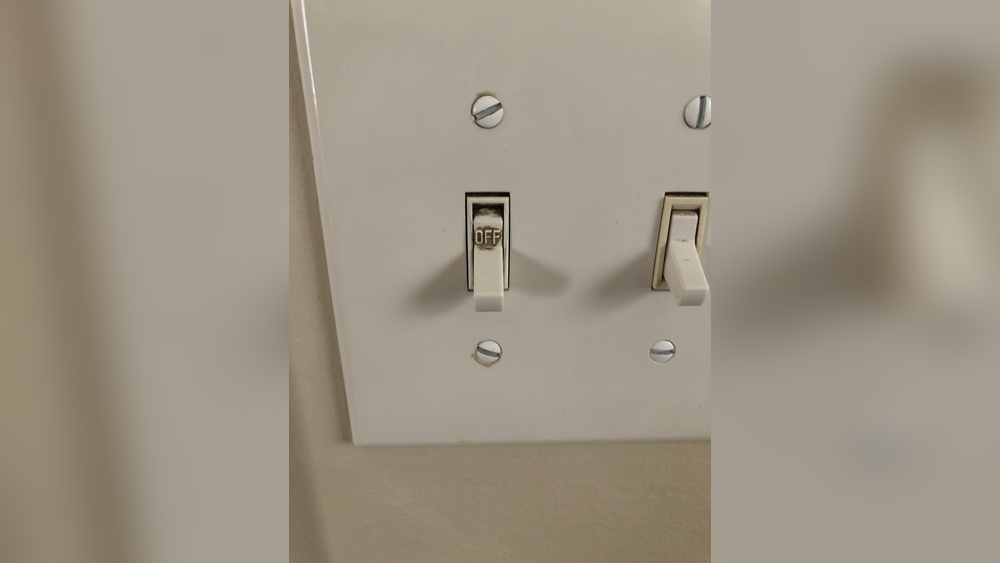
Credit: www.homedepot.com
Tools And Materials Needed
Changing a dimmer light switch requires some basic tools and materials. Having the right items ready makes the process easier and safer. Prepare everything before starting the work.
Essential Tools
A screwdriver is a must for removing the switch cover and screws. Use a flathead or Phillips screwdriver, depending on the screws.
A voltage tester helps check that the power is off. This tool keeps you safe from electric shocks.
Wire strippers are useful for preparing wires to connect the new switch. They remove insulation without damaging the wire.
Needle-nose pliers make bending and holding wires easier. They give better control during installation.
Required Materials
The new dimmer switch matches your light type and wiring. Check if it fits your bulbs and electrical system.
Wire nuts secure wire connections inside the box. They prevent loose wires and short circuits.
Electrical tape adds extra safety by covering exposed wire ends. It helps keep connections tight.
A faceplate covers the switch and completes the look. Choose a style that fits your decor.

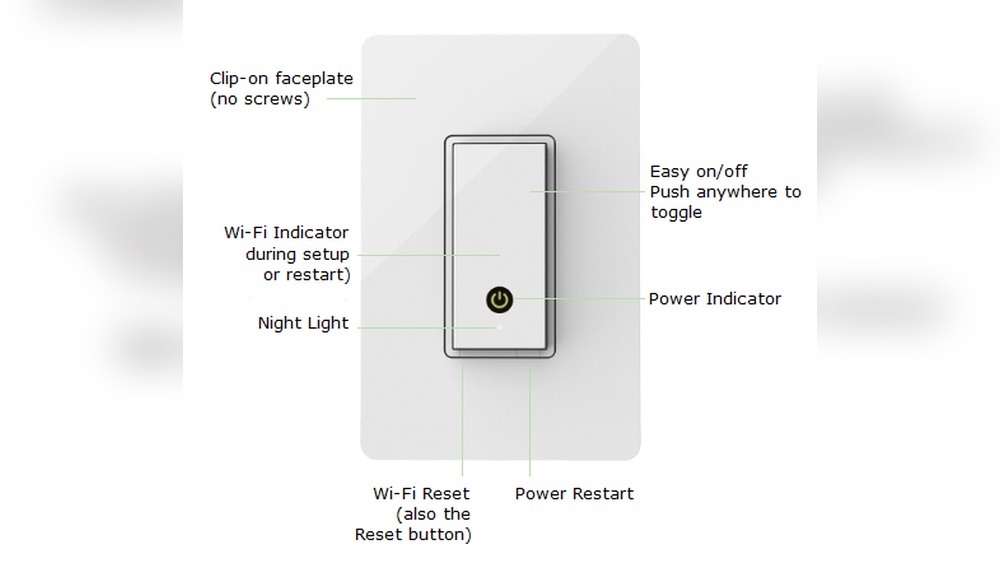
Credit: www.youtube.com
Safety Tips Before Starting
Changing a dimmer light switch can improve your room’s lighting and save energy. Safety must come first before starting any electrical work. Taking simple precautions will protect you from shocks and accidents. Follow these safety tips carefully to work with confidence.
Turn Off The Power
Switch off the main power at your circuit breaker. This stops electricity from flowing to the switch. Use a voltage tester to check the wires are not live. Never trust the switch’s off position alone.
Use Proper Tools
Pick insulated screwdrivers and pliers for safety. Avoid metal tools without insulation. Keep tools dry and in good condition to prevent slips and shocks.
Wear Safety Gear
Wear rubber-soled shoes to reduce shock risk. Use safety glasses to protect your eyes. Avoid loose clothing or jewelry that can catch wires.
Work In A Dry Area
Ensure the workspace is dry and clear of water. Avoid working in damp or wet conditions. Electricity and water together increase danger.
Follow Manufacturer Instructions
Read the dimmer switch instructions carefully. Each model may have special steps or warnings. Proper installation avoids damage and hazards.
Turning Off Power
Turning off the power is the first step in changing a dimmer light switch. Safety must come first. Working with electricity without cutting the power can cause serious harm. Always take the time to stop the flow of electricity before starting any electrical work.
Shutting off power protects you from electric shocks. It also prevents damage to your home’s wiring and devices. This step is simple but very important. Follow the right process to ensure the power is fully off.
Locate The Circuit Breaker Panel
Find the circuit breaker panel in your home. It is usually in the basement, garage, or a utility closet. The panel holds switches for all electrical circuits in your house. Look for the breaker that controls the dimmer switch you want to change.
Switch Off The Correct Breaker
Flip the breaker switch to the “off” position. This stops electricity from reaching the dimmer switch. Double-check to make sure you turned off the right breaker. Turning off the wrong one can affect other parts of your home.
Use A Voltage Tester
Test the dimmer switch with a voltage tester. This tool shows if any power is still flowing. Touch the tester probes to the wires in the switch box. No light or sound from the tester means the power is off.
Double Check Before You Touch
Even after turning off the breaker, test the switch again. Confirm no electricity is present before you handle wires. Safety is the top rule. Never skip this step to avoid accidents.
Removing The Old Dimmer Switch
Removing the old dimmer switch is the first step in replacing it. This process requires safety and care. Turning off the power is crucial to avoid shocks. After that, take off the switch cover and check the wiring.
Follow each step slowly. This helps prevent damage to wires or walls. Keep track of how wires connect to the switch. It makes installing the new dimmer easier.
Turn Off The Power At The Circuit Breaker
Locate your home’s circuit breaker panel. Switch off the breaker that controls the light circuit. Double-check by trying to turn the light on. It should not light up. This step keeps you safe during removal.
Remove The Switch Plate Cover
Use a screwdriver to remove screws from the switch plate. Carefully take off the cover. Set the screws and cover aside for reuse. This exposes the dimmer switch inside the wall.
Unscrew And Pull Out The Old Dimmer Switch
Remove the screws holding the dimmer switch in place. Gently pull the switch out from the wall box. Avoid pulling too hard to protect wires. Pull enough to see the wiring behind it.
Note The Wiring Connections
Look closely at how wires connect to the dimmer. Usually, wires attach with screws or wire nuts. Take a clear picture or draw a diagram. This reference helps with the new switch installation.
Disconnect The Wires Safely
Loosen screws or remove wire nuts to free wires. Keep wires separated to prevent contact. Handle wires carefully to avoid damage. Now, the old dimmer switch is ready to be replaced.
Identifying Wires
Identifying wires is a crucial step before changing a dimmer light switch. It helps ensure safety and proper connection. Knowing which wire is which makes the installation smooth and prevents damage.
Wires in a dimmer switch box usually have different colors and functions. Understanding these colors will guide you in connecting the new dimmer correctly. Let’s explore the common wires and how to identify them.
Recognizing The Line Wire
The line wire carries power from your electrical panel to the switch. It is often black or red. This wire is live and must be handled with care. Use a voltage tester to confirm which wire is the line.
Finding The Load Wire
The load wire connects the switch to the light fixture. It usually has the same color as the line wire but is not live until the switch is on. Identifying the load wire ensures the dimmer controls the light correctly.
Locating The Neutral Wire
Neutral wires complete the electrical circuit. They are typically white and may be bundled together in the switch box. Many dimmer switches need a neutral wire to work properly, so locating it is important.
Spotting The Ground Wire
The ground wire is a safety feature that prevents electric shock. It is either bare copper or green. Always connect the ground wire to the dimmer switch’s grounding screw to ensure safety.
Connecting The New Dimmer Switch
Connecting the new dimmer switch is a key step in your light switch replacement project. It involves attaching wires correctly to ensure safe and smooth operation. Take your time to follow each step carefully. Safety is very important here. Always double-check that the power is off before touching any wires.
Identify The Wires On The New Dimmer Switch
Start by looking at the wires coming from your new dimmer switch. Most dimmer switches have three wires. Usually, these are black, red, and green or bare copper. The black and red wires carry the electrical current. The green or bare wire is for grounding. Knowing which wire does what is very important before connecting them.
Match The Wires From The Wall To The Dimmer Switch
Next, match the wires from your wall to the dimmer switch wires. The black or red wires from the wall connect to the black and red wires on the dimmer. The green or bare copper wire from the wall must connect to the green or bare wire on the switch. Use wire nuts to secure each connection firmly.
Secure All Wire Connections With Wire Nuts
After matching the wires, twist wire nuts onto each pair of wires. Make sure each wire nut fits tightly. Give a gentle tug on each wire to confirm it is secure. Loose connections can cause flickering or be dangerous. Wrap electrical tape around the wire nuts for extra safety and stability.
Attach The Dimmer Switch To The Wall Box
Once all wires are connected, carefully push them back into the wall box. Align the dimmer switch with the screw holes in the box. Use the screws provided to secure the switch in place. Do not over-tighten screws. The switch should sit snugly but not be forced.
Securing The Switch And Cover Plate
Securing the dimmer switch and cover plate is the final step in your installation. This step keeps everything safe and looking neat. A properly secured switch prevents it from moving or causing electrical issues.
Take your time to tighten screws correctly. Loose screws can lead to a wobbly switch or exposed wiring. The cover plate also protects the switch and hides the wall opening.
Aligning The Dimmer Switch
First, make sure the dimmer switch fits well in the electrical box. The switch should sit flush against the wall. Check for any wires that might get pinched or stuck.
Hold the switch steady. Use your fingers to push it gently into place. Avoid forcing it, which could damage wires or the switch itself.
Tightening The Mounting Screws
Next, use a screwdriver to tighten the mounting screws. Tighten each screw evenly. Stop when the switch feels firm and does not move.
Do not overtighten. Too much force can crack the switch or strip the screws. The goal is a secure, snug fit.
Attaching The Cover Plate
Place the cover plate over the switch. Make sure the screw holes line up. The plate should sit flat against the wall.
Insert the cover plate screws. Tighten them just enough to hold the plate firmly. Avoid overtightening to prevent cracking the plate.

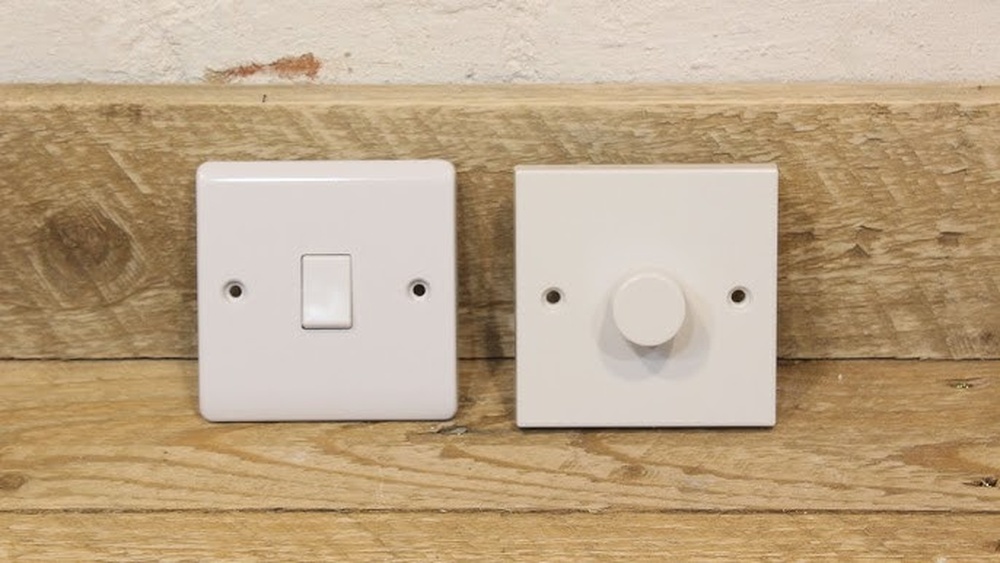
Credit: www.gelighting.com
Restoring Power And Testing
Restoring power and testing the dimmer switch completes the installation process. This step ensures the switch works correctly and safely. Follow these simple actions to bring power back and check the switch’s function.
Restore Power At The Circuit Breaker
Go to your circuit breaker panel. Find the breaker that controls the light switch. Flip the breaker to the ON position. This action restores electricity to the switch. Make sure the breaker stays in the ON position.
Test The Dimmer Switch
Return to the dimmer switch location. Slowly turn the dimmer knob or slide the control. Watch the light brightness change smoothly. Turn the dimmer all the way off and on again. The light should respond without flickering or cutting out.
Check For Any Issues
Listen for buzzing or humming sounds. These can mean the dimmer is not compatible with the bulbs. Look for flickering or uneven light levels. If problems appear, turn off power and review the installation steps. Fix any wiring errors or replace incompatible bulbs.
Troubleshooting Common Issues
Troubleshooting common issues with dimmer light switches helps save time and effort. Some problems may seem tricky but often have simple fixes. Understanding these issues makes replacing or repairing easier.
Many dimmer switch problems come from wiring, compatibility, or bulb types. Identifying the cause helps avoid further damage and ensures smooth operation.
Check For Loose Wiring Connections
Loose wires cause flickering or no light at all. Turn off the power before inspecting the switch. Tighten any screws holding the wires firmly. Make sure each wire is connected to the correct terminal.
Verify Bulb Compatibility
Not all bulbs work with dimmer switches. Use dimmable LED or incandescent bulbs. Non-dimmable bulbs may flicker or not dim properly. Always check the bulb packaging for dimmer compatibility.
Test The Dimmer Switch Function
Sometimes the dimmer switch itself is faulty. Swap it with a known working switch to test. If the issue stops, the dimmer switch needs replacement. If not, check wiring or bulbs again.
Inspect For Overheating Or Damage
Overheating can cause switch failure. Look for discoloration or melting around the switch. Replace the dimmer if any damage appears. Use switches rated for the total wattage of your bulbs.
Choosing The Right Dimmer For Your Space
Choosing the right dimmer for your space is important for comfort and style. The right dimmer controls light levels smoothly. It matches your bulbs and room needs. A good dimmer saves energy and extends bulb life.
Think about the type of bulbs you use. Different bulbs need different dimmers. Also, consider the size of your room and the mood you want. Some dimmers offer more control than others.
Types Of Dimmer Switches
There are several dimmer switch types. Rotary dimmers turn with a knob. Slide dimmers move up and down. Touch dimmers work with a tap. Choose one that fits your habits and style.
Compatibility With Bulbs
Not all dimmers work with all bulbs. LED bulbs need special dimmers. Incandescent bulbs work with most dimmers. Check the packaging for compatibility. Using the wrong dimmer can cause flickering or damage.
Consider The Room Size And Lighting Needs
Large rooms may need multiple dimmers or zones. Small rooms can use simple dimmers. Think about how much light you want. Some dimmers allow fine adjustments. Match the dimmer to your lighting plan.
Frequently Asked Questions
How Do I Safely Turn Off Power Before Changing A Dimmer Switch?
Always switch off the circuit breaker controlling the dimmer. Use a voltage tester to ensure no electricity flows. Safety first prevents shocks and accidents during installation.
What Tools Do I Need To Replace A Dimmer Light Switch?
You’ll need a screwdriver, wire stripper, voltage tester, and the new dimmer switch. These tools ensure a smooth and safe replacement process.
Can I Replace A Standard Switch With A Dimmer Switch?
Yes, you can replace a standard switch with a dimmer if compatible. Check your light bulbs and wiring before installation for proper function.
How Do I Connect Wires To A New Dimmer Switch?
Match the wires by color: usually black to black, green or copper to ground. Secure them tightly with wire nuts to ensure good contact.
Conclusion
Changing a dimmer light switch is simple and safe with the right steps. Always turn off the power before starting to avoid accidents. Take your time to connect wires carefully and securely. Test the new switch to make sure it works well.
A proper install can improve your room’s lighting and save energy. You can enjoy the right brightness for any mood or task. This small project boosts your home’s comfort without much effort. Give it a try and see the difference yourself.