Are you tired of stubborn command hooks leaving marks or peeling paint when you try to remove them? You’re not alone.
Removing command hooks without damaging your walls might seem tricky, but it doesn’t have to be. Imagine taking down those hooks smoothly, without stress or mess, and keeping your walls looking perfect. You’ll discover simple, effective steps that anyone can follow to protect their walls while removing command hooks.
Keep reading—you’re about to save time, avoid frustration, and keep your space looking flawless.
Credit: www.makingmanzanita.com
Choosing The Right Command Hooks
Choosing the right Command hooks is important to protect your walls. Different hooks work best on different surfaces and weights. Picking the correct hook helps you remove it without damage. It also keeps your items secure and your walls clean.
Types Of Command Hooks
There are many types of Command hooks. Some have a small design for light items. Others are larger and stronger for heavy objects. Some hooks come with a wire or clip. Others have a flat back for smooth surfaces. Choose the hook that fits your item and wall type.
Weight Limits And Wall Compatibility
Each Command hook has a weight limit. Exceeding the limit can cause damage to the wall. Check the package for the maximum weight the hook can hold. Also, consider your wall type. Some hooks work better on painted walls or tiles. Others fit well on wood or metal surfaces. Match the hook’s weight limit and wall type for best results.
Preparing For Removal
Preparing to remove command hooks is important to protect your walls. Careful steps help avoid damage and make the process smooth. Start by getting ready with the right tools and clearing the hooks safely.
Clearing Items From Hooks
Remove all items hanging on the command hooks. Take down pictures, keys, or decorations gently. This prevents accidents and gives you clear access to the hooks. Make sure nothing is left that could fall or break during removal.
Gathering Necessary Tools
Collect tools needed for the job. You might need dental floss, a hairdryer, or rubbing alcohol. Having these tools ready saves time and helps the removal go well. Keep a soft cloth nearby to clean any marks after removal.
Step-by-step Removal Process
Removing command hooks without damaging your wall is easy with the right steps. Following a clear process helps keep your wall smooth and clean. This guide breaks down the removal into simple actions anyone can do.
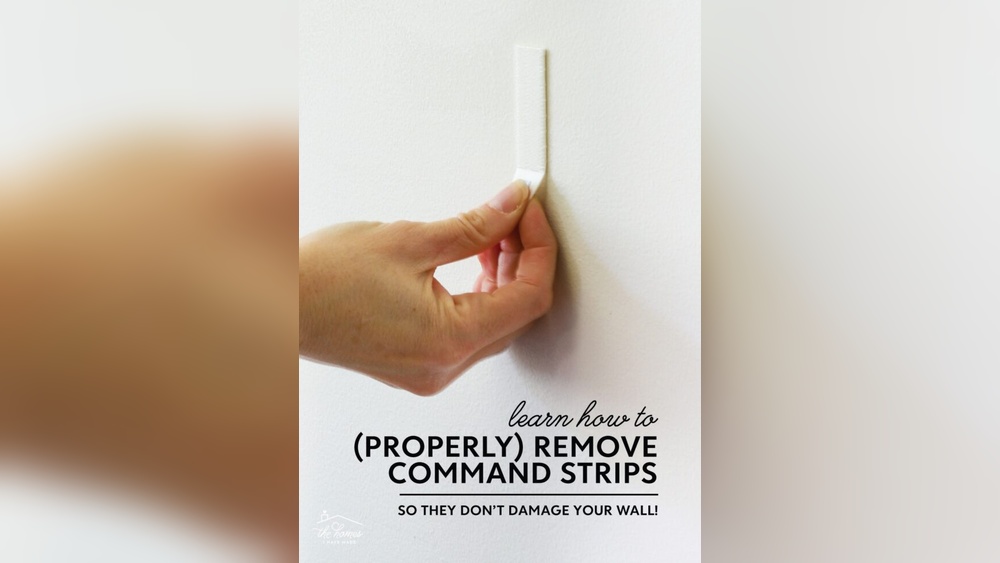
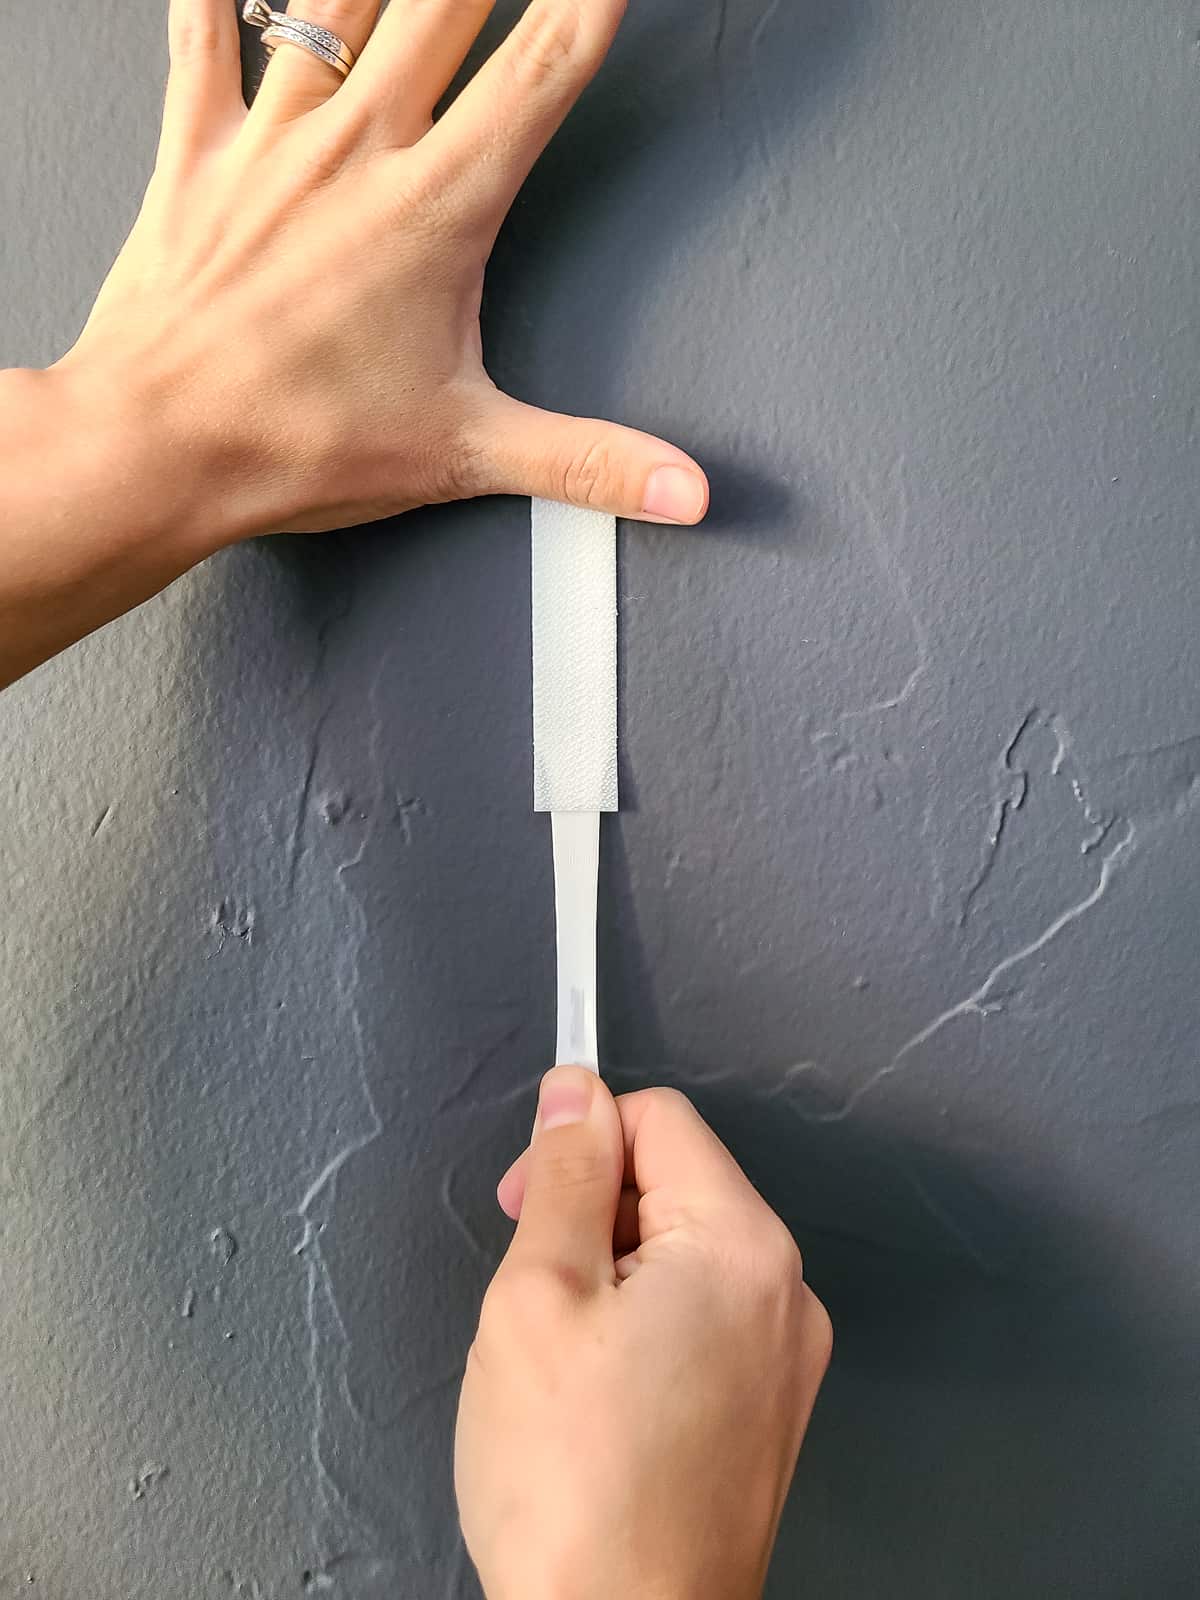
Stretching The Adhesive Strip
First, hold the command hook gently. Find the tab at the bottom of the adhesive strip. Slowly pull this tab straight down. Keep pulling the strip along the wall, not outward. Stretching the strip this way breaks the bond safely.
Pulling The Strip Slowly
Pull the strip slowly and steadily. Quick or strong pulls can damage paint or drywall. Stretch the strip until it comes off completely. Take your time to avoid wall damage. A slow pull keeps the surface intact.
Avoiding Common Mistakes
Do not pull the strip toward you or at an angle. Avoid rushing the removal process. Do not use sharp tools to pry the hook off. Using heat or rubbing alcohol can help loosen the adhesive if needed. These tips prevent wall marks and peeling paint.

Credit: www.youtube.com
Tips For Different Wall Surfaces
Removing command hooks without harming your walls requires care. Different wall surfaces need special steps. Knowing the right method protects your walls and keeps them looking good. Below are tips for common wall types.
Drywall
Drywall is common in many homes. Pull the tab slowly down along the wall. Do not pull the hook outward. This avoids peeling paint or drywall paper. If the hook feels stuck, warm the adhesive with a hairdryer. This softens the glue and makes removal easier.
Painted Walls
Painted walls can peel if pulled too hard. Gently stretch the adhesive strip straight down. Avoid pulling at an angle or outwards. Use a hairdryer on low heat to soften the glue. Move the heat back and forth for a minute before pulling. This reduces the risk of paint damage.
Tile And Glass
Tile and glass surfaces handle hooks differently. Pull the adhesive strip straight down slowly. These surfaces do not absorb glue, so removal is easier. Clean any leftover sticky residue with rubbing alcohol. Avoid sharp tools that can scratch tiles or glass.
Dealing With Residue And Marks
Removing command hooks can leave sticky residue or marks on your wall. These marks look messy and can attract dirt. Cleaning them carefully keeps your wall smooth and fresh. Use gentle methods to avoid damage while removing sticky spots.
Using Mild Cleaners
Start with mild cleaners like warm water and soap. Dampen a soft cloth and rub the marks gently. Avoid harsh chemicals that can peel paint or damage wallpaper. Mild cleaners are safe and effective for most wall surfaces.
Test the cleaner on a small hidden spot first. This ensures no discoloration or damage will occur. Repeat the cleaning process until residue fades away completely.
Removing Sticky Residue Safely
Sticky residue can be stubborn but patience helps. Use a little rubbing alcohol or vinegar on a cloth. Dab gently on the sticky area, do not soak the wall. Let it sit for a minute to soften the glue.
Wipe the softened residue carefully in circular motions. Avoid scrubbing hard to protect the paint or wallpaper. After removal, clean the spot with water and a soft cloth to remove any leftover cleaner.
Preventing Wall Damage In Future
Preventing wall damage in the future starts with smart choices today. Small steps can save you from big repairs later. Taking care during hook placement and selecting the right adhesive makes all the difference. These simple habits keep your walls clean and smooth.
Proper Hook Placement
Choose smooth, clean areas for your hooks. Avoid placing hooks on textured or weak surfaces. Place hooks away from corners and edges. These spots are more likely to peel or chip. Use a level to keep hooks straight. Proper placement spreads the weight evenly. This prevents paint from cracking or peeling over time.
Choosing Removable Adhesives
Select adhesives made for easy removal. Look for products labeled damage-free or removable. These adhesives hold well but peel off cleanly. Avoid strong glues or tapes that tear paint. Test a small area before full use. Using the right adhesive keeps walls intact. It also saves time and effort during removal.

Credit: www.reddit.com
Frequently Asked Questions
How Do I Remove Command Hooks Without Wall Damage?
To remove command hooks safely, pull the adhesive strip slowly downward, stretching it along the wall. Avoid pulling outward to prevent paint peeling or wall damage.
Can I Reuse Command Hooks After Removal?
No, command hooks are designed for single use. Once removed, the adhesive loses strength, so reuse is not recommended for secure hanging.
What Tools Help Remove Command Hooks Safely?
No tools are needed. Gently stretch the adhesive strip downward by hand. Using tools may damage the wall or paint surface.
How To Fix Minor Wall Damage From Command Hooks?
Use a small amount of spackle or wall filler to fill holes. Sand smooth after drying, then repaint if necessary for a flawless finish.
Conclusion
Removing command hooks without harming your walls is simple with care. Pull the tab slowly, straight down, to avoid damage. Use heat from a hairdryer if the adhesive feels stuck. Take your time. Small steps protect your paint and drywall.
Clean the area gently after removal for best results. These tips help keep walls smooth and ready for new hooks. Easy and safe. Save money and avoid repairs. Walls stay looking fresh and neat.