Your home’s small details can make a big difference, and light switch plates are no exception. If you’ve ever noticed how plain or boring they look, you’re not alone.
But what if you could turn those simple switch plates into eye-catching accents that reflect your style? Decorating your light switch plates is easier than you think, and it can instantly lift the look of any room. Keep reading, and you’ll discover creative, budget-friendly ideas that you can try right now to transform those overlooked spots into something truly special.
Credit: www.buzzfeed.com
Choose A Theme
Choosing a theme is the first step to decorate light switch plates. It helps create a consistent look and feel in your room. Themes make the switch plates more than just functional. They become part of the room’s style and mood.
Selecting a theme also makes decorating easier. You can pick colors, patterns, and designs that fit together. This way, your light switch plates blend with the room or stand out in a fun way.
Match Your Room Style
Start by looking at your room’s style. Is it modern, rustic, or classic? Choose switch plate designs that fit this style. For a modern room, try sleek and simple plates. Rustic rooms do well with wood or nature-inspired designs. Classic rooms look good with elegant, vintage patterns. Matching the style keeps your room balanced and neat.
Seasonal And Holiday Ideas
Seasonal themes bring fresh vibes to your space. Use bright flowers or soft pastels in spring. Warm tones and leaves work well for fall. Holiday themes like Christmas or Halloween add fun and cheer. Change plates with the seasons to keep your room lively. This small change can brighten the whole room.
Whimsical And Fun Themes
Whimsical themes add playfulness to any space. Choose designs with animals, cartoons, or funny shapes. Kids’ rooms are perfect for these lively themes. They make the room feel happy and inviting. Fun switch plates can also be a great conversation starter. Don’t be afraid to pick bold and colorful options.
Select Materials
Selecting the right material for your light switch plates can change a room’s feel. The material affects the style, texture, and durability. Choose something that matches your room’s mood and your personal taste. Here are some popular options that work well in many spaces.
Wood And Natural Elements
Wood switch plates add warmth and charm to any room. They fit well in rustic or farmhouse styles. Natural grains create unique patterns on each plate. You can stain or paint wood to match furniture or walls. These plates bring a cozy, organic touch to your space.
Metal And Industrial Looks
Metal plates offer a sleek, modern vibe. They work great in industrial or contemporary rooms. Common metals include stainless steel, brass, and copper. These materials are sturdy and easy to clean. Metal plates add a cool, polished finish to your walls.
Fabric And Textured Covers
Fabric switch plates create softness and texture. Choose fabrics like burlap, linen, or cotton. These covers can match curtains or upholstery. They bring a gentle, homey feel to the room. Fabric plates are perfect for adding subtle color and pattern.
Paint And Patterns
Painting and patterns transform plain light switch plates into eye-catching decor. They offer a simple way to add personality to any room. Choose colors and designs that match your style. Experiment with different techniques for unique effects. These ideas help your switch plates stand out and brighten the space.
Bold Colors And Contrasts
Use bright colors to make switch plates pop. Contrast light and dark shades for a striking look. Red against white or black on yellow creates strong visual interest. Pick colors that match or complement your wall paint. Bold hues draw the eye and add energy to the room.
Stencils And Stamping Techniques
Stencils create neat, repeatable patterns on switch plates. Use simple shapes like stars or flowers for a charming touch. Stamping adds texture and detail quickly. Choose stamps with fun designs to personalize your plates. Both methods make painting easier and more precise.
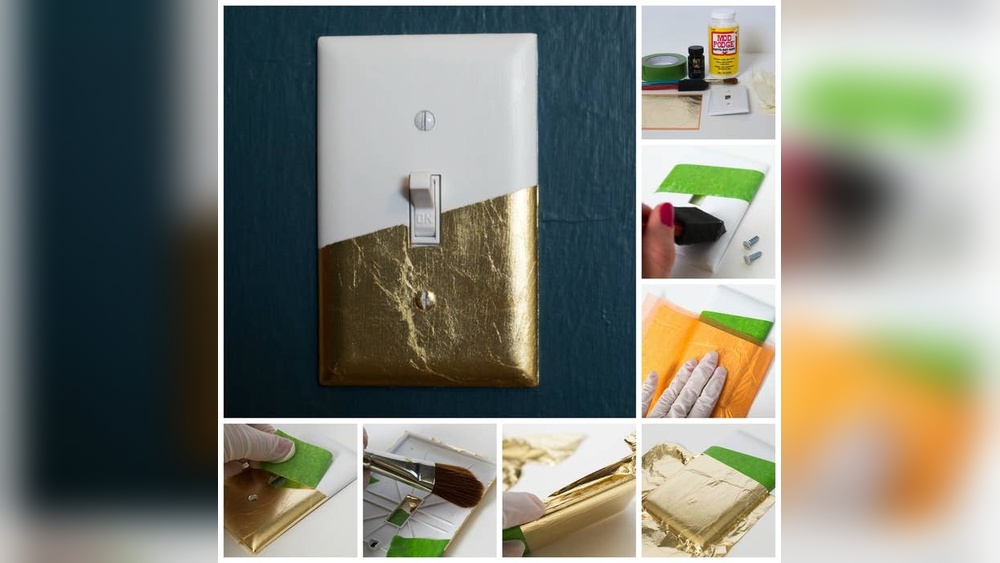
Ombre And Gradient Effects
Ombre blends colors smoothly from light to dark. This gradient effect adds depth and style. Start with a light color at the top and darken it gradually. Use a sponge or brush to blend the paint. Ombre effects create a soft, artistic look on switch plates.
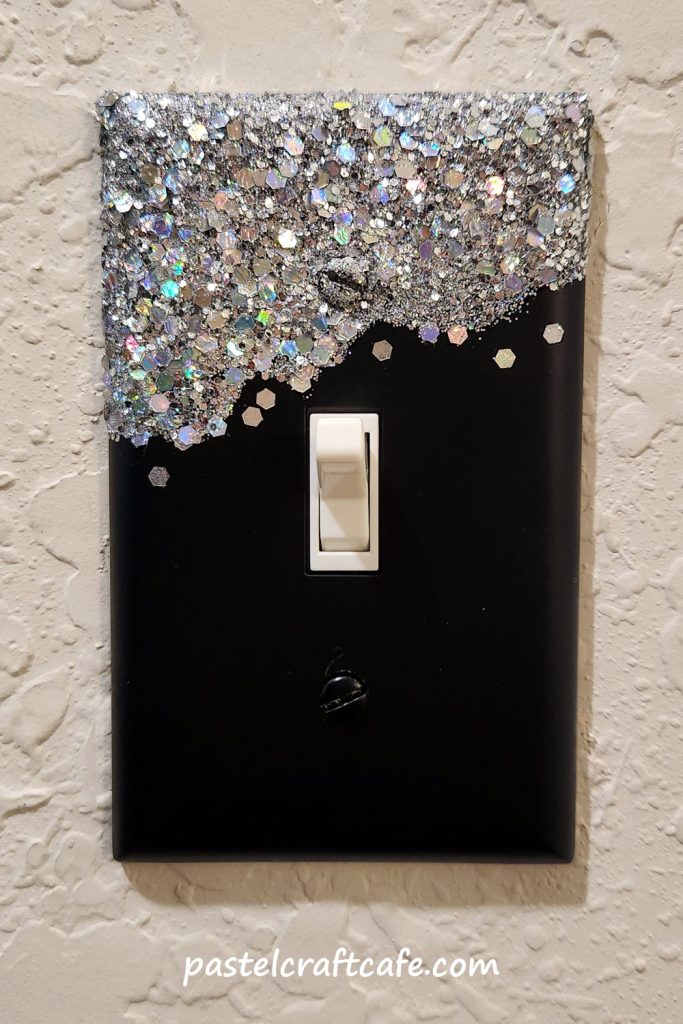
Credit: pastelcraftcafe.com
Add Embellishments
Adding embellishments to light switch plates transforms plain covers into unique decor pieces. This simple step personalizes your space and adds charm. Small details catch the eye and brighten the room.
Using Stickers And Decals
Stickers and decals offer an easy way to decorate switch plates. Choose designs that match your room’s style. Apply them carefully to avoid bubbles or wrinkles. They peel off without damage, perfect for renters.
Attach Small Ornaments
Small ornaments create a three-dimensional look on switch plates. Use lightweight items like tiny flowers or charms. Glue them securely with strong adhesive. This adds texture and makes the switch plate stand out.
Incorporate Beads And Rhinestones
Beads and rhinestones bring sparkle and elegance to switch plates. Arrange them in patterns or borders for a neat design. Use clear glue to hold each piece firmly in place. They catch light and add a bit of glam.
Diy Techniques
DIY techniques make decorating light switch plates fun and personal. These simple projects need few tools and materials. You can create unique designs that match your room’s style. Small changes bring a fresh look without much effort.
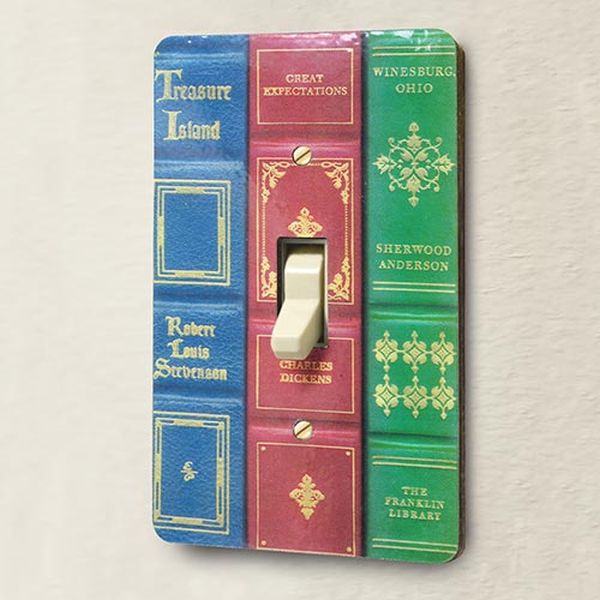
Decoupage Ideas
Decoupage uses paper cutouts to decorate switch plates. Choose pretty napkins, magazine pictures, or wrapping paper. Cut shapes or patterns and glue them on the plate. Seal with clear glue or varnish for a smooth finish. This method is easy for beginners and offers endless designs.
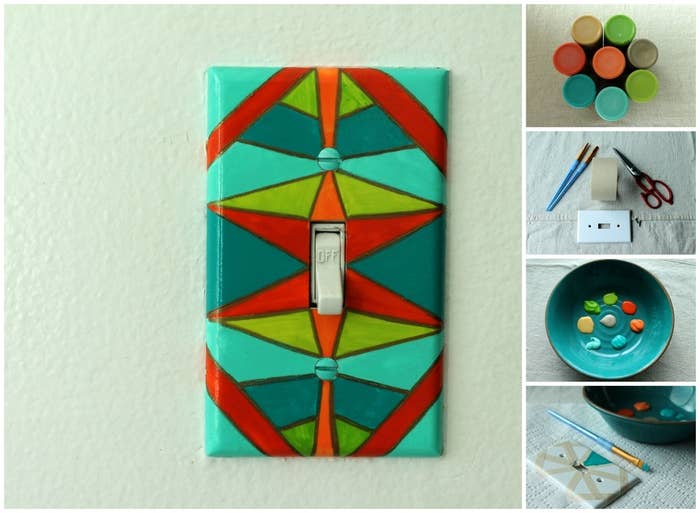
Hand-painted Designs
Hand-painting lets you create custom art on switch plates. Use acrylic paint and small brushes for details. Simple patterns like flowers, stripes, or dots work well. Paint in thin layers to avoid drips. Finish with a clear coat to protect your design. This technique adds a personal touch to any room.
Upcycling Old Switch Plates
Old plates can become new with upcycling. Sand them lightly to remove old paint. Apply primer and then paint in your favorite colors. Add texture with stencils or sponges. Use materials like fabric or beads to decorate further. Upcycling saves money and helps the environment.
Safety Tips
Decorating light switch plates can brighten any room. Safety is key during this fun task. Taking simple steps keeps you safe and avoids accidents. Follow these essential safety tips before starting your decoration project.
Turn Off Power Before Decorating
Always switch off the power at the circuit breaker. This stops electricity flow to the switch. It prevents shocks while you work. Double-check by flipping the light switch to see if it’s off.
Use Non-conductive Materials
Choose materials that do not carry electricity. Avoid metals or anything that can cause sparks. Use plastic, wood, or fabric for decoration. This keeps the switch safe to use after decorating.
Ensure Easy Access To Switches
Keep the switch plate design simple and accessible. Don’t cover the switch or make it hard to press. Make sure decorations do not block the switch or its edges. This allows easy use and quick access in emergencies.
Maintenance And Care
Decorated light switch plates add charm to any room. They need care to stay beautiful and last long. Regular maintenance keeps them clean and fresh. Small repairs fix damage and keep plates looking new. Sometimes, replacing covers is the best choice for a neat look.
Cleaning Painted Plates
Use a soft cloth to clean painted switch plates. Avoid harsh chemicals that can damage the paint. A damp cloth with mild soap works well. Gently wipe the surface to remove dust and dirt. Dry the plate with a clean cloth to prevent water spots.
Repairing Chips And Scratches
Small chips and scratches can be fixed easily. Use a matching paint to cover the damaged spots. Apply paint in thin layers for a smooth finish. Let the paint dry completely before touching the plate. This keeps the plate looking fresh and new.
Replacing Covers When Needed
Switch plates can wear out over time. Cracks or deep scratches may need replacement. Unscrew the old plate carefully and remove it. Choose a new cover that matches your decor. Screw the new plate tightly but avoid over-tightening to prevent cracks.
Credit: www.homedit.com
Frequently Asked Questions
How Can I Decorate Light Switch Plates Creatively?
You can paint, use washi tape, or add decals to switch plates. Consider using fabric or wallpaper for a textured look. Customize with stencils or stickers for unique designs. These options are affordable and easy to update, enhancing any room’s style.
What Materials Work Best For Customizing Switch Plates?
Plastic and metal switch plates are ideal for decoration. Acrylic paint adheres well to plastic plates. For metal, use spray paint or enamel. Stickers and decoupage work on both surfaces. Always clean plates before decorating for best results.
Are There Safe Ways To Decorate Light Switch Plates?
Yes, always turn off power before removing plates. Use non-toxic paints and adhesives. Avoid covering ventilation holes to prevent overheating. Let paints dry completely before reinstalling. Safety ensures your decor is both beautiful and functional.
How Often Should I Update Switch Plate Designs?
Update switch plates seasonally or during room makeovers. Frequent changes keep spaces fresh and trendy. Lightweight materials like paper or fabric make swaps easy. Regular updates can match evolving decor styles or holidays.
Conclusion
Decorating light switch plates adds charm to any room. Small changes can make a big difference. Choose colors and patterns that match your space. Use easy tools and materials for quick results. Personal touches make your home feel special. Try different styles to find what you like best.
Enjoy the process and have fun creating. Simple projects bring joy and brighten your walls. Give your switches a fresh, new look today!