Are you struggling to hang heavy items on your hollow walls without worrying about them falling? Learning how to drill hollow wall anchors correctly can make all the difference.
With the right technique, you’ll secure shelves, mirrors, and more safely and easily. In this guide, you’ll discover step-by-step instructions that anyone can follow, even if you’re new to DIY projects. Keep reading, and you’ll gain the confidence to handle your walls like a pro.
Choosing The Right Anchor
Choosing the right anchor is key for a strong and safe hold. Different anchors fit different walls and loads. Picking the correct one saves time and prevents damage. This guide helps you find the best hollow wall anchor for your project.
Types Of Hollow Wall Anchors
There are several hollow wall anchors. Toggle bolts have wings that open behind the wall. They hold heavy items well. Molly bolts expand inside the wall when tightened. They work for medium weight loads. Plastic anchors are simple and fit light items. Each type suits a different need and wall.
Selecting Based On Wall Material
Wall material affects anchor choice. Drywall is soft and needs anchors that spread the load. Plaster walls are harder and may crack without the right anchor. Hollow block or panel walls require anchors that expand or lock inside. Match the anchor to the wall type for best results.
Weight Capacity Considerations
Check the weight of the item to hang. Each anchor has a weight limit listed on the package. Use anchors that handle more than your item weighs. Overloading anchors causes wall damage or falling objects. Safety depends on choosing anchors that support the load securely.

Credit: www.youtube.com
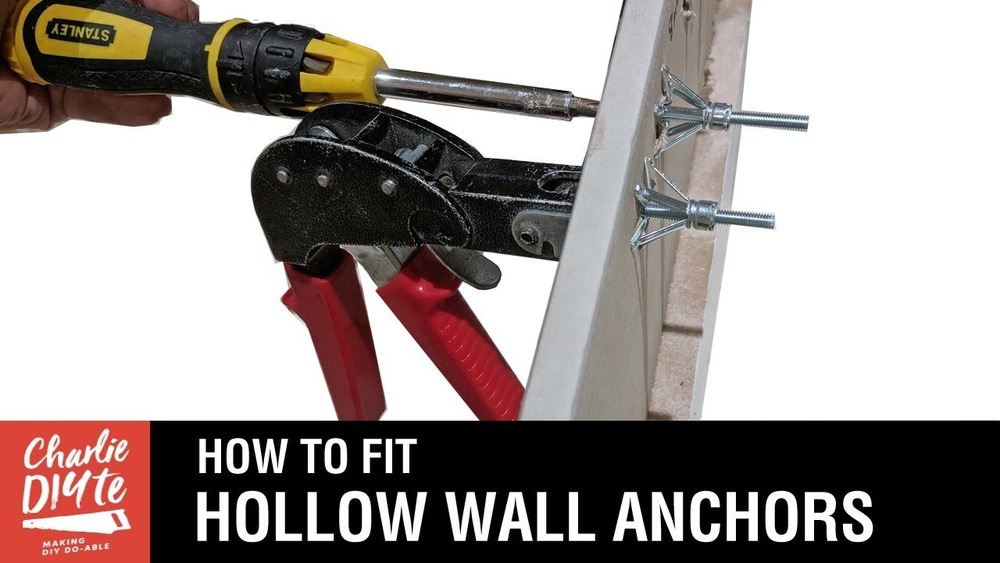
Gathering Essential Tools
Gathering the right tools is the first step to drilling hollow wall anchors successfully. Having the correct equipment makes the task easier and safer. It also helps ensure the anchors hold firmly in place. Below are the essential tools you will need before starting.
Drill And Drill Bits
A reliable drill is necessary for making clean holes in hollow walls. Choose a drill with adjustable speed settings for better control. Use drill bits designed for drywall or plaster to avoid damage. The bit size should match the anchor size exactly. This helps the anchor fit tightly and hold strong.
Measuring Tools
Accurate measurements prevent mistakes and wasted materials. Use a tape measure or ruler to mark the drill spot. A pencil works well for marking without damaging the wall. A level can help ensure your anchors are straight. Measuring twice saves time and effort.
Safety Equipment
Protecting yourself is vital during drilling tasks. Wear safety glasses to shield your eyes from dust and debris. Use a dust mask to avoid inhaling particles. Gloves protect your hands from rough surfaces and sharp tools. Keep your workspace clean and well-lit for safer work.
Preparing The Wall
Preparing the wall is a key step before drilling hollow wall anchors. This step ensures the anchors hold strong and the wall stays safe. Proper preparation prevents damage and makes the job easier.
Take time to prepare the wall carefully. It saves effort and avoids mistakes during drilling.
Locating Studs And Cavity
First, find the studs behind the wall. Studs are wooden or metal supports. Anchors should go into the wall cavity, not the studs. Use a stud finder tool. It helps locate studs quickly and accurately. Mark the spaces between studs where the cavity is deep enough for anchors.
Marking Drill Points
After finding the cavity, mark the exact drill points. Use a pencil to make small dots on the wall. These marks guide your drill and keep holes straight. Measure carefully to space the anchors evenly. Proper marking helps avoid mistakes and keeps the work neat.
Checking For Obstacles
Look for pipes, wires, or other obstacles inside the wall. These can cause damage or danger if drilled into. Use a wire detector or inspection camera. Avoid drilling where obstacles are present. Safety comes first when preparing the wall.
Credit: www.jcyscrews.com
Drilling The Hole
Drilling the hole is a key step when installing hollow wall anchors. The hole must be the right size and depth. This ensures the anchor fits well and holds firmly. Careful drilling prevents wall damage and makes the installation easier.
Choosing Drill Bit Size
Pick a drill bit that matches the anchor size. Check the anchor packaging for the recommended size. Using a drill bit too large makes the hole loose. Too small, and the anchor won’t fit.
Use a standard twist drill bit for most hollow walls. For plaster or drywall, a sharp bit cuts cleaner holes. Measure twice before drilling to avoid mistakes.
Drilling Technique
Hold the drill steady and perpendicular to the wall. Start drilling slowly to avoid slipping. Increase speed once the bit bites into the wall.
Drill straight to keep the hole clean and even. Stop drilling once the hole reaches the anchor’s length. Mark the drill bit with tape as a depth guide.
Avoiding Damage
Check for pipes or wires behind the wall before drilling. Use a stud finder or wire detector. Avoid drilling near corners or edges to prevent cracks.
Do not force the drill. Let the bit cut the material gently. Clean dust from the hole before inserting the anchor. This helps the anchor grip better.
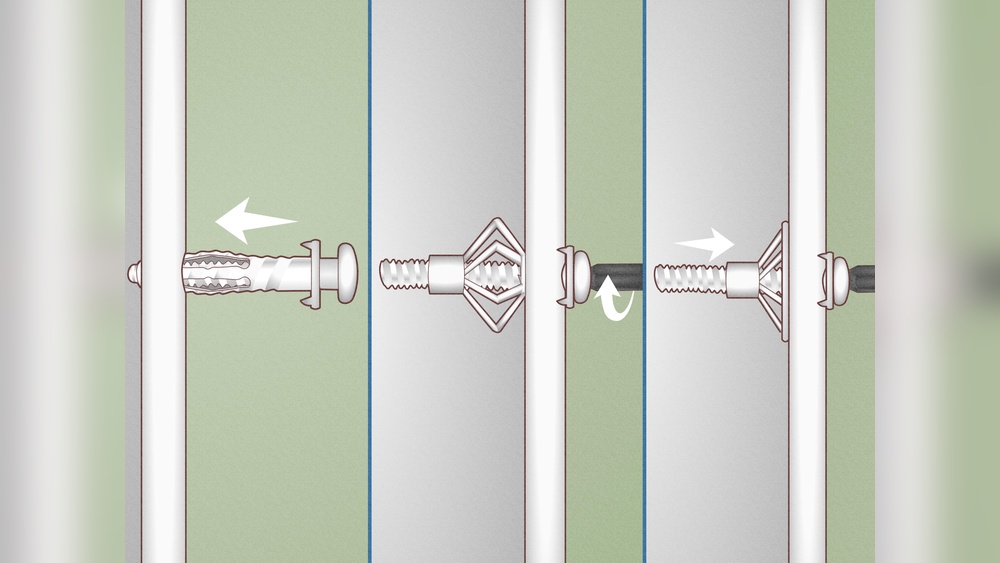
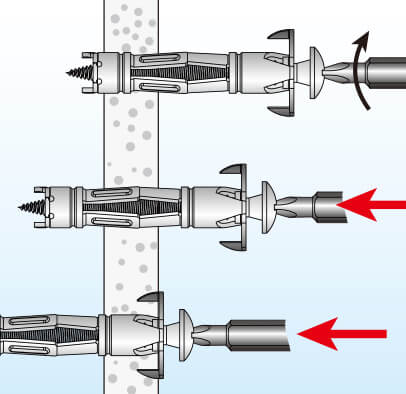
Installing The Anchor
Installing a hollow wall anchor is a key step to secure objects safely. This process makes sure the anchor fits tightly inside the wall. Proper installation helps the anchor hold weight without slipping or falling out.
Inserting The Anchor
Push the hollow wall anchor gently into the drilled hole. Use your fingers or a small hammer to tap it in. Stop when the anchor’s flange is flush with the wall surface. The anchor must sit evenly to hold firmly.
Expanding The Anchor
Turn the screw or bolt slowly to expand the anchor inside the wall. This causes the anchor to spread behind the drywall. The expansion grips the wall firmly, creating a strong hold. Do not overtighten; stop when you feel resistance.
Testing Anchor Stability
Pull lightly on the installed anchor to test its grip. The anchor should not move or wiggle. If it feels loose, remove and try again with a larger anchor. A stable anchor keeps mounted items safe and secure.
Mounting Your Item
Mounting your item on a hollow wall requires careful steps. This ensures the anchor holds firmly and your fixture stays safe. Follow these simple steps to mount your item securely and neatly.
Aligning The Fixture
Place your item against the wall. Match the holes of the fixture with the drilled anchors. Hold it steady to prevent movement. Check if the item is level and straight. Small adjustments now save trouble later.
Securing With Screws
Insert screws through the fixture holes into the anchors. Use a screwdriver or drill with a low setting. Tighten screws slowly to avoid damaging the wall. Stop once the item feels firm and does not wiggle. Avoid over-tightening to protect the anchor’s grip.
Final Adjustments
Look closely at the mounted item. Make sure it is secure and aligned. Tighten any loose screws gently. Wipe the area clean from dust or debris. Enjoy the clean, strong mount ready to hold your item safely.
Common Mistakes To Avoid
Drilling hollow wall anchors can be tricky. Many people make simple mistakes that cause weak holds or damaged walls. Avoid these common errors to get a strong and safe fix. Understanding what to avoid saves time and effort.
Wrong Anchor Size
Choosing the wrong anchor size causes poor support. Too small anchors may not hold the weight. Too large anchors can crack the wall. Match the anchor size to your drill bit and the item’s weight.
Over-drilling
Drilling too deep or too wide weakens the wall. The anchor won’t fit snugly, leading to a loose hold. Drill just enough to fit the anchor tightly. Stop as soon as the anchor fits in place.
Ignoring Wall Material
Different walls need different anchors. Drywall, plaster, and brick are not the same. Using the wrong anchor can cause damage or failure. Check the wall type before choosing the anchor and drill bit.
Maintenance Tips
Maintaining hollow wall anchors is important for safety and durability. Regular care helps keep them strong and reliable. Small checks can prevent big problems later. Follow these tips to keep your anchors in good shape.
Regular Checks
Inspect your anchors often. Look for signs of wear or movement. Check if the anchor holds tight against the wall. Loose or damaged anchors can cause your items to fall.
Reinforcing Loose Anchors
If an anchor feels loose, tighten it carefully. Use the right screwdriver or drill bit. Avoid forcing the anchor, as this may damage the wall. Adding extra support helps keep the anchor firm.
Replacing Damaged Anchors
Remove anchors that show cracks or breaks. Drill a new hole nearby for a fresh anchor. Use the correct size and type for your wall. Proper replacement ensures strong and safe support.

Credit: www.lowes.com
Frequently Asked Questions
What Tools Do I Need To Drill Hollow Wall Anchors?
You need a drill, a drill bit matching anchor size, a screwdriver, and a hammer. These tools ensure proper installation and secure anchoring.
How Do I Choose The Right Drill Bit Size?
Select a drill bit matching the hollow wall anchor’s diameter. This ensures a snug fit and prevents wall damage during installation.
Can I Drill Hollow Wall Anchors In Drywall?
Yes, hollow wall anchors work well in drywall. They provide strong support for hanging items without damaging the wall.
How Deep Should I Drill For Hollow Wall Anchors?
Drill a hole slightly longer than the anchor’s length. This allows the anchor to expand fully and hold securely.
Conclusion
Drilling hollow wall anchors is simple with the right steps. Use the correct drill bit size for a secure fit. Always check the wall type before drilling to avoid damage. Take your time and drill carefully for best results. Practice safety by wearing goggles and keeping tools steady.
With patience, you can hang items firmly and safely. Now, you are ready to handle hollow wall anchors confidently.