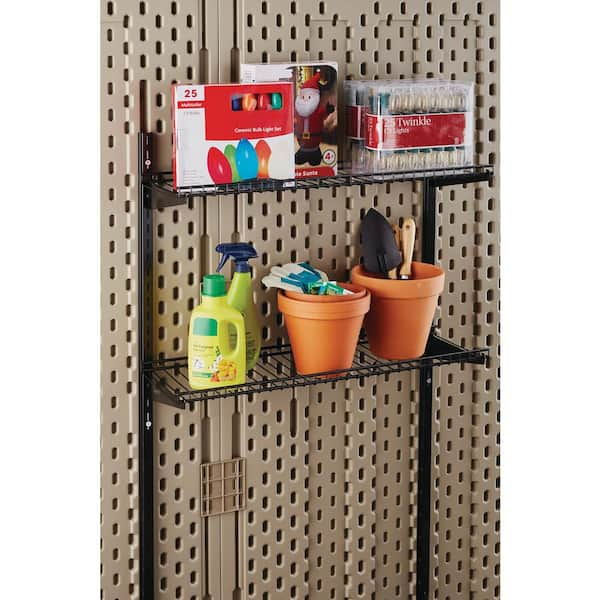
Are you ready to hang shelves, pictures, or hooks but worried about finding the right support? Installing Rubbermaid plastic wall anchors is the simple solution you need.
These anchors hold your items securely on drywall without damaging your walls. In this guide, you’ll learn step-by-step how to install them quickly and correctly. By the end, you’ll feel confident tackling your next home project with ease. Keep reading to discover the easy way to make your walls stronger and your space more organized.
Credit: www.lowes.com
Choosing The Right Wall Anchors
Choosing the right wall anchors is crucial for a secure and lasting hold. Using the wrong type can cause damage or failure. Each project needs specific anchors based on the wall and the object weight. Understanding the types and their uses helps avoid common problems. This guide breaks down how to select the best Rubbermaid plastic wall anchors for your needs.
Types Of Rubbermaid Plastic Anchors
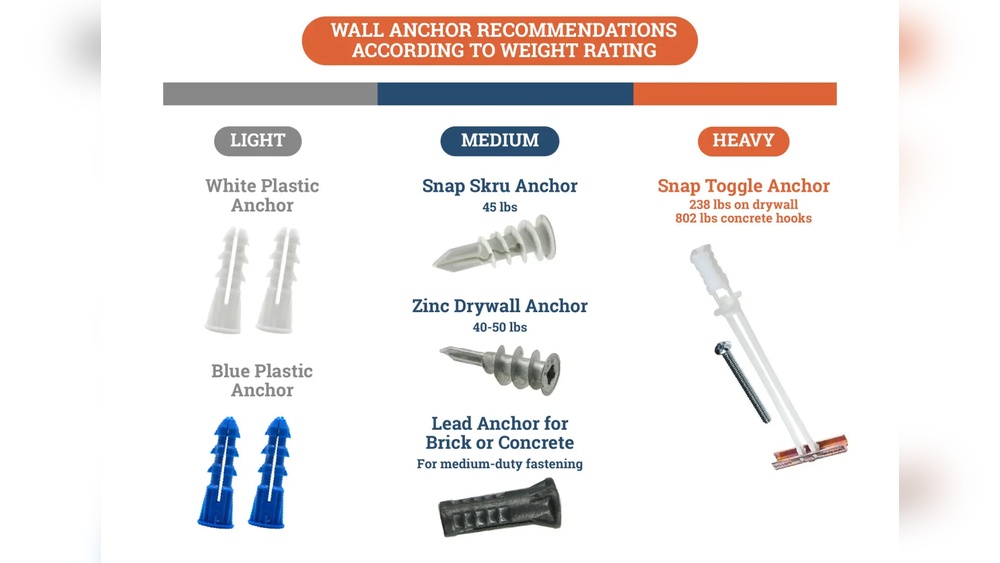
Rubbermaid offers several plastic anchor types. The most common are expansion anchors, toggle anchors, and self-drilling anchors. Expansion anchors expand inside the wall for a tight grip. Toggle anchors use a spring mechanism to hold behind the wall. Self-drilling anchors screw directly into drywall without pre-drilling. Each type fits different wall types and loads. Knowing these types helps pick the right one fast.
Selecting Based On Wall Material
Wall material affects anchor choice. Drywall anchors work best with drywall and plaster. For concrete or brick walls, use anchors designed for masonry. Hollow walls need toggle or expansion anchors for a strong hold. Solid walls require anchors that expand tightly in the hole. Always match the anchor type to the wall material. This ensures stability and prevents wall damage.
Weight Capacity Considerations
Anchor strength depends on weight capacity. Check the label for maximum load the anchor can hold. Light objects need anchors rated for low weight. Heavy objects require anchors with higher weight ratings. Overloading an anchor can cause it to fail. Use anchors with a safety margin above the object’s weight. This protects your walls and mounted items.
Tools And Materials Needed
Before installing Rubbermaid plastic wall anchors, gather all needed tools and materials. Having the right items ready makes the process smooth and safe. This section covers what you need to prepare for the installation.
Essential Tools
Start with a power drill to make holes in the wall. Use drill bits that match the anchor size. A screwdriver helps to secure the anchors tightly. A hammer may be needed to tap anchors into place. A tape measure ensures correct spacing between anchors. Finally, a pencil marks the drilling spots clearly.
Safety Gear
Wear safety goggles to protect your eyes from dust. Use gloves to keep your hands safe from sharp edges. Dust masks prevent inhaling particles during drilling. Ear protection guards your ears from loud drill noises. Safety gear keeps you secure throughout the task.
Preparing The Work Area
Clear the wall and floor space around your work zone. Remove furniture and cover floors with a drop cloth. Ensure good lighting to see marks and holes clearly. Keep tools organized for easy access. A tidy area reduces accidents and speeds up work.
Preparing The Wall
Preparing the wall correctly is key for a strong hold with Rubbermaid plastic wall anchors. It makes the installation easier and safer. Taking time to prepare ensures the anchors fit perfectly and hold weight well.
Marking Anchor Locations
Start by deciding where you want to place the anchors. Use a pencil to mark each spot clearly on the wall. Measure carefully to keep the marks even and straight. This step helps avoid mistakes during drilling.
Checking For Studs And Wires
Use a stud finder to check for studs behind the wall. Avoid drilling into them when using plastic anchors. Also, look out for electrical wires or pipes. This check prevents damage and keeps you safe.
Drilling Pilot Holes
Choose a drill bit size that matches the anchor size. Drill small pilot holes at each marked spot. Drill straight and slow to avoid cracking the wall. These holes guide the anchors for a snug fit.
Credit: www.homedepot.com
Installing The Plastic Anchors
Installing Rubbermaid plastic wall anchors is a simple process that makes your wall fixtures strong. These anchors hold screws tightly in drywall or hollow walls. Follow clear steps to insert and secure the anchors properly. Avoid common mistakes to get the best hold for your items.
Inserting The Anchors
Start by drilling a hole slightly smaller than the anchor size. Push the plastic anchor gently into the hole. Use your fingers or a small hammer to tap it in until it is flush with the wall surface. Do not force it too hard, or the anchor may break.
Ensuring A Secure Fit
Check that the anchor fits tightly inside the hole. It should not wiggle or move. If the hole is too big, the anchor will not hold well. Tighten the screw slowly into the anchor. Feel for resistance as the anchor expands inside the wall. This expansion locks the anchor firmly in place.
Common Installation Mistakes
Drilling a hole that is too large or too small is a frequent error. Forcing the anchor too hard can crack it. Screwing too fast or too deep may strip the anchor’s grip. Using the wrong size anchor for the screw also causes problems. Always match the anchor size to the screw and wall type.
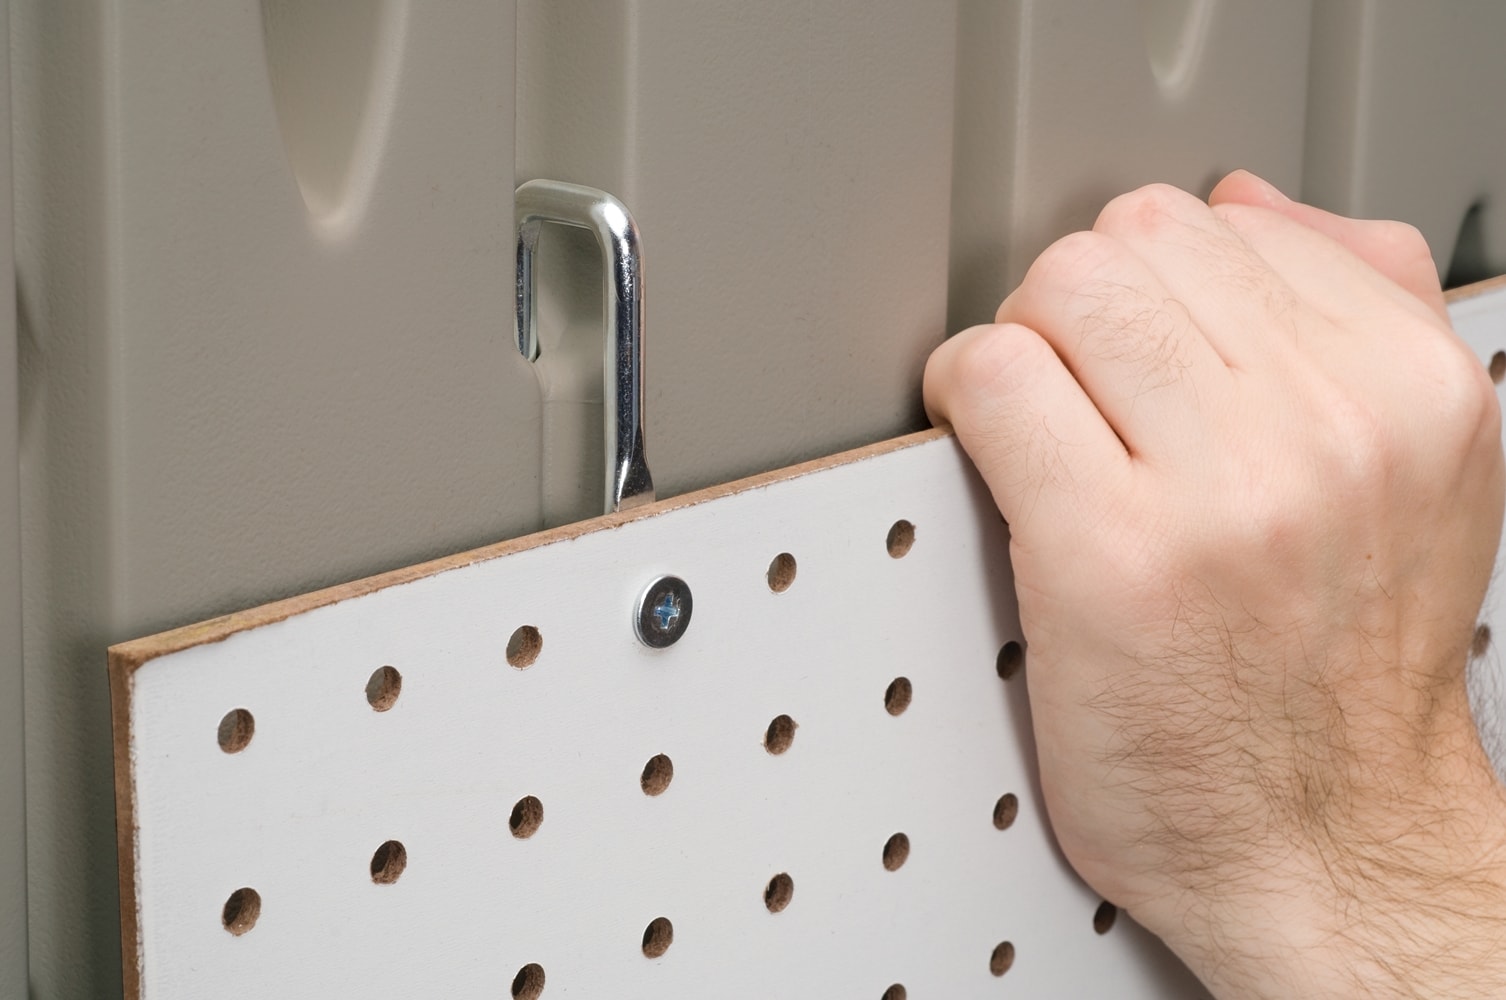
Attaching Fixtures To Anchors
Attaching fixtures to Rubbermaid plastic wall anchors is a key step in securing items safely to your wall. This process ensures the fixture stays firm and stable. Proper attachment prevents damage to both the fixture and wall. Follow these simple steps to make sure your fixture is properly fixed.
Aligning Fixtures Correctly
Place the fixture over the anchor holes carefully. Make sure the holes in the fixture line up with the wall anchors. Check the position twice before inserting screws. Correct alignment avoids crooked or loose fixtures. Use a level tool if needed for perfect placement.
Using The Right Screws
Choose screws that fit the size of the anchors. Screws that are too short or too long can cause problems. Use screws made for plastic anchors to ensure a tight hold. Avoid using old or damaged screws. The right screws help the fixture stay secure over time.
Tightening Without Damage
Turn the screws slowly and gently into the anchors. Tighten just enough to hold the fixture firmly. Over-tightening can crack the plastic anchors or damage the wall. Stop once the fixture feels stable and does not move. Use a screwdriver with good grip for better control.
Testing Stability And Safety
Testing the stability and safety of Rubbermaid plastic wall anchors is crucial after installation. It ensures the anchors hold firm and the mounted item stays secure. This step prevents accidents and damage to walls or belongings. Proper testing helps you trust the installation’s strength and durability.
Checking Anchor Hold
Gently pull or push the mounted item to test the anchor hold. It should not move or wiggle. A firm grip means the anchor is properly set. If the item shifts, the anchor may not be secure enough. Test several times to confirm stability.
Adjustments If Needed
Loose anchors require quick adjustments to improve hold. Remove the item carefully before fixing the anchor. Try tightening the anchor or repositioning it in the wall. Use a larger anchor if the hole is too big. Repeat the stability check after each adjustment.
Maintenance Tips
Regularly inspect the anchors and mounted items for any looseness. Tighten screws or replace anchors showing wear or damage. Avoid overloading the anchors beyond their weight capacity. Keeping anchors in good condition ensures long-term safety and performance.

Credit: www.acehardware.com
Frequently Asked Questions
What Tools Are Needed To Install Rubbermaid Wall Anchors?
You need a drill, screwdriver, hammer, and the Rubbermaid anchors. These tools ensure proper installation and secure mounting.
How Do I Prepare The Wall For Rubbermaid Anchors?
Mark the spot, drill a hole slightly smaller than the anchor. Clean debris for better grip and stability.
Can Rubbermaid Wall Anchors Support Heavy Items?
Yes, they can hold moderate weight like shelves and frames. Check the anchor packaging for specific weight limits.
How Do I Insert Rubbermaid Plastic Anchors Correctly?
Push the anchor into the drilled hole until flush with the wall. Tap gently with a hammer if needed.
Conclusion
Installing Rubbermaid plastic wall anchors is simple and effective. Start by choosing the right size for your project. Drill a hole carefully, then push the anchor in firmly. Screw your item into the anchor for a strong hold. These steps help keep things secure on your wall.
With practice, the process becomes quick and easy. Now, you can hang shelves, pictures, or hooks with confidence. Proper installation protects your walls and supports weight safely. Try it yourself and see how well these anchors work. A small effort makes a big difference.