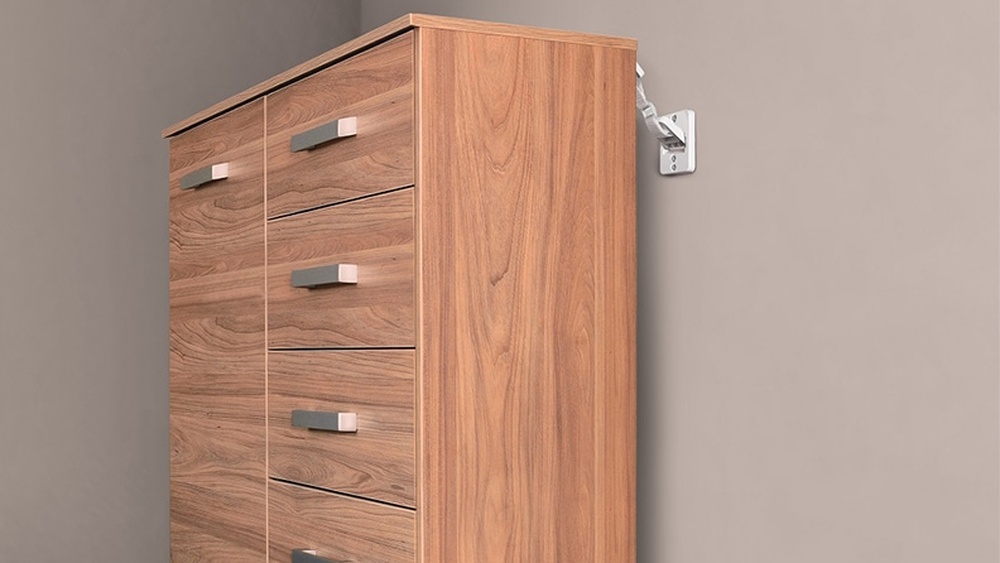
Are you struggling to hang shelves, pictures, or fixtures on hollow walls without worrying about them falling down? Knowing how to attach using hollow wall anchors can make all the difference in keeping your items secure and your walls damage-free.
In this guide, you’ll discover simple, step-by-step tips that anyone can follow—even if you’re new to DIY projects. By the end, you’ll feel confident tackling your next wall-mounting task with ease. Ready to learn the secret to strong, reliable attachments?
Let’s dive in!
Types Of Hollow Wall Anchors
Hollow wall anchors come in several types. Each type suits different wall materials and weights. Choosing the right anchor ensures strong, secure attachments.
Here are the main types of hollow wall anchors you should know.
Plastic Expansion Anchors
Plastic expansion anchors are simple and affordable. They expand inside the wall when you insert a screw. Best for light loads and drywall. Not ideal for heavy items.
Metal Molly Bolts
Metal molly bolts have a metal sleeve that expands behind the wall. They provide strong support for medium-weight objects. Great for drywall and hollow plaster walls. Require a pre-drilled hole.
Toggle Bolts
Toggle bolts use spring-loaded wings that open inside the wall. They hold heavy items securely. Ideal for hollow walls with no studs. Need a larger hole to insert the wings.
Self-drilling Anchors
Self-drilling anchors have sharp tips that drill into drywall. They do not need a pre-drilled hole. Easy to install and good for medium loads. Made from metal or plastic.
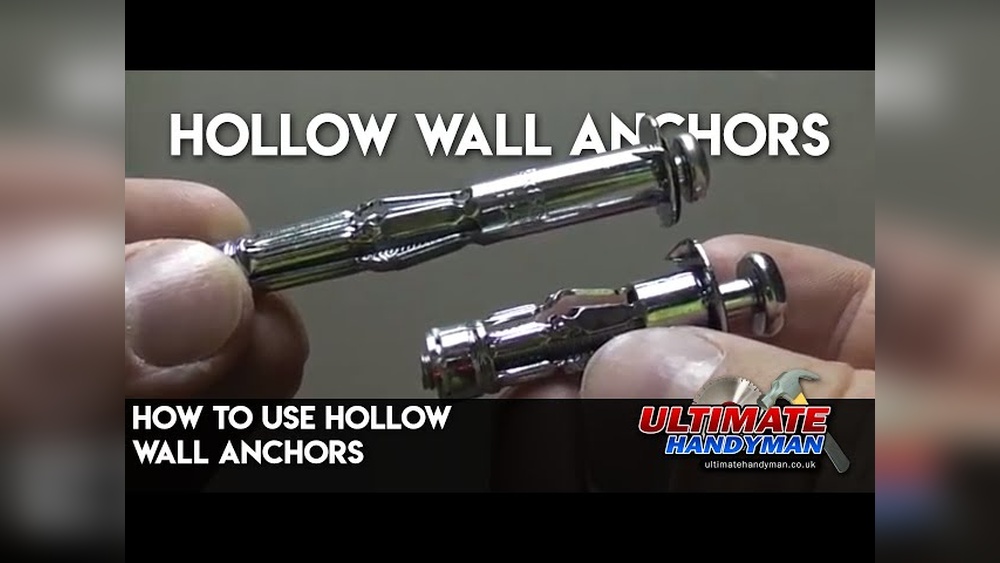
Credit: www.celofixings.com
Tools And Materials Needed
Before starting with hollow wall anchors, gather the right tools. Having everything ready makes the job easier and faster. Each tool plays a key role in the process.
These tools help you drill, measure, and fix the anchors securely. Preparing them ensures a smooth experience and a strong hold.
Drill And Drill Bits
A drill is essential for making holes in the wall. Use drill bits that match the size of the anchor. This ensures a perfect fit and prevents damage to the wall.
Choose bits designed for drywall or hollow walls. This helps to create clean, accurate holes every time.
Screwdriver
A screwdriver is needed to insert screws into the anchors. Use the correct type, either flathead or Phillips, depending on your screws. This makes the process easier and avoids stripping the screw heads.
Measuring Tape
Measure carefully before drilling. Use a measuring tape to mark exact spots on the wall. Accurate marks help place anchors evenly and avoid mistakes.
Level
A level checks if your marks are straight. It prevents crooked installations. Use it to align anchors horizontally or vertically for a neat finish.
Preparing The Wall
Preparing the wall is the first step to secure hollow wall anchors correctly. This step makes sure the anchors hold tight and keep your items safe. It involves finding the right spots on the wall and making precise holes. Take time here. It will save effort later and prevent damage to your wall.
Locating Studs And Voids
Find the studs and empty spaces inside the wall. Studs are the wooden or metal frames behind drywall. Anchors usually go into the empty spaces, or voids, between studs. Use a stud finder to spot these areas. Avoid drilling into studs if the anchor is for hollow walls. This gives the anchor space to expand and hold better.
Marking Anchor Points
Mark exact points on the wall for the anchors. Measure carefully to keep the marks level and spaced correctly. Use a pencil for light marks that are easy to erase. Marking helps guide your drilling and avoids mistakes. Check your marks twice before moving on.
Drilling Correct Hole Size
Choose the right drill bit size for your anchor. The hole should fit the anchor snugly but not too tight. Too big, and the anchor won’t hold. Too small, and you could crack the wall. Drill slowly and straight. Clean out dust from the hole before inserting the anchor.

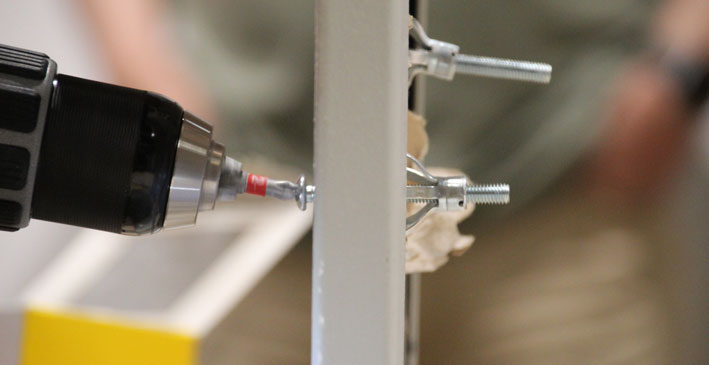
Credit: www.do-it-yourself-help.com
Installing Plastic Expansion Anchors
Plastic expansion anchors are common for light to medium loads on hollow walls. They provide a secure hold by expanding inside the wall cavity. These anchors are easy to install and work well with drywall and plaster.
Inserting The Anchor
Start by drilling a hole slightly smaller than the anchor. Push the plastic anchor gently into the hole. The anchor should fit snugly and sit flush with the wall surface. Tap lightly with a hammer if needed to fully insert it.
Securing With Screws
Choose a screw that matches the anchor size. Insert the screw into the anchor and turn it slowly. As the screw tightens, the anchor expands inside the wall. Stop tightening when the screw feels secure and the anchor holds firmly.
Installing Metal Molly Bolts
Installing metal molly bolts is a reliable way to hang objects on hollow walls. These anchors provide strong support by expanding behind the wall surface. The process is simple and does not require special tools.
Inserting The Molly Bolt
Begin by drilling a hole in the wall. The hole size should match the anchor diameter. Push the molly bolt through the hole until the flange rests on the wall surface.
Expanding The Anchor
Use a screwdriver to turn the screw inside the molly bolt. This action expands the anchor wings behind the wall. The wings grip the wall firmly, creating a secure hold.
Securing The Fixture
Remove the screw from the molly bolt. Place the fixture’s mounting hole over the anchor. Reinsert the screw and tighten it to secure the fixture to the wall.
Installing Toggle Bolts
Installing toggle bolts is an effective way to secure items to hollow walls. These anchors provide strong support by spreading the load behind the wall. The process involves preparing the toggle, inserting it through the wall, and tightening the screw properly. Each step must be done carefully for a firm hold.
Preparing The Toggle
Start by threading the screw through the toggle. Leave enough space for the toggle to fold. Fold the wings of the toggle so it can fit inside the hole. Make sure the toggle is aligned with the screw for smooth insertion.
Inserting And Expanding
Drill a hole in the wall that matches the toggle size. Push the folded toggle through the hole. Once inside, the wings open wide behind the wall. This expansion locks the toggle in place securely.
Tightening The Screw
Pull the screw gently to keep the toggle tight against the wall. Turn the screw clockwise to tighten it. Do not overtighten to avoid damage. The screw should hold the item firmly without wobbling.
Installing Self-drilling Anchors
Installing self-drilling anchors is a simple way to secure items to hollow walls. These anchors do not need a pre-drilled hole. They cut their own path into drywall or plaster, saving time and effort. Follow these steps to install them correctly and hold your fixtures firmly.
Positioning The Anchor
Find the exact spot where you want to attach your item. Mark the spot clearly with a pencil. Make sure it is free from wires or pipes behind the wall. Hold the anchor tip against the mark. Keep it straight for a secure fit.
Driving The Anchor
Use a screwdriver or drill with a Phillips head bit. Place the anchor tip on the wall mark. Turn slowly and apply steady pressure. The anchor will start cutting into the drywall. Continue until the anchor’s flange sits flush with the wall surface.
Attaching The Fixture
Align your fixture’s hole with the installed anchor. Insert the screw into the anchor’s center. Tighten the screw gently using a screwdriver. The anchor expands behind the wall, holding tight. Avoid overtightening to prevent damage to the wall or anchor.

Credit: www.youtube.com
Tips For Secure Installation
Installing hollow wall anchors securely is key for a strong hold. Follow simple tips to avoid common mistakes. This helps keep your items safe and stable on the wall. Use the right size and tighten carefully. Always check stability after installation.
Choosing The Right Anchor Size
Select an anchor size that matches the weight of your item. A small anchor may not hold heavy objects well. Too large an anchor can damage the wall. Measure the hole and the item’s weight before picking an anchor. Use a size chart for guidance.
Avoiding Over-tightening
Turn the screw slowly and stop when it feels firm. Over-tightening can strip the anchor or crack the wall. A snug fit is enough to hold the item firmly. Use a screwdriver instead of a power drill for more control. Check the anchor’s instructions for torque advice.
Checking Anchor Stability
After installation, gently wiggle the item to test stability. The anchor should not move or feel loose. If it shifts, remove and try a larger anchor or a different type. Make sure the wall surface is clean and dry for better grip. Regularly check anchors over time for safety.
Common Mistakes To Avoid
Using hollow wall anchors can be tricky without the right knowledge. Avoiding common mistakes ensures a strong and secure hold. Many problems come from simple errors that anyone can fix.
Incorrect Hole Size
Drilling the wrong hole size weakens the anchor’s grip. Too big a hole makes the anchor loose. Too small a hole can break the anchor or wall. Always check the anchor instructions for the exact hole size. Measure twice, drill once.
Ignoring Wall Material
Not all walls are the same. Drywall, plaster, and hollow blocks need different anchors. Using the wrong anchor on your wall type leads to failure. Identify your wall material before choosing anchors. This step prevents wasted time and damage.
Using The Wrong Anchor Type
Anchors come in many styles for different weights and uses. Plastic, metal, toggle, and molly anchors each serve unique purposes. Choosing the wrong type can cause the anchor to pull out. Match the anchor type to the weight and wall type for best results.
Frequently Asked Questions
What Are Hollow Wall Anchors Used For?
Hollow wall anchors secure items to drywall or hollow walls. They provide strong support without wall damage. Ideal for hanging shelves, mirrors, or fixtures.
How Do You Install Hollow Wall Anchors Correctly?
Drill a hole matching anchor size. Insert anchor into wall. Tighten screw to expand anchor behind wall, securing it firmly.
Can Hollow Wall Anchors Support Heavy Objects?
They support moderate weights, typically up to 50 pounds. For heavy items, use specialized anchors or wall studs for safety.
What Tools Are Needed To Attach Hollow Wall Anchors?
You need a drill, drill bit, screwdriver, and the correct size hollow wall anchors. These tools ensure proper installation and hold.
Conclusion
Attaching items with hollow wall anchors is simple and effective. Choose the right anchor size and type for your wall. Drill a proper hole, then insert the anchor carefully. Tighten the screw slowly to secure your object firmly. This method holds well on drywall and hollow walls.
Following these steps helps avoid damage and ensures stability. Practice makes the process easier and more confident. Now, you can hang shelves, pictures, or hooks safely and quickly.