Are you struggling to hang heavy items on your walls without worrying about them falling? Using a hollow wall anchor can be the simple solution you need.
But how do you use one correctly to ensure your shelves, mirrors, or frames stay secure? In this guide, you’ll discover easy, step-by-step instructions that anyone can follow. By the end, you’ll feel confident tackling your next wall project without the fear of damage or failure.
Keep reading—you’re just moments away from mastering this handy skill!
Choosing The Right Anchor
Choosing the right hollow wall anchor is key for a strong and safe hold. Different anchors suit different walls and weights. Picking the wrong one can cause damage or make your item fall. This guide helps you find the best anchor for your needs.
Types Of Hollow Wall Anchors
There are several types of hollow wall anchors. Plastic expansion anchors are good for light loads. Metal toggle bolts spread inside the wall for heavier items. Snap toggles are easy to install and hold well. Each type fits different uses and wall types.
Selecting Based On Wall Material
Wall material affects which anchor to use. Drywall needs anchors that expand or toggle behind it. Plaster walls need anchors that don’t crack the surface. Hollow concrete blocks require strong anchors that grip inside the cavity. Choose anchors made for your wall type for best results.
Weight Capacity Considerations
Check the weight of the item you want to hang. Light items need simple anchors like plastic ones. Heavy shelves or TVs need metal anchors that hold more weight. Always pick anchors rated for more than your item’s weight. Safety first to avoid accidents and wall damage.
Tools Needed
Using a hollow wall anchor requires some basic tools. These tools help make sure the anchor fits tightly and holds well. You need to prepare these tools before starting your project. This section explains the main tools you need to use a hollow wall anchor.
Drill And Drill Bits
A drill is essential for making holes in the wall. Choose a drill bit that matches the size of the anchor. A bit too small or too large can cause problems. Use a power drill for faster and cleaner holes. Make sure the drill bit is sharp and in good condition.
Screwdriver Options
You will need a screwdriver to tighten the screw into the anchor. A manual screwdriver works well for small jobs. An electric screwdriver saves time for bigger projects. Pick the right screwdriver head type, usually Phillips or flathead, to fit the screw.
Measuring And Marking Tools
Accurate placement is key to a strong hold. Use a tape measure to find the exact spot for the anchor. Mark the spot with a pencil or marker. A level can help keep your marks straight and even. These tools ensure your anchor is positioned correctly on the wall.
Preparing The Wall
Preparing the wall is the first step before using a hollow wall anchor. It helps ensure the anchor holds strong and stays secure. Careful preparation prevents damage and makes the installation easier.
Locating The Spot
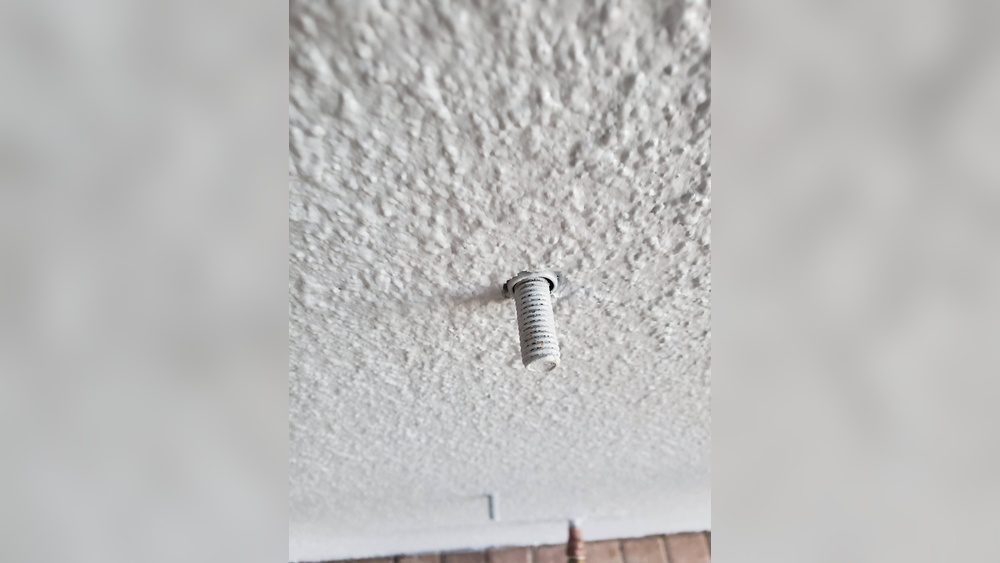
Choose the exact place on the wall for the anchor. Consider what you want to hang and the weight it will hold. Pick a spot on the hollow part of the wall, not on studs or solid areas.
Marking The Drill Point
Use a pencil to mark the drilling point clearly. Make a small dot where the center of the hole will be. This mark guides your drill and keeps the hole in the right place.
Checking For Obstructions
Check inside the wall for wires, pipes, or studs. Use a stud finder or a small inspection tool. Avoid drilling into anything that can cause damage or danger.

Credit: www.youtube.com
Drilling The Hole
Drilling the hole correctly is the first step in using a hollow wall anchor. It ensures a strong hold and prevents damage to the wall. Taking care during this step makes installation easier and safer. Follow these tips to drill the perfect hole for your anchor.
Choosing The Correct Drill Bit Size
Select a drill bit that matches the anchor size exactly. Too small a bit will make the hole tight and risk breaking the anchor. Too large a bit will cause a loose fit and weak support. Check the anchor package or instructions for the right drill bit size. Using the right size saves time and prevents mistakes.
Drilling Techniques For Hollow Walls
Use a drill with a steady hand and low speed. Hold the drill straight and apply light pressure. Start slowly to avoid cracking the wall surface. Drill just deep enough for the anchor length. Stop and check often to keep control. Avoid pushing too hard or drilling too fast.
Cleaning The Hole
Remove dust and debris from the hole before inserting the anchor. Use a small brush or blow air into the hole. A clean hole helps the anchor grip firmly. It also prevents the anchor from slipping out over time. Always prepare the hole to ensure a strong hold.
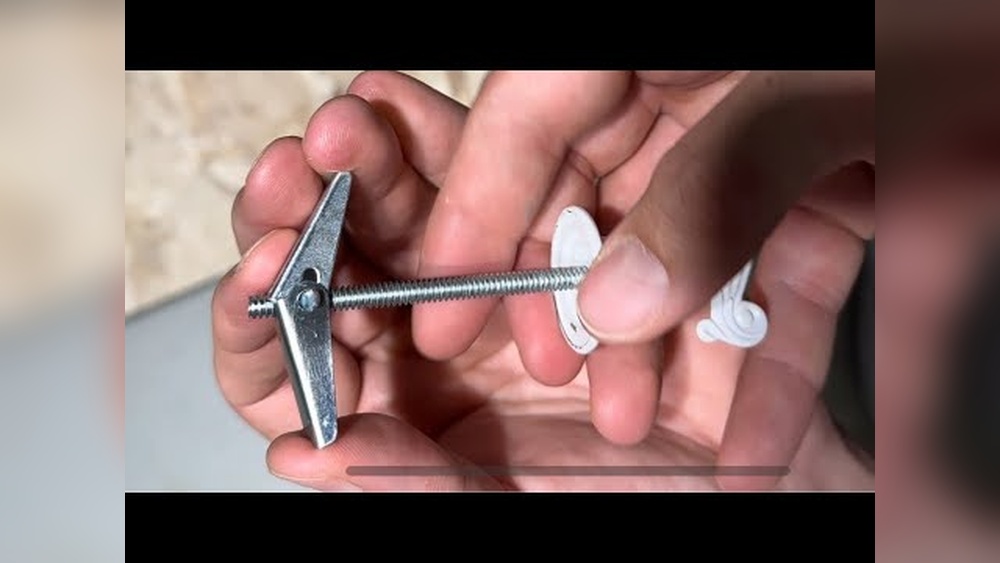
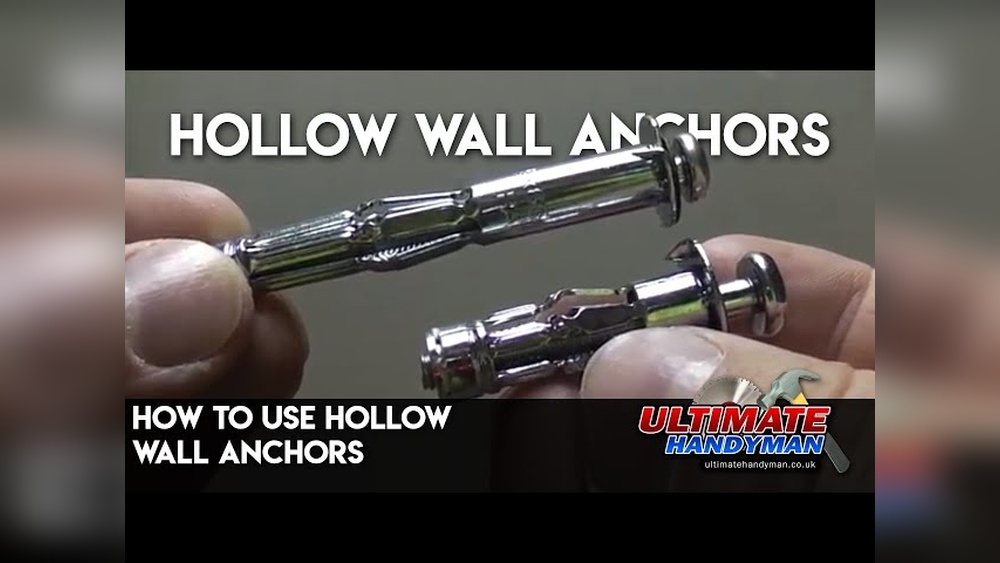
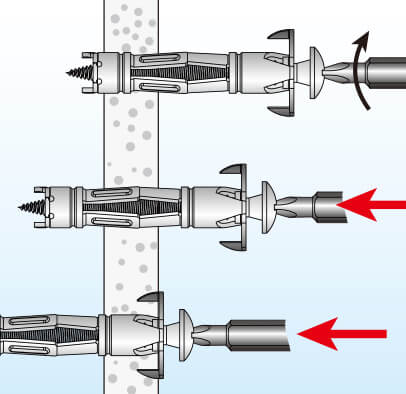
Installing The Anchor
Installing a hollow wall anchor is simple and quick. It creates a strong hold in drywall or hollow walls. Proper installation ensures your fixture stays secure and stable. Follow these steps carefully for the best results.
Inserting The Anchor
Start by drilling a hole in the wall. Choose a drill bit that fits the anchor size. Push the anchor gently into the hole. It should fit snugly without too much force. Make sure the anchor sits flush with the wall surface.
Expanding The Anchor Inside The Wall
Next, use a screwdriver or drill to turn the anchor. This action expands the anchor inside the wall cavity. The wings or sleeves open wide behind the drywall. This creates a strong grip that prevents pulling out. Turn until the anchor feels tight and secure.
Securing The Anchor Firmly
Finally, insert the screw into the anchor. Tighten the screw slowly to avoid damaging the wall. The screw pulls the anchor firmly against the back of the drywall. Check that the anchor does not move. Your anchor is now ready to hold shelves, pictures, or fixtures securely.
Credit: www.jcyscrews.com
Attaching Fixtures
Attaching fixtures to a hollow wall requires care and precision. The hollow wall anchor helps hold the fixture firmly. Follow simple steps to attach your fixture safely and securely. This section explains how to use the anchor correctly for a strong hold.
Aligning The Fixture
Place the fixture near the spot where the anchor is installed. Make sure the holes in the fixture line up with the anchor’s opening. Proper alignment prevents damage to the wall and fixture. Take a moment to adjust the fixture until it fits well.
Screwing Into The Anchor
Insert the screw through the fixture hole and into the hollow wall anchor. Turn the screw slowly using a screwdriver. The anchor expands inside the wall as the screw tightens. Stop tightening once the fixture feels secure, avoiding over-tightening.
Ensuring Stability
Check the fixture by gently pulling or pushing it. It should not move or wobble. If it feels loose, tighten the screw a bit more. Proper stability keeps your fixture safe and prevents accidents. A well-attached fixture lasts longer and looks better.
Troubleshooting Common Issues
Troubleshooting common issues with hollow wall anchors helps avoid frustration. These anchors are useful but can sometimes cause problems during installation. Identifying and fixing these issues early saves time and effort. Below are some typical problems and how to solve them effectively.
Anchor Spinning In The Hole
Sometimes the anchor spins inside the wall. This happens when the hole is too big or the anchor is not tight. Try pushing the anchor deeper. Use pliers to hold the anchor steady while tightening the screw. If it still spins, remove it and use a larger anchor or smaller drill bit.
Loose Fixtures
Loose fixtures happen when the anchor does not grip the wall properly. Check if the anchor expanded fully behind the wall. Tighten the screw a bit more, but do not overtighten. If the fixture remains loose, remove the anchor and try a longer or heavier-duty type.
Removing And Reinstalling Anchors
Removing anchors can be tricky but not impossible. Unscrew the fastener first. If the anchor stays inside, push it through the wall or gently pull it out with pliers. For reinstalling, use a new anchor hole nearby. Avoid reusing the same hole to keep a strong hold.
Safety Tips
Using hollow wall anchors can make projects easier and neater. Safety is key to avoid accidents and damage. Follow these tips to stay safe while working with hollow wall anchors.
Protective Gear
Always wear safety glasses to protect your eyes from dust and debris. Use gloves to keep your hands safe from sharp edges. A dust mask helps prevent inhaling particles during drilling.
Avoiding Electrical Wires
Check walls for hidden wires before drilling. Use a stud finder with a wire detector to locate electrical lines. Avoid drilling near switches, outlets, or visible wiring areas.
Handling Tools Properly
Hold tools firmly and use the correct drill bit size. Keep the drill steady to prevent slipping. Turn off power tools immediately if they feel hot or make strange noises.

Credit: www.do-it-yourself-help.com
Frequently Asked Questions
What Is A Hollow Wall Anchor Used For?
A hollow wall anchor secures objects to drywall or hollow walls. It provides strong support by expanding behind the wall. This prevents damage and ensures stability for hanging items like shelves or frames.
How Do I Install A Hollow Wall Anchor Properly?
First, drill a hole matching the anchor size. Insert the anchor into the hole until flush. Tighten the screw, causing the anchor to expand behind the wall. Ensure it is secure before hanging any weight.
Can Hollow Wall Anchors Support Heavy Items?
Hollow wall anchors can support moderate weight, typically up to 50 pounds. For very heavy items, use specialized anchors or mount directly into studs. Always check the anchor’s weight rating before use.
What Tools Do I Need For Hollow Wall Anchors?
You need a drill, drill bit, screwdriver, and the hollow wall anchor itself. A level and measuring tape help ensure accurate placement. These tools make installation quick and precise.
Conclusion
Using a hollow wall anchor makes hanging items easier and safer. Choose the right size for your wall and object. Drill a proper hole to fit the anchor snugly. Insert the anchor carefully and tighten the screw slowly. This method holds weight better than simple nails or screws.
Always check the weight limit before hanging heavy objects. With practice, you can hang shelves, pictures, or mirrors securely. Small steps lead to strong, stable walls. Try it yourself and see the difference. Simple tools, smart use—strong walls follow.