If you’re tired of struggling with heavy logs and want a faster, safer way to split wood, building your own log splitter could be the solution. Imagine turning a simple floor jack into a powerful tool that saves you time and effort.
In this guide, you’ll discover easy steps to create a log splitter that works like a pro’s without spending a fortune. Ready to make your wood-splitting tasks easier and more efficient? Keep reading, because your perfect DIY log splitter is just a few steps away.
Tools And Materials Needed
Building a log splitter with a floor jack requires some specific tools and materials. Gathering everything before starting saves time and effort. This list covers all essentials for a smooth project.
Floor Jack
The floor jack is the main tool. It provides the force needed to split logs easily. Choose a jack with a strong lifting capacity, usually 2 tons or more.
Steel Frame Materials
Steel bars or square tubes form the frame. They must be strong to hold the jack and logs safely. Look for steel pieces about 1/4 inch thick for durability.
Welding Equipment
A welder joins the steel parts together. A MIG or arc welder works well. Welding ensures the frame stays solid under pressure.
Cutting Tools
Metal cutting tools shape the steel parts. An angle grinder or metal saw is necessary. Clean, precise cuts help with easy assembly.
Bolts And Fasteners
Bolts keep the jack and frame connected. Use strong, rust-resistant bolts and nuts. These parts add extra safety and stability.
Safety Gear
Protect yourself with gloves, goggles, and ear protection. Welding and cutting can cause injuries without safety gear. Always work in a well-ventilated area.
Choosing The Right Floor Jack
Choosing the right floor jack is key to building a safe and effective log splitter. The jack must handle the pressure needed to split logs without breaking. Picking the wrong jack can cause accidents or damage your materials.
Focus on size, strength, and ease of use. These factors affect how well your log splitter will work. A suitable floor jack will save time and effort during wood splitting tasks.
Capacity And Weight Limit
Select a floor jack with enough lifting capacity for large logs. Most floor jacks show their maximum weight limit on the label. Choose one that supports at least 4 tons to avoid strain or failure.
Lift Height And Range
The jack’s lift height must suit the log size you plan to split. A higher lift height allows you to work with bigger logs. Check the jack’s lowest and highest points before buying.
Durability And Build Quality
Look for a jack made from strong materials like steel. A durable jack lasts longer and handles heavy loads better. Avoid jacks with plastic parts that might break under pressure.
Ease Of Operation
Choose a jack with a smooth pumping action. A simple handle and easy controls make splitting logs quicker. Test the jack’s movement if possible to ensure it works smoothly.
Size And Portability
Consider the floor jack’s size and weight. A compact jack is easier to move and store. However, very small jacks might not provide enough power for big logs.
Preparing The Work Area
Preparing the work area is the first step to build a log splitter with a floor jack. A clean and safe space helps you work faster and avoid accidents. This section covers key points to set up your work area properly.
Clear The Space
Remove all items from the area where you will build the log splitter. Keep only tools and materials needed for the project. This prevents tripping and makes moving parts easier.
Choose A Flat Surface
Select a flat and solid surface to work on. A level ground keeps the floor jack steady. Avoid slopes or uneven floors that can cause instability.
Ensure Good Lighting
Work in a well-lit area. Bright light helps you see small parts and read instructions clearly. Use natural light or add lamps if needed.
Gather Safety Gear
Prepare safety equipment like gloves, safety glasses, and sturdy shoes. Wear these at all times during the project. Safety gear protects you from sharp tools and heavy logs.
Organize Tools And Materials
Place tools within reach but not in the way. Group similar items together for quick access. This organization saves time and keeps the workspace tidy.

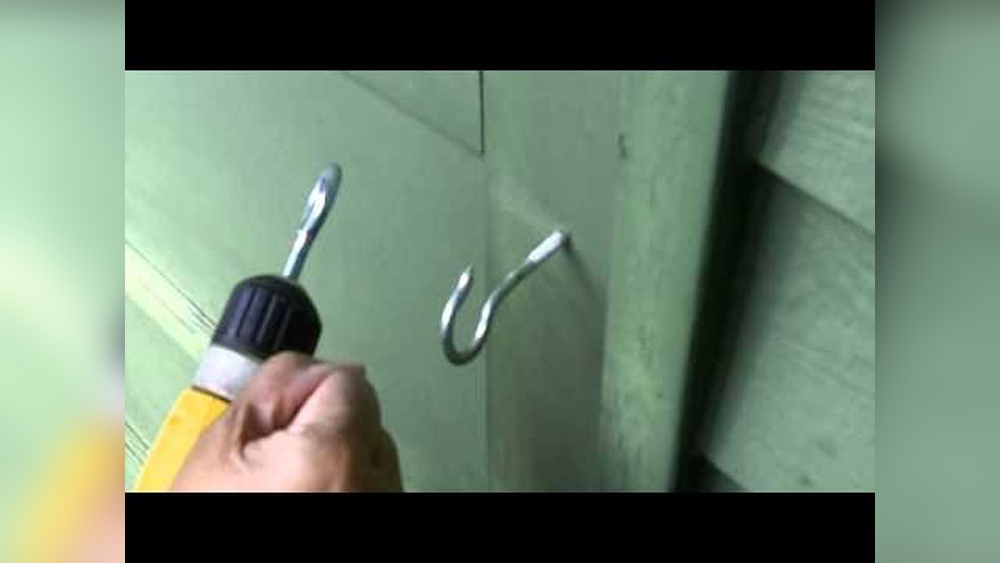
Credit: www.youtube.com
Building The Frame
Building the frame is the first and most important step in making a log splitter with a floor jack. The frame holds all parts together and keeps the splitter strong during use. A solid frame ensures safety and better performance.
Use strong metal pieces to create a sturdy base. The frame must support the weight and pressure from the floor jack. Careful measurements and welding help build a reliable frame.
Choosing The Right Materials
Steel is the best material for the frame. It is strong and lasts long. Use square or rectangular steel tubes. They provide good support and are easy to weld.
Avoid thin or weak metals. They may bend or break under pressure. Pick materials that can hold heavy loads safely.
Measuring And Cutting The Steel
Measure the floor jack and logs before cutting steel. The frame size depends on these measurements. Cut steel pieces to match the needed length.
Use a metal saw or cutting tool for precise cuts. Clean edges make welding easier. Accurate cuts help the frame fit together perfectly.
Welding The Frame Together
Arrange steel pieces on a flat surface. Align them carefully before welding. Welding joins the pieces into a strong frame.
Wear safety gear when welding. Weld all joints fully to avoid weak spots. Let the frame cool before moving it.
Adding Support Braces
Support braces increase frame strength. Add braces at corners and stress points. They prevent bending and twisting during use.
Use smaller steel pieces for braces. Weld them securely to the main frame. Check for stability before attaching the jack.
Mounting The Floor Jack
Mounting the floor jack is a key step in building a log splitter. The jack must be secure and steady. This ensures safe and effective splitting power. Proper mounting helps the jack handle heavy pressure without moving or tipping.
Choose a flat, strong base for mounting. Wood or metal platforms work well. The base should be thick enough to hold bolts tightly. Avoid weak or thin materials that may bend or break.
Prepare The Mounting Surface
Start by cleaning the surface. Remove dirt, dust, and grease. Mark the spots where the jack bolts will go. Use the jack’s base as a guide. Drill holes matching the bolt size. Make sure holes are straight and accurate.
Secure The Floor Jack
Place the jack on the prepared surface. Align the holes carefully. Insert strong bolts through the holes. Use washers to spread the load. Tighten nuts with a wrench until firm. Check for any movement or wobble. The jack should feel solid and fixed.
Check Alignment And Stability
Double-check the jack’s position. The ram should move straight up and down. Adjust if needed to avoid any tilt. Test stability by pressing down on the jack. It must not shift or rock. A stable jack improves safety and efficiency.
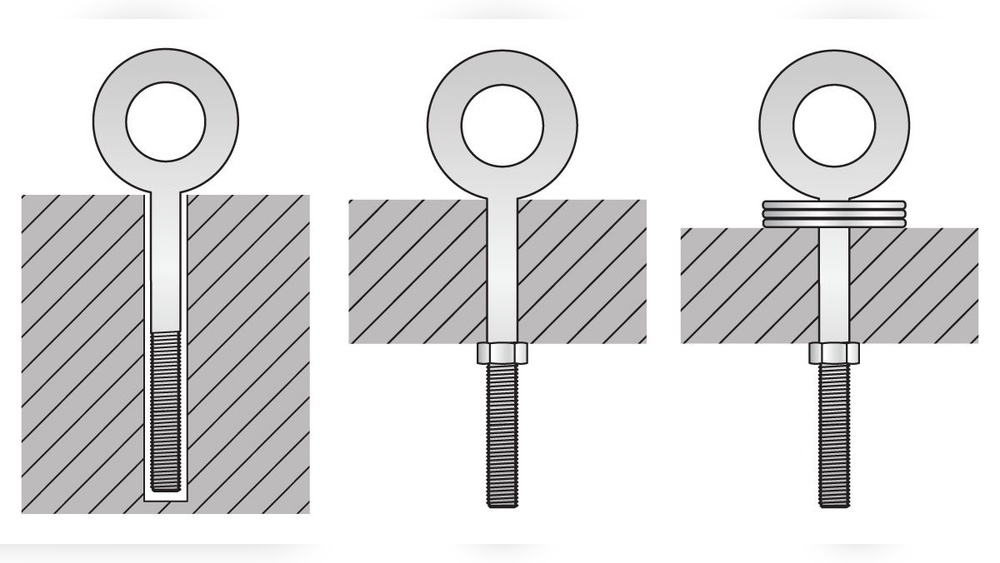
Attaching The Splitting Wedge
Attaching the splitting wedge is a key step in building a log splitter with a floor jack. The wedge must be secure and strong. It pushes the log apart when the jack applies force. A loose or weak wedge can be unsafe and ineffective. Follow clear steps to fix the wedge firmly to your splitter frame.
Choosing The Right Splitting Wedge
Pick a wedge made from solid steel. It should be sharp and heavy. The sharper the edge, the easier it splits logs. Avoid thin or weak metal. A good wedge lasts longer and works better. The size of the wedge depends on the logs you split.
Preparing The Wedge For Attachment
Clean the wedge surface to remove rust and dirt. Smooth any rough edges with a file. Drill holes in the wedge for bolts. Use a drill bit that fits your bolts tightly. Proper holes help secure the wedge firmly to the frame.
Securing The Wedge To The Frame
Align the wedge on the splitter frame carefully. Mark the spots for bolts on the frame. Drill matching holes in the frame if needed. Insert bolts through the wedge and frame. Tighten nuts with a wrench to hold the wedge steady. Check that the wedge does not move or wobble.
Testing The Wedge Attachment
Before use, test the wedge by applying pressure. Use the floor jack to push the wedge gently against a log. Watch for any movement or shifting. Tighten bolts more if the wedge feels loose. Safety comes first in this step.
Safety Tips And Precautions
Building a log splitter with a floor jack is a useful project. Safety must come first. Using tools and heavy wood can cause injuries. Follow these safety tips and precautions for a safe experience.
Wear Protective Gear
Always wear safety glasses to protect your eyes. Use gloves to protect your hands from splinters and sharp edges. Wear sturdy boots to protect your feet from falling logs. A helmet can protect your head if working with large logs.
Check Equipment Before Use
Inspect the floor jack for any damage or leaks. Make sure all parts are tight and secure. Test the jack on a small load before starting. Use tools that are in good condition to avoid accidents.
Work On A Stable Surface
Place the log splitter on flat, solid ground. Avoid working on slippery or uneven surfaces. Secure the log to prevent it from rolling or shifting. Stability helps control the log during splitting.
Keep Hands Clear
Keep your hands and fingers away from the splitting area. Use a tool or stick to hold the log instead of hands. Stay focused and avoid distractions while splitting. Quick movements can cause serious injuries.
Use Proper Lifting Techniques
Lift logs with your legs, not your back. Avoid lifting heavy logs alone; ask for help. Use mechanical aids like dollies if available. Proper lifting prevents strains and muscle injuries.
Maintain Clear Work Area
Keep the area free of clutter and obstacles. Remove any tripping hazards near the splitter. Make sure pets and children stay away. A clean space reduces the risk of accidents.

Credit: www.youtube.com
Testing Your Log Splitter
Testing your log splitter is a key step before full use. It ensures safety and checks the machine’s power. This step helps find any issues early. Proper testing makes sure the splitter works well.
Test your log splitter in a safe area. Clear the space of any obstacles or people. Wear safety gloves and goggles during testing. Safety is the top priority at all times.
Preparing The Log For Testing
Choose a log that fits the splitter’s size limits. Use dry wood for easier splitting. Place the log firmly on the splitter base. The log should not wobble or move.
Operating The Floor Jack
Slowly pump the floor jack handle to push the wedge. Watch the wedge as it moves toward the log. Stop if you see any unusual sounds or movements. Smooth operation shows the machine is working properly.
Checking The Split Quality
Look at how the log splits after pressure. A clean split means the wedge is sharp and aligned. Uneven splits may need adjustment of the wedge or log position. Test several logs to confirm consistent results.
Inspecting For Leaks Or Damage
After testing, check the floor jack for fluid leaks. Look for cracks or loose parts on the splitter frame. Tighten bolts if needed. Fix any damage before using the splitter again.
Maintenance And Storage
Maintaining and storing your log splitter made with a floor jack is vital. It keeps the tool safe and working well for a long time.
Proper care helps avoid damage and saves money on repairs. Clean and check the splitter regularly to find small problems early.
Cleaning After Use
Remove dirt, wood chips, and sap from the splitter after each use. Wipe the floor jack and metal parts with a dry cloth. Use a brush to clean hard-to-reach areas. Avoid water on the hydraulic parts to prevent rust. Dry the splitter completely before storage.
Lubricating Moving Parts
Apply oil or grease to the moving parts often. This reduces friction and prevents wear and tear. Focus on the jack’s piston and pivot points. Use a light machine oil for smooth operation. Wipe off extra lubricant to stop dust buildup.
Checking Hydraulic Fluid
Inspect the hydraulic fluid level regularly. Low fluid can cause poor performance or damage. Add the recommended hydraulic oil if needed. Avoid overfilling the reservoir. Replace the fluid yearly for best results.
Safe Storage Tips
Store the log splitter in a dry place away from rain. Cover it with a tarp or plastic sheet to block dust. Keep it off the ground on a pallet or shelf. Avoid storing near heat sources or chemicals. Check the splitter before storage to ensure it is clean and dry.
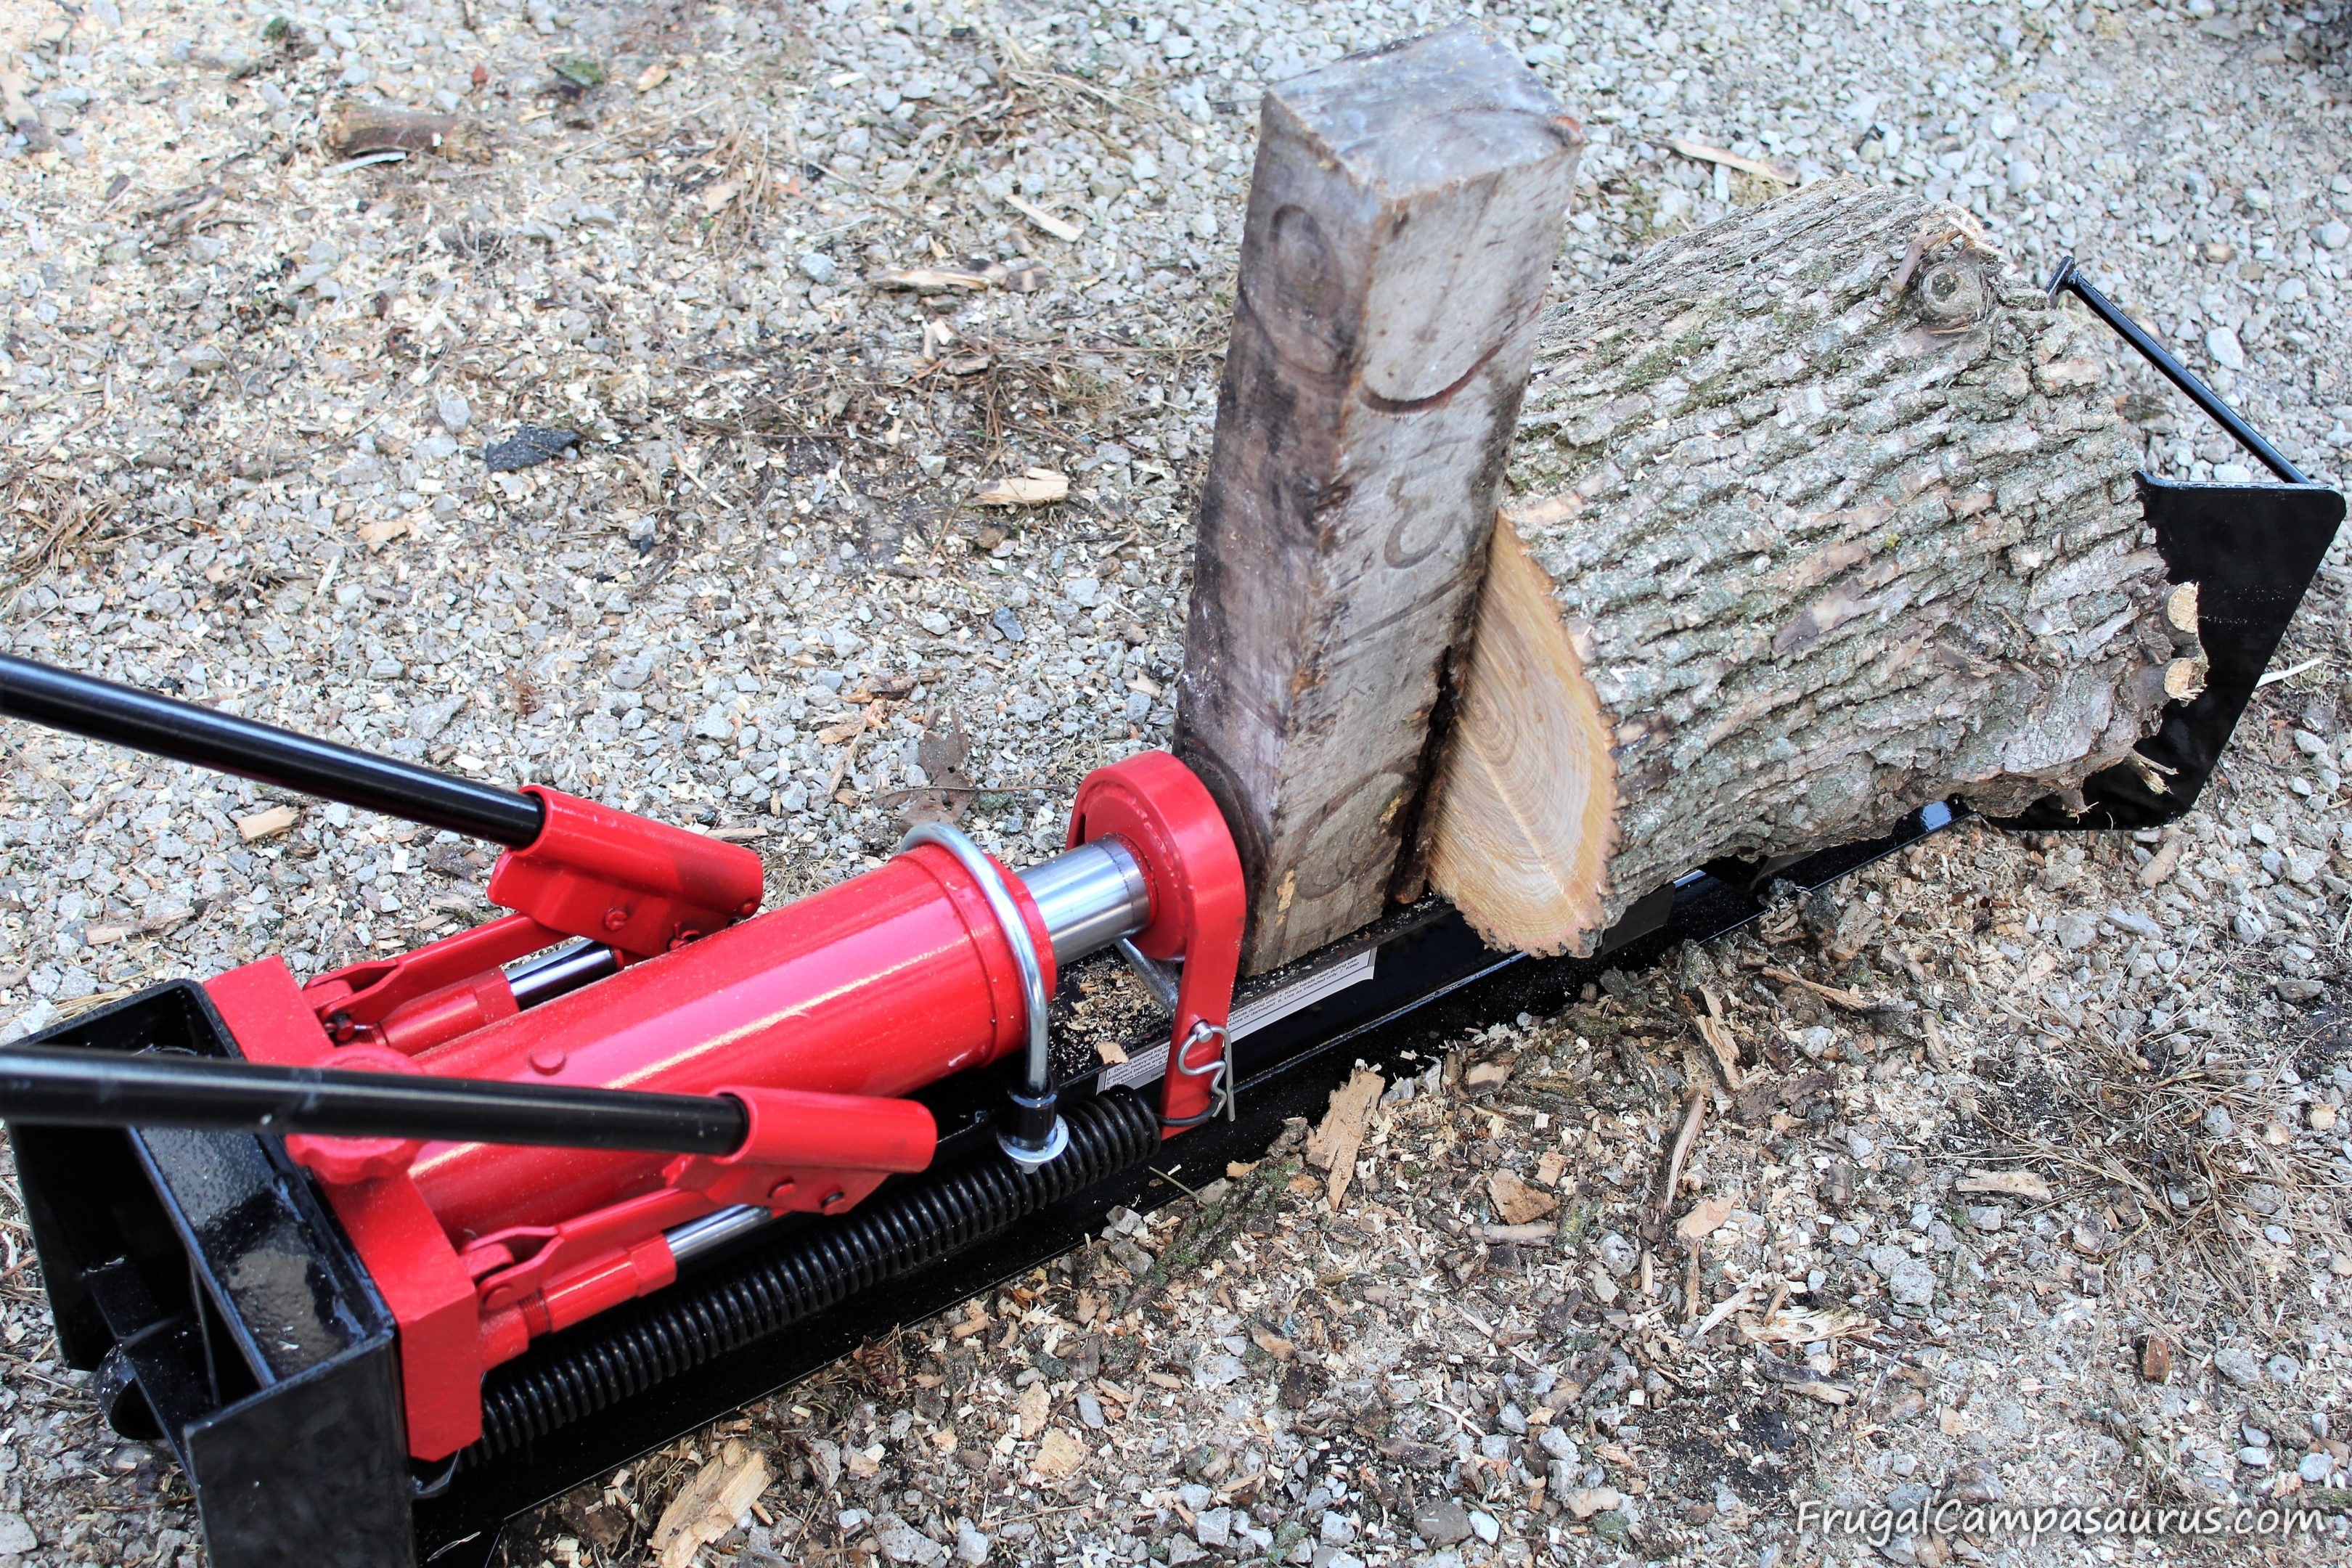
Credit: frugalcampasaurus.com
Frequently Asked Questions
How Does A Floor Jack Work For Splitting Logs?
A floor jack lifts heavy logs using hydraulic pressure. It applies controlled force to split wood efficiently and safely. This method requires minimal manual effort compared to traditional axes or mauls.
What Materials Are Needed To Build A Log Splitter?
You need a sturdy floor jack, metal frame, welding tools, and a splitting wedge. Safety gear like gloves and goggles is essential. Proper materials ensure durability and safe operation.
Is Building A Log Splitter With A Floor Jack Safe?
Yes, if built correctly with quality parts and safety precautions. Always follow instructions and wear protective gear. Regular maintenance of the jack and frame is crucial for safe use.
Can A Diy Log Splitter Handle Large Logs?
A floor jack splitter can handle medium to large logs, depending on the jack’s capacity. Choose a jack rated for at least 4 tons for efficient splitting of bigger logs.
Conclusion
Building a log splitter with a floor jack saves time and money. It uses common tools and simple steps anyone can follow. This DIY project makes splitting logs easier and safer. Always wear safety gear and work carefully to avoid injury.
Now, you have a useful tool made by your own hands. Try it out and see how much easier your woodcutting tasks become. Simple, strong, and effective – that’s the power of a homemade log splitter.