Have you ever wanted to add a personal touch to your home décor? Making your own wall hook is easier than you might think, and it gives you a unique piece that no store can match.
Imagine hanging your keys or jacket on a sturdy, handcrafted hook that you made yourself. In this guide, you’ll learn simple steps to forge a wall hook, even if you’ve never worked with metal before. By the end, you’ll have the skills to create something useful and stylish—right from your own workshop.
Ready to turn ordinary metal into something extraordinary? Let’s get started!

Credit: forge-foundry.com
Materials And Tools
Before forging a wall hook, gather the right materials and tools. These determine the quality and ease of your project. Choose metal that fits your skill level and the hook’s purpose. Use tools that help shape and finish the metal safely and precisely.
Choosing The Right Metal
Steel is the best metal for wall hooks. It is strong and easy to shape. Mild steel works well for beginners. It heats evenly and cools slowly. Avoid metals that are too hard or brittle. They can crack or break during forging. Soft metals like aluminum are not durable for hooks.
Essential Tools For Forging
A forge or a heat source is necessary to heat the metal. Use a hammer to shape the metal on an anvil. Tongs hold the hot metal safely. A chisel helps create detailed shapes. A wire brush cleans the metal after forging. Safety gear like gloves and goggles protects your hands and eyes.

Credit: forge-foundry.com
Preparing The Workspace
Preparing your workspace is the first step to forge a strong wall hook. A clean and organized area helps you work safely and quickly. Setting up the right environment reduces risks and keeps your tools ready. This section guides you through creating a safe forge area and organizing tools for the best results.
Setting Up A Safe Forge Area
Choose a place with good ventilation. Smoke and heat must leave the area easily. Keep the space clear of anything flammable like paper or cloth. Use a fireproof surface to place your forge. Make sure there is enough room to move around safely. Wear protective gear like gloves and goggles. Keep a fire extinguisher nearby at all times. Safety comes first to avoid accidents and injuries.
Organizing Tools For Efficiency
Arrange your hammer, tongs, and anvil within arm’s reach. Group similar tools together for quick access. Use a tool rack or magnetic strip to keep tools off the floor. Clean tools before and after use to maintain their condition. Planning the layout reduces time spent searching for items. A tidy workspace helps you focus on shaping the metal. This setup makes forging easier and more enjoyable.
Heating The Metal
Heating the metal is a key step in forging a wall hook. The metal must be hot enough to shape easily. Too cold, and it will crack or bend poorly. Too hot, and it can burn or lose strength. Controlling the heat ensures a smooth forging process.
Proper Furnace Temperature
The furnace should reach about 2,000°F (1,093°C) for steel. This heat makes the metal soft and workable. Use a reliable thermometer or rely on color changes to judge temperature. Keep the furnace steady to avoid uneven heating. Consistent heat helps shape the metal evenly.
Signs The Metal Is Ready
Look for a bright red or orange glow on the metal. This color shows it is hot enough to forge. The metal will feel soft when gently tapped with a hammer. Avoid overheating, which makes it look white or yellow. Correct heat makes the metal easier to bend and form.
Shaping The Hook
Shaping the hook is an important step in forging a wall hook. It gives the hook its form and function. You will work the metal to create a strong, useful piece. This stage needs focus and care for best results.
Forming The Base
Start by heating the metal until it is red hot. Use a hammer to flatten one end. Make the base wide and flat. This part will hold the hook to the wall. Make sure it is strong and even.
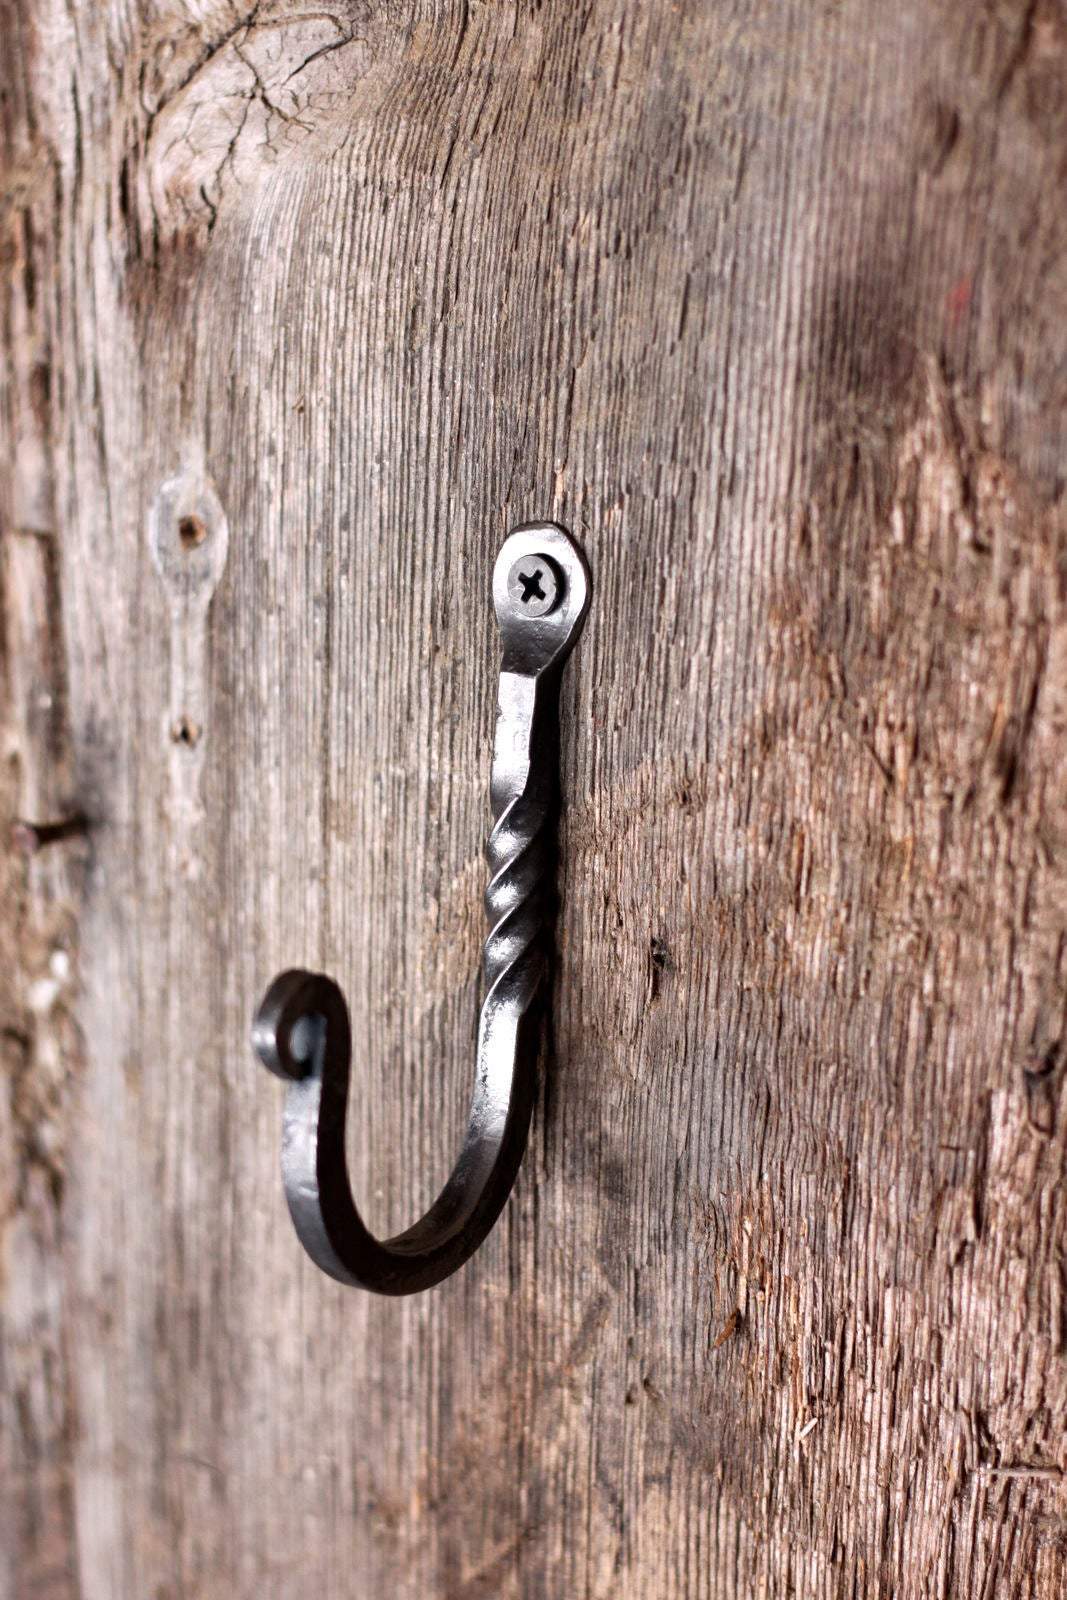
Creating The Hook Curve
Next, heat the other end of the metal again. Use tongs to bend the hot metal slowly. Shape it into a smooth curve. The curve should be wide enough to hold items. Avoid sharp edges to protect your things.
Adding Decorative Elements
After shaping, add simple designs to the hook. Use a small hammer to make patterns or textures. You can create lines, dots, or small shapes. These details make the hook look nice and unique. Keep decorations small so they don’t weaken the hook.
Cooling And Hardening
Cooling and hardening are key steps in forging a wall hook. These steps change the metal’s strength and shape. Proper cooling makes the hook tough and durable. Hardening locks in the metal’s new form.
Quenching Techniques
Quenching means cooling hot metal fast. It stops the metal from bending or breaking. You can quench in water, oil, or air. Water cools metal the fastest but can cause cracks. Oil cools slower and is safer for metal. Air cooling is the slowest and softens the metal. Choose the quench based on the metal type and hook use.
Tempering For Strength
Tempering follows quenching to reduce metal brittleness. Heat the metal gently after quenching. This process makes the hook less likely to crack. Tempering balances hardness and flexibility. The metal becomes strong but still slightly bendable. Proper tempering extends the hook’s life in use.
Credit: miamijetski.com
Finishing Touches
Finishing touches give your wall hook a clean and polished look. These final steps make the hook safe to use and improve its durability. Taking time to finish your project well shows in the final product’s appearance and strength.
Sanding And Smoothing
Start by sanding the wall hook to remove rough edges and marks. Use medium-grit sandpaper first, then switch to fine-grit for a smooth surface. Sand all parts, including the hook’s curves and corners. Smooth edges prevent scratches and make the hook comfortable to handle. Wipe off dust with a clean cloth after sanding.
Applying Protective Coatings
Apply a protective coating to stop rust and wear. Use clear spray paint, oil, or wax based on the metal type. Spray paint adds color and protection quickly. Oil or wax keeps the metal shiny and guards against moisture. Let the coating dry fully before using the hook. This step helps your wall hook last longer and look better.
Mounting The Wall Hook
Mounting the wall hook is an important step after forging it. A well-mounted hook stays strong and holds weight safely. Proper mounting also keeps the hook looking neat and professional. This section explains how to choose the right hardware and install the hook correctly.
Choosing The Right Mounting Hardware
Select screws or bolts that fit your wall type. Use wood screws for wooden walls and masonry anchors for brick or concrete. Make sure the hardware matches the hook’s size and weight capacity. Avoid using small or weak fasteners that may fail.
Pick mounting hardware that resists rust for outdoor hooks. Stainless steel or coated screws last longer in damp areas. Check the hook’s mounting holes before buying hardware. This ensures a perfect fit and secure hold.
Installation Tips For Stability
Mark the exact spot for the hook before drilling. Use a level to keep the hook straight. Drill pilot holes to prevent splitting wood or cracking walls. Insert anchors if needed for extra grip in drywall or masonry.
Tighten screws firmly but avoid over-tightening. Over-tightening can damage the wall or hook. Test the hook by gently pulling on it after mounting. Make sure it stays secure and does not wobble.
Frequently Asked Questions
What Tools Do I Need To Forge A Wall Hook?
You need a forge or torch, an anvil, hammer, tongs, and steel rod. Safety gear like gloves and goggles is essential.
What Type Of Metal Is Best For Wall Hooks?
Mild steel is ideal for forging wall hooks due to its strength and ease of shaping. Avoid brittle metals.
How Long Does It Take To Forge A Wall Hook?
Forging a wall hook typically takes 30 to 60 minutes, depending on skill level and design complexity.
Can Beginners Forge A Wall Hook Safely?
Yes, beginners can forge wall hooks safely by following instructions, using proper tools, and wearing safety gear.
Conclusion
Forging a wall hook is a simple and rewarding skill. You can create useful items with just basic tools and metal. Each step builds your confidence and understanding of metalwork. Practice helps you improve your technique and results. Soon, you will enjoy making hooks for your home or gifts.
Keep exploring and have fun with your forging projects. The satisfaction of crafting something by hand is worth the effort. Try it today and see what you can make!