Are you tired of struggling to hang heavy items on your walls without worrying about them falling down? Knowing how to get anchors in the wall can make all the difference.
Whether you’re mounting shelves, pictures, or mirrors, the right wall anchors will keep your belongings secure and your walls damage-free. In this guide, you’ll discover simple, step-by-step tips that anyone can follow to make your walls strong and reliable. Keep reading to learn how to choose, install, and use wall anchors like a pro—your walls will thank you!
Types Of Wall Anchors
Wall anchors help secure objects to walls safely. Different anchors suit different wall types and weights. Knowing the right anchor makes your project stronger and easier. Here are common types of wall anchors and how they work.
Plastic Expansion Anchors
Plastic expansion anchors fit into drilled holes in drywall or masonry. They expand when a screw is driven inside. This expansion holds the anchor tightly in place. These anchors work best for light loads like picture frames or small shelves.
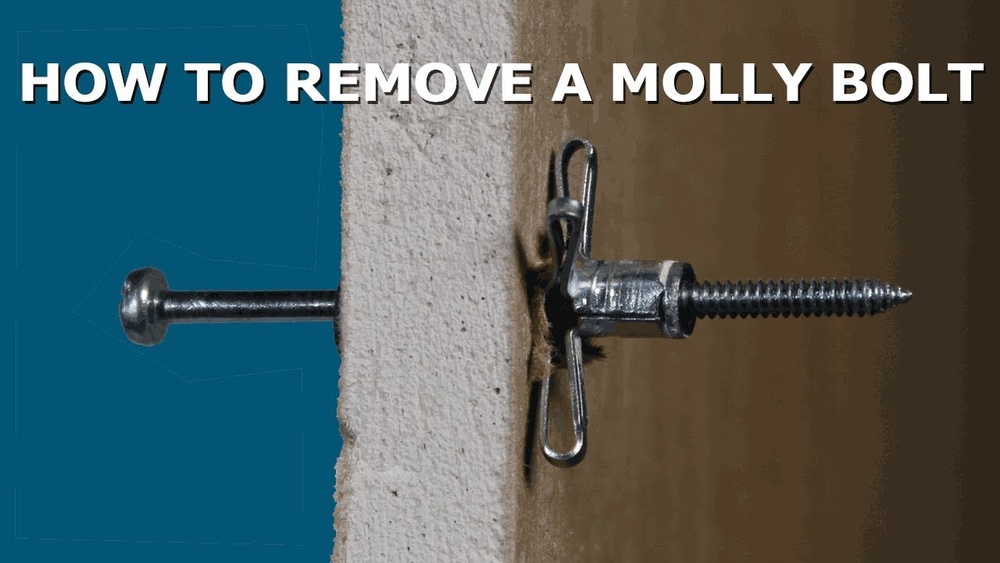
Molly Bolts
Molly bolts are metal anchors that open behind the wall. Insert them into a drilled hole and tighten the screw. The metal wings expand and grip the wall’s backside. They support medium-weight items like curtain rods or towel racks.
Toggle Bolts
Toggle bolts have spring-loaded wings that fold to fit inside a hole. After insertion, the wings open behind the wall. This creates a strong hold on drywall or hollow walls. Use toggle bolts for heavy items like large mirrors or shelves.
Self-drilling Anchors
Self-drilling anchors screw directly into drywall without pre-drilling. Their sharp threads cut into the wall for a secure fit. These anchors are easy to use and hold moderate weight. Perfect for hanging clocks or small decorations.

Credit: www.wikihow.com
Choosing The Right Anchor
Choosing the right anchor is key to a secure wall mount. The anchor must fit the wall type and hold the weight safely. Picking the wrong anchor can cause damage or failure. This guide helps you choose the best anchor for your project.
Assessing Wall Material
Check the wall type before selecting an anchor. Drywall needs different anchors than brick or concrete. Soft walls require anchors that expand or grip well. Hard walls need anchors that can drill in and hold tight. Knowing your wall material helps pick the right anchor.
Weight Capacity Considerations
Think about the weight of the item you hang. Heavy items need anchors with high weight limits. Use anchors rated above the item’s weight for safety. Light items can use smaller anchors. Choosing an anchor with the right capacity prevents falls and damage.
Anchor Size And Length
Match the anchor size to the hole and wall thickness. Longer anchors work better in thick walls. Short anchors suit thin walls or hollow spaces. The anchor must fit snugly in the hole. Proper size ensures strong hold and stability.
Tools Needed
Getting anchors in the wall needs the right tools. These tools help make the job safe and easy. Using proper tools also protects your wall from damage. Prepare these items before starting your work. This saves time and effort.
Drill And Drill Bits
A drill is important to make holes for anchors. Choose drill bits that fit the anchor size. Use a slow speed to avoid wall cracks. A sharp drill bit gives a clean hole. This helps anchors hold better.
Screwdriver
A screwdriver drives screws into anchors. Pick a screwdriver that matches your screw head. This prevents slipping and damage to screws. Manual or electric screwdrivers both work well. A steady hand makes the process smooth.
Measuring Tape
Measure the exact spot for your anchors. Use a tape to mark the right place. Accurate measuring avoids crooked or uneven placement. Mark the wall gently with a pencil. This keeps your project neat and balanced.
Level
A level checks if your marks are straight. Place it against the wall after marking. Adjust the marks until the bubble is centered. Straight anchors hold items properly on the wall. This tool ensures your work looks professional.

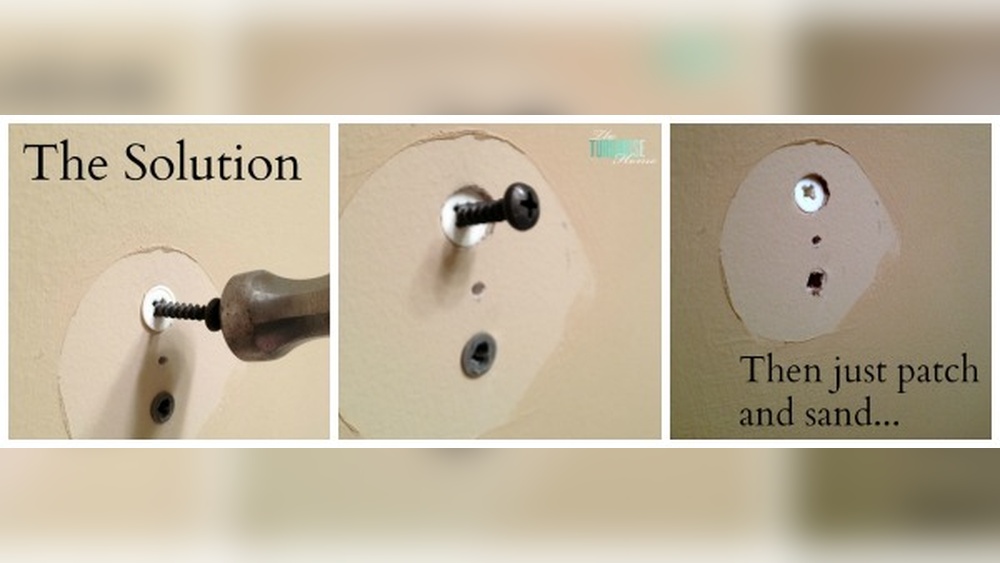
Credit: theturquoisehome.com
Marking The Spot
Marking the spot on the wall is the first step in getting anchors in place. This step helps ensure your anchors hold firmly and your item stays secure. Careful marking prevents mistakes and saves time during installation.
Take your time to mark the exact points for drilling. Clear and accurate marks make the process smoother and help avoid unnecessary holes in the wall.
Measuring Placement
Use a tape measure to find the right spots for your anchors. Measure the distance between brackets or mounting points on your item. Transfer these measurements to the wall carefully.
Double-check your numbers before marking. Small errors can cause uneven or loose mounting. Mark the points with a pencil for easy adjustments.
Using A Level For Accuracy
A level ensures your marks are straight and even. Hold the level against the wall near your marks. Adjust the marks until the bubble centers in the level’s vial.
Even marks create a professional look and strong hold. Avoid skipping this step, especially for shelves or heavy items. Straight lines help distribute weight evenly.
Drilling The Hole
Drilling the hole is a key step in getting anchors into the wall. It creates space for the anchor to fit tightly. A well-drilled hole ensures the anchor holds strong and does not loosen over time. Take care in this step to avoid cracks or weak spots in the wall.
Selecting The Correct Drill Bit
Choose a drill bit that matches the anchor size. The hole should be just wide enough for the anchor to fit snugly. Too large, and the anchor will not hold well. Too small, and the anchor will be hard to insert or may break.
Use a masonry bit for concrete or brick walls. For drywall, a standard twist bit works fine. Always check the package instructions for the recommended drill bit size.
Drilling At The Right Depth
Drill a hole deep enough for the entire anchor. Use a tape measure or mark the drill bit with tape to control depth. A shallow hole makes the anchor loose. A hole too deep may weaken the wall.
Slow and steady drilling prevents damage. Stop once the marked depth is reached. Clear dust from the hole before inserting the anchor. This helps the anchor hold better.

Credit: www.tjlituo.com
Installing The Anchor
Installing the anchor is a key step in securing objects to the wall. It ensures the anchor holds tight and supports weight. Each type of anchor requires a different installation method. Follow these simple steps to install anchors correctly for a strong hold.
Inserting Plastic Anchors
Start by drilling a hole the same size as the anchor. Push the plastic anchor gently into the hole until it is flush. Tap it lightly with a hammer if needed. Avoid forcing it to prevent damage. Once inserted, screw your fastener into the anchor carefully.
Setting Molly Bolts
Drill a hole slightly larger than the folded molly bolt. Insert the bolt fully into the hole. Use a screwdriver to tighten the bolt’s screw. This action expands the anchor behind the wall. It grips firmly and holds weight well. Stop tightening once it feels secure.
Securing Toggle Bolts
Fold the toggle wings and push the bolt through the hole. Insert the toggle into the drilled hole in the wall. The wings open inside the wall cavity. Pull back gently on the bolt to lock the wings in place. Tighten the screw while keeping slight tension. The toggle anchor now supports heavy items.
Using Self-drilling Anchors
Select the right size anchor for your wall type. Place the tip of the anchor against the wall surface. Use a screwdriver to twist the anchor into the drywall. It cuts its own hole as it goes in. Keep turning until the anchor is flush with the wall. Insert the screw into the anchor firmly.
Attaching Fixtures
Attaching fixtures to the wall is an important step to ensure they stay secure. Proper attachment helps avoid damage to the wall and keeps items stable. Using the right method with anchors makes the process easier and safer.
Aligning With Anchors
First, check that the fixture holes match the anchor positions. Hold the fixture against the wall. Mark the exact spots where screws will go. Make sure these marks line up with the anchors already placed. Correct alignment prevents the fixture from hanging crooked or falling.
Use a level to keep everything straight. Small adjustments can make a big difference. Take your time before drilling or screwing. Proper alignment saves effort and protects your wall.
Tightening Screws Properly
Insert screws into the anchors gently. Turn the screws slowly to avoid stripping the anchor. Tighten them until the fixture feels firm against the wall. Do not over-tighten. Over-tightening can crack the wall or damage the anchor.
Use a screwdriver or drill with low torque. Stop as soon as the fixture does not move. Check the fixture after tightening. It should feel solid and not wiggle. Proper screw tightening ensures a long-lasting hold.
Tips For Strong Support
Strong support is key to keeping items safely on your wall. Anchors help hold weight and prevent damage. Use the right steps for the best hold.
Follow these tips to make sure your anchors stay firm and secure.
Avoid Overloading
Each anchor has a weight limit. Do not hang items heavier than this limit. Too much weight causes anchors to fail. Check the package for weight ratings. Stay within those limits for safety.
Check Anchor Stability
After installing, test the anchor gently. Give it a small pull or push. If it moves or feels loose, it may not hold well. Replace weak anchors with stronger ones. Good stability means strong support.
Use Multiple Anchors If Needed
Heavy or large items need more support. Use two or more anchors spaced apart. This spreads the weight evenly on the wall. It lowers the risk of damage or falling. Multiple anchors help keep things steady.
Frequently Asked Questions
What Tools Do I Need To Get Anchors In The Wall?
You need a drill, screwdriver, wall anchors, and screws. Choose the right anchor type for your wall material. A hammer may help for certain anchors. Safety goggles are also recommended.
How Do I Choose The Right Wall Anchor?
Select anchors based on wall type: drywall, plaster, or masonry. Consider the weight you want to support. Plastic anchors suit light loads; metal anchors handle heavier items. Check package instructions for weight limits.
Can I Install Anchors Without Drilling Holes?
Some anchors, like adhesive or self-drilling anchors, don’t need pre-drilled holes. However, drilled holes often provide stronger support. For heavy items, drilling is usually necessary. Always follow the anchor manufacturer’s guidelines.
How Deep Should I Drill For Wall Anchors?
Drill a hole slightly deeper than the anchor’s length. This ensures a snug fit and proper anchoring. Check the anchor packaging for recommended hole depth. Avoid drilling too deep or too shallow.
Conclusion
Getting anchors in the wall is simple with the right steps. Choose the correct anchor for your wall type. Mark the spot clearly and drill carefully. Insert the anchor firmly and screw in gently. This helps hold items safely and prevents damage.
Practice makes the process easier and faster. Keep these tips in mind for strong wall support. Now you can hang things with confidence and ease.