Have you ever removed a wall anchor and been left with an ugly hole staring back at you? It’s frustrating, especially when you want your walls to look smooth and clean again.
But fixing that hole doesn’t have to be hard or expensive. In this guide, you’ll learn simple, step-by-step ways to fill the hole from a wall anchor quickly and effectively. By the end, your wall will look as good as new—and you’ll save time and money by doing it yourself.
Ready to get started? Let’s dive in!
Gather Repair Tools
Before fixing a hole left by an anchor, gather all needed tools. Having the right tools makes the repair faster and neater. Prepare a small workspace with good light. This helps you see the hole clearly and work with ease.
List Essential Materials
Collect these materials before starting your wall repair:
- Spackling paste or wall filler
- Putty knife or scraper
- Sandpaper (fine grit)
- Clean cloth or sponge
- Primer and paint (optional)
- Drop cloth or old newspaper to catch debris
These basics cover most small hole repairs. Having everything ready avoids delays.
Choose The Right Filler
Select a filler that suits your wall type. For drywall, use spackling paste or lightweight filler. For plaster walls, a stronger filler may be best. Some fillers dry faster, letting you finish sooner. Read the product label for drying time and ease of use. Avoid fillers that shrink or crack after drying.
Credit: www.thehandymansdaughter.com
Prepare The Damaged Area
Preparing the damaged area is the first step to fix a hole left by a wall anchor. This step helps the patch stick better and last longer. Cleaning and removing loose parts makes the surface smooth and ready for repair.
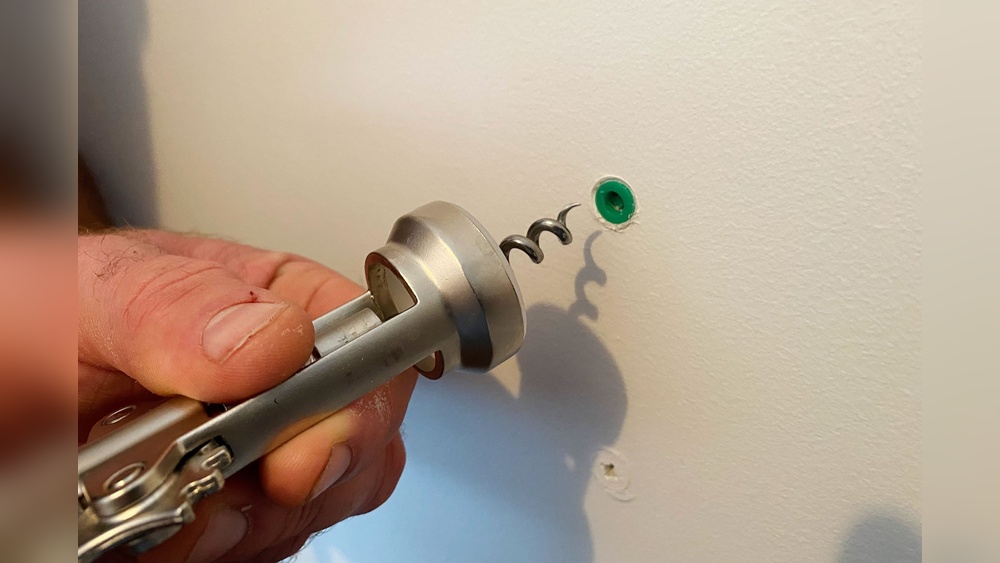
Remove Loose Debris
Start by taking out any loose pieces around the hole. Use a small brush or your fingers to clear dust and crumbling drywall. Loose debris can stop the filler from holding properly. Make sure the edges of the hole are firm and solid.
Clean The Surface
Next, wipe the area with a damp cloth. This removes any dirt, dust, or grease on the wall. A clean surface helps the patch material stick tightly. Let the area dry before you begin filling the hole.
Apply Wall Filler
Applying wall filler is the key step to fix holes left by anchors. It smooths the surface and prepares it for painting. Doing this right ensures a clean, even finish that blends with the wall.
Mix Filler Properly
Start by choosing the right filler for your wall type. Follow the instructions on the package carefully. Use a clean container and mix the filler with water until it feels smooth. Avoid lumps or dry spots in the mixture. A well-mixed filler spreads easily and sticks better.
Fill The Hole Carefully
Use a putty knife to scoop the filler. Press it firmly into the hole to remove air pockets. Spread the filler evenly over the surface. Smooth the edges to match the wall’s texture. Let the filler dry completely before sanding or painting. Filling carefully makes the repair less visible.
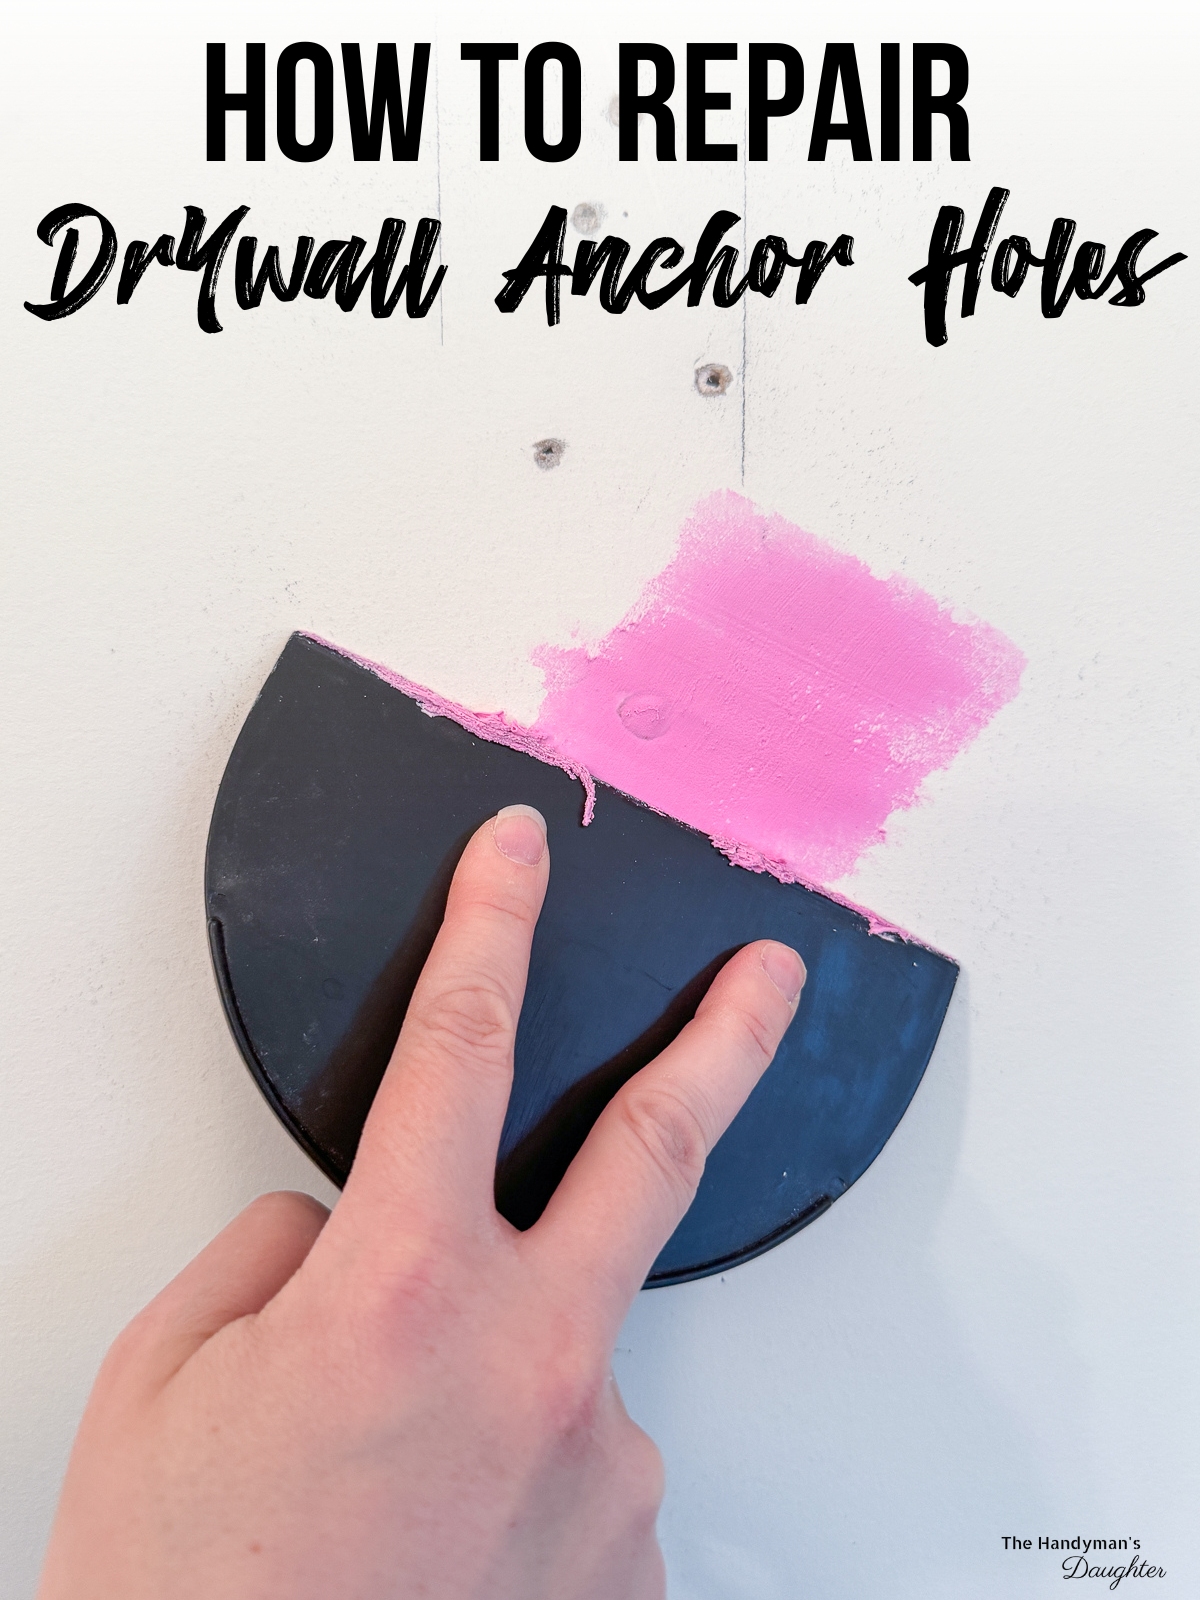
Smooth And Shape The Repair
Smoothing and shaping the repair is a key step to fixing a hole from a wall anchor. This step helps the patch blend with the wall. It creates a clean, flat surface. A smooth finish hides the repair well. It also makes painting easier and more even.
Careful smoothing ensures the patch will not stand out. Take your time to shape the filler properly. This process needs the right tools and some patience.
Use A Putty Knife
A putty knife is the main tool for smoothing wall filler. Hold the knife at a slight angle. Spread the filler over the hole evenly. Push gently to fill all gaps and cracks. Remove any extra filler by scraping it off.
Work slowly and carefully. Smooth the surface with long, even strokes. The goal is a flat and level patch. Rinse the knife often to avoid buildup. Clean edges help the repair blend with the wall.
Feather Edges For Blending
Feathering the edges means making the patch fade into the wall. This step avoids sharp lines around the repair. Use the putty knife to thin the filler outward from the hole. Apply less pressure as you move away from the center.
Feathering creates a soft transition. It hides the patch under paint or wallpaper. Smooth, blended edges are less visible. This technique improves the overall look of the fix.
Dry And Sand The Surface
After filling the hole left by the anchor, drying and sanding the surface is important. This step ensures the patch blends well with the wall. It prepares the wall for painting and leaves a smooth finish. Patience and care during drying and sanding improve the final look.
Allow Proper Drying Time
Let the filler dry completely. Wet filler can crumble and ruin your work. Drying time depends on the product used and room temperature. Usually, it takes a few hours. Avoid rushing this step. Check the filler’s instructions for exact drying times.
Sand For A Smooth Finish
Use fine-grit sandpaper to smooth the dried filler. Sand gently in small circles. This removes bumps and uneven areas. Stop sanding when the patch feels flat and blends with the wall. Wipe away dust with a dry cloth. A smooth surface is ready for painting.

Credit: www.youtube.com
Prime And Paint
Priming and painting are key steps to make a repaired wall look smooth. After filling the hole left by the anchor, these steps protect the wall and blend the patch with the rest of the surface. Proper priming stops paint from soaking unevenly. Painting then gives the wall a fresh, uniform look.
Select Matching Paint
Choose paint that matches your wall color closely. Check the room’s existing paint or use leftover paint if available. Bring a small sample to a paint store for color matching. Matching paint ensures the patch is invisible and the wall looks neat.
Apply Primer And Paint
Start by applying a thin layer of primer on the patched area. Let it dry fully to seal the surface and improve paint adhesion. Next, use a small brush or roller to apply the matching paint. Apply paint in thin, even coats for the best finish. Allow each coat to dry before adding another. This process helps the repair blend seamlessly with the wall.
Prevent Future Damage
Preventing future damage to your walls helps keep your home safe and looking good. Small holes from anchors can turn into big problems over time. Fixing them properly and taking smart steps stops new damage.
Focus on how you choose and use anchors. Also, avoid putting too much weight on your walls. These simple actions protect your walls and save you from extra repairs.
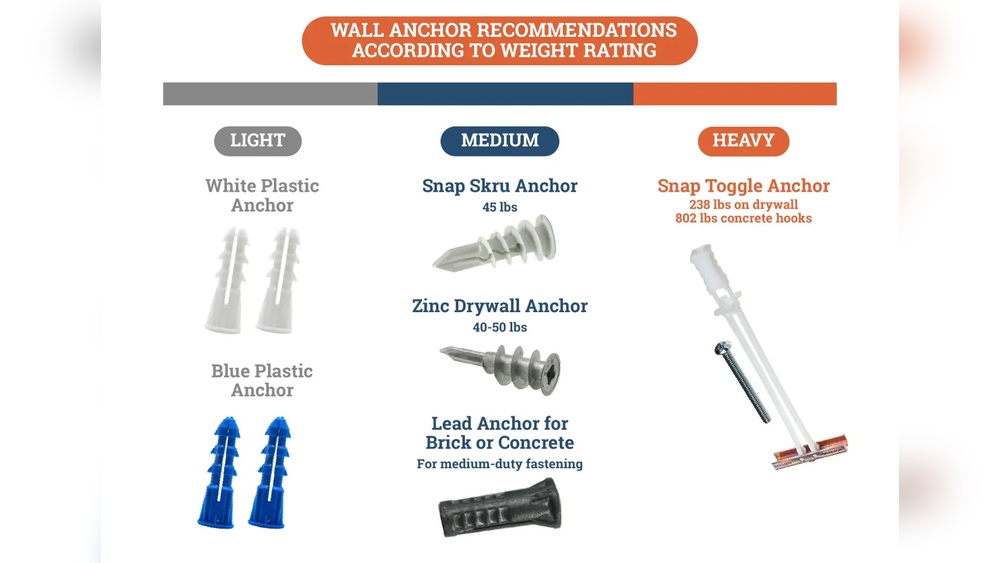
Use Appropriate Anchors
Choose anchors that fit the wall type. Drywall, plaster, and brick all need different anchors. Using the wrong anchor can cause holes to grow or walls to crack.
Pick anchors with the right size and strength. Heavy items need strong anchors. Light items can use smaller ones. Always follow the anchor’s instructions for the best hold.
Avoid Overloading Walls
Do not hang items heavier than the anchor can hold. Overloading pulls anchors out and breaks the wall. Spread heavy items across several anchors to share the weight.
Check weight limits on anchors before hanging. Use shelves or stands for very heavy objects instead. This keeps walls stable and damage-free.

Credit: diy.stackexchange.com
Frequently Asked Questions
How Do I Fill A Hole From A Wall Anchor?
To fill a hole from a wall anchor, remove the anchor first. Then, use spackle or wall filler to fill the hole. Smooth it with a putty knife and let it dry. Finally, sand the area and repaint for a seamless finish.
What Materials Are Needed To Fill Wall Anchor Holes?
You will need spackle or wall filler, a putty knife, sandpaper, and paint. Optional tools include a utility knife and a damp cloth for cleaning the area before repair.
Can I Fill Anchor Holes Without Sanding?
Sanding is recommended for a smooth finish. However, if the filler is flush with the wall, you can skip sanding. Note that skipping sanding might result in a rough or uneven surface before painting.
How Long Does Wall Filler Take To Dry?
Wall filler typically takes 30 minutes to 1 hour to dry. Drying time varies based on product type and hole size. Always check the manufacturer’s instructions for the most accurate drying time.
Conclusion
Fixing a hole from a wall anchor is simple with the right steps. Use filler, smooth it out, and let it dry well. Sand the spot gently for a clean finish. Paint over to match your wall color. This quick fix keeps your walls looking neat and fresh.
A little care goes a long way. Now your wall looks as good as new!