Are you worried about your home’s security? Installing a deadbolt door lock is one of the simplest and most effective ways to protect your space.
But if you’ve never done it before, the idea might feel overwhelming. Don’t worry—this guide will walk you through every step, making the process easy and stress-free. By the end, you’ll have a strong, reliable lock that gives you peace of mind.
Ready to take control of your home’s safety? Let’s get started!
Choosing The Right Deadbolt
Choosing the right deadbolt is key for home security. A good deadbolt stops unwanted entry and gives peace of mind. Picking the right lock depends on your door type, security needs, and style preferences. This section helps you understand what to look for.
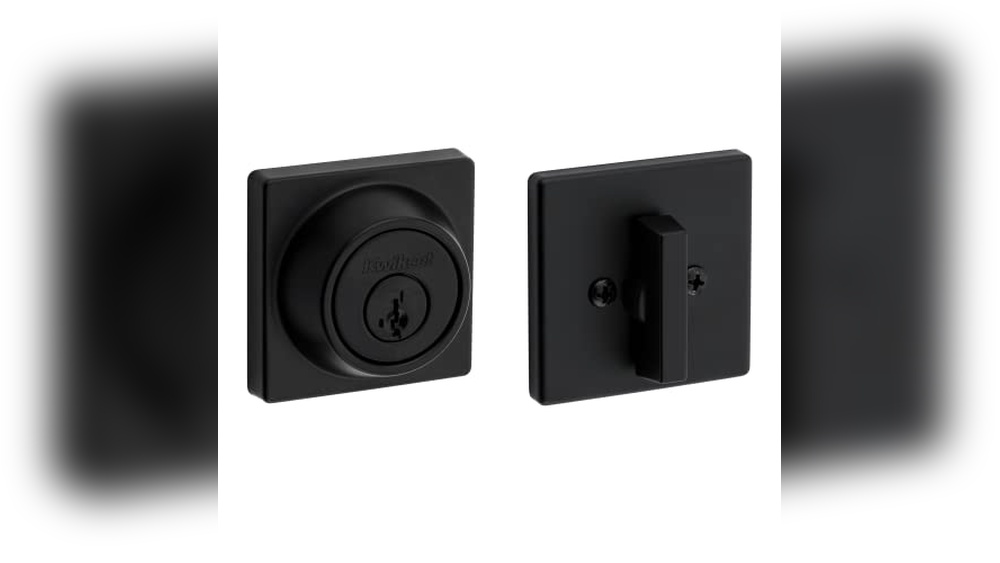
Types Of Deadbolts
Single-cylinder deadbolts use a key outside and a thumb turn inside. They work well for most homes. Double-cylinder deadbolts need a key on both sides. Use them if windows are near your door. There are also keyless deadbolts with a keypad for easy access.
Material And Finish Options
Deadbolts come in various materials like brass, steel, and zinc. Steel is strong and resists force. Brass looks nice and resists rust. Choose a finish that matches your door, such as chrome, bronze, or nickel. The finish protects the lock and adds style.
Security Ratings To Consider
Look for deadbolts rated by ANSI or BHMA. Grade 1 offers the highest security. Grade 2 is good for most homes. Grade 3 provides basic protection. Check the lock’s resistance to picking, drilling, and force. Higher-rated locks last longer and keep your home safer.

Credit: www.youtube.com
Tools And Materials Needed
Installing a deadbolt door lock requires specific tools and materials. Having the right items ready makes the process smooth and fast. This section lists everything needed for a successful installation.
Basic Tools Checklist
- Power drill with drill bits
- Screwdriver (Phillips and flathead)
- Measuring tape
- Pencil or marker
- Chisel
- Hammer
- Level
Optional Tools For Easier Installation
- Hole saw kit for door drilling
- Wood filler for fixing mistakes
- Utility knife for trimming
- Clamp for holding parts steady
Materials To Have On Hand
- Deadbolt lock set
- Wood screws (usually included)
- Masking tape to mark drill spots
- Safety glasses
- Work gloves
Preparing The Door
Preparing the door is a key step before installing a deadbolt lock. This step ensures the lock fits well and works properly. It involves measuring, marking, drilling, and checking the door thickness. Taking time here avoids mistakes later.
Measuring And Marking
Start by measuring the height where the deadbolt will go. Usually, it sits about 6 to 12 inches above the door handle. Use a tape measure and pencil to mark the exact spot on the door edge and face. Accurate marks help guide the drilling and fitting.
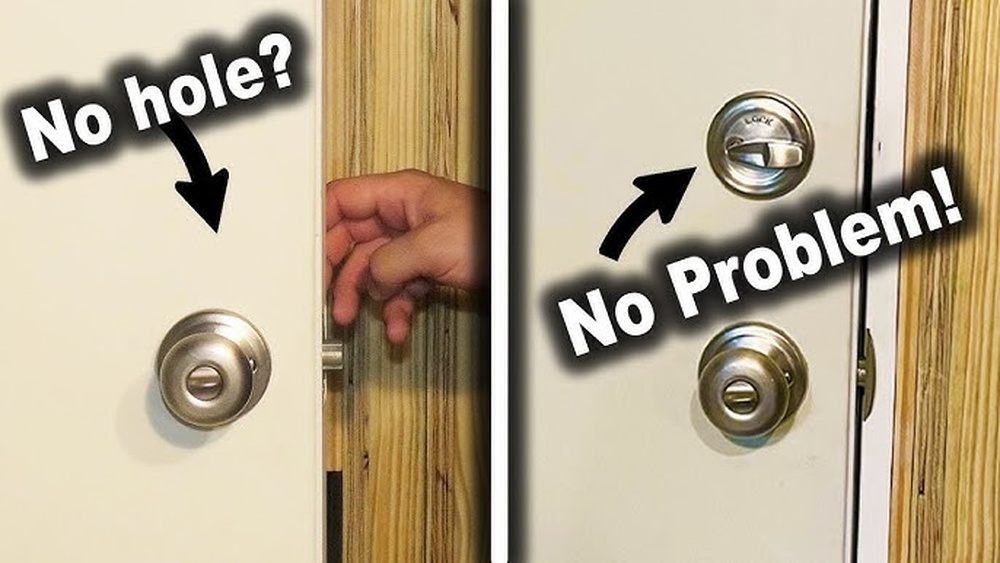
Drilling Holes
Drill a hole through the door face where the lock cylinder will sit. Use a hole saw bit that matches the lock size. Then, drill a hole in the door edge for the bolt. Keep the drill straight to avoid uneven holes. Clean out any wood chips to keep the area clear.
Checking Door Thickness
Measure the door thickness to confirm lock compatibility. Most deadbolts fit doors between 1 3/8 and 1 3/4 inches thick. If the door is thinner or thicker, find a lock designed for that size. A good fit ensures the lock works smoothly and secures the door well.
Installing The Deadbolt Mechanism
Installing the deadbolt mechanism is a crucial step for securing your door. It ensures the lock works smoothly and protects your home. This part involves placing the bolt inside the door and fixing it firmly in place. Following simple steps will help you complete this task correctly.
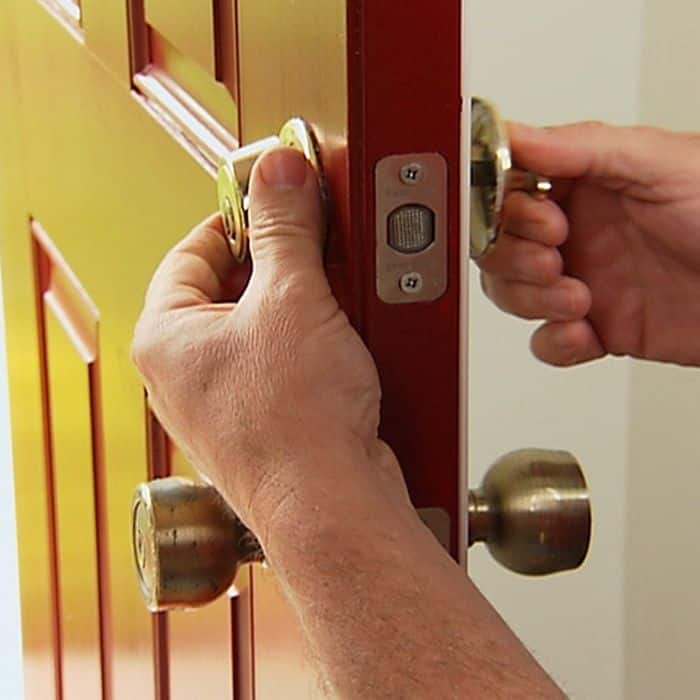
Inserting The Bolt
Begin by sliding the bolt into the hole on the edge of the door. The bolt should fit snugly without forcing it. Make sure the bolt’s angled side faces the door frame to allow smooth locking and unlocking.
Securing The Bolt With Screws
Use the screws provided with your lock to fix the bolt firmly. Insert each screw into the holes around the bolt and tighten them with a screwdriver. Screws must be tight to keep the bolt steady but avoid over-tightening to prevent damage.
Ensuring Proper Alignment
Check if the bolt moves freely by sliding it back and forth. The bolt should extend and retract without sticking. Align the bolt so it fits perfectly into the strike plate on the door frame for secure locking.
Mounting The Exterior And Interior Plates
Mounting the exterior and interior plates is a key step in installing a deadbolt lock. These plates hold the lock parts in place and keep your door secure. Proper alignment makes sure the lock works smoothly and lasts longer.
Take your time to position and attach the plates correctly. This will help avoid problems with locking or unlocking later.
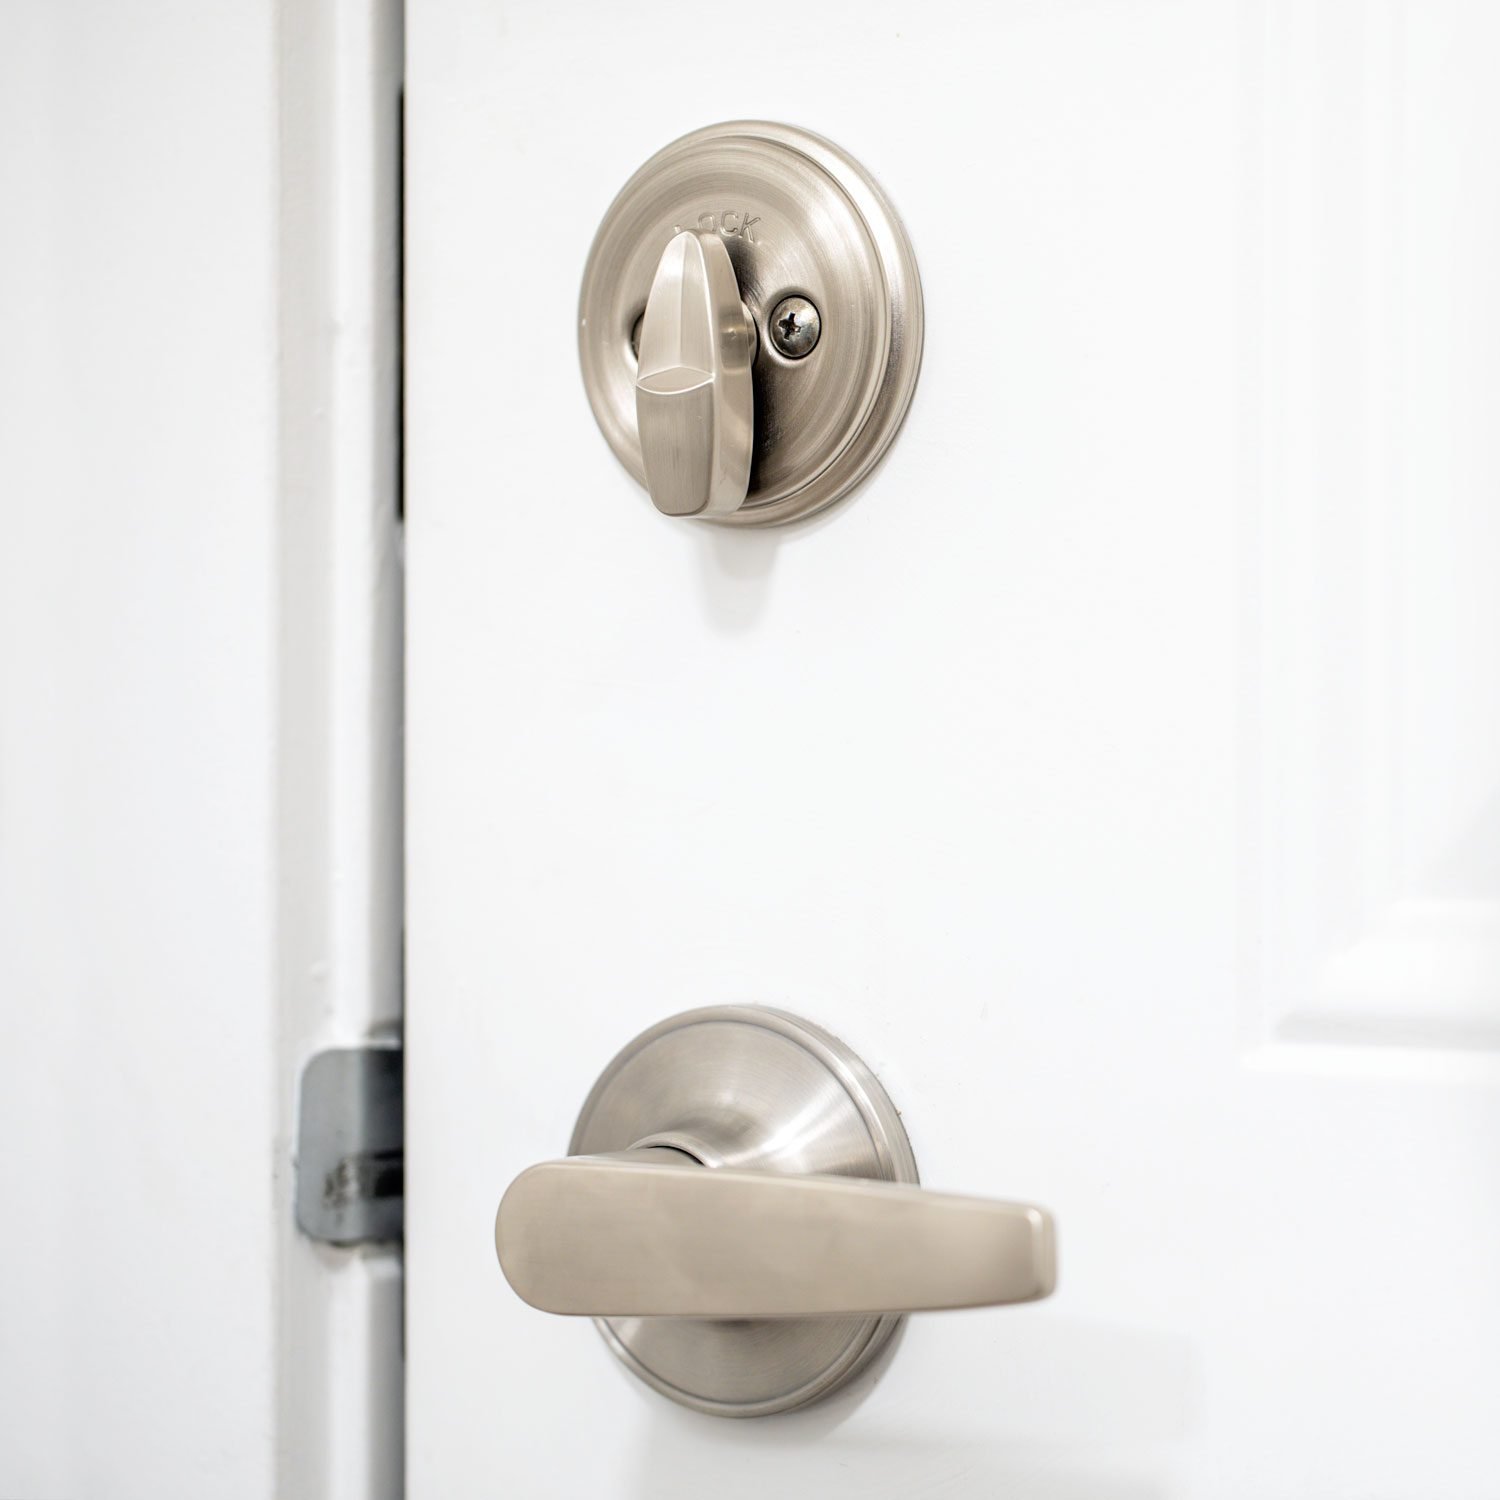
Positioning The Exterior Plate
Start with the exterior plate on the outside of the door. Line it up with the hole made for the lock cylinder. The plate should sit flat against the door surface. Use the screws provided to hold it loosely in place. Check the alignment to make sure the key will turn without resistance.
Attaching The Interior Plate
Next, place the interior plate on the inside of the door. Match it to the exterior plate through the hole in the door. The interior plate should sit flush with the door surface. Insert screws and tighten them evenly. This keeps the plates tightly secured and prevents wobbling.
Installing The Thumb Turn And Cylinder
Insert the lock cylinder through the exterior plate. Make sure it fits snugly. Attach the thumb turn on the interior plate. It should turn smoothly to lock and unlock the deadbolt. Check both sides for proper operation before fully tightening all screws.
Credit: www.lowes.com
Testing And Adjustments
Testing and adjusting your deadbolt lock is a crucial step after installation. It ensures the lock works smoothly and securely. Small adjustments can prevent future problems and keep your door safe.
Checking Lock Operation
Turn the key or thumb turn to test the lock. The bolt should move easily without sticking. Lock and unlock several times to confirm smooth action. Make sure the key inserts and turns without force. Check both sides of the door for proper function.
Adjusting Strike Plate Position
Close the door slowly and watch the bolt hit the strike plate. It should slide in easily. If the bolt hits the edge, loosen the screws on the strike plate. Move the strike plate slightly up, down, or sideways. Tighten the screws and test again. Repeat until the bolt fits perfectly.
Troubleshooting Common Issues
If the lock sticks or won’t turn, check for misalignment. Inspect the door frame and strike plate. Sand or file rough spots if needed. Tighten loose screws on the lock and strike plate. Lubricate the lock with graphite powder or silicone spray. Avoid oil-based lubricants that attract dirt.
Maintenance Tips
Maintaining your deadbolt door lock keeps it working smoothly and extends its life. Regular care prevents problems like sticking or jamming. Small steps can save you from costly repairs or replacements.
Lubrication Recommendations
Use a graphite or silicone spray for lubrication. Avoid oil-based lubricants; they attract dirt and dust. Apply lubricant to the keyhole and bolt mechanism. Operate the lock several times to spread it evenly. Lubricate your lock every six months for best results.
Regular Inspection
Check your deadbolt lock for wear and tear often. Look for loose screws and tighten them if needed. Test the lock’s smoothness by turning the key or thumb turn. Notice any unusual sounds or resistance. Early detection of issues helps avoid lock failure.
When To Replace Parts
Replace parts if the lock sticks or jams frequently. Change the key cylinder if the key feels loose or hard to turn. Swap out worn or damaged screws and strike plates. Replace the entire lock if it shows signs of rust or breaks. Keeping parts in good condition ensures your home stays secure.
Credit: www.familyhandyman.com
Frequently Asked Questions
How Do I Install A Deadbolt Lock On My Door?
First, mark the door for the lock placement. Drill holes for the lock and latch. Insert the deadbolt and secure with screws. Finally, test the lock to ensure smooth operation.
What Tools Are Needed To Install A Deadbolt?
You need a drill, screwdriver, measuring tape, pencil, and chisel. These tools help in drilling holes and securing the lock properly. Having them ready makes installation easier and faster.
How Long Does Deadbolt Installation Usually Take?
Installing a deadbolt typically takes 30 to 60 minutes. Time depends on your experience and door type. Following instructions carefully ensures a quick and secure installation.
Can I Install A Deadbolt Without Professional Help?
Yes, many deadbolts are designed for DIY installation. Clear instructions and basic tools make it simple. However, ensure accurate measurements and careful drilling for best results.
Conclusion
Installing a deadbolt door lock adds extra security to your home. Follow each step carefully for the best results. Take your time and use the right tools. Double-check the lock fits and works smoothly. A secure lock helps protect your family and belongings.
Practice makes perfect—don’t rush the process. Now, enjoy the peace of mind a strong lock brings.