Are you struggling with a Lori deadbolt that just won’t budge? Removing it might seem tricky, but you don’t have to be a locksmith to get it done.
Whether you’re replacing an old lock or fixing a jam, this guide will walk you through every simple step. By the end, you’ll feel confident handling your deadbolt like a pro—saving time, money, and frustration. Ready to unlock the secret?
Let’s dive in and make your door work the way it should.

Credit: diy.stackexchange.com
Tools Needed
Removing a Lori deadbolt requires a few basic tools. Having the right tools makes the job easier and faster. Each tool plays a specific role in the removal process. Prepare all tools before starting to avoid interruptions.
Phillips Screwdriver
This screwdriver is essential for removing screws on the deadbolt. Most Lori deadbolts use Phillips screws. A medium-sized Phillips screwdriver fits well for most screws.
Flathead Screwdriver
A flathead screwdriver helps to pry parts gently. It also works to push out any stuck components. Use it carefully to avoid damage.
Allen Wrench
Some Lori deadbolts have small hex screws. An Allen wrench set includes different sizes. Check which size fits your deadbolt before starting.
Pliers
Pliers grip and pull small parts easily. They help remove stubborn screws or bolts. Needle-nose pliers work best for tight spots.
Utility Knife
A utility knife can cut through sealant or paint around the lock. This makes it easier to remove the deadbolt cover. Use the knife carefully to avoid scratches.
Identify The Lori Deadbolt Type
Identifying the type of Lori deadbolt is the first step in removing it. Different models have different designs and mechanisms. Knowing the type helps choose the right tools and method. This makes the removal process faster and safer.
Check The Exterior Side Of The Deadbolt
Look closely at the outside part of the deadbolt. Some Lori deadbolts have a keyhole, while others do not. The presence of a keyhole shows it is a keyed deadbolt. No keyhole means it might be a thumb-turn type or electronic lock.
Inspect The Interior Side Of The Deadbolt
Open the door and examine the inside part of the lock. Many Lori deadbolts have a thumb-turn knob inside. Others may have a push-button or a small switch. This detail tells if the lock is manual or electronic.
Look For Model Numbers Or Brand Labels
Find any numbers or labels on the lock. Most Lori deadbolts have a small tag or engraving with model details. These codes help identify the exact type and the best removal technique. Use a flashlight if needed to see clearly.
Determine If The Deadbolt Is Electronic Or Mechanical
Electronic deadbolts often have a keypad or a battery pack. Mechanical deadbolts rely on a key or thumb-turn only. This difference changes the tools you need. Removing electronic locks may require extra steps like disconnecting power.
Prepare The Door
Preparing the door is the first step to remove a Lori deadbolt safely and smoothly.
This step helps avoid damage to the door and lock parts. It also makes the process easier and faster.
Clear The Area Around The Door
Remove any rugs or mats near the door. Clear furniture or objects that block your movement. This gives you enough space to work freely.
Gather Necessary Tools
Get a screwdriver, usually Phillips or flathead. Have a small flashlight ready to see inside the lock. Keep a cloth handy to protect the door surface.
Check The Door’s Condition
Look for any cracks or loose parts on the door. Tighten screws on the door frame if needed. This prevents accidents while removing the deadbolt.
Remove Door Decorations
Take off any decorations or door knockers nearby. These can get in the way or be damaged during removal. Work with a clear door surface.

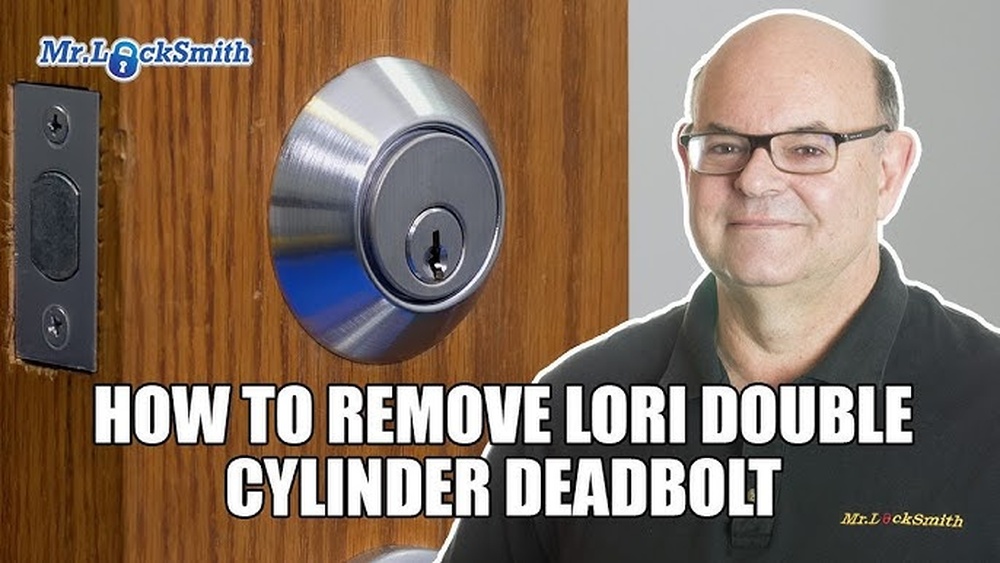
Credit: www.youtube.com
Remove The Exterior Side
Removing the exterior side of a Lori deadbolt is the first step to take. This part holds the keyhole and the outer handle. It connects to the inside mechanism that locks and unlocks the door.
Careful removal avoids damage to the lock and door. Follow these simple steps to take it off safely and easily.
Gather Necessary Tools
Before starting, collect all tools. A screwdriver set is often needed. Sometimes, a drill or Allen wrench helps. Having the right tools makes the process smooth.
Locate And Remove Screws
Look closely at the exterior side. Find screws holding the lock to the door. Most Lori deadbolts have two or three screws visible. Use the screwdriver to turn them counterclockwise. Keep the screws safe for later use.
Detach The Exterior Plate
Once screws are out, gently pull the exterior plate. It may need a slight wiggle to loosen. Avoid using too much force to prevent damage. The plate should come off easily after screws removal.
Disconnect The Tailpiece
Behind the plate, find the tailpiece. This small metal bar connects to the inside lock. Slide or pull it out carefully. Disconnecting the tailpiece frees the exterior side from the lock mechanism.
Remove The Interior Side
Removing the interior side of a Lori deadbolt is a key step. It gives you access to the lock mechanism inside the door. This part holds the lock in place and connects to the exterior side.
Careful removal avoids damage to the door or lock. Basic tools and simple steps make the job easier. Follow these instructions to remove the interior side safely.
Locate And Remove The Screws
Find the screws holding the interior plate to the door. These are usually visible around the circular base. Use a screwdriver to turn each screw counterclockwise. Keep the screws safe for reassembly later.
Detach The Interior Plate
After screws are out, gently pull the interior plate away from the door. It may feel tight. Wiggle it slightly to loosen it. Avoid using force to prevent damage.
Disconnect The Turn Knob Or Lever
The turn knob or lever connects to the deadbolt. Pull it straight off the spindle. Some models have a small clip or pin. Remove that carefully to free the knob.
Remove The Connecting Rod
Inside, a rod links the interior side to the bolt. Slide or unclip this rod from the lock mechanism. Keep track of how it fits for later assembly.
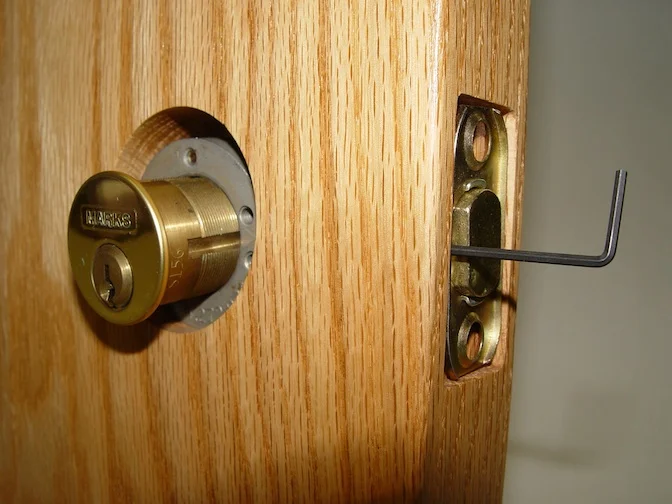
Credit: www.reddit.com
Extract The Deadbolt Mechanism
Extracting the deadbolt mechanism is a key step in removing a Lori deadbolt. This part controls the locking and unlocking of the door. Taking it out carefully ensures the lock can be replaced or repaired without damage. The process requires focus and some basic tools.
Follow the steps below to remove the deadbolt mechanism smoothly. Work slowly and keep track of all parts. Small pieces can easily get lost during this task.
Remove The Screws Holding The Deadbolt
Find the screws on the edge of the door. These screws hold the deadbolt in place. Use a screwdriver to turn them counterclockwise. Keep the screws safe for reassembly or replacement.
Pull Out The Deadbolt From The Door
Gently pull the deadbolt mechanism from the door edge. It may need a little wiggle to come free. Avoid using too much force to prevent damage to the door or lock.
Inspect The Deadbolt For Damage
Check the extracted deadbolt for signs of wear or damage. Look for broken parts or rust. This inspection helps decide if a repair is possible or a full replacement is needed.
Check And Remove Screws
Removing a Lori deadbolt starts with checking and removing screws. These screws hold the lock firmly to the door. Without taking them out, you cannot remove the deadbolt. This step is simple but important for safe removal.
Locate each screw carefully. They are usually visible on the lock’s faceplate or inside the knob area. Use a screwdriver that fits well to avoid stripping the screws. Turn slowly and steadily to loosen each one.
Locate All Visible Screws
Look closely at both sides of the deadbolt. Screws often hide under a cover plate. Pry the cover gently with a flat tool. Find every screw that holds the lock in place. Missing one can make removal hard.
Use The Right Screwdriver
Choose a screwdriver matching the screw type. Most Lori deadbolts use Phillips-head screws. A wrong screwdriver can damage the screw head. This makes removal difficult and can damage the door.
Remove Screws Carefully
Turn each screw counterclockwise. Keep screws safe after removal. They may be small and easy to lose. Removing screws evenly helps avoid bending parts. Work slowly for best results.
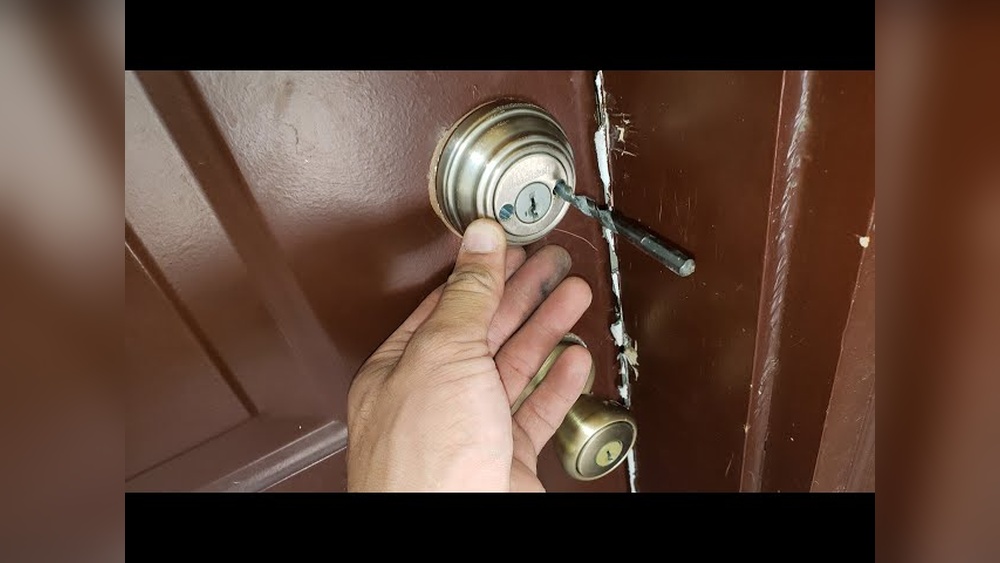
Handle Stubborn Or Jammed Deadbolts
Dealing with a stubborn or jammed Lori deadbolt can be frustrating. These locks sometimes stick or refuse to turn, making removal tricky. Knowing how to handle these issues saves time and effort. The key is to stay patient and use the right techniques.
Apply Lubricant To The Deadbolt Mechanism
Spray a small amount of lubricant into the keyhole and around the bolt. This helps loosen dirt and rust inside the lock. Wait a few minutes for the lubricant to work. Try turning the key gently after applying it. Repeat if needed until the bolt moves smoothly.
Use A Screwdriver To Gently Pry The Deadbolt
Find the screws holding the deadbolt on the door edge. Loosen them slightly but do not remove yet. Insert a flathead screwdriver between the lock and the door. Carefully pry to create a small gap. This can help free the jammed bolt. Work slowly to avoid damage.
Tap The Deadbolt Lightly With A Hammer
Use a small hammer or rubber mallet. Tap the deadbolt gently near the lock cylinder. This can shake loose any stuck parts inside. Avoid hard hits to prevent breaking the lock. After tapping, try turning the key again. Repeat as needed with gentle taps.
Check For Misaligned Door Or Strike Plate
Sometimes the deadbolt jams due to misalignment. Check if the door closes properly. Look at the strike plate on the door frame. If it is off-center, the bolt may not fit correctly. Adjust the strike plate by loosening screws and repositioning it. This can reduce jamming and ease deadbolt removal.
Replace Or Repair Options
Deciding between replacing or repairing a Lori deadbolt depends on the issue’s severity. Small problems can often be fixed without much trouble. More serious damage might need a full replacement. Understanding these options helps save time and money.
Repairing The Lori Deadbolt
Repairing works well for minor issues like jammed locks or loose screws. Start by cleaning the lock parts and removing dirt. Tighten any loose components carefully. Lubricate the mechanism with graphite or silicone spray. Check if the latch moves smoothly after these steps.
Replacing The Lori Deadbolt
Replace the deadbolt if parts are broken or worn out. New deadbolts improve security and function better. Choose a model matching your door’s size and style. Remove the old deadbolt by unscrewing the faceplate and interior plate. Install the new lock following the manufacturer’s instructions.
When To Choose Repair Or Replace
Choose repair for easy fixes and small wear. Replace if the lock is damaged or old. Safety is key. A faulty deadbolt risks home security. Regular checks keep your lock working well. Decide based on cost, effort, and lock condition.
Safety Tips And Precautions
Removing a Lori deadbolt requires care and attention. Safety is the top priority. Following proper precautions prevents injuries and damage.
Taking simple safety steps makes the job easier. It helps avoid common problems. These tips protect both you and your home.
Wear Protective Gear
Always wear gloves to protect your hands. Safety glasses shield your eyes from dust and metal bits. Long sleeves prevent scratches on your arms.
Use The Right Tools
Choose tools made for lock removal. Avoid using damaged or worn-out equipment. Proper tools reduce slipping and accidents.
Work In A Well-lit Area
Bright light helps you see small parts clearly. Use extra lamps if needed. Good visibility prevents mistakes and injury.
Keep The Work Area Clean
Clear the space around your work zone. Remove clutter to avoid tripping or knocking things over. A tidy area helps you focus better.
Turn Off Power Near Electronic Locks
If the deadbolt has electronic parts, disconnect power first. This stops electric shocks or damage to the lock’s system.
Handle Small Parts Carefully
Keep screws and components in a container. This prevents loss and confusion during reassembly. Small parts can be sharp, so handle gently.
Frequently Asked Questions
How Do I Remove A Lori Deadbolt Lock?
To remove a Lori deadbolt, first unscrew the interior plate. Then, gently pull out the lock mechanism. Finally, remove the exterior faceplate and latch assembly carefully to avoid damage.
What Tools Are Needed To Remove Lori Deadbolt?
You will need a Phillips screwdriver, flathead screwdriver, and possibly a hex key. These tools help you unscrew the lock components safely and efficiently.
Can I Remove A Lori Deadbolt Without Damaging The Door?
Yes, by carefully unscrewing all parts and gently pulling components apart. Avoid forcing pieces to prevent scratches or damage to your door.
How Long Does It Take To Remove A Lori Deadbolt?
Removing a Lori deadbolt usually takes about 10 to 15 minutes. Time depends on your experience and the lock’s condition.
Conclusion
Removing a Lori deadbolt is simple with the right steps. Take your time and follow each part carefully. Use basic tools and stay safe while working. This guide helps you fix or replace your lock easily. Trust yourself to handle the task without stress.
Keep this method handy for future lock needs. A secure door means peace of mind every day.