Are you struggling with a double keyed deadbolt that just won’t budge? Whether you’re locked out or simply need to replace your lock, removing this type of deadbolt can seem tricky.
But don’t worry—you can do it yourself with the right steps. In this guide, you’ll discover simple, clear instructions to remove your double keyed deadbolt safely and quickly. Keep reading, and you’ll have your lock off in no time, saving money and avoiding frustration.

Credit: diy.stackexchange.com
Tools Needed
Removing a double keyed deadbolt requires specific tools. These tools help make the process easier and safer. Having the right tools ready saves time and effort.
Below are the essential tools needed for this task. Each tool plays an important role in removing the deadbolt smoothly.
Phillips Screwdriver
A Phillips screwdriver is necessary to remove screws from the deadbolt. Most deadbolts use Phillips head screws. This tool fits the screw heads perfectly and prevents damage.
Flathead Screwdriver
A flathead screwdriver helps pry off covers or trim plates. It also assists in loosening small parts. Its flat, thin blade fits into narrow spaces easily.
Allen Wrench Set
Some deadbolts use hex screws that need an Allen wrench. Having a set ensures the right size is available. This helps remove screws without stripping them.
Pliers
Pliers grip and turn stubborn parts. They help pull out the lock cylinder or twist tight screws. Use pliers carefully to avoid damaging the lock.
Utility Knife
A utility knife cuts through paint or sealant around the lock. This makes removing covers easier. Handle the knife with care to avoid injury.
Safety Glasses
Safety glasses protect your eyes from dust and small metal pieces. Removing a deadbolt can create debris. Wear glasses to keep your eyes safe.
Safety Precautions
Removing a double keyed deadbolt needs care. Safety is the first step. Working with locks can be tricky. Mistakes may cause damage or injury. Follow safety rules to protect yourself and your home. Take your time and stay alert.
Use Proper Tools
Use tools made for lock removal. Avoid makeshift tools. Poor tools can slip or break. This leads to injury or damage. Keep all tools clean and sharp.
Wear Protective Gear
Wear gloves to protect your hands. Use safety glasses to shield your eyes. Small metal pieces might fly off. Protect yourself from cuts and debris.
Turn Off Power Nearby
Check for electrical wires near the door. Turn off power to avoid shocks. Locks near electrical parts need extra care. Safety first to prevent accidents.
Work In A Well-lit Area
Good lighting helps you see clearly. It reduces mistakes and accidents. Use a bright flashlight if needed. Clear vision means safer work.
Keep Children And Pets Away
Children and pets should stay out of the work area. Tools and small parts can be dangerous. Keep your workspace safe and clean.
Identify Deadbolt Type
Identifying the deadbolt type is the first step in removing a double keyed deadbolt. Knowing the exact type helps you choose the right tools and method. Different deadbolts have different parts and designs.
This section explains how to recognize a double keyed deadbolt. It also covers how to check if your deadbolt matches this type. Understanding these details makes removal easier and safer.
Check The Lock Cylinder On Both Sides
Look at the door from inside and outside. A double keyed deadbolt has a key cylinder on both sides. You need a key to unlock it from either side. No thumb turn or button is present inside the house.
Inspect The Lock Faceplate
Examine the metal plate around the deadbolt. Double keyed deadbolts often have a thicker, more secure faceplate. This plate holds the bolt firmly in the door edge. It may have visible screws or a solid design.
Test The Key Operation
Try to turn the key on both sides of the lock. If both sides require a key to open or lock, it is double keyed. This type does not allow locking or unlocking without a key on either side.
Look For Manufacturer Markings
Check for brand names or model numbers on the lock. These markings help confirm the deadbolt type. Search online using this information to find exact specs and removal guides.
Remove Exterior Key Cylinder
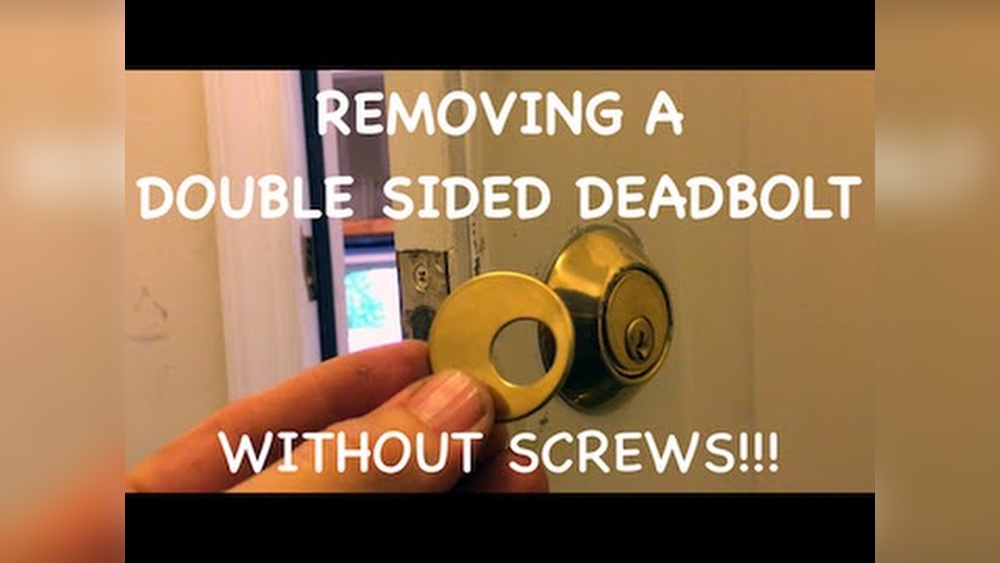
Start by removing the screws on the interior side of the deadbolt. Gently pull out the exterior key cylinder to avoid damage. This process helps in replacing or fixing a double keyed deadbolt safely.
Understanding The Exterior Key Cylinder
The exterior key cylinder is the part of the deadbolt where you insert the key. It controls the lock mechanism inside the door. Removing this cylinder is important to access the inner parts of the deadbolt.
This step requires care. The cylinder connects to the lock with small screws. Keep tools ready and work slowly.
Gather The Right Tools
Prepare a screwdriver that fits your deadbolt screws. A flathead or Phillips screwdriver usually works. Also, have a small pick or shim handy to help release the cylinder.
Good lighting helps see screws and parts clearly. A flashlight or lamp near the door is useful.
Remove The Screws Holding The Cylinder
Locate the screws on the interior side of the door. These screws hold the cylinder in place. Use the screwdriver to remove them carefully. Keep the screws safe for later use.
Do not force the screws. If tight, turn slowly to avoid stripping them.
Pull Out The Exterior Cylinder
After removing screws, gently pull the exterior cylinder. It should slide out with little resistance. Use steady force to avoid breaking parts.
If the cylinder sticks, wiggle it slightly while pulling. Avoid using too much force to prevent damage.
Inspect The Cylinder And Lock Mechanism
Look inside the door where the cylinder was. Check for any damage or dirt. Clean the area if needed before installing a new cylinder.
Inspect the old cylinder for wear. This helps decide if replacement is necessary.
Detach Interior Thumb Turn
Detaching the interior thumb turn is a key step in removing a double keyed deadbolt. This part controls the lock from inside your door. Removing it carefully prevents damage and makes the next steps easier.
The thumb turn usually sits on the inside of the door. It connects to the locking mechanism. You need to take it off before removing the whole deadbolt.
Locate The Thumb Turn
First, find the thumb turn on the inside of your door. It looks like a small knob or lever. Check if there are any visible screws holding it in place.
Remove Screws Holding The Thumb Turn
Use a screwdriver to remove the screws. Keep the screws safe for reassembly. Sometimes, screws might be hidden under a cover plate. Gently pry off the cover if needed.
Pull Out The Thumb Turn
After removing screws, pull the thumb turn straight out. It should slide off easily. If it feels stuck, wiggle it gently to loosen it.
Check For Additional Fasteners
Some thumb turns have extra clips or pins. Look closely around the base. Remove any clips carefully using a flat tool.
Unscrew Deadbolt Assembly
Unscrewing the deadbolt assembly is the first key step in removing a double keyed deadbolt. This part holds the lock firmly in place on your door. Taking it apart carefully helps prevent damage to the door or lock. You will need a screwdriver that fits the screws on your deadbolt.
Start by locating the screws on the interior side of the door. These screws attach the deadbolt’s two main parts. Removing them allows you to separate the lock from the door.
Locate The Mounting Screws
Look closely at the inside face of the deadbolt. Most double keyed deadbolts have two long screws. They run through the lock body into the door. These screws secure the assembly tightly.
Choose The Right Screwdriver
Use a screwdriver that matches the screws’ head type. Common types include Phillips or flathead. A proper fit prevents stripping the screws. Tight or damaged screws may need extra care to remove.
Remove The Screws Slowly
Turn the screwdriver counterclockwise to loosen each screw. Apply steady pressure without forcing. Loose screws come out smoothly. Keep the screws safe for reassembly or replacement.
Separate The Deadbolt Assembly
Once screws are out, gently pull the two halves of the lock apart. The deadbolt mechanism should come free from the door. If stuck, wiggle slightly but avoid pulling hard. Check for any hidden screws or clips.
Extract Deadbolt From Door
Extracting a double keyed deadbolt from a door is a task that requires patience and the right tools. This step is crucial to remove the lock safely without damaging the door. Understanding how to take out the deadbolt helps you prepare for replacement or repair.
Before starting, check that you have a screwdriver, pliers, and possibly a drill. Make sure the door is open and stable to work on. Follow each step carefully to avoid mistakes.
Remove The Interior Thumb Turn
Locate the screws holding the thumb turn on the inside of the door. Use a screwdriver to unscrew them. Pull the thumb turn away from the door gently. This exposes the mechanism inside the lock.
Unscrew The Exterior Lock Cylinder
Find the screws that secure the lock cylinder on the outside. Unscrew them with the screwdriver. Carefully pull the cylinder straight out from the door. Keep the screws in a safe place for later use.
Take Out The Deadbolt Mechanism
Look into the edge of the door where the deadbolt slides. Unscrew the faceplate covering the bolt. Pull the deadbolt mechanism out by sliding it from the door. This step frees the main locking part.
Check For Hidden Screws Or Pins
Examine the deadbolt area for any hidden screws or pins. Remove any found using the correct tool. This ensures the deadbolt is fully detached from the door. Double-check to avoid damage during removal.

Credit: kc.allegion.com
Install Replacement Lock
Installing a replacement lock is the final step after removing a double keyed deadbolt. It secures your door and restores safety. The process is simple with the right tools and parts. Follow each step carefully for a proper fit and smooth operation.
Choose The Right Replacement Lock
Select a lock that fits your door’s thickness and hole size. Check the lock type to match your security needs. Pick a lock with clear instructions and easy installation.
Prepare The Door For Installation
Clean the door surface where the new lock will go. Remove any old screws or debris from the holes. Ensure the holes are the correct size for the new lock.
Install The Deadbolt Mechanism
Insert the deadbolt part into the edge of the door. Align it with the holes for smooth movement. Use screws to secure the mechanism tightly in place.
Attach The Exterior And Interior Parts
Place the exterior lock piece on the outside of the door. Fit the interior lock piece on the inside. Connect the two parts using the long screws provided.
Test The Lock Function
Turn the key and thumb turn to check smooth locking. Make sure the deadbolt slides fully into the door frame. Adjust screws if the lock feels loose or stiff.
Test New Lock Functionality
Testing the new lock functionality is a crucial step after installing a double keyed deadbolt. It ensures the lock works properly and provides security. Without testing, you might face problems like keys not turning or the lock jamming.
Check every part of the lock to confirm smooth operation. This simple task saves time and effort later.
Insert And Turn Each Key
Start by inserting the key into the lock. Turn it slowly to see if it moves without resistance. Repeat with the second key. Both keys should turn easily and lock or unlock the door smoothly.
Check The Deadbolt Movement
Watch the deadbolt as you turn the key. It should slide in and out fully without sticking. Test this several times. The bolt needs to move freely to secure the door effectively.
Test The Lock From Both Sides
Try using the keys on both the inside and outside of the door. The double keyed deadbolt requires a key on each side. Make sure both sides work correctly for locking and unlocking.
Listen For Unusual Sounds
Notice any strange clicking or grinding noises. These sounds can indicate a problem inside the lock. The lock should operate quietly and smoothly every time.
Ensure The Door Closes Properly
Close the door and lock it with the new deadbolt. The door should latch securely without extra force. If the door does not close well, adjust the strike plate or lock position.

Credit: www.youtube.com
Frequently Asked Questions
How Do You Remove A Double Keyed Deadbolt?
To remove a double keyed deadbolt, first unscrew the interior and exterior plates. Then, carefully pull out the lock cylinder and bolt mechanism.
Can I Remove A Double Keyed Deadbolt Without A Key?
Yes, but it’s tricky. You may need to disassemble the door hardware or drill the lock cylinder carefully.
What Tools Are Needed To Remove A Double Keyed Deadbolt?
You will need a screwdriver, possibly a drill, and sometimes a lock removal tool to remove the deadbolt.
How Long Does It Take To Remove A Double Keyed Deadbolt?
Removing a double keyed deadbolt typically takes 15 to 30 minutes, depending on your experience and tools.
Conclusion
Removing a double keyed deadbolt can be simple with the right steps. Start by gathering basic tools and staying patient. Follow each step carefully to avoid damage. Safety matters, so take your time. This guide helps you save money and effort.
Now, you can handle this task yourself. Keep your home secure after removal. Practice makes perfect. Try again if needed, and you will get better.