Have you ever wished you could control the brightness of your lights to create the perfect mood in any room? Adding a dimmer switch is a simple upgrade that can transform your space, save energy, and extend the life of your bulbs.
If you think installing one is complicated or expensive, think again. In this guide, you’ll learn exactly how to add a dimmer switch to your light—step by step, with easy-to-follow tips. By the end, you’ll have the confidence to brighten up your home just the way you like it.
Keep reading to discover how simple and rewarding this small change can be.
Credit: www.homedepot.com
Benefits Of Dimmer Switches
Dimmer switches offer many benefits beyond simple light control. They help save energy, improve room atmosphere, and protect your light bulbs. These advantages make dimmer switches a smart addition to any home.
Energy Savings
Dimming lights reduces the amount of electricity used. This lowers your energy bills each month. Using less power also helps the environment by cutting down energy waste.
Mood Enhancement
Dimmer switches let you change the light level to fit your mood. Soft light creates a cozy, relaxing space. Brighter light is great for tasks and focus. This flexibility makes any room more comfortable.
Extended Bulb Life
Running lights at lower brightness reduces wear on bulbs. Bulbs last longer and break less often. This means fewer replacements and less hassle for you.

Credit: www.gelighting.com
Types Of Dimmer Switches
Dimmer switches control the brightness of your lights. They help create the right mood in any room. Different types of dimmers offer various ways to adjust light levels. Choose one that fits your style and needs.
Rotary Dimmers
Rotary dimmers turn on and off with a twist. You rotate the knob to change brightness. They are easy to use and common in many homes. These dimmers work well with most bulbs.
Slide Dimmers
Slide dimmers use a small slider to adjust light. Move the slider up for brighter light. Move it down to dim the light. They give smooth control and look modern on walls.
Touch Dimmers
Touch dimmers respond to a simple tap or touch. No need to turn or slide anything. They often have a sleek design and are easy to clean. Touch dimmers offer quick and quiet control.
Smart Dimmers
Smart dimmers connect to your phone or home system. Control lights with an app or voice commands. Set schedules or change brightness remotely. They add convenience and can save energy.
Tools And Materials Needed
Adding a dimmer switch to a light is a simple project. It improves lighting control and saves energy. Before starting, gather the right tools and materials. This ensures a smooth and safe installation.
Basic Electrical Tools
Use a screwdriver set with flat and Phillips heads. A wire stripper helps remove insulation from wires. A voltage tester checks if wires are live. Needle-nose pliers assist in bending and holding wires. Electrical tape secures wire connections. These tools make the work easier and safer.
Safety Gear
Wear insulated gloves to protect from electric shock. Use safety goggles to shield your eyes from dust and debris. Turn off power at the breaker box before starting. A flashlight helps when working in dim areas. Safety gear reduces risks and keeps you safe.
Dimmer Switch Selection
Choose a dimmer switch that matches your light type. Check if it supports LED, incandescent, or CFL bulbs. Confirm the switch’s voltage and wattage ratings. Pick a style that fits your wall plate and room decor. Proper selection avoids damage and ensures smooth dimming.
Safety Precautions
Safety is the top priority when adding a dimmer switch to a light. Electrical work can be dangerous without the right precautions. Follow these steps carefully to keep yourself safe and avoid damage.
Power Shutdown
Always turn off the power at the circuit breaker first. Do not rely on the light switch to cut power. Use a lock or tape to keep the breaker off while you work. This prevents accidental shocks or short circuits.
Testing For Live Wires
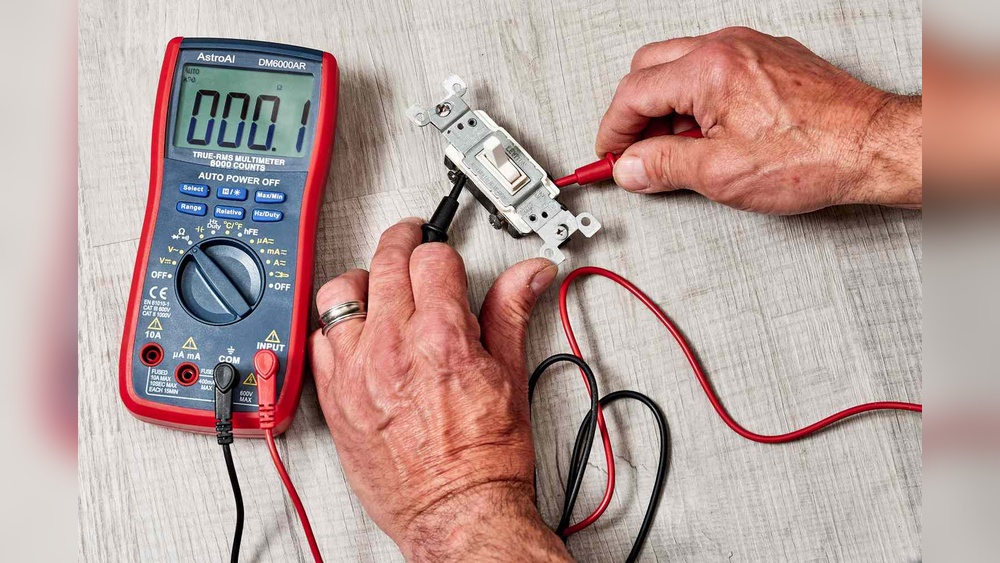
Use a voltage tester to check all wires before touching them. Test each wire separately to confirm no electricity flows. Even if the breaker is off, wires can still hold power. Never assume wires are safe without testing.
Handling Electrical Components
Wear insulated gloves for extra protection. Hold wires by their insulated parts only. Avoid metal jewelry or watches that can cause shocks. Use tools with insulated handles to reduce risk. Work slowly and carefully to prevent mistakes.
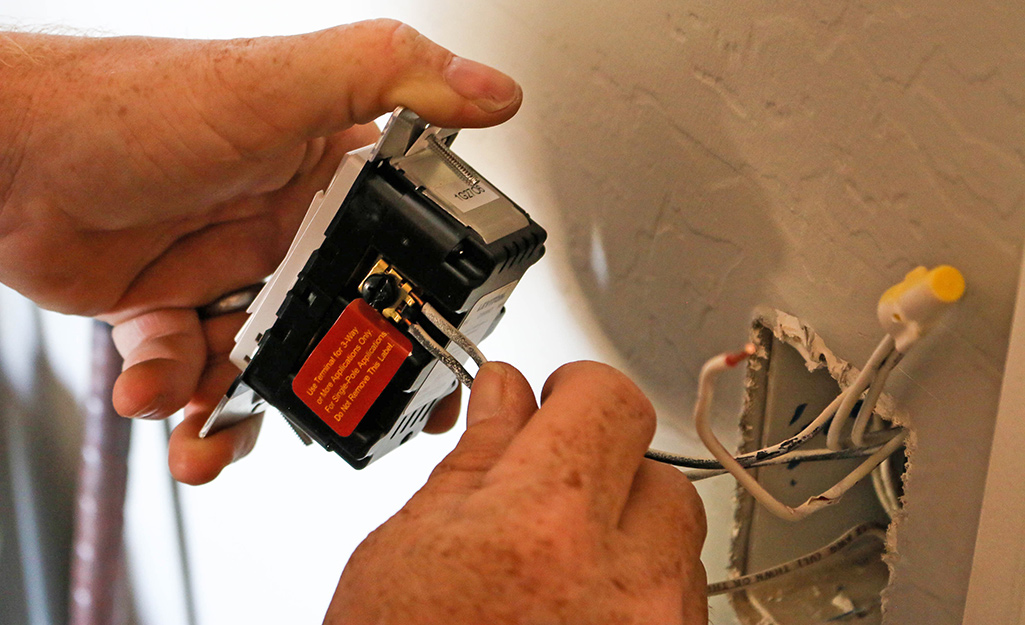
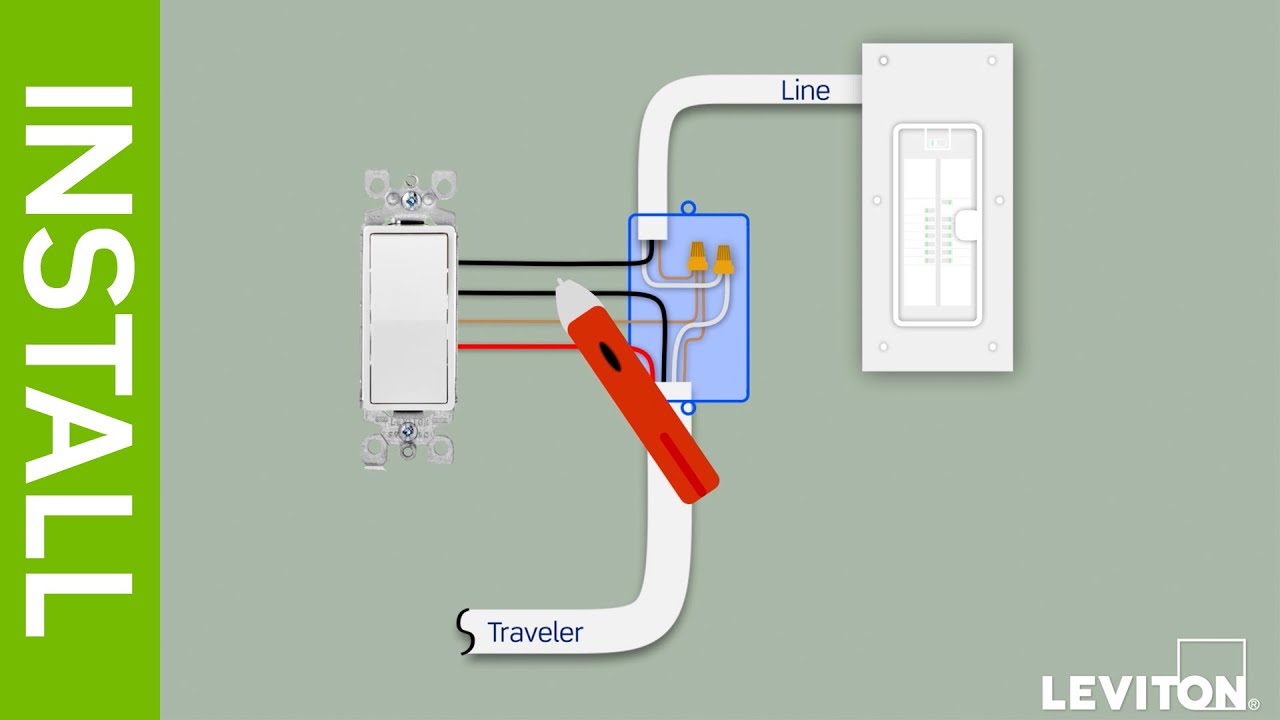
Step-by-step Installation
Installing a dimmer switch can change your room’s lighting mood easily. Follow these clear steps to replace your old switch. This guide helps you do it safely and correctly.
Removing The Existing Switch
Turn off the power at the circuit breaker. Use a voltage tester to confirm no electricity flows. Remove the switch cover plate with a screwdriver. Unscrew the old switch from the wall box. Gently pull the switch out to expose the wires.
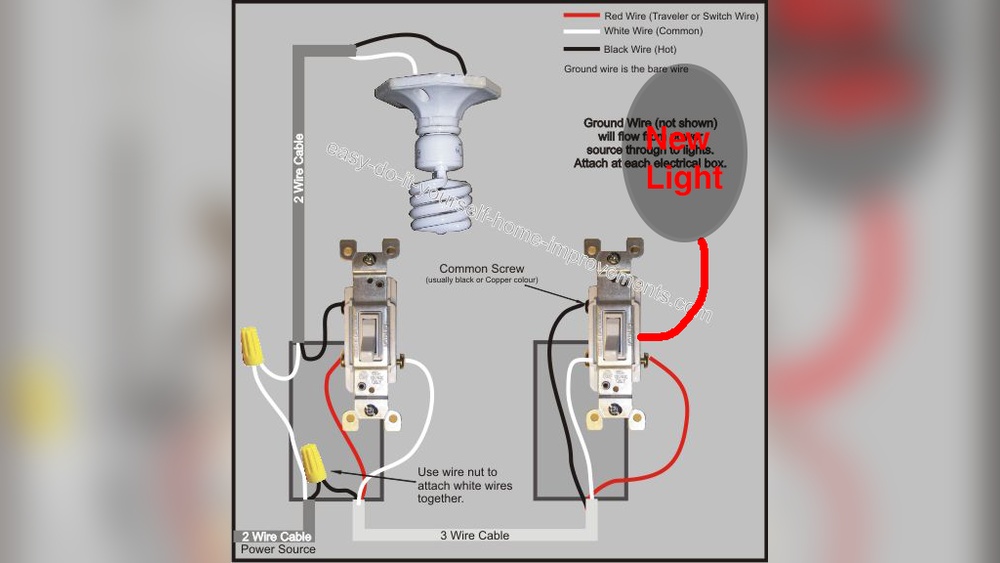
Identifying Wire Connections
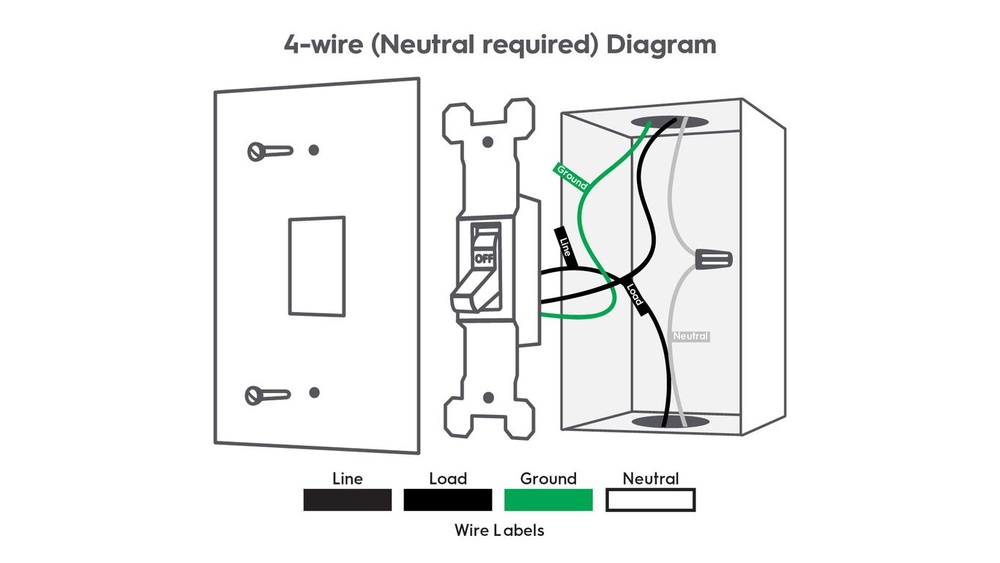
Look carefully at the wires attached to the old switch. Note the colors and which terminals they connect to. Usually, black or red wires are hot. White wires are neutral, and green or bare wires are ground. Take a photo for reference if needed.
Wiring The Dimmer Switch
Match the dimmer switch wires to the house wires. Connect black wires together, white to white if present, and green or bare wire to ground. Use wire nuts to secure each connection tightly. Wrap electrical tape around the wire nuts for safety.
Securing And Testing The Switch
Push the wires back into the wall box carefully. Screw the dimmer switch into place. Attach the switch cover plate. Turn the power back on at the breaker. Test the dimmer by turning the knob to adjust the light brightness.
Troubleshooting Tips
Adding a dimmer switch can change your room’s lighting and mood. Sometimes, problems happen during or after installation. These troubleshooting tips help fix common dimmer switch issues quickly. Follow these easy steps to get your dimmer working right.
Flickering Lights
Flickering lights often mean a loose connection. Check the wires inside the switch box. Make sure all wires are tight and secure. Use a voltage tester for safety before touching wires. Flickering can also happen if the bulb is not dimmer-compatible. Replace the bulb with a dimmable type for smooth lighting.
Dimmer Not Working
The dimmer switch may not work if it is wired wrong. Turn off power and double-check the wiring instructions. Confirm the wires connect to the correct terminals. Another cause could be a faulty dimmer. Try swapping the dimmer with a new one to see if it works. Make sure your circuit breaker is on and not tripped.
Compatibility Issues
Not all bulbs work with all dimmers. LED bulbs need special dimmers made for LEDs. Using the wrong dimmer causes buzzing or poor dimming. Check the dimmer packaging for bulb compatibility. Also, some dimmers cannot handle high wattage bulbs. Add up the total wattage and pick a dimmer with the right capacity.
Enhancing Ambiance With Dimmers
Adding a dimmer switch to your lights can change the whole feeling of a room. It lets you control the brightness with ease. This simple tool helps set the mood for any moment. Whether it’s a quiet evening or a lively party, dimmers create the perfect light.
Dimmers do more than just save energy. They make your space feel warm and inviting. Soft light can reduce stress and help you relax. Bright light can boost focus and energy. Dimmers give you the power to choose the atmosphere.
Lighting Scenes
With dimmers, you can create different lighting scenes. Set a low glow for watching movies. Choose medium brightness for reading or working. Bright light is great for cleaning or cooking. Changing scenes is easy and quick. It fits your daily activities and needs perfectly.
Combining With Smart Home Systems
Dimmers work well with smart home devices. You can control lights from your phone or voice assistant. Schedule lights to dim at night or brighten in the morning. Smart dimmers add convenience and comfort. They help you manage light without moving from your seat.
Credit: www.youtube.com
Frequently Asked Questions
What Tools Are Needed To Install A Dimmer Switch?
You need a screwdriver, voltage tester, wire stripper, and electrical tape. Always turn off power before starting. These tools ensure safe and efficient installation of your dimmer switch.
Can I Install A Dimmer Switch Myself Safely?
Yes, if you follow safety guidelines and turn off the power. Basic electrical knowledge helps, but instructions are usually clear. When unsure, consult a professional electrician to avoid hazards.
Will A Dimmer Switch Work With All Types Of Bulbs?
No, dimmer switches work best with incandescent, halogen, and compatible LED bulbs. Check bulb packaging for dimmer compatibility to ensure smooth dimming and avoid flickering or damage.
How Do I Know If My Wiring Supports A Dimmer Switch?
Most standard home wiring supports dimmer switches. Look for a neutral wire in the switch box. If unsure, use a voltage tester or consult an electrician for confirmation.
Conclusion
Adding a dimmer switch changes how you control your lights. It helps save energy and sets the mood. The steps are simple and safe to follow. Just take your time and use the right tools. Soon, you will enjoy soft or bright lighting anytime you want.
Try it yourself and see the difference it makes.