Have you ever wished your lights could turn off automatically, saving you money and hassle? Adding a timer to your light switch is an easy way to make that happen.
Whether you want to boost your home’s security, reduce energy bills, or simply never forget to turn off the lights, this simple upgrade can change how you control your lighting. In this guide, you’ll discover clear, step-by-step instructions to put a timer on your light switch—no complicated tools or skills needed.
Ready to take control of your lighting and make your home smarter? Let’s get started.

Credit: ourhomefromscratch.com
Benefits Of A Timer On Light Switch
Using a timer on a light switch offers several advantages. It helps manage electricity use and adds safety to your home. Timers also bring ease by automating your lighting. These benefits make timers a smart choice for any household.
Energy Savings
A timer turns lights off automatically. This stops lights from staying on too long. It lowers electricity bills by saving power. Less energy use means less harm to the environment.
Enhanced Security
Timers can turn lights on at set times. They make your home look occupied even when you are away. This can scare off burglars. A well-lit home feels safer at night.
Convenience And Automation
Timers help you avoid manual switching. Lights turn on or off without your help. This is useful for busy mornings and late nights. It adds comfort and saves time every day.
Types Of Timers For Light Switches
Timers for light switches help control lights automatically. They save energy and add convenience. Different types of timers fit various needs and budgets. Understanding these types helps you choose the right one for your home.
Mechanical Timers
Mechanical timers use simple gears and dials. You set the time by turning a dial. They work without electricity, so they are reliable. These timers usually have a wheel with pins. Pins push the switch to turn lights on or off. Mechanical timers are easy to install and use. They are perfect for basic, short-term lighting control.
Digital Timers
Digital timers use a small screen and buttons. You program the timer with exact on and off times. They offer more accuracy than mechanical timers. Digital timers can control lights daily or weekly. Many models let you set multiple programs. These timers need power to operate. They suit homes needing precise and flexible light control.
Smart Timers
Smart timers connect to your Wi-Fi network. They work with apps on your phone or voice assistants. You control lights from anywhere using your device. Smart timers can learn your habits and adjust automatically. They often include features like dimming and schedules. These timers are ideal for tech-savvy users. They add comfort and help reduce energy use.
Tools And Materials Needed
Installing a timer on your light switch requires some specific tools and materials. Having the right items ready helps the process go smoothly. It also ensures your safety and the proper function of the timer switch.
Below, find the essential tools and materials needed to install a timer switch in your home.
Timer Switch Options
Choose a timer switch that fits your needs. Mechanical timers are simple and easy to use. Digital timers offer more features and precise control. Some timers include motion sensors or remote control options.
Check the voltage and compatibility with your current wiring. Make sure the timer switch matches the type of light switch you have.
Basic Electrical Tools
You will need a screwdriver, usually flathead and Phillips. Wire strippers help prepare the wires for connection. A voltage tester ensures the power is off before starting. Needle-nose pliers can assist in bending and twisting wires.
Also, have electrical tape and wire nuts for securing connections. A drill may be needed if mounting holes are required.
Safety Gear
Wear insulated gloves to protect against electric shock. Safety goggles shield your eyes from dust and debris. Use a sturdy ladder if working on high switches. Ensure the power is turned off at the breaker before beginning work.
Following safety measures keeps you safe and prevents accidents.
Preparing For Installation
Preparing for installation is the first step to put a timer on your light switch. It helps ensure safety and smooth setup. Taking time to prepare can save effort and prevent problems later. Follow these steps carefully before starting the installation.
Turning Off Power
Turn off power at the circuit breaker. This stops electricity from flowing to the switch. Use a voltage tester to confirm no power is present. Never skip this step. It protects you from electric shocks.
Removing Existing Switch
Remove the switch cover plate with a screwdriver. Unscrew the switch from the wall box. Gently pull the switch out to expose wires. Note how wires connect to the switch. Take a photo for reference. This helps during reinstallation.
Checking Wiring Compatibility
Check if your wiring works with the timer switch. Timer switches often need a neutral wire. Look for a white wire in the box. If no neutral wire exists, the timer may not work. Consult an electrician if unsure. Proper wiring ensures the timer operates correctly.
Step-by-step Installation Guide
Installing a timer on your light switch helps save energy and adds convenience. Follow this clear step-by-step guide to set up your timer switch safely and correctly. Each step is simple and easy to follow, even if you have no prior experience.
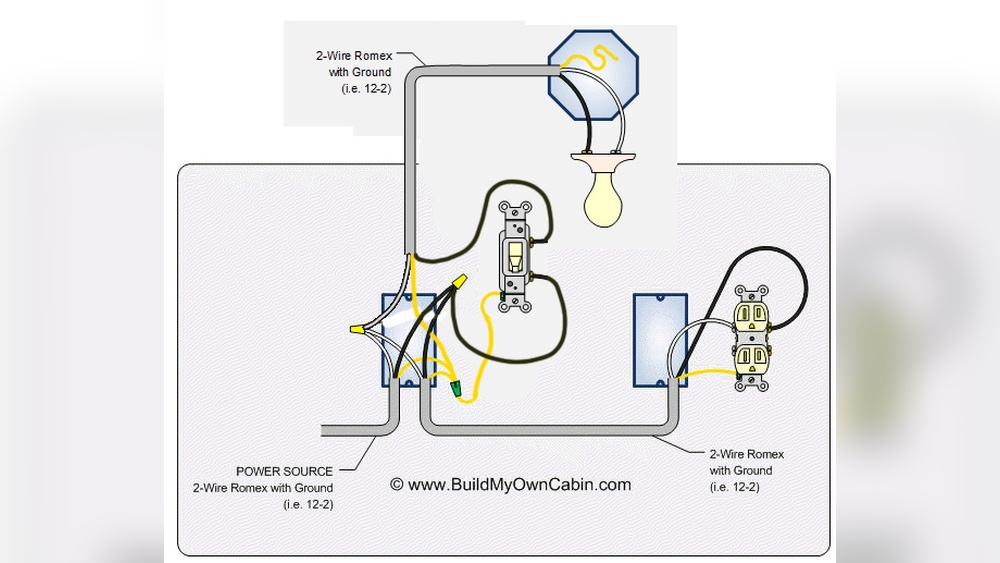
Connecting Wires To Timer
First, turn off the power at the circuit breaker. Remove the old switch cover and switch carefully. Identify the wires: usually black (live), white (neutral), and green or bare (ground).
Connect the live wire to the timer’s live terminal. Attach the neutral wire to the timer’s neutral terminal. Connect the ground wire to the timer’s ground screw. Use wire nuts to secure all connections tightly.
Double-check each wire is connected to the correct terminal. Loose connections can cause the timer to malfunction or create safety hazards.
Mounting The Timer Switch
Push the wires gently back into the electrical box. Align the timer switch with the screw holes on the box. Use a screwdriver to fasten the switch firmly in place.
Make sure the timer switch is flush with the wall and not tilted. Attach the faceplate to cover the switch and screws.
Check that the timer’s buttons or dial are accessible and easy to use once mounted.
Restoring Power And Testing
Turn the power back on at the breaker. Test the timer switch by setting the timer and checking if the light turns on and off as expected.
Adjust the timer settings to ensure the light follows your preferred schedule. Watch for any flickering or odd behavior, which may indicate a wiring issue.
Turn the light on and off manually to confirm the timer switch works both automatically and manually.

Credit: www.youtube.com
Programming Your Timer Switch
Programming your timer switch is simple and saves energy. It lets you control when your lights turn on and off. Setting correct times ensures your home is safe and well-lit only when needed. Follow these easy steps to program your timer switch effectively.
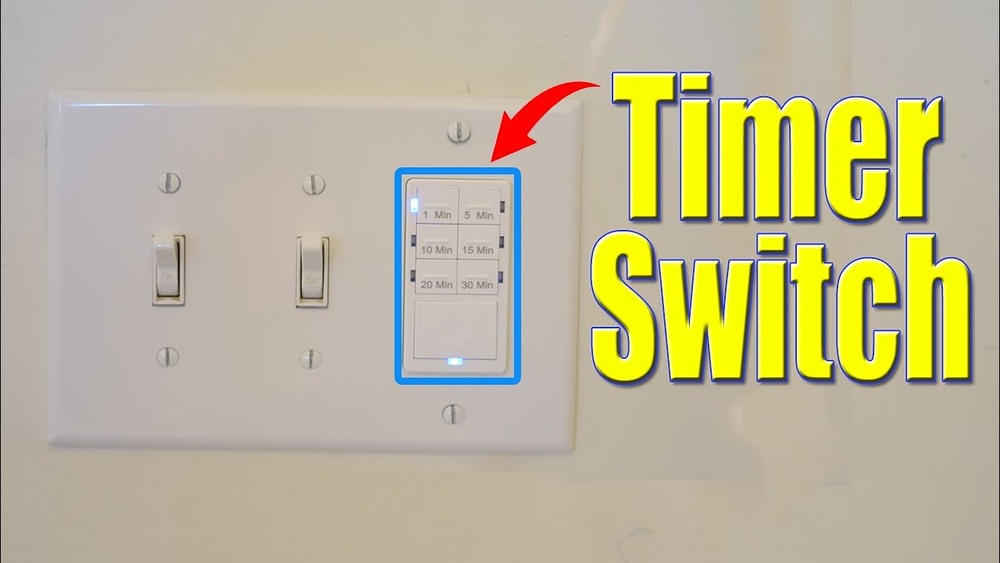
Setting On And Off Times
Start by deciding when you want your lights to turn on. Use the timer dial or buttons on the switch. Set the “on” time by moving the dial or pressing the time buttons. Then, set the “off” time the same way. Double-check the times to avoid mistakes. Your lights will now follow this daily schedule.
Adjusting For Weekdays And Weekends
Many timer switches let you set different times for weekdays and weekends. Use this feature to save more energy. For example, turn lights on later during weekends when you wake up late. Set earlier on weekdays for work or school days. Check your timer’s manual to find this option and adjust it easily.
Using Smartphone Apps For Smart Timers
Smart timer switches connect to your phone via an app. Download the app and follow the setup steps. The app lets you set on/off times with a few taps. You can also change schedules anytime, even away from home. Some apps offer extra features like vacation mode or light dimming. This makes controlling your lights very easy.
Troubleshooting Common Issues
Troubleshooting common issues with a timer on a light switch saves time and frustration. Some problems occur often but have easy fixes. Understanding these issues helps keep your timer working smoothly. Below are solutions for three typical problems you might face.
Timer Not Turning Lights On Or Off
First, check if the timer is set correctly. Incorrect settings cause the timer to miss the scheduled times. Also, verify the power supply to the timer. No power means the timer cannot control the light. Lastly, inspect wiring connections. Loose wires can stop the timer from working right.
Power Surges And Flickering
Power surges may cause flickering lights or timer resets. Use a surge protector to shield the timer. Flickering can also result from poor wiring or weak bulbs. Replace any faulty bulbs and check the wiring for damage. Stable power keeps the timer and light steady.
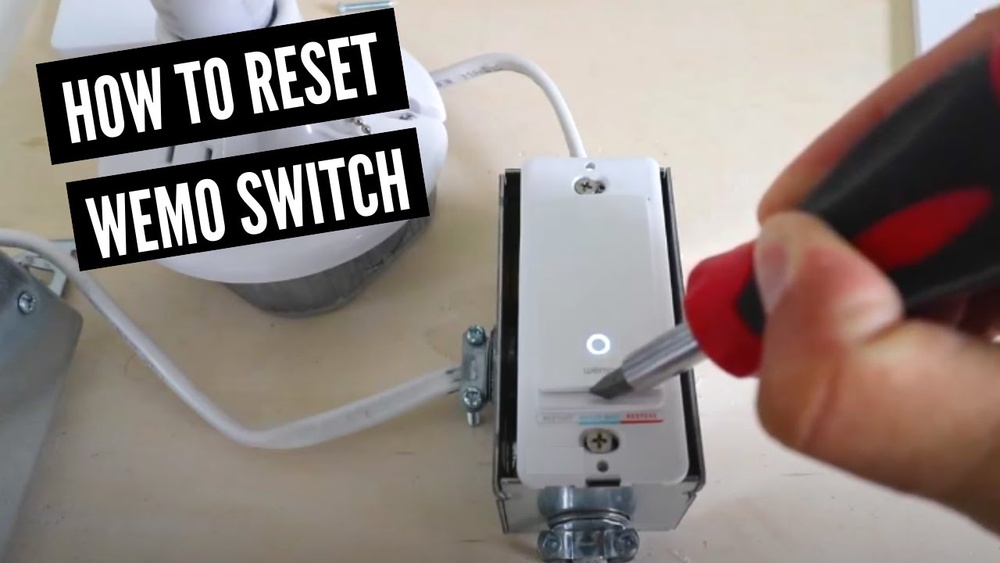
Resetting The Timer
Resetting the timer can solve many issues. Find the reset button on your timer model. Press and hold it for a few seconds. This clears errors and restores factory settings. After resetting, reprogram the timer with your desired schedule. A reset often fixes unresponsive timers.
Safety Tips And Best Practices
Installing a timer on a light switch brings convenience and energy savings. Safety is key during and after installation. Follow these tips to keep your home safe and your timer working well.
Avoiding Electrical Hazards
Always turn off power at the breaker before starting. Use a voltage tester to confirm no electricity flows. Avoid touching wires with wet hands. Wear insulated gloves for extra protection. Never work on a live circuit. Use tools with insulated handles. Read and follow the timer’s instructions carefully.
Regular Maintenance
Check the timer switch regularly for damage or wear. Clean dust and debris from the switch area. Ensure the timer settings match your needs. Replace the timer if it shows signs of malfunction. Test the timer periodically to confirm it works. Tighten loose screws and connections to avoid sparks.
When To Call A Professional
Call an electrician if you feel unsure about wiring. Seek help for complex or old electrical systems. Contact a professional if the timer causes flickering or sparks. Avoid risks by not forcing parts to fit. Let an expert handle troubleshooting and repairs. Safety is worth the cost of a pro.

Credit: diy.stackexchange.com
Frequently Asked Questions
How Do I Install A Timer On A Light Switch?
To install a timer, turn off power first. Remove the existing switch, connect timer wires as instructed, and secure it. Restore power and test the timer. Always follow manufacturer guidelines for safety and correct installation.
What Types Of Timers Work With Light Switches?
Mechanical, digital, and smart timers work well with switches. Mechanical timers use manual dials. Digital timers offer programmable settings. Smart timers connect to Wi-Fi for remote control and automation.
Can I Install A Timer Without Electrician Help?
Yes, if you have basic electrical skills and tools. Always turn off power at the breaker. Follow instructions carefully. If unsure, hire a professional to ensure safety and compliance.
Will A Timer Save Energy On Lighting?
Yes, timers reduce energy use by limiting light duration. They prevent lights from staying on unnecessarily. This leads to lower electricity bills and increased bulb lifespan.
Conclusion
Adding a timer to your light switch saves energy and money. It makes your home safer by turning lights off automatically. The steps are simple and easy to follow. You only need basic tools and a little time. This small change can bring big benefits to your daily life.
Try it today and enjoy the convenience and control it offers.