Are you tired of struggling with a single switch that controls both your fan and light? It can be frustrating when you want just the light on or only the fan running, but you’re stuck with both turning on together.
What if you could fix this yourself and enjoy full control over your ceiling fan and its light? You’ll learn simple, step-by-step instructions to separate your fan and light switch. No confusing jargon, just clear guidance that anyone can follow.
Keep reading, and you’ll soon have the power to switch your fan and light independently—making your space more comfortable and convenient.
Credit: www.protoolreviews.com
Tools And Materials Needed
Separating a fan and light switch requires specific tools and materials. Having the right items ensures safety and efficiency. Prepare everything before starting the work.
Essential Tools
A flathead screwdriver is needed to remove the switch cover. A Phillips screwdriver helps in unscrewing the switches from the box. Wire strippers are important for cutting and stripping wires cleanly. Needle-nose pliers help to bend wires and make connections. A voltage tester ensures no electricity flows during work. Electrical tape secures wire connections safely.
Materials To Have
New switches are necessary if replacing old ones. Wire nuts connect wires securely. Electrical boxes hold the switches in place. Wire connectors ensure safe and stable wiring. A faceplate covers the switches for a finished look.
Safety Equipment
Insulated gloves protect hands from electric shocks. Safety goggles shield eyes from dust and debris. A flashlight helps to see inside dark switch boxes. Always turn off the power before handling wires. Use the voltage tester to confirm power is off.
Safety Precautions
Safety is the top priority when separating a fan and light switch. Electricity can cause serious injuries or damage. Taking the right safety steps protects you and your home. Follow each guideline carefully to work safely.
Turn Off Power At The Circuit Breaker
Always switch off the power at the circuit breaker before starting. This stops electricity from flowing to the switches. Do not rely on just the switch being off. Use a tester to confirm no power is present.
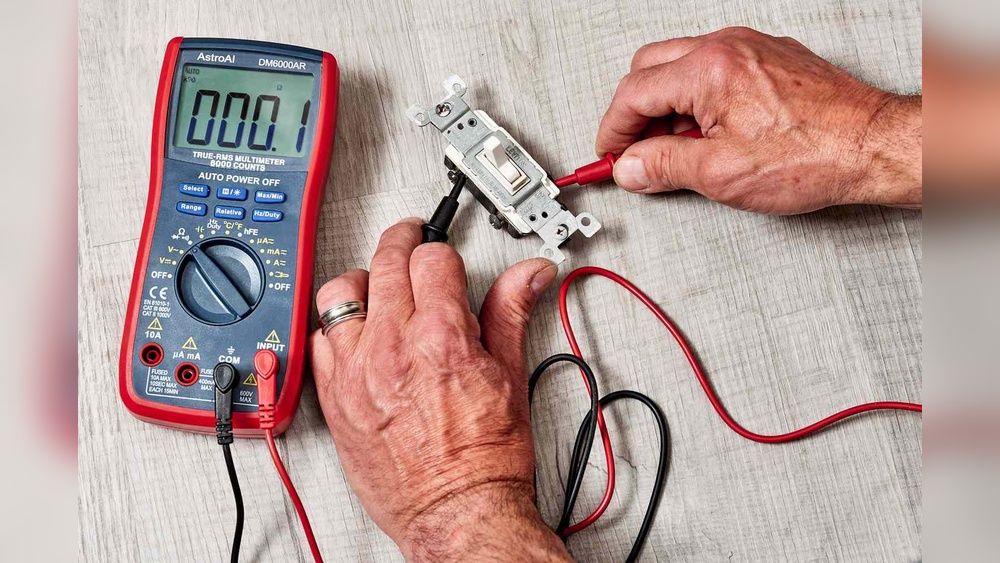
Use A Voltage Tester
A voltage tester checks if wires carry current. Test every wire you plan to touch. This tool helps avoid electric shocks. Never skip this step, even if power seems off.
Wear Safety Gear
Wear insulated gloves to protect from shocks. Use safety glasses to guard your eyes. Avoid loose clothes or jewelry that can catch on wires or tools.
Work In A Dry Area
Water conducts electricity and increases shock risk. Ensure the work area is dry. Do not work with wet hands or stand on wet floors.
Use Proper Tools
Use insulated screwdrivers and pliers. These tools reduce the chance of electric shock. Avoid using damaged or worn-out tools.
Label Wires And Switches
Label wires before disconnecting them. Clear labels help avoid confusion during reassembly. This step prevents wiring mistakes that cause hazards.
Identify Your Existing Setup
Identifying your existing setup is the first step to separate a fan and light switch. This helps you understand how the wiring works. Knowing the setup avoids mistakes and keeps you safe.
Check Wiring Type
Start by turning off the power at the breaker. Remove the switch cover carefully. Look inside the switch box to see the wires. Notice how many wires come into the box. Identify the black, white, and ground wires. The black wires usually carry power. White wires are neutral. Ground wires are green or bare copper. Check if one black wire controls both fan and light or separate wires do. This tells if the fan and light share a switch or have separate controls.
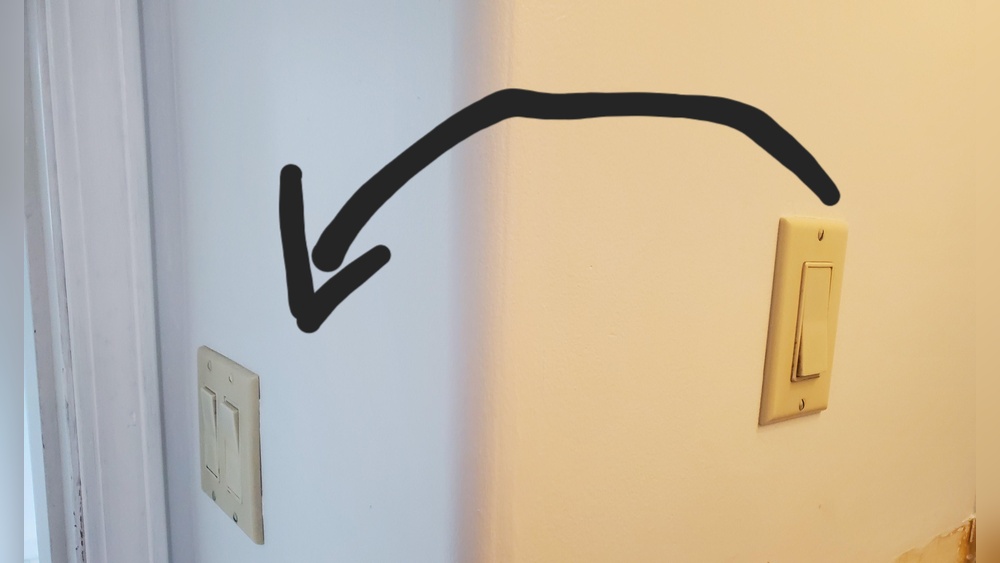
Locate Switch Box
Find the switch box on the wall. It holds the switch controlling the fan and light. Use a flashlight to see inside if needed. The box may have one or two switches. One switch might control both the fan and light. Two switches likely control them separately. Note the number of switches and wires. This helps plan the separation process. Make sure the box has enough space for extra wiring if needed.

Credit: www.youtube.com
Turn Off Power Safely
Removing the existing switch is the first step in separating your fan and light controls. This task requires care and attention to avoid electrical hazards. Turn off the power at the circuit breaker before touching any wires. Confirm the power is off by testing the switch with a voltage tester.
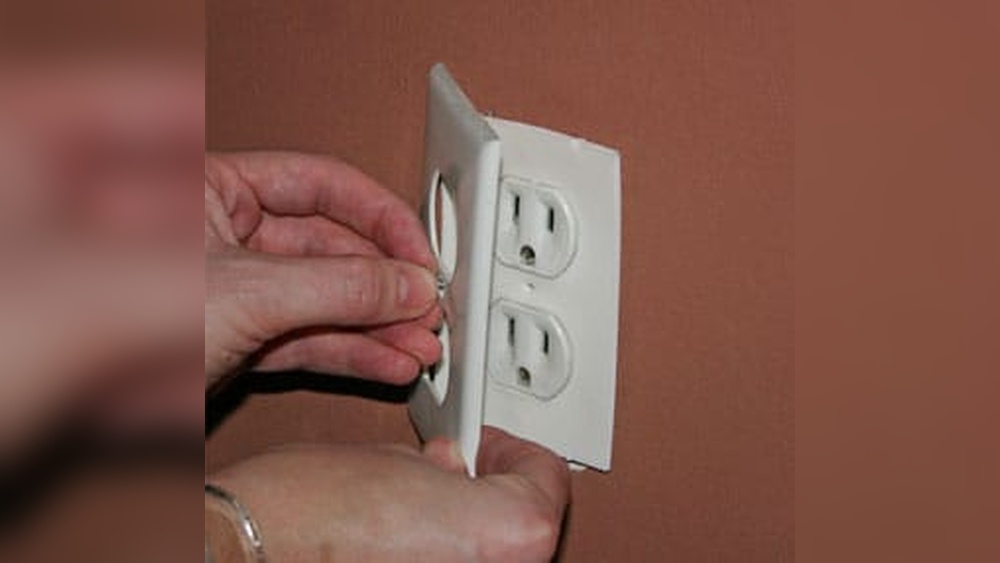
Once the power is off, remove the switch cover plate. Use a screwdriver to take out the screws holding the plate in place. Set the screws and plate aside safely.
Unscrew The Switch From The Wall Box
Next, unscrew the switch itself from the electrical box. Pull the switch gently out of the wall to expose the wiring behind it. Do not pull too hard to avoid damaging the wires.
Identify And Label Wires
Identify each wire connected to the switch. Use masking tape or labels to mark them clearly. Labeling helps to reconnect wires correctly later.
Disconnect The Wires From The Switch
Carefully loosen the screws or release the wire connectors holding the wires. Remove the wires from the switch terminals. Keep the wires separate and untangled.
Inspect Wires For Damage
Check the wires for any signs of wear or damage. Frayed or broken wires should be repaired or replaced. Safe wiring ensures a reliable and secure connection.
Remove Existing Switch
Separate fan and light wiring helps control each device independently. This makes using the fan and light easier and more convenient. It also improves safety and prevents electrical issues. Understanding how to separate these wires is important before starting any electrical work.
This process involves identifying which wires belong to the fan and which belong to the light. Correct identification ensures proper connection and functioning of switches. Follow these steps to identify the wires clearly.
Identify Fan Wires
Turn off the power at the circuit breaker before touching any wires. Remove the switch plate to access the wiring. Look for wires that connect directly to the fan motor. These wires are usually black or red. Sometimes, the fan wire has a label or marking.
Use a voltage tester to check which wire carries power to the fan. The fan wire will activate the fan motor when switched on. Mark this wire with tape or a marker for easy recognition. Keep it separate from other wires to avoid confusion.
Identify Light Wires
The light wires typically connect to the light fixture. These wires are often black or blue. They may also have a different color from the fan wires. Use a voltage tester to confirm which wire powers the light.
Turn the light switch on and off while testing wires. The wire that shows power only when the light switch is on is the light wire. Mark this wire clearly. Keeping the wires separate prevents mixing up the controls.
Separate Fan And Light Wiring
Installing separate switches for your fan and light makes control easier. You can turn the fan or light on or off without affecting the other. This setup adds convenience and saves energy. It also improves safety by reducing the risk of electrical overloads. Follow the steps below to wire the switches properly.
Wiring The Fan Switch
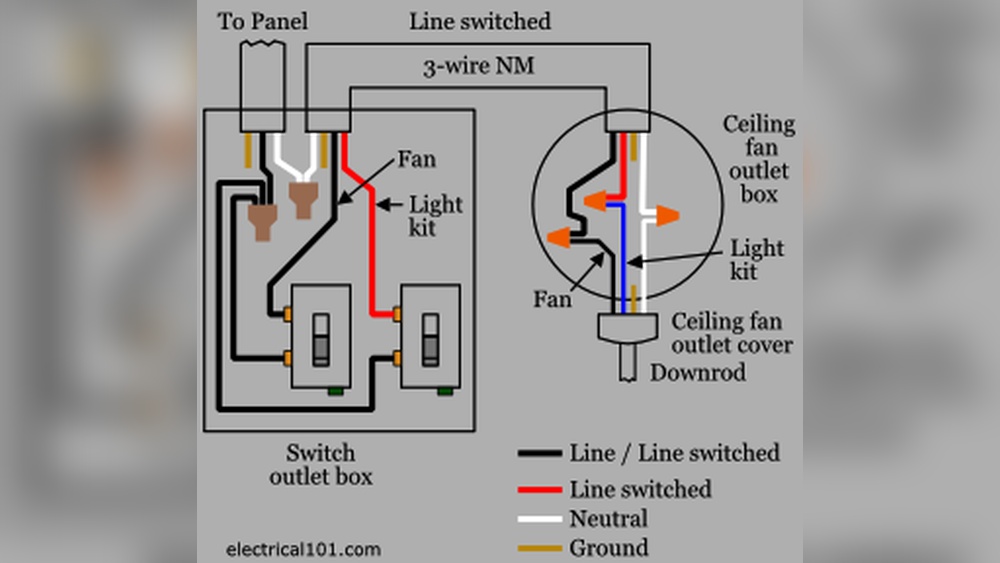
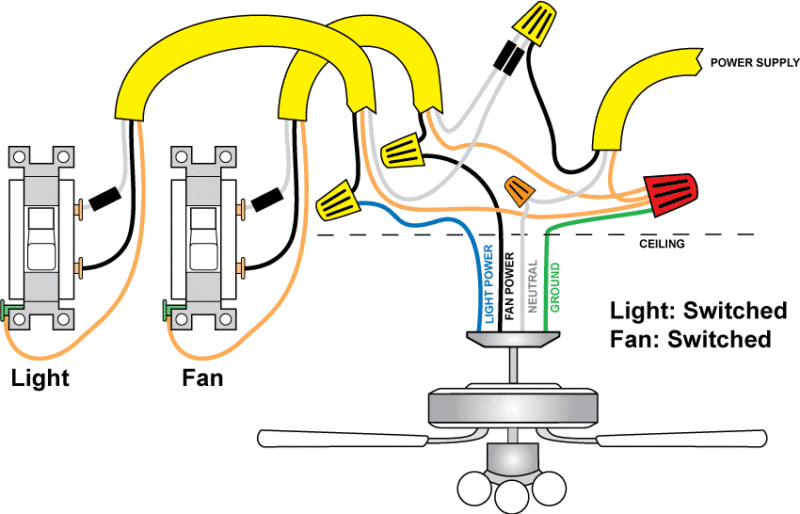
First, turn off the power at the circuit breaker. Use a voltage tester to confirm no power is present. Connect the black wire from the power source to the fan switch’s input terminal. Attach the black wire from the fan to the switch’s output terminal. Connect all white wires together with a wire nut. Attach the ground wires to the switch’s ground screw. Secure the switch into the box and restore power to test the fan switch.
Wiring The Light Switch
Turn off the power again before working on the light switch. Connect the black wire from the power source to the light switch’s input terminal. Attach the black wire from the light fixture to the switch’s output terminal. Join all white wires together with a wire nut. Connect the ground wires to the switch’s ground screw. Mount the switch securely in the box. Turn on the power and check if the light switch works correctly.
Install Separate Switches
Testing the new setup is a crucial step after separating the fan and light switch. It ensures everything works safely and correctly. This step confirms that each switch controls the right device. It also helps find any wiring mistakes early. Follow these simple checks to verify your work.
Turn On The Power
First, switch the power back on at the circuit breaker. Be cautious and avoid touching any wires. Make sure the area is dry and safe. This restores electricity to your switches and devices.
Check The Fan Switch
Flip the fan switch and watch the fan. It should start spinning smoothly. If it does not move, double-check the wiring connections. A properly wired fan switch controls only the fan.
Test The Light Switch
Next, turn on the light switch. The light should illuminate without flickering. If the light does not turn on, inspect the wiring again. The light switch must operate only the light fixture.
Verify Both Switches Work Independently
Try turning on the fan and light separately. Both should work without affecting each other. This proves the switches are correctly separated. If they interfere, review your wiring setup.
Listen For Unusual Sounds
Pay attention to any buzzing or humming sounds. These could indicate a wiring problem. Properly installed switches should operate quietly. Stop and fix any odd noises before finalizing.
Final Safety Check
Ensure all switch plates and covers are securely attached. Loose covers can expose wires and cause shocks. Confirm no wires are exposed or damaged. Safety is the top priority in electrical work.

Credit: www.electrical-online.com
Frequently Asked Questions
How Do I Separate A Fan And Light Switch Safely?
Turn off power at the breaker first. Use a voltage tester to confirm no electricity flows. Then, disconnect wiring and install separate switches following the wiring diagram carefully.
What Tools Are Needed To Separate Fan And Light Switches?
You need a screwdriver, wire stripper, voltage tester, electrical tape, and wire nuts. These tools help you safely disconnect and rewire switches.
Can I Separate Fan And Light Switches Myself?
Yes, if you have basic electrical knowledge and follow safety precautions. Otherwise, hire a licensed electrician to avoid hazards.
Why Separate Fan And Light Switches?
Separating allows independent control of fan and light, improving convenience and energy efficiency. It also enhances room comfort.
Conclusion
Separating a fan and light switch can make your home more convenient. It allows you to control each device easily. Always turn off power before starting the work. Use the right tools and follow safety steps carefully. This simple change can improve comfort and save energy.
Take your time and double-check connections. Enjoy the flexibility of separate controls for your fan and light.