Are you tired of constantly turning your lights on and off? Imagine setting your lights to switch on and off automatically, saving you time and energy every day.
Learning how to program your Intermatic light switch timer is easier than you think, and once you master it, you’ll wonder how you ever lived without it. In this guide, you’ll discover simple steps that anyone can follow to take full control of your lighting.
Ready to make your home smarter and your life easier? Let’s get started!
Intermatic Timer Basics
Understanding the basics of Intermatic light switch timers helps you control your lights with ease. These timers save energy and add convenience. Knowing how they work makes programming simple and quick.
Types Of Intermatic Timers
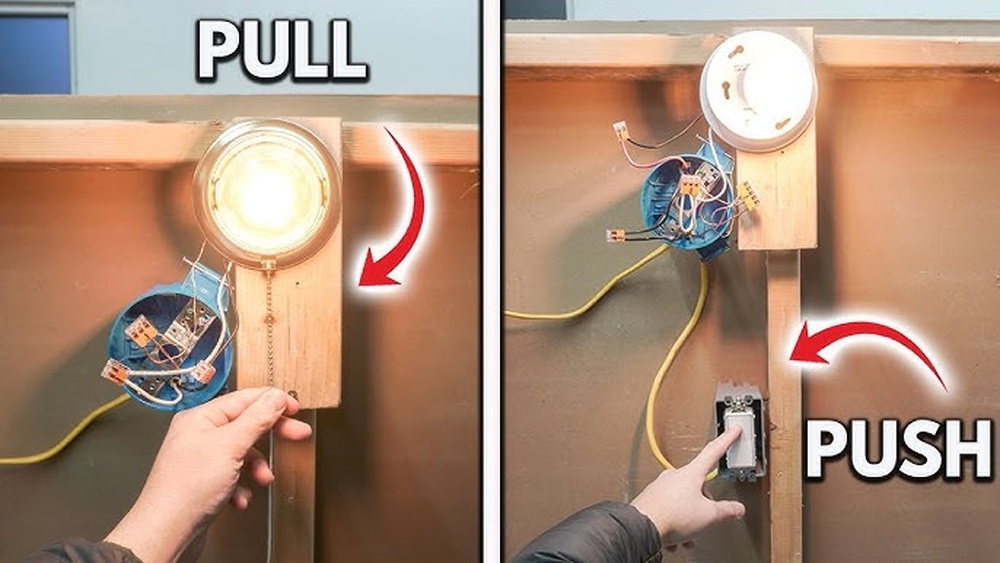
Intermatic offers several timer types for different needs. Mechanical timers use a dial and pins to set on/off times. They are easy to use but less flexible.
Digital timers have a screen and buttons for precise settings. They offer more options like multiple programs and random modes. Some models allow manual override to turn lights on or off anytime.
Photocell timers turn lights on at dusk and off at dawn automatically. They are great for outdoor lighting without daily programming.
Key Features To Know
Most Intermatic timers have an easy-to-read display. This helps you check and change settings fast. Some models come with battery backup to keep time during power outages.
The timers support multiple programs so you can set different schedules for weekdays and weekends. Many also include manual control for instant on or off.
Safety features include surge protection and overload capacity. These protect your lights and wiring from damage. Installing the correct timer type ensures compatibility with your lighting system.
Preparing To Program
Before programming your Intermatic light switch timer, some steps are important. Proper preparation ensures easy setup and safe use. Follow these guidelines for a smooth start.
Safety Precautions
Turn off power at the circuit breaker before handling the switch. Avoid touching wires with wet hands. Use insulated tools to prevent electric shock. Make sure the area is dry and well-lit. Never skip safety checks to protect yourself and your home.
Tools And Materials Needed
Gather a flathead screwdriver, a voltage tester, and wire strippers. Have the timer switch and its instructions nearby. A ladder may help reach high switches. Keep a flashlight handy in case of low light. Prepare these items before you start programming.
Resetting The Timer
Reset the timer to clear old settings. Locate the reset button or switch on the device. Press and hold it for a few seconds until the display resets. This step ensures no previous programs interfere with your new setup. A fresh start makes programming simpler.
Setting The Current Time
Setting the current time on your Intermatic light switch timer is the first step in programming it correctly. This ensures the timer turns your lights on and off at the right moments. Without the correct time, the schedule will not work as expected. Follow these simple steps to set the current time accurately.
Locate The Time Setting Buttons
Start by finding the buttons used to adjust the time. Most Intermatic timers have clearly labeled buttons for hour and minute settings. Look for buttons marked “Hour,” “Min,” or “Time.” These control the clock on your device.
Enter The Current Time Mode
Press and hold the “Time” or “Clock” button to enter the time-setting mode. The display will start flashing or show a blinking digit. This means the timer is ready for you to set the current time.
Set The Current Hour
Press the “Hour” button repeatedly until the display shows the correct hour. Remember to check if the timer uses a 12-hour or 24-hour format. Some models have an AM/PM indicator, so choose the right one.
Set The Current Minutes
Next, press the “Min” button to adjust the minutes. Keep pressing until the display shows the exact minute. Take your time to make sure it matches your current local time.
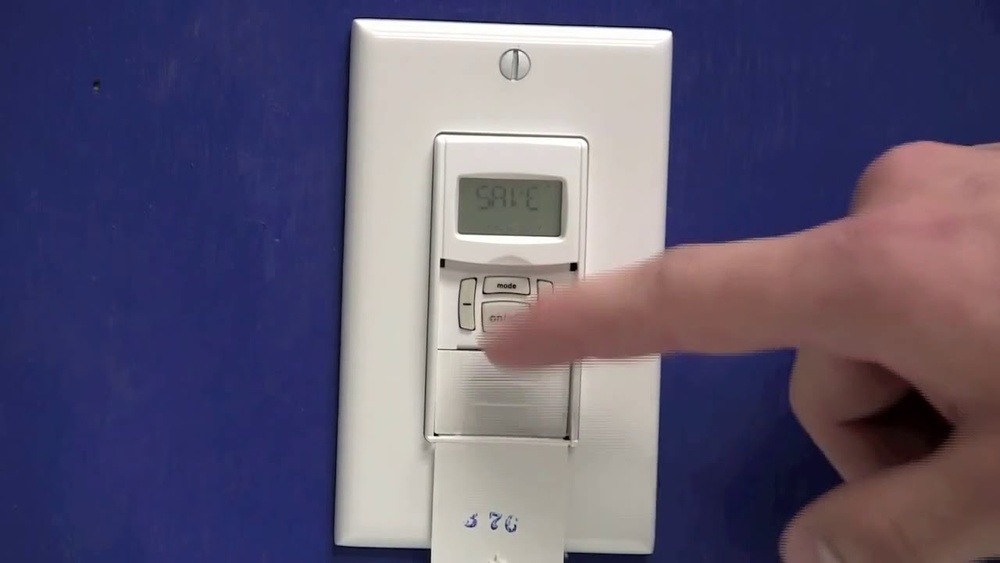
Save The Time Setting
After setting the hour and minutes, press the “Time” or “Clock” button again. This will save the current time and exit the time-setting mode. The display should stop flashing, confirming the time is set.

Credit: www.youtube.com
Programming On And Off Times
Programming the on and off times on your Intermatic light switch timer allows you to control your lights automatically. This helps save energy and adds convenience. Setting these times is simple and can be done in just a few steps.
Each time setting tells the timer when to turn your lights on or off. You can set one or multiple times depending on your needs. The process is easy and does not require technical skills.
Selecting On Time
Start by choosing the time you want your lights to turn on. Use the timer’s buttons to scroll through the hours and minutes. Make sure you set AM or PM correctly. Confirm the time by pressing the set or enter button. This tells the timer when to activate the lights.
Selecting Off Time
Next, set the time for your lights to turn off. Follow the same steps as setting the on time. Scroll to the desired hour and minute, then confirm. The timer will switch the lights off at this time. Check that the off time is after the on time to avoid errors.
Adjusting For Multiple Settings
Your Intermatic timer can handle more than one on/off schedule. Use the program button to add extra times. Repeat the process of setting on and off times for each schedule. This is useful for different days or events. Save each setting before moving to the next. Review all settings to ensure they match your needs.
Fine-tuning Timer Settings
Fine-tuning the timer settings on your Intermatic light switch helps match the schedule to your daily needs. Small adjustments ensure the light turns on and off exactly when you want. This saves energy and adds convenience to your routine.
Understanding how to make these tweaks lets you control your lighting better. It also helps the timer work smoothly through changes in seasons and special situations.
Manual Override Options
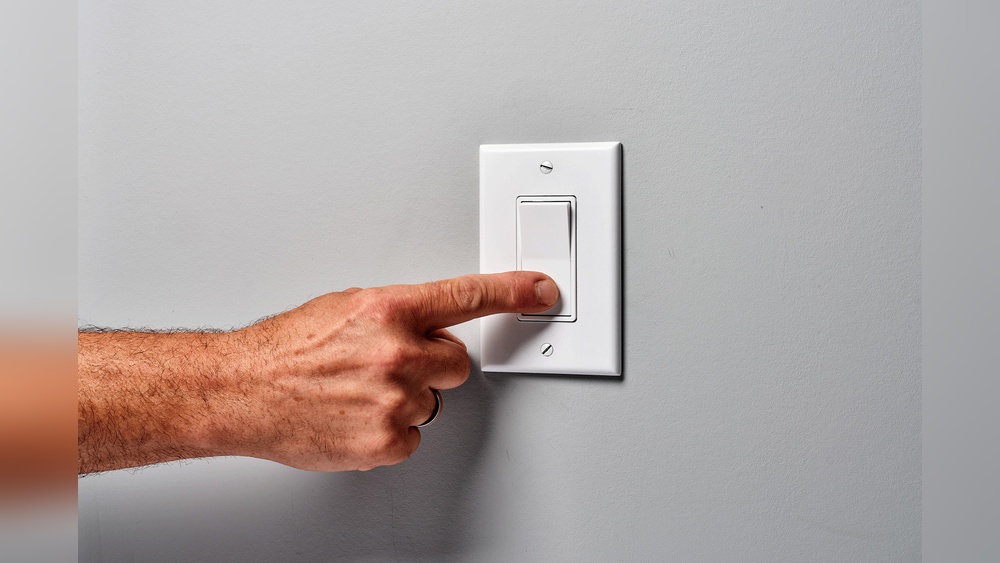
The manual override lets you turn the light on or off anytime. This feature works without changing the timer program. Use it when you want light outside the set schedule.
To activate manual override, press the switch button briefly. The light will stay on or off until the next scheduled event. It is useful for unexpected needs or temporary changes.
Remember to check the switch display to know the current override status. This keeps you aware of the timer’s operation and avoids confusion.
Daylight Savings Adjustments
Daylight savings time affects the timer’s clock by shifting one hour. Adjusting for this change keeps your schedule accurate. It prevents lights from turning on too early or late.
Intermatic timers often have an automatic daylight savings setting. If not, you can manually move the clock forward or backward. Follow the user manual steps to update the time correctly.
Make this adjustment soon after the time change. It keeps your lighting aligned with daylight hours and your daily habits.
Credit: www.thepoolsupplywarehouse.com
Testing Your Timer
Testing your Intermatic light switch timer is a crucial step. It ensures the timer works correctly and controls your lights as planned. A proper test saves time and prevents frustration later. Follow these simple steps to check your timer’s function and fix common problems.
Running A Trial Cycle
Start by setting the timer to turn the light on and off within a short period. For example, set it to switch on in one minute and off in two. Watch the light carefully during this test. Confirm it turns on and off exactly at the set times. Repeat the test a couple of times to be sure the timer works consistently. This trial cycle helps you understand the timer’s behavior.
Troubleshooting Common Issues
If the light does not turn on or off as expected, check the timer settings. Make sure the current time is correct. Verify that the on and off times are properly set. Look for loose wiring or power supply issues at the switch. Reset the timer to factory settings if the problem continues. Test again after making adjustments. These steps often fix most common problems quickly.
Maintenance Tips
Proper maintenance keeps your Intermatic light switch timer working well. Regular care avoids problems and extends the timer’s life. Small steps can make a big difference.
Battery Replacement
Check the battery often to keep the timer running smoothly. Replace the battery once a year or if the timer stops working. Use the exact battery type recommended by the manufacturer. Turn off power before changing the battery to stay safe. Dispose of old batteries properly to protect the environment.
Cleaning And Care
Keep the timer clean to prevent dust build-up. Use a soft, dry cloth to wipe the surface gently. Avoid using water or harsh chemicals that can damage the timer. Check the timer buttons and display regularly for dirt or grime. Clean carefully to keep all parts working well and easy to use.
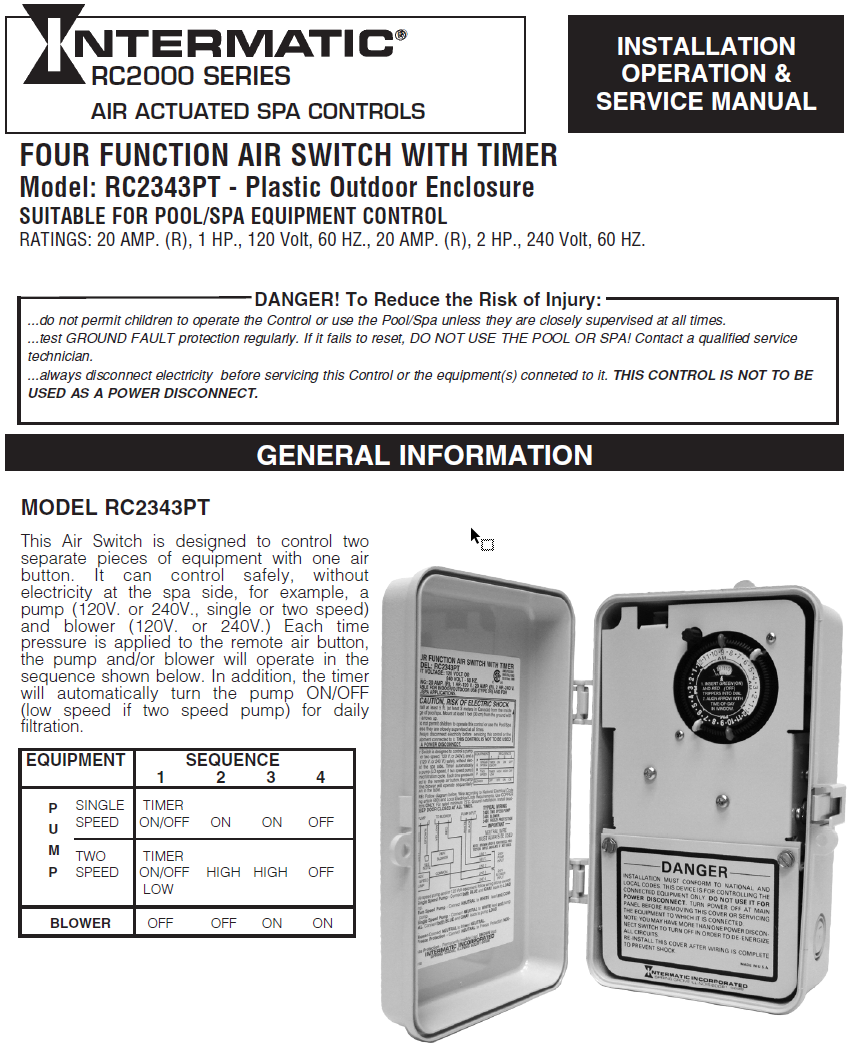
Credit: www.yumpu.com
Frequently Asked Questions
How Do I Set The Time On An Intermatic Light Switch Timer?
To set the time, press and hold the “Clock” button. Use the “Hour” and “Minute” buttons to adjust. Release the “Clock” button to confirm the current time. This ensures your timer operates accurately.
Can I Program Multiple On/off Settings On Intermatic Timers?
Yes, most Intermatic timers allow multiple on/off settings. Use the “Program” button to set desired times. This helps automate lighting for various schedules efficiently.
What Should I Do If The Timer Isn’t Working Properly?
First, check if the timer is correctly wired and powered. Reset the device by pressing the reset button. Ensure the current time and programs are set accurately.
How To Override The Intermatic Timer For Manual Control?
Press the “Override” or “Manual” button to bypass the timer. This turns lights on or off regardless of programming. It’s useful for temporary manual control.
Conclusion
Programming your Intermatic light switch timer saves energy and adds convenience. Set the timer to match your daily routine. Enjoy automatic control without lifting a finger. This simple step makes your home smarter and safer. Keep your instructions handy for quick changes anytime.
Small efforts bring big benefits in lighting control. Try it today and notice the difference.