Are you struggling with removing fasteners from your sheetrock without causing damage? You’re not alone.
Whether you’re fixing a wall, replacing a fixture, or prepping for a fresh coat of paint, knowing the right way to remove those stubborn nails or screws is key. You’ll discover simple, effective techniques that make the job easier and help protect your walls.
Keep reading, and you’ll learn how to tackle this common task like a pro—saving time, effort, and frustration.
Tools Needed
Removing fasteners from sheetrock needs the right tools. Using proper tools makes the job easier and protects the wall. You save time and avoid damage. Knowing which tools fit each fastener type is key. Below are the common fasteners and tools for removal.
Common Fastener Types
Sheetrock uses different fasteners. Nails are common and simple. They push through drywall paper and hold firmly. Screws are also popular. They dig into the wood behind the sheetrock. Sometimes staples hold wires or insulation. Each fastener needs a different approach to remove it safely.
Essential Removal Tools
A claw hammer works well for pulling out nails. Use the claw end to grip and lever nails out. A screwdriver is needed for screws. Choose a screwdriver that fits the screw head exactly. An electric drill with a screwdriver bit speeds up screw removal. Pliers help with stubborn fasteners or staples. Use needle-nose pliers for tight spots. A putty knife can help loosen fasteners without tearing the wall.
Preparing The Area
Preparing the area is the first step before removing fasteners from sheetrock. This step helps avoid damage and keeps the space clean. Taking time here makes the process smoother and safer.
Clear Surroundings
Remove furniture and objects near the wall. This creates space to work comfortably. It also prevents items from getting dirty or broken. Clear floors help you move tools easily. A tidy area reduces accidents and distractions.
Protect Surfaces
Cover floors and nearby surfaces with drop cloths or plastic sheets. This stops dust and debris from settling. Use painter’s tape to hold covers in place. Protect light switches and outlets with masking tape. These simple steps save time on cleanup later.
Removing Nails
Removing nails from sheetrock needs care. Nails hold the drywall in place. Pulling them out without damage is important. Use the right tools and methods. This helps keep your wall smooth and ready for repair or paint.
Using A Claw Hammer
Start with a claw hammer for easy nail removal. Slide the claw under the nail head gently. Pull the handle back slowly. This lifts the nail out without tearing the sheetrock. Use a small piece of wood under the hammer. It protects the wall from dents and marks.
Leveraging Pliers
Pliers work well for nails stuck deep in the wall. Grip the nail head firmly with the pliers. Pull straight out with steady force. Avoid twisting to prevent breaking the nail. If the nail bends, use the hammer to straighten it before pulling again.
Minimizing Wall Damage
Protect the sheetrock during nail removal. Place a putty knife or thin board under tools. This stops the tool from digging into the wall. Pull nails slowly and smoothly. Patch small holes with spackle or drywall compound. Sand and paint for a clean finish.

Credit: www.hgtv.com
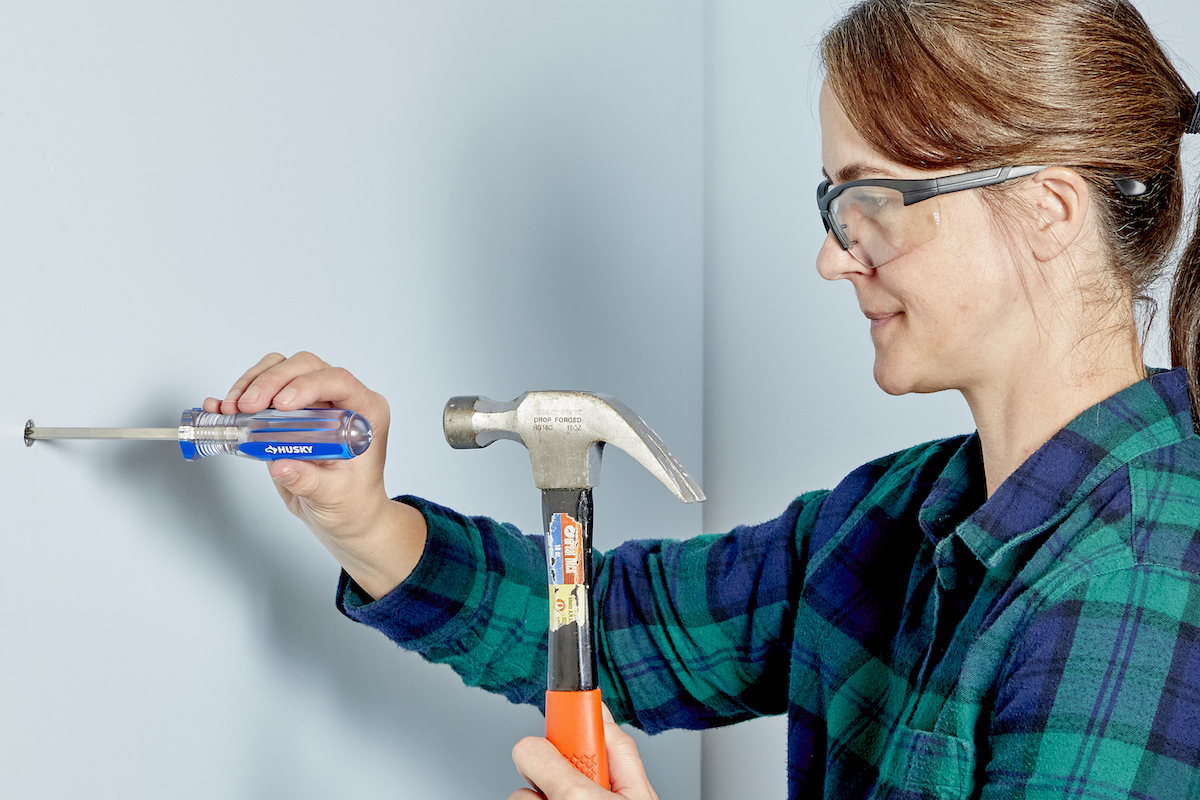
Removing Screws
Removing screws from sheetrock is a common task during repairs or remodeling. Doing it right prevents damage to the wall and saves time. Use the correct tools and techniques to make the job easier and cleaner.
Selecting The Right Screwdriver
Choosing the proper screwdriver is important for easy screw removal. Match the screwdriver head to the screw type. Most sheetrock screws use a Phillips head.
Use a screwdriver with a comfortable handle for better grip. A power drill with a screwdriver bit can also work well. Turn slowly to avoid stripping the screw head.
Dealing With Stripped Screws
Stripped screws have damaged heads that make removal hard. Use a rubber band for extra grip. Place it over the screw head, then turn with the screwdriver.
Try a screwdriver with a larger or different head size. Tap the screwdriver gently with a hammer to improve grip. These tricks often loosen stuck screws.
Alternative Extraction Methods
If screws still won’t come out, try other tools. Needle-nose pliers can grip and twist the screw out carefully. Use an easy-out extractor tool for stubborn screws.
Drill a small hole into the screw head and use the extractor. Work slowly to avoid damaging the sheetrock. These methods help remove screws without harming the wall.
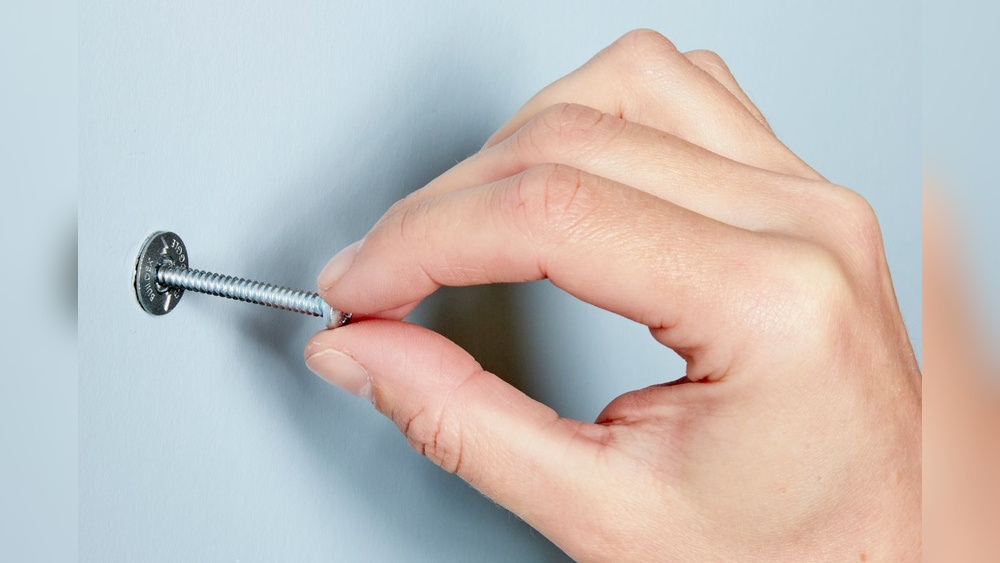
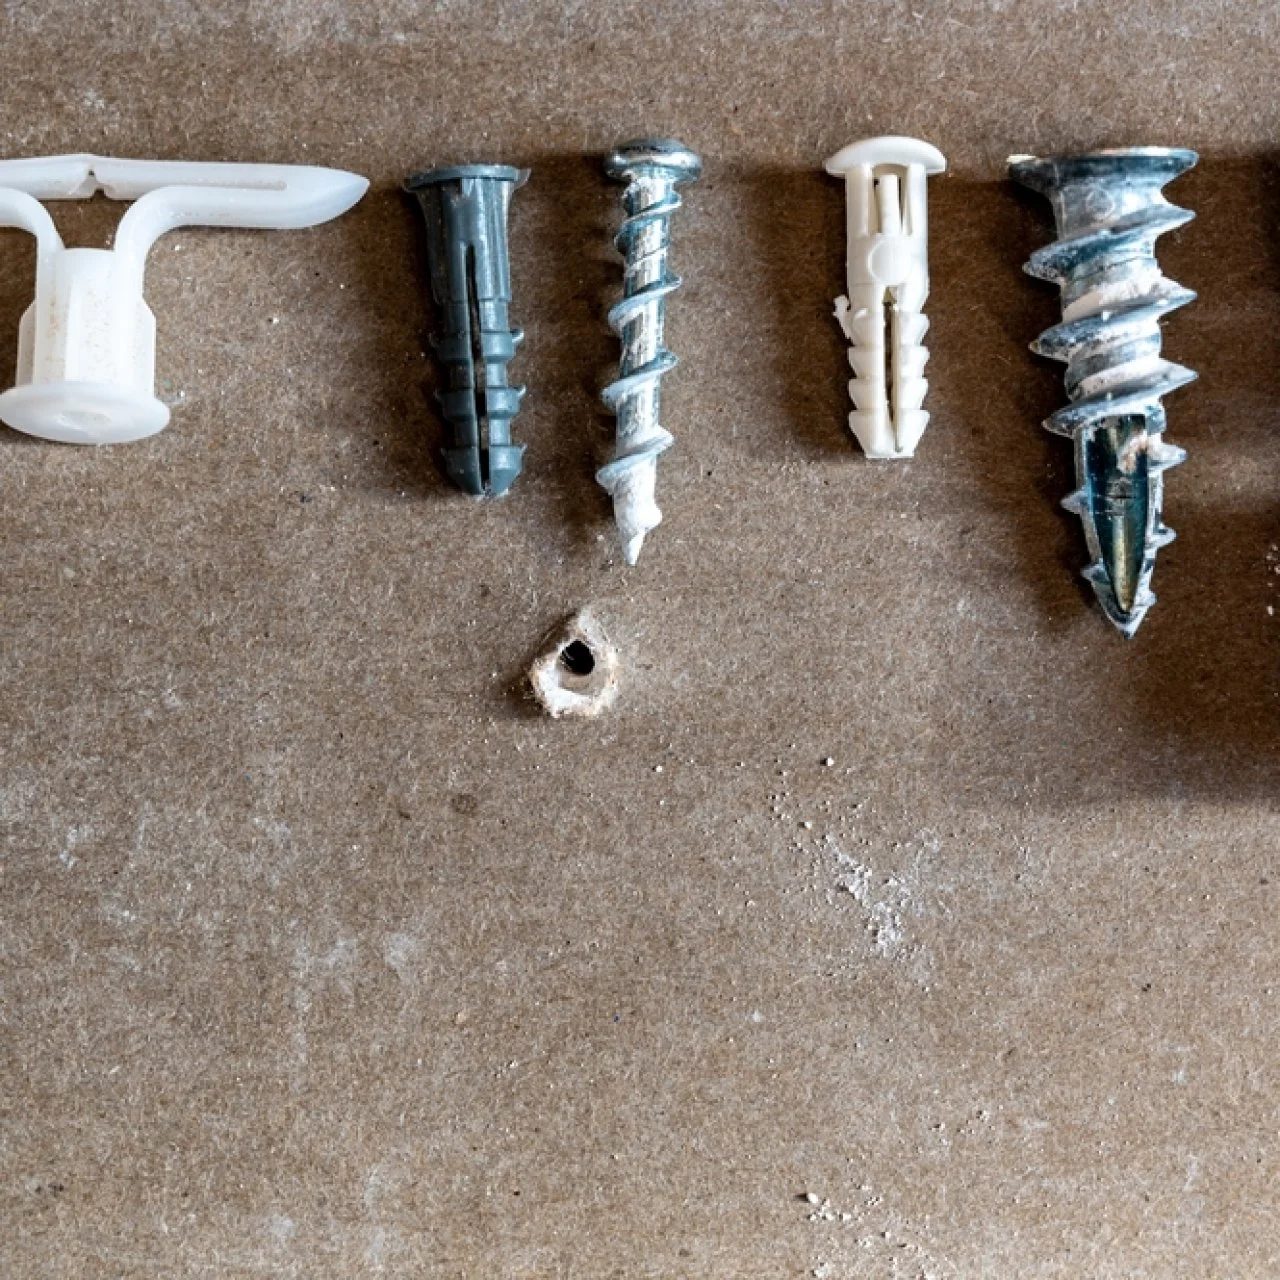
Handling Anchors
Anchors hold fasteners firmly in sheetrock. Removing them takes care and the right method. Different types of anchors need different steps for safe removal. Avoid damage to your walls by handling anchors gently and correctly.
Pulling Plastic Anchors
Plastic anchors often stay stuck inside the wall. Use needle-nose pliers to grip the anchor’s edge. Pull slowly and steadily. If the anchor breaks, try pushing it deeper and patch the hole later.
Removing Toggle Bolts
Toggle bolts have wings that open behind the wall. Unscrew the bolt by turning it counterclockwise. The wings will fall inside the wall cavity. Pull out the bolt once loose. The hole may need filling afterward.
Dealing With Molly Bolts
Molly bolts expand behind the wall for strong hold. Unscrew the bolt until the head comes off. Push the sleeve into the wall cavity with a screwdriver. Patch the hole left behind for a smooth wall.
Repairing Wall Damage
Removing fasteners from sheetrock often leaves small holes or minor damage behind. Repairing this damage is important for a smooth, clean wall. Proper repair helps the wall look like new again. It also prepares the surface for painting or wallpaper. Follow these simple steps for the best results.
Filling Small Holes
Start by cleaning the hole from dust and debris. Use a putty knife to apply spackling paste or joint compound. Press the filler firmly into the hole until it is full. Smooth the surface with the putty knife, removing extra material. Let the filler dry completely before the next step.
Sanding And Smoothing
Once the filler is dry, use fine-grit sandpaper to smooth the area. Sand gently until the patched spot blends with the wall. Avoid sanding too hard to prevent damage to the wall. Wipe away dust with a damp cloth. The surface should feel even and ready for paint.
Priming And Painting
Apply a coat of primer to the repaired area. Primer helps paint stick and prevents color differences. Let the primer dry fully before painting. Choose paint that matches the wall color. Use a brush or roller to apply paint in thin, even coats. Allow the paint to dry, then add a second coat if needed.
Preventing Future Damage
Preventing damage to your Sheetrock is key to keeping walls strong and looking good. Taking care during fastener selection and installation helps avoid cracks, holes, and weak spots. Proper steps extend the life of your walls and save repair costs.
Choosing Appropriate Fasteners
Pick fasteners made for Sheetrock or drywall use. Screws with coarse threads hold better than nails. Use the right length so they don’t go too deep or stay too shallow. Avoid oversized fasteners that can cause cracks.
Plastic anchors or toggle bolts work well for heavy items. Match fasteners to wall weight and material. This choice reduces stress on the Sheetrock surface.
Using Proper Installation Techniques
Drive screws straight and avoid over-tightening. Over-tightening breaks the drywall paper layer. Leave the fastener head just below the wall surface.
Space fasteners evenly to spread the load. Use a drill with a clutch to control depth. Pre-drill holes if Sheetrock is brittle or old.
Take time to check each fastener’s fit. A careful approach prevents damage and strengthens walls.
Credit: www.hgtv.com
Credit: www.bobvila.com
Frequently Asked Questions
How Do I Safely Remove Fasteners From Sheetrock?
Use a screwdriver or pliers to gently pry out the fastener. Avoid damaging the drywall surface. Work slowly and apply steady pressure to prevent holes.
What Tools Are Best For Removing Sheetrock Fasteners?
A flathead screwdriver, needle-nose pliers, or a putty knife work well. Choose tools that fit the fastener size to avoid drywall damage.
Can I Reuse Fasteners After Removing From Sheetrock?
Yes, if the fasteners are undamaged and clean. Inspect them carefully before reuse to ensure they still hold securely.
How To Repair Holes After Removing Fasteners From Sheetrock?
Fill holes with spackle or joint compound. Sand smooth when dry, then repaint for a seamless finish.
Conclusion
Removing fasteners from sheetrock takes care and the right tools. Use gentle force to avoid damaging the wall. Start with common tools like pliers or a screwdriver. Small holes can be patched easily later. Take your time and work slowly.
This method saves you effort and keeps walls neat. Practice makes the process smoother and faster. You can handle this task with simple steps and patience.


