Are your light fixtures outdated or no longer fitting your style? Changing them can completely transform the look and feel of any room.
But if you’ve never done it before, the idea might seem tricky or even risky. Don’t worry—you’re about to discover how simple and safe switching out light fixtures can be. By the end of this guide, you’ll have the confidence to tackle the job yourself and give your space an instant upgrade.
Ready to brighten up your home? Let’s dive in.
Safety First
Safety is the most important step before changing any light fixture. Electricity can be dangerous. Taking the right precautions keeps you safe. Follow these simple safety tips to protect yourself and your home.
Turn Off Power
Always switch off the power at the main circuit breaker. Do not rely on just the light switch. Use a voltage tester to confirm the power is off. This prevents shocks and injuries. Safety starts with cutting the electricity supply.
Gather Safety Gear
Wear insulated gloves to protect your hands from shocks. Use safety goggles to shield your eyes from dust and debris. Have a sturdy ladder for stable support. Prepare all tools and gear before starting the work. Being prepared reduces risks and accidents.
Credit: 100things2do.ca
Tools And Materials
Switching out light fixtures requires the right tools and materials. Having everything ready makes the job easier and safer. This section covers the essential tools and how to pick new fixtures.
Essential Tools
Start with a screwdriver set. Both flathead and Phillips screwdrivers are needed. A voltage tester is crucial to check if wires carry electricity. Wire strippers help prepare the wires for connection. Needle-nose pliers make bending and twisting wires simpler. A ladder or step stool helps reach ceiling fixtures safely. Electrical tape secures wire connections. A flashlight is handy when working in dim spaces.
Choosing New Fixtures
Pick fixtures that match your room’s style and size. Consider the fixture’s weight and how it fits the ceiling box. Check the fixture’s voltage and wattage limits. Choose energy-efficient bulbs to save electricity. Look for fixtures with easy installation features. Think about the light’s brightness and color temperature. Make sure the fixture meets safety standards for your home.
Remove Old Fixture
Removing the old light fixture is the first step in your project. Safety matters most. Turn off the power at the breaker box to avoid shocks. Use a voltage tester to check the wires before touching them.
Take your time. Follow these steps carefully to remove the fixture without damage.
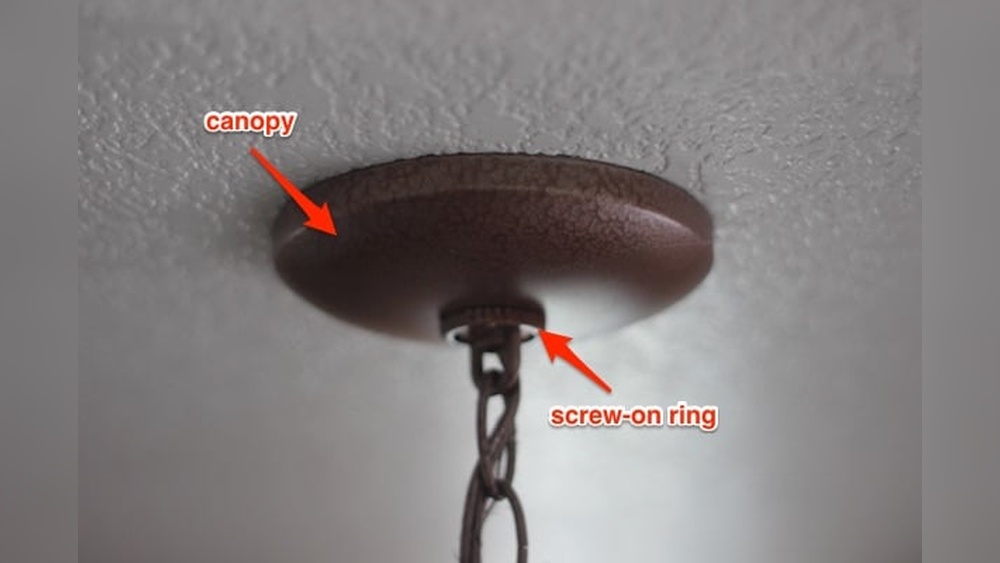
Unscrew Fixture
Locate the screws or bolts holding the fixture to the ceiling or wall. Use a screwdriver to loosen and remove them. Hold the fixture with one hand to prevent it from falling.
Once the screws are out, gently pull the fixture away from the mounting plate. Set it down on a soft surface to avoid scratches or broken parts.
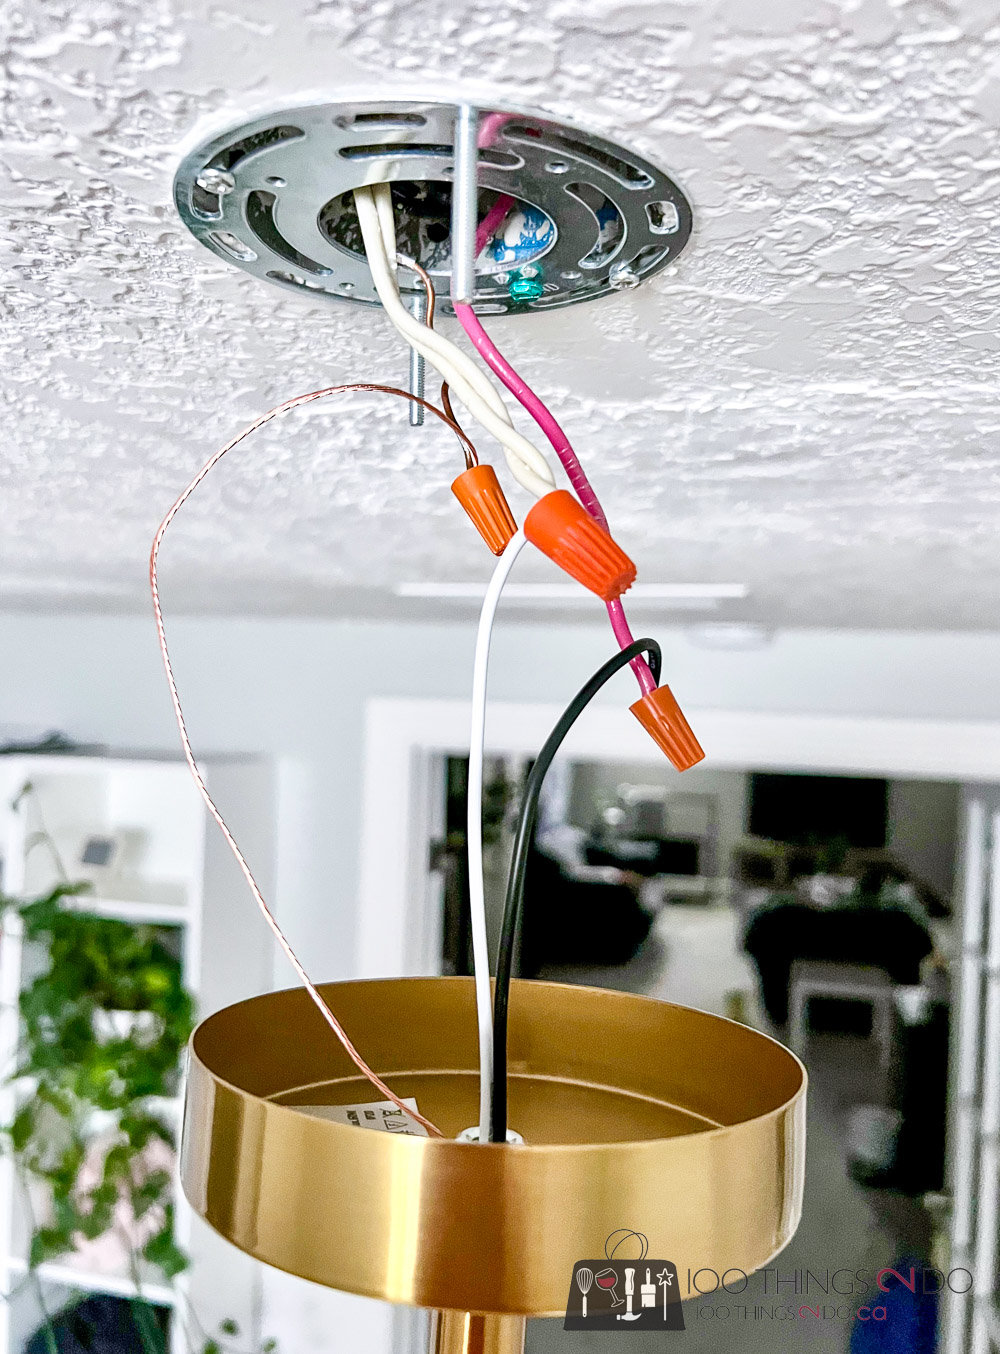
Disconnect Wiring
Look for the wire connectors that join the fixture wires to the house wires. Twist off the wire nuts carefully. Keep track of which wires connect together.
Separate the fixture wires from the house wires. If needed, use a small tool to loosen tight connections. Do not force or pull hard on the wires.
Wrap loose wires with electrical tape for safety until you install the new fixture.

Credit: www.youtube.com
Prepare Wiring
Preparing the wiring is an important step before installing a new light fixture. This ensures safety and proper function. Carefully checking and handling the wires helps avoid electrical problems later.
Inspect Wires
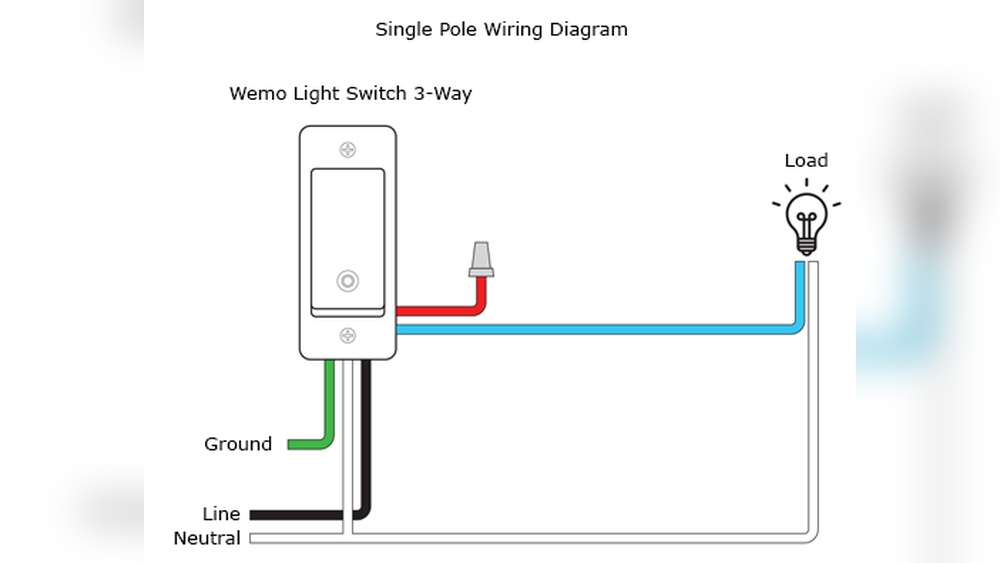
Start by turning off the power at the breaker box. Use a voltage tester to confirm no electricity flows through the wires. Look closely for damaged or frayed wires. Replace any wire that looks worn or unsafe. Check that the wire colors follow standard codes: black or red for hot, white for neutral, and green or bare for ground. Clean any dust or debris from the wires to ensure a good connection.
Strip Wire Ends
Use a wire stripper tool to remove about half an inch of insulation from each wire end. Be careful not to cut into the copper wire itself. Stripping the right length helps the wires connect firmly to the new fixture. Twist the exposed copper strands tightly for a neat end. This prevents loose connections that can cause flickering or electrical shorts. Double-check that no insulation remains on the copper wire before attaching the fixture.
Install New Fixture
Installing a new light fixture is the final step in your upgrade project. This process needs care and attention to detail. Correct installation ensures safety and proper function.
Follow each step carefully. This helps the new fixture work well and look great in your space.
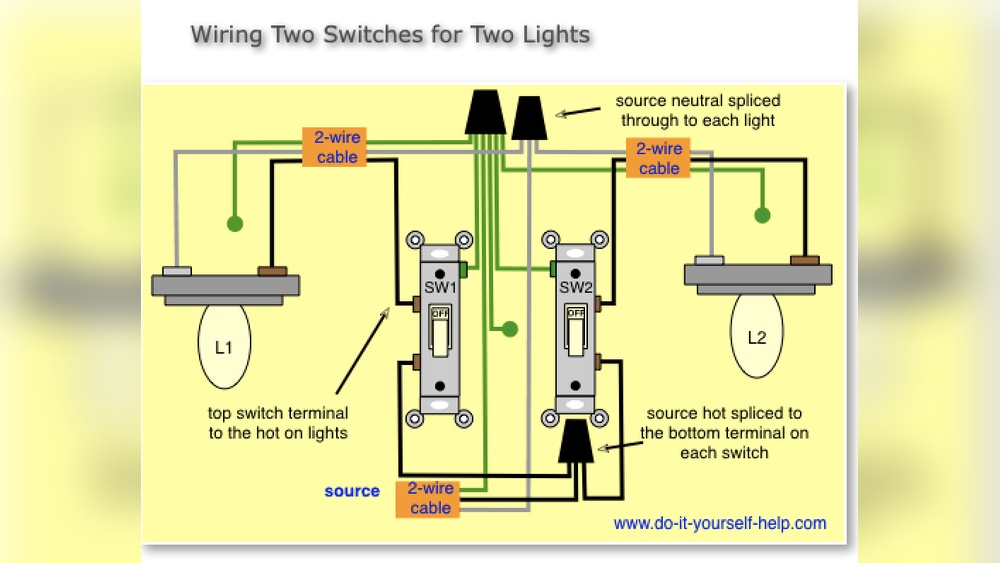
Connect Wires
Start by matching the wires from the fixture to the wires in the ceiling box. Usually, black or red wires are live, white wires are neutral, and green or bare wires are ground. Connect the wires using wire nuts. Twist the wires together firmly before securing the nuts. Make sure no bare wire is exposed. This step prevents electrical shorts and keeps the connection strong.
Secure Fixture
Hold the fixture close to the ceiling bracket. Align the holes on the fixture base with the screws or mounting plate. Tighten screws evenly to avoid tilting. Ensure the fixture is snug against the ceiling. Double-check stability by gently shaking the fixture. A secure fixture will not move or wobble. Proper securing keeps the light safe and prevents accidents.
Test And Adjust
After installing a new light fixture, testing and adjusting it is important. This step ensures safety and proper function. It also helps spot any issues early. Always handle this step carefully.
Restore Power
Turn the circuit breaker back on to restore power. Check that the wall switch is in the off position before flipping the breaker. Then, switch the wall control on. This method prevents accidental shocks and protects the fixture.
Check Functionality
Flip the light switch to test your new fixture. The light should turn on and off smoothly. Look for flickering or dimming. If you see these, the wiring may need adjustment. Tighten all wire connections if needed. Replace bulbs that don’t work properly. Testing confirms your fixture is safe and ready to use.
Troubleshooting Tips
Switching out light fixtures can be simple, but sometimes problems arise. Knowing how to troubleshoot helps fix issues quickly. This section shares tips to solve common problems and know when to call for help.
Common Issues
One common problem is the light not turning on. Check if the bulb is screwed in tight or if it is burned out. Also, test the switch to see if it works properly.
Loose wiring can cause flickering lights or no power at all. Make sure all wires are connected firmly and match the correct colors. Turn off power before touching wires.
Sometimes the fixture won’t fit the existing box. Measure the space and compare it with the new fixture’s size. Use adapters if needed for a secure fit.
When To Call A Professional
Call an electrician if you see sparks or smell burning. These signs mean a serious electrical problem.
If you feel unsure about handling wires, don’t risk it. Electricity can be dangerous without proper knowledge.
When your home has old or faulty wiring, a professional can ensure safety and code compliance.
For complex fixture setups or dimmer switches, expert help saves time and prevents damage.
:max_bytes(150000):strip_icc()/how-to-replace-ceiling-light-fixture-1824657-03-d0831082affb46be9ab0fb2652da8092.jpg)
Credit: www.thespruce.com
Frequently Asked Questions
How Do I Safely Turn Off Power Before Switching Fixtures?
Always switch off the circuit breaker controlling the fixture. Use a voltage tester to confirm no electricity flows. This ensures safety before you start removing or installing light fixtures.
What Tools Do I Need To Replace A Light Fixture?
You need a screwdriver, wire stripper, voltage tester, and electrical tape. These tools help you remove old fixtures and safely connect new wiring.
Can I Replace A Fixture Without An Electrician?
Yes, if you follow safety steps and local codes. Turn off power, test wires, and carefully handle connections. Hire an electrician for complex or unfamiliar tasks.
How Do I Match A New Fixture To Existing Wiring?
Check the number of wires and their colors. Most homes have black (hot), white (neutral), and green or bare (ground). Match wires accordingly for safe installation.
Conclusion
Switching out light fixtures can change your room’s look quickly. Always turn off power before starting any work. Use the right tools and follow safety steps carefully. Take your time to avoid mistakes and ensure a secure fit. A new fixture can brighten your space and add style.
With practice, the process becomes easier and more fun. Try upgrading your lights to refresh your home’s feel today. Small changes make a big difference.