Are you tired of coming home to a dark house or forgetting to turn off your lights? Learning how to program a timer light switch can solve these problems easily.
Imagine having your lights turn on and off automatically, saving you energy and giving your home a welcoming glow when you walk in. In this guide, you’ll discover simple steps to set up your timer light switch quickly, even if you’ve never done it before.
Keep reading, and you’ll gain control over your lighting like a pro—making your home smarter and your life easier.
Credit: www.thefrugalnoodle.com
Choosing The Right Timer Switch
Choosing the right timer switch is important for your lighting setup. The right switch saves energy and adds convenience. It controls when your lights turn on and off without manual effort. Picking the correct type ensures smooth operation and long-lasting use. Consider your needs and fixture type before buying. This helps avoid problems during installation and use.
Types Of Timer Switches
Several timer switches exist for different purposes. Mechanical timers use dials and simple settings. They are easy to use and affordable. Digital timers offer precise control with buttons and displays. They provide more programming options. Some models connect with Wi-Fi. This lets you control lights from your phone. Choose a type that matches your comfort with technology.
Compatibility With Your Fixtures
Check if the timer switch fits your light fixture. Some switches work only with certain bulbs, like LED or incandescent. Ensure the switch supports the voltage and wattage of your lights. Also, verify the switch fits your wall box size. Incorrect compatibility can cause flickering or damage. Read product details and consult instructions before purchase.
Key Features To Consider
Look for user-friendly programming. Simple buttons and clear displays help avoid confusion. Backup battery support keeps settings during power outages. Some timers offer multiple on/off settings per day. This adds flexibility for your schedule. Consider a manual override switch for instant control. Also, check the timer’s warranty for reliability assurance.
Tools And Materials Needed
Preparing to program a timer light switch requires some basic tools and safety gear. Having the right items ready makes the process smoother and safer. This section lists what you need before starting.
Essential Tools
You will need a screwdriver set with flat and Phillips heads. A voltage tester helps check if the power is off. Wire strippers make it easier to prepare the wires. Needle-nose pliers help bend and hold wires in place. A drill might be needed for mounting the switch box. Keep a flashlight nearby for better visibility.
Safety Equipment
Always wear safety glasses to protect your eyes from dust or sparks. Use insulated gloves to avoid electric shocks. Wear closed-toe shoes for foot safety. Make sure your work area is dry to prevent slips or shocks. Turn off the main power before starting any work on wiring.
Preparing For Installation
Preparing for the installation of a timer light switch is a key step. It ensures safety and a smooth setup. Take your time and follow each step carefully. This preparation helps avoid mistakes and electrical hazards.
Turning Off Power
Start by turning off the power at the circuit breaker. This stops electricity from flowing to the switch. Use a voltage tester to confirm the power is off. Never skip this step. Safety first.
Removing Existing Switch
Remove the switch cover plate with a screwdriver. Unscrew the switch from the electrical box gently. Pull the switch out to expose the wires. Keep track of how the wires connect. Take a photo if needed.
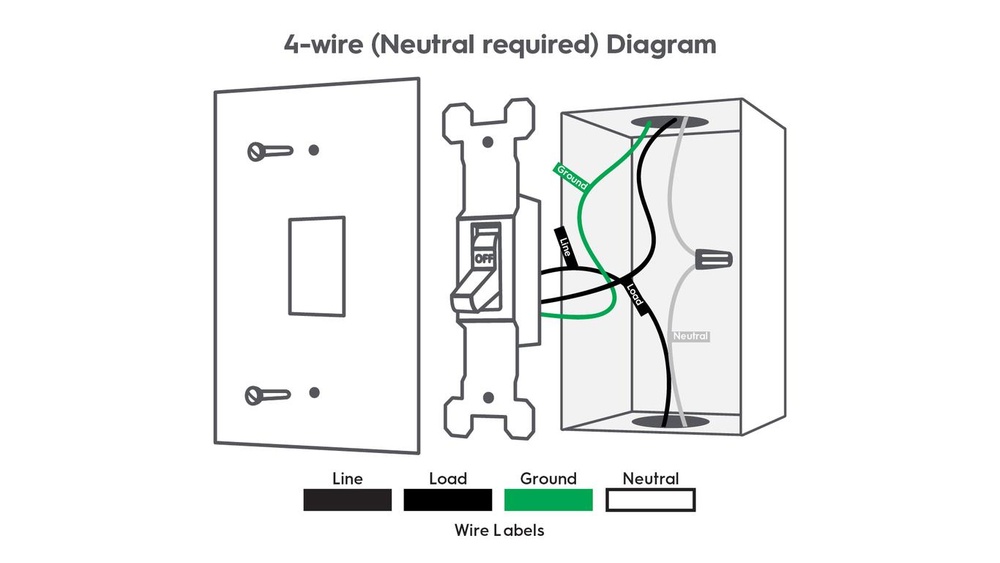
Checking Wiring
Check the wires for damage or wear. Identify the line, load, neutral, and ground wires. These wires are essential for the timer switch to work. Make sure the wiring matches the timer switch instructions. Proper wiring prevents problems later.
Wiring The Timer Switch
Wiring the timer light switch is a key step in installing it safely and correctly. This part ensures the switch works properly to control your lights automatically. Careful attention during wiring prevents electrical problems and keeps your home safe.
Identifying Wires
Start by turning off the power at the circuit breaker. Use a voltage tester to check wires are not live. Look for three main wires: live (hot), neutral, and ground. The live wire is usually black or red. Neutral wires are white. Ground wires are green or bare copper. Correctly identifying each wire is important.
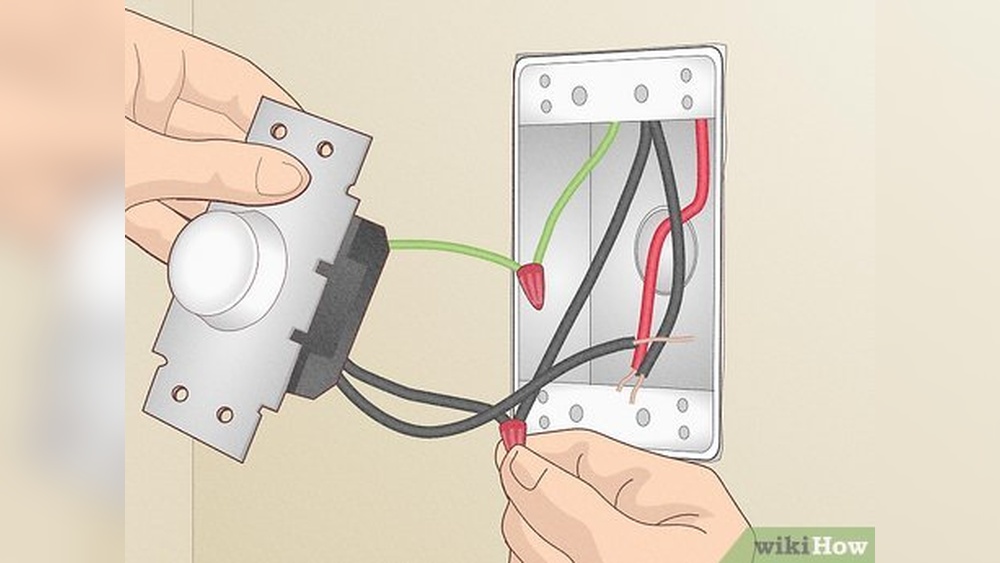
Connecting Wires Correctly
Match the timer switch wires with the house wires. Connect live wire to live terminal on the switch. Attach neutral wire to the neutral terminal. Connect ground wire to the ground screw or wire. Use wire nuts to secure connections tightly. Avoid loose or exposed wires to prevent hazards.
Securing The Switch
Carefully push the wires back into the electrical box. Place the timer switch inside the box without pinching wires. Screw the switch firmly to the box. Attach the faceplate to finish the installation. Turn the power back on and test the switch operation.
Programming The Timer
Programming the timer on your light switch allows you to control when your lights turn on and off. This feature helps save energy and adds convenience to your daily routine. Follow these simple steps to set up your timer correctly.
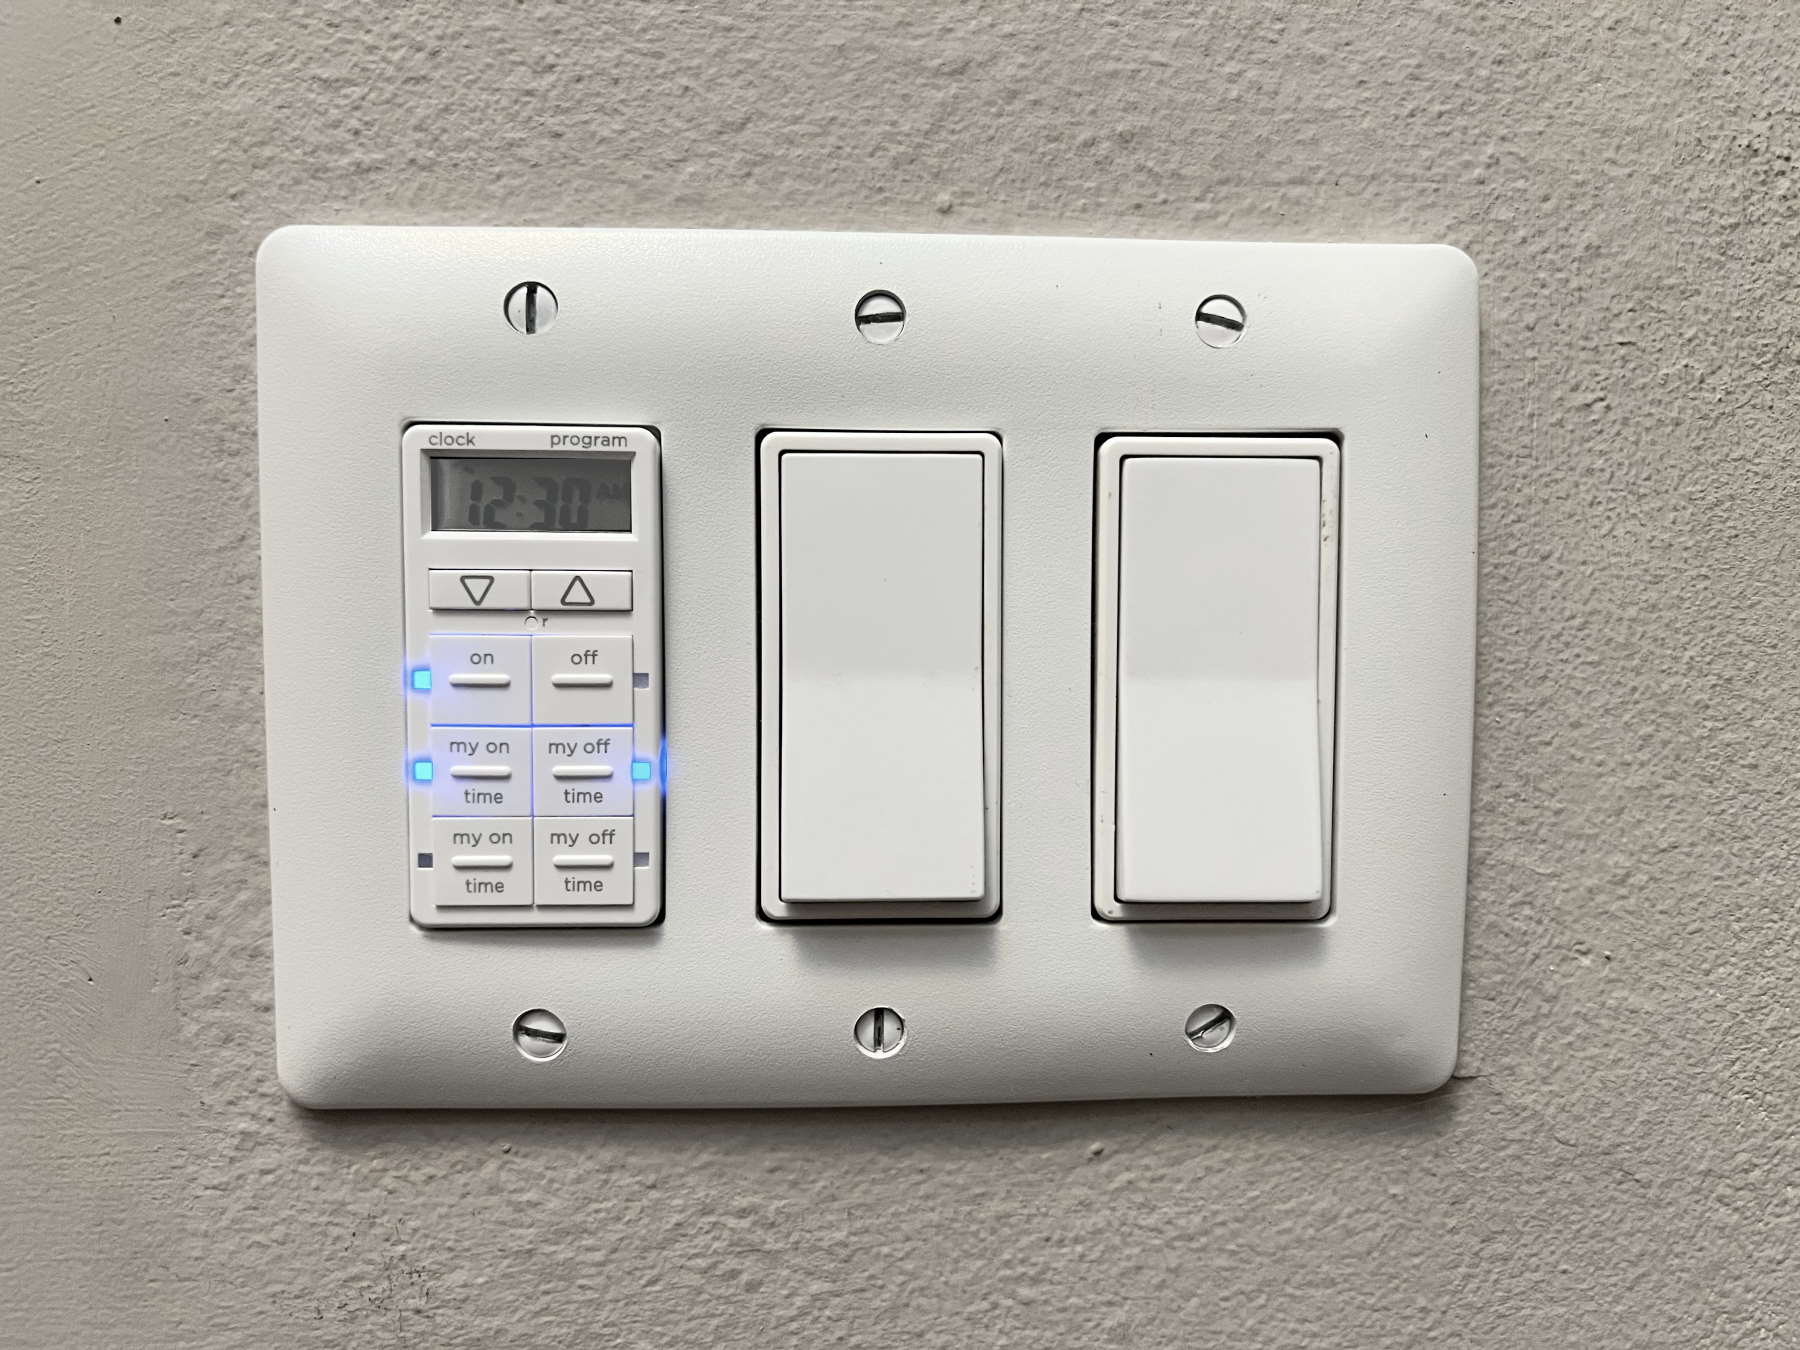
Setting The Current Time
First, set the current time on the timer. Press the clock or time button on your switch. Use the up and down arrows to select the correct hour. Then, set the minutes the same way. Confirm the time by pressing the clock button again. Your timer now knows the exact current time.
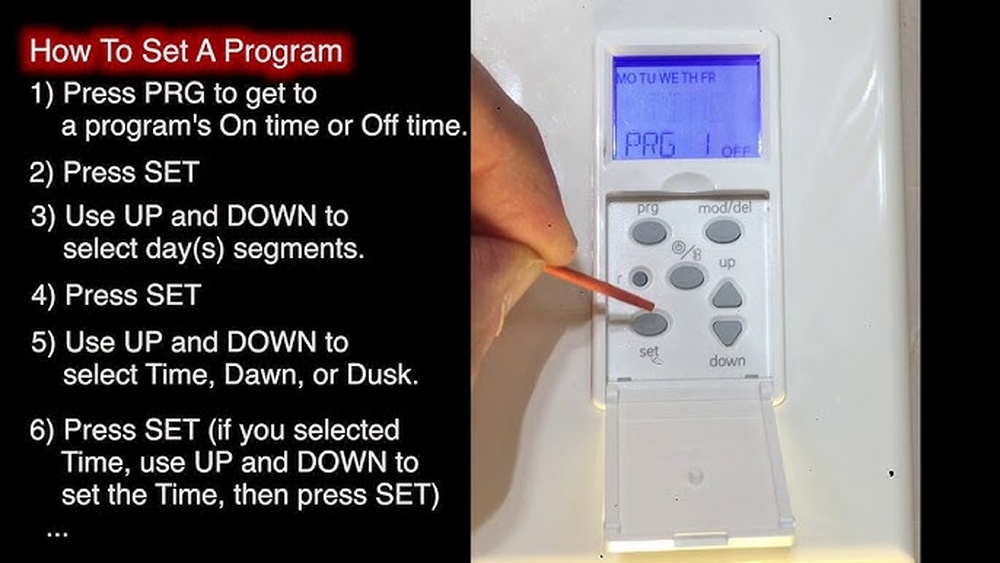
Configuring On/off Schedules
Next, decide when you want your lights to turn on and off. Press the program or schedule button. Use the arrows to pick the on time. Confirm by pressing the program button again. Then, set the off time in the same way. You can add multiple on/off schedules if needed. This lets your lights work exactly when you want.
Adjusting For Weekdays And Weekends
Many timers let you set different schedules for weekdays and weekends. Find the day setting option on your timer. Select weekdays first and set your on/off times. Then, choose weekends and adjust the schedule as you prefer. This feature fits your lighting needs for every day of the week.
Testing Your Timer Switch
Testing your timer switch is a key step after installation. It ensures the device works properly and controls your lights as planned. This process helps catch any errors before regular use.
Restoring Power Safely
Turn the power back on at the circuit breaker carefully. Avoid touching wires or metal parts during this step. Use a voltage tester to confirm the power is active. Always follow safety rules to prevent shocks.
Verifying Timer Functions
Check if the timer switch turns lights on and off at set times. Set the timer for a short cycle to test quickly. Watch the lights during the cycle to see if they respond correctly. Adjust settings if the timing is off.
Troubleshooting Common Issues
If the timer does not work, check the wiring connections first. Loose or wrong connections cause most problems. Ensure the timer is compatible with your light type. Reset the timer or replace batteries if needed. Consult the manual for specific error codes or signals.
Maintaining Your Timer Switch
Maintaining your timer light switch helps it work well for a long time. Simple care keeps the device safe and saves energy. Checking and updating the switch prevents problems and ensures it turns lights on and off correctly. Small steps make a big difference in your home’s lighting system.
Regular Checks
Look at your timer switch often. Make sure the buttons and display work without trouble. Clean dust and dirt gently with a dry cloth. Check that the switch fits tightly on the wall. Watch for any flickering lights or strange sounds. Fix problems early to avoid bigger issues later.
Updating Settings
Change your timer switch settings to match your daily routine. Adjust the on and off times for different seasons. Use the manual or app to set new schedules. This keeps your lighting efficient and saves electricity. Review settings monthly to keep them correct and useful.
When To Replace
Replace the timer switch if it stops working well. Look for faded buttons, no display, or random switching. Old switches may waste power and cause safety risks. Choose a new model with better features and energy-saving options. Regular replacement helps keep your home safe and smart.

Credit: www.youtube.com
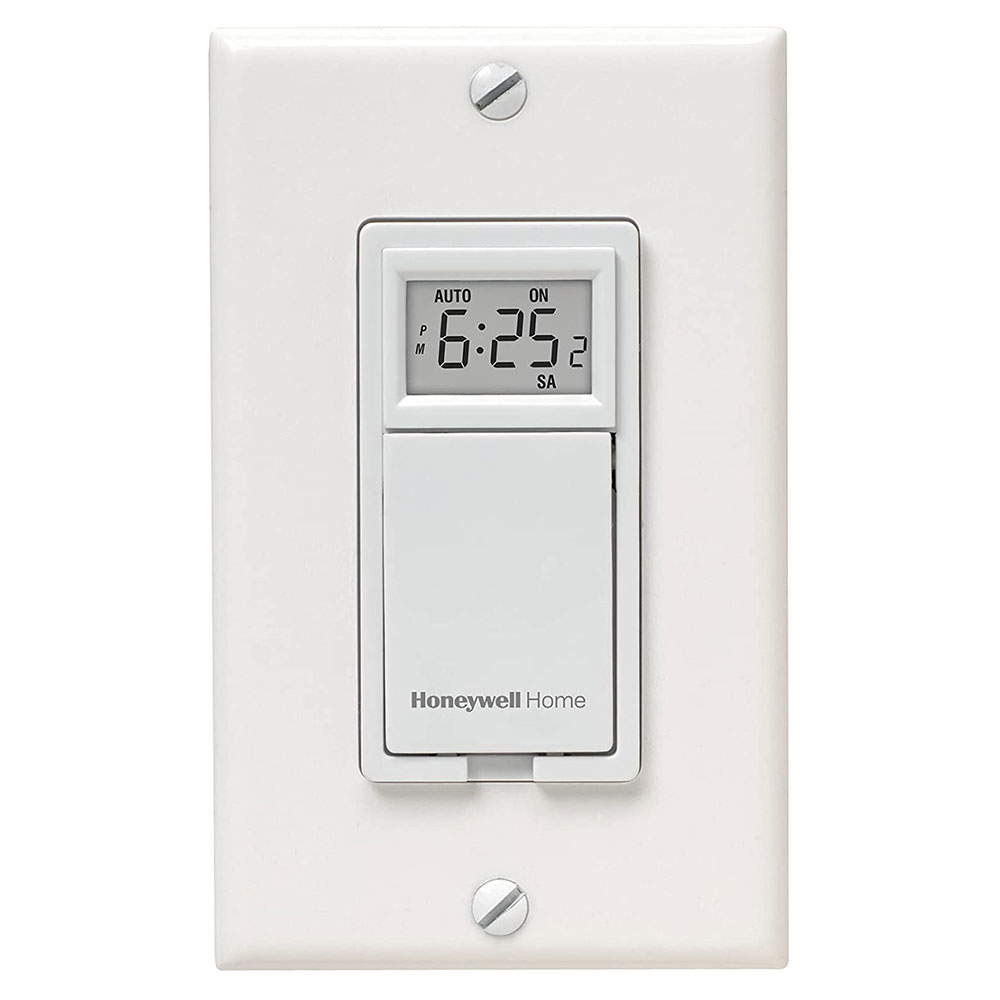
Credit: www.honeywellstore.com
Frequently Asked Questions
How Do I Set A Timer On A Light Switch?
To set a timer, first turn off power at the breaker. Connect the timer switch as per instructions. Program the start and stop times using the switch buttons. Restore power and test the timer operation for accuracy.
What Tools Are Needed To Program A Timer Switch?
You need a screwdriver, voltage tester, and possibly wire strippers. A ladder may help reach the switch. Follow safety precautions and the switch’s manual during installation and programming.
Can I Program A Timer Light Switch Without A Manual?
While manuals help, many timer switches have intuitive buttons. You can often set current time and on/off times by following on-screen prompts or button sequences. Check the manufacturer’s website for downloadable guides if needed.
How Often Should I Update Timer Settings?
Update settings whenever your schedule changes. Seasonal adjustments for daylight saving time may also be needed. Regular updates ensure your lighting matches your daily routines efficiently.
Conclusion
Programming a timer light switch saves energy and adds convenience. It lets you control lights without manual effort. Simple steps make the process easy to follow. You can set times to fit your daily routine. This helps reduce electricity bills and waste.
Try programming your timer switch today for better home lighting. Small changes make a big difference.