Have you ever wished you could set the perfect mood in any room with just a flick of a switch? Installing a light dimmer switch lets you do exactly that—giving you full control over your lighting and helping you save energy at the same time.
If you think it sounds complicated, don’t worry. You can easily install a dimmer switch yourself, even if you’re not a DIY expert. Keep reading, and I’ll guide you step-by-step to make your lighting smarter and your home more inviting.

Credit: www.gelighting.com
Tools And Materials Needed
Installing a light dimmer switch is a simple task with the right tools and materials. Having everything ready makes the process faster and safer. This guide lists what you need before starting the installation.
Essential Tools
You will need a few basic tools. A screwdriver is necessary to remove and attach the switch plate. A voltage tester helps ensure the power is off before touching wires. Wire strippers make it easy to prepare the wires for connection. Needle-nose pliers assist in bending wires and making tight connections. A flashlight or headlamp can be helpful in dark spaces.
Required Materials
Choose a dimmer switch compatible with your lights. Check the wattage and type of bulb before buying. You will also need electrical tape to secure wire connections. Wire nuts are important for joining wires safely. If your existing wires are damaged, extra electrical wire may be required. Make sure your materials meet local electrical codes.
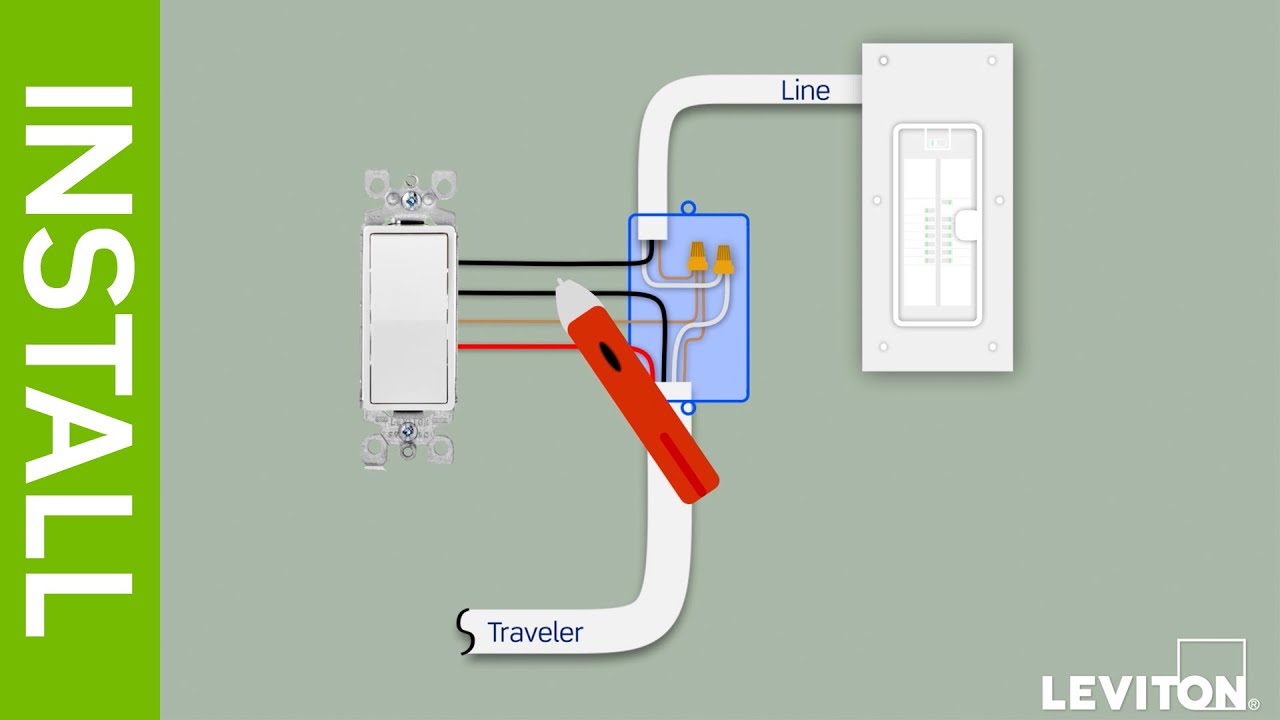
Credit: www.youtube.com
Choosing The Right Dimmer Switch
Choosing the right dimmer switch is key for a smooth installation. Picking the correct type makes your lighting work perfectly. It also saves you from electrical issues and extra costs. This section helps you understand important points about dimmer switches.
Types Of Dimmer Switches
There are several types of dimmer switches. Rotary dimmers turn a knob to adjust light. Slide dimmers use a sliding control for brightness. Touch dimmers respond to touch instead of a button. Each type fits different needs and preferences. Choose one that feels easy to use and matches your room style.
Compatibility With Bulbs
Not all dimmer switches work with every bulb. Some dimmers suit incandescent bulbs only. Others work with LED or CFL bulbs. Using the wrong dimmer can cause flickering or damage. Check the bulb type before buying a dimmer switch. Match the dimmer with your bulbs for smooth dimming and longer bulb life.
Safety Precautions
Safety is the top priority when installing a light dimmer switch. Electrical work can be dangerous without the right steps. Follow these safety precautions to protect yourself and your home.
Turning Off Power
Start by turning off the power at the circuit breaker. Do not rely on just the wall switch. Switching off the breaker cuts all electricity to the wires. This step helps avoid electric shocks. Double-check that the power is off before you proceed.
Using A Voltage Tester
Use a voltage tester to confirm no electricity flows to the switch. Touch the tester to the wires you will work on. If the tester lights up or beeps, power is still on. Only begin work after the tester shows no voltage. This tool ensures your safety during installation.
Removing The Old Switch
Removing the old light switch is the first step in installing a dimmer switch. This process is simple but requires care. Turn off the power to the switch at the circuit breaker. This prevents electric shock while you work.
Next, you will remove the faceplate and disconnect the wires. Take your time and follow each step carefully. Proper removal ensures a smooth installation of the new dimmer switch.
Unscrewing The Faceplate
Start by locating the screws holding the faceplate. Use a screwdriver to remove these screws. Keep the screws safe; you may need them later. Gently pull the faceplate away from the wall. Set it aside carefully to avoid damage.
Disconnecting Wires
Look behind the faceplate to see the old switch and wires. Use a voltage tester to confirm the power is off. Next, unscrew the terminal screws holding the wires. Carefully pull the wires free from the switch. Remember their positions or take a photo for reference.
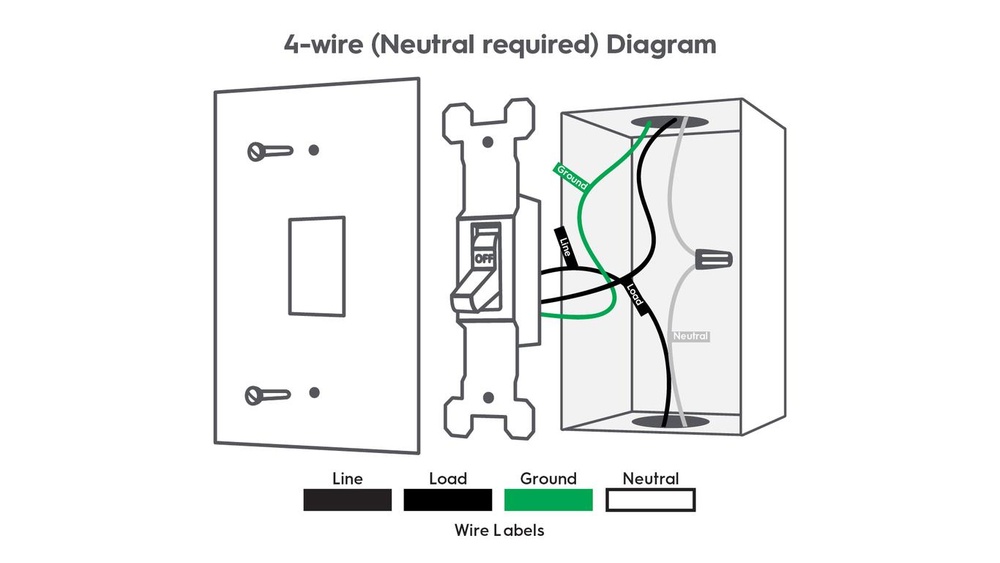
Wiring The Dimmer Switch
Wiring the dimmer switch is a key step in the installation process. This step controls how the light will dim and brighten. Careful wiring ensures safety and proper function. Follow simple steps to connect the wires correctly.
Matching Wire Colors
Identify the wires in the wall and on the dimmer switch. Usually, black wires are hot and carry electricity. White wires are neutral and return electricity to the panel. Match black wires from the switch to the black wires in the wall. Connect white wires if your dimmer has a neutral wire. Use wire nuts to secure the connections tightly. Never mix wires of different colors.
Connecting Ground Wire
Ground wire is usually green or bare copper. This wire protects against electric shock. Connect the ground wire from the dimmer switch to the ground wire in the wall box. If there is a green screw on the dimmer, attach the ground wire there. Secure all connections firmly. Proper grounding is important for safety and code compliance.
Securing The Dimmer Switch
Securing the dimmer switch is an important step in installation. It ensures the switch stays firmly in place. A loose switch can cause flickering lights or electrical problems. Take your time to mount the switch carefully and attach the faceplate properly. These steps make your dimmer safe and neat.
Mounting The Switch
First, gently push the wires back into the electrical box. Align the dimmer switch with the mounting holes. Use a screwdriver to tighten the screws. Do not overtighten; it may crack the switch. The switch should sit flush against the wall.
Attaching The Faceplate
Place the faceplate over the dimmer switch. Match the screw holes on the faceplate with the switch. Insert the screws and tighten them by hand. The faceplate should be snug but not too tight. This protects the switch and gives a clean look.
Testing The Dimmer Switch
Testing the dimmer switch is a key step after installation. It confirms the switch works correctly and safely controls your light’s brightness. Proper testing helps avoid problems like flickering or no response. Follow simple steps to check your new dimmer switch before regular use.
Restoring Power
Start by turning the power back on at the circuit breaker. This supplies electricity to the dimmer switch. Stand clear of the switch as you restore power. Use the switch to see if the light turns on. If the light stays off, check the connections again. Safety first—never touch wires with power on.
Adjusting Light Levels
Next, test the dimmer’s ability to change light brightness. Slowly slide or turn the dimmer control. Watch the light dim from bright to low smoothly. The light should not flicker or buzz. Try the full range of settings for best results. If the light flickers, check the bulb type or switch compatibility.
Troubleshooting Common Issues
Troubleshooting common issues with a light dimmer switch helps keep your lighting working well. Problems can happen even after careful installation. Knowing how to fix them saves time and frustration.
Dimmer Not Working
Check the power supply first. Make sure the circuit breaker is on. Loose wiring can stop the dimmer from working. Turn off the power and tighten all wire connections. Use a voltage tester to confirm power reaches the switch. Replace the dimmer if it feels hot or smells burned.
Flickering Lights
Flickering often means a bad connection or incompatible bulbs. Tighten all bulb sockets and wiring. Use bulbs made for dimmer switches, like LED or incandescent. Avoid mixing bulb types on one dimmer. A dimmer with low wattage capacity can also cause flicker. Match the dimmer’s rating to your total bulb wattage.
Tips For Optimal Lighting
Lighting sets the mood in any room. Using a dimmer switch helps control brightness easily. Proper tips can improve your lighting experience.
Adjust the light to match the activity. Bright light works well for reading or cooking. Softer light suits relaxing or watching TV.
Choose The Right Bulbs
Pick bulbs that work with dimmer switches. LED bulbs save energy and last longer. Make sure bulbs say “dimmable” on the package.
Balance Brightness Levels
Set the dimmer to avoid flickering or buzzing sounds. Test different levels to find the best comfort. Avoid too dim or too bright settings.
Layer Your Lighting
Use a mix of lights in one room. Combine ceiling lights with lamps or wall lights. This adds depth and flexibility to lighting.
Consider Room Size And Color
Large rooms need stronger light or more bulbs. Dark walls absorb light; choose higher brightness. Light walls reflect light well, so less brightness works.

Credit: www.youtube.com
Frequently Asked Questions
What Tools Do I Need To Install A Light Dimmer Switch?
You need a screwdriver, voltage tester, wire stripper, and electrical tape. These tools help ensure safe and precise installation. Having all tools ready speeds up the process and prevents mistakes.
Can I Install A Dimmer Switch Myself Safely?
Yes, if you follow safety steps like turning off power at the breaker. Use a voltage tester to confirm no electricity flows before starting. Basic wiring knowledge is helpful for proper installation.
Will A Dimmer Switch Work With Led Bulbs?
Make sure to use dimmer switches compatible with LED bulbs. Not all dimmers support LEDs, which may cause flickering or damage. Check product specifications before buying for smooth dimming performance.
How Do I Know If My Wiring Suits A Dimmer Switch?
Most modern homes have compatible wiring, usually with a neutral wire. Check for a neutral wire in your switch box for proper dimmer function. If unsure, consult an electrician before installation.
Conclusion
Installing a light dimmer switch can change your room’s mood easily. You just need some basic tools and safety steps. Take your time and follow each instruction carefully. Testing the switch after installation ensures it works well. Enjoy adjusting your lights for any occasion or time of day.
Simple upgrades like this improve comfort and save energy. Now, your home feels cozier and more inviting. Give it a try and see the difference yourself.


