Are you ready to transform your kitchen or workspace with bright, convenient lighting? Installing under cabinet lighting controlled by a switch can make your space more functional and stylish.
Imagine turning on your lights with just a flick of a switch, creating the perfect ambiance while saving energy. In this guide, you’ll discover simple, step-by-step instructions to install under cabinet lighting yourself — no special skills needed. Keep reading to learn how to brighten your space easily and enjoy the benefits every day.
Choosing The Right Under Cabinet Lighting
Choosing the right under cabinet lighting sets the tone for your kitchen workspace. It affects visibility, style, and energy use. Picking the best option makes your installation easier and more effective.
Consider your needs and space before buying. The right lighting improves tasks and highlights your kitchen design.
Types Of Lighting Options
LED strips are popular for their brightness and flexibility. They fit easily under cabinets and last long.
Puck lights create focused spots of light. Ideal for small areas or accent lighting.
Fluorescent lights give soft, even light but use more energy. Best for larger spaces needing broad light.
Rope lights offer a decorative glow. Good for mood lighting but less bright for work.
Factors To Consider
Think about brightness. Choose enough light to see clearly without glare.
Color temperature changes mood. Warm light feels cozy. Cool light looks modern and bright.
Energy efficiency saves money. LED lights use less power and last longer.
Size and shape must fit your cabinet space. Measure carefully before buying.
Ease of installation matters. Some lights need wiring; others use batteries.
Tools And Materials Needed
Gather a screwdriver, drill, and wire stripper for installation.
Use electrical tape and wire nuts for safe connections.
Have a voltage tester to check power before working.
Mounting brackets or adhesive strips help fix lights in place.
Switch and electrical wires may be needed to connect the lights.

Credit: www.thisoldhouse.com
Planning The Installation
Planning the installation of under cabinet lighting to a switch is the first step for a smooth project. It helps avoid mistakes and saves time. Careful planning ensures the lights work well and look great.
Measuring And Marking
Start by measuring the length of the cabinets. Mark where each light will go. Keep marks clear and straight. Measure twice to avoid errors. Use a pencil for easy changes.
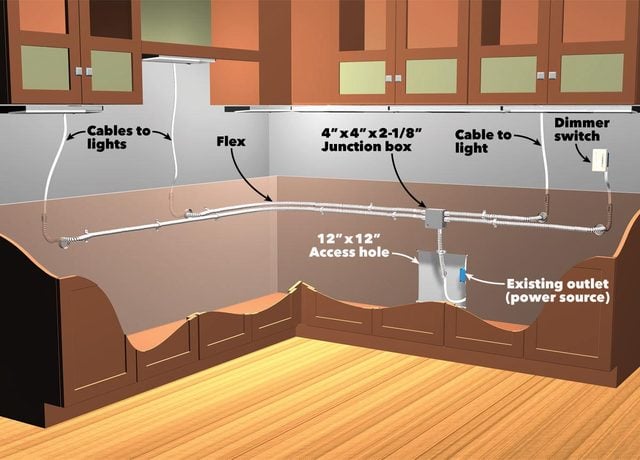
Locating Power Sources
Find the nearest power source for your lights. Check under the sink or behind cabinets. Look for existing outlets or wiring. The power source must handle the extra lights safely.
Safety Precautions
Turn off power at the circuit breaker before starting. Use a voltage tester to confirm no electricity flows. Wear safety gloves and goggles. Follow all local electrical codes and guidelines.
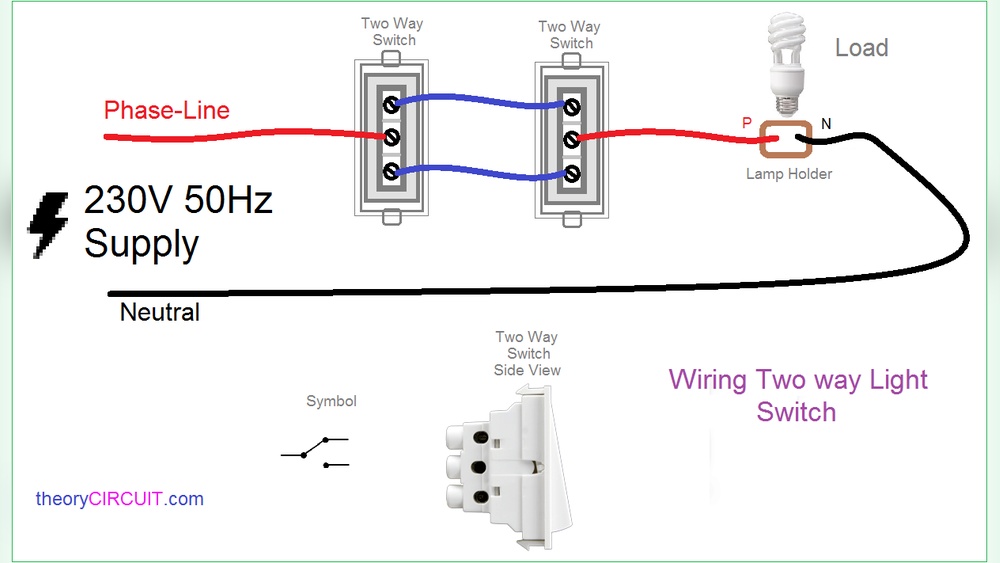
Wiring The Lights To A Switch
Wiring under cabinet lights to a switch lets you control the lights easily. It makes your kitchen or workspace more functional. This section guides you through the wiring steps safely and clearly.
Turning Off The Power
Start by turning off the power at your home’s breaker box. This prevents electric shock while working. Use a voltage tester on the wires to confirm no electricity flows. Safety is the first and most important step.
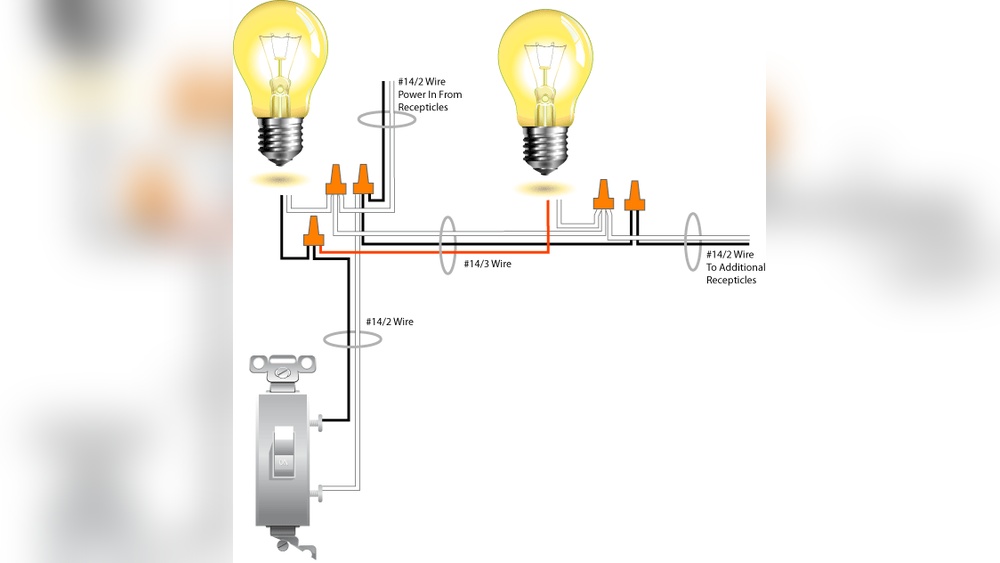
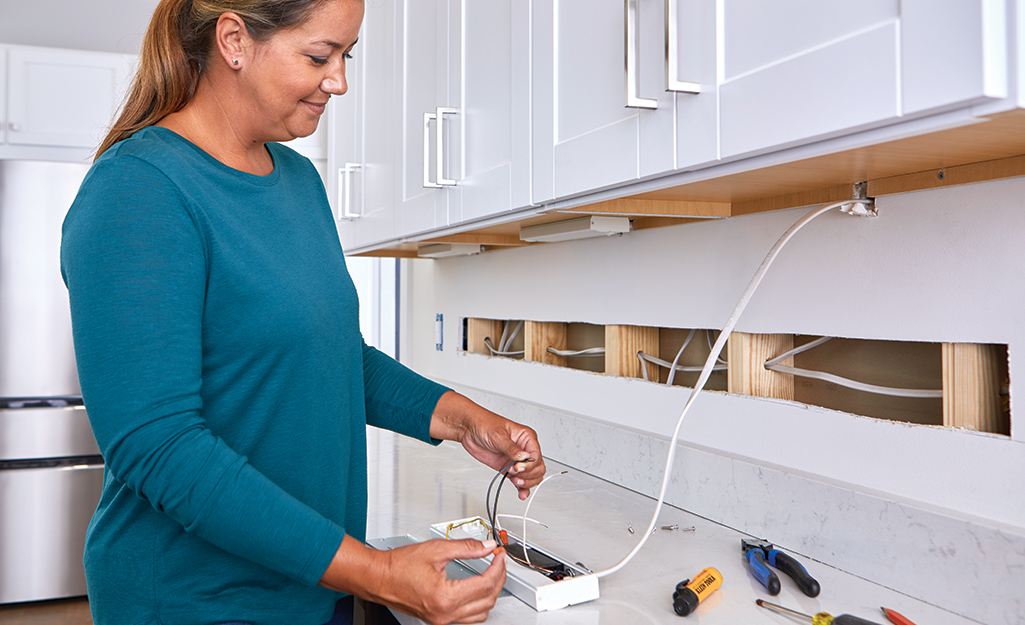
Connecting The Wires
Identify the wires from the light fixture and the switch. Usually, black is live, white is neutral, and green or bare is ground. Connect black wires together and to the switch’s terminal. Join white wires together with a wire connector. Attach ground wires to the switch’s ground screw and the metal box if present.
Installing The Switch
Carefully place the connected wires into the electrical box. Secure the switch with screws to the box. Attach the switch cover plate to keep wires safe and tidy. Turn the power back on and test the switch to ensure lights work properly.
Credit: www.familyhandyman.com
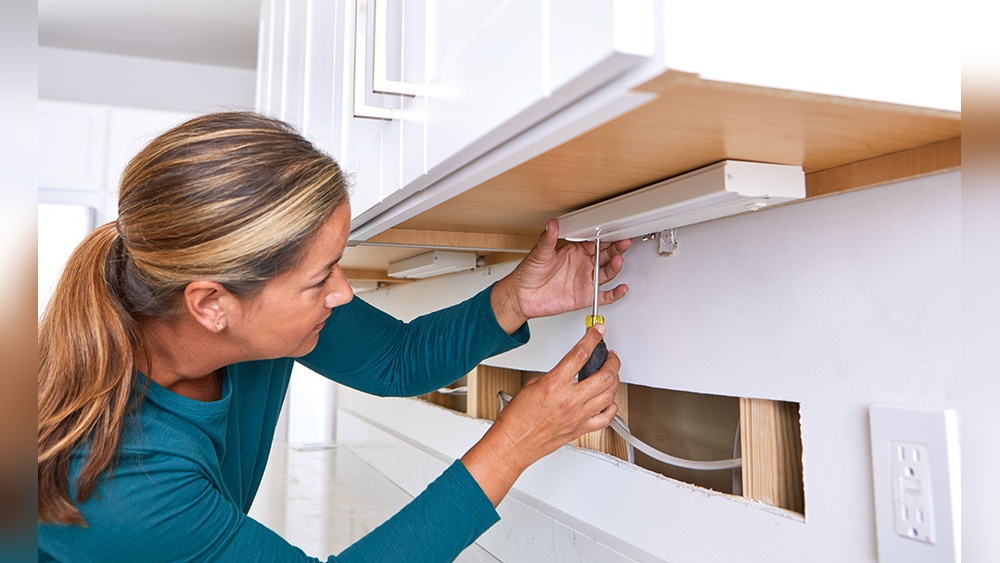
Mounting The Lighting Fixtures
Mounting the lighting fixtures is a key step in installing under cabinet lighting to a switch. Proper mounting ensures the lights shine exactly where you need them. It also keeps the setup safe and neat. Follow simple steps for a strong, clean installation.
Positioning The Lights
Place the lights evenly along the cabinet bottom. Avoid shadows on your countertop. Keep lights close to the front edge for best brightness. Measure twice to ensure balanced spacing. Think about which areas need more light, like near the sink or stove.
Securing The Fixtures
Use screws or adhesive tape to hold the fixtures firmly. Screws provide a strong hold for heavier lights. Adhesive tape works well for lighter fixtures and smooth surfaces. Check the manufacturer’s instructions for the best option. Press firmly if using tape to avoid falling lights.
Hiding The Wires
Run wires along the cabinet edges or inside grooves. Use cable clips or adhesive channels to keep wires tidy. Tuck wires behind the cabinet or under molding for a clean look. Avoid loose hanging wires to prevent accidents. A neat setup looks professional and lasts longer.
Testing And Troubleshooting
Testing and troubleshooting are crucial steps after installing under cabinet lighting to a switch. These steps ensure the lights work correctly and safely. Identifying small issues early saves time and effort later. Follow the guide below to check your setup effectively.
Powering On
Start by turning on the switch connected to the under cabinet lights. Watch if the lights turn on immediately. If they do, your wiring and connection are good. If not, check the power source and switch again. Sometimes, the circuit breaker might be off. Make sure it is switched on before testing.
Checking For Issues
Look for any flickering or dim lights. These signs show a poor connection or a weak power supply. Inspect the wires for any loose ends or damage. Tighten any loose connections carefully. Replace damaged wires with the correct type. Use a voltage tester to confirm power flows properly. If the problem continues, consult a professional electrician.
Adjusting Light Position
Check the light angle under the cabinet. Adjust the position to reduce glare and shadows. Use mounting brackets or adhesive strips for better placement. Ensure the lights shine directly on your work area. Proper positioning improves visibility and room ambiance. Small changes can make a big difference in lighting quality.
Credit: www.homedepot.com
Frequently Asked Questions
How Do I Wire Under Cabinet Lighting To A Switch?
To wire under cabinet lighting to a switch, first turn off power. Connect the light wires to the switch wires using wire nuts. Ensure proper grounding and secure connections. Finally, restore power and test the switch operation to control the lights.
What Tools Are Needed For Installing Under Cabinet Lighting?
You need a drill, screwdriver, wire stripper, voltage tester, and wire nuts. A tape measure and pencil help mark placement. These tools ensure safe, accurate installation of under cabinet lighting to a switch.
Can I Install Under Cabinet Lights Myself?
Yes, with basic electrical knowledge, you can install under cabinet lights. Follow safety steps, turn off power, and connect wires carefully. If unsure, consult a professional electrician to avoid hazards and ensure code compliance.
What Type Of Switch Is Best For Under Cabinet Lighting?
A standard single-pole switch works well for under cabinet lighting. For dimming, use a compatible dimmer switch. Choose switches rated for the lighting load and compatible with your lighting type.
Conclusion
Installing under cabinet lighting to a switch is simple and useful. It gives you better control over your kitchen lights. You can save energy by turning lights off when not needed. The process requires basic tools and some safety steps.
Follow the steps carefully to avoid mistakes. Take your time and check your work. Soon, you will enjoy bright and convenient lighting. This small change can improve your kitchen’s look and feel. Try it yourself and see the difference.